Sunday, April 20th, 2014

Luxuriating in chalkboard goodness


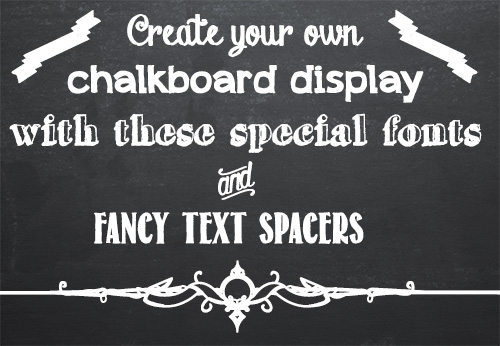
Find all the resources you need to create and print your own chalkboard designs.

Grocery stores and cafes seem to be chock-full of hand drawn chalkboard menus these days. Of course, who can blame them when they look so great? While most of us are not skilled enough artists to reproduce the fancy flowing chalkboard fonts, our computers certainly are. Recently the chalkboard craze has come online, and font artists across the internet have given us dozens of wonderful chalk-like fonts to choose from. I’ve compiled a list of my favorites of these fonts, including some special symbol fonts for text dividers and flourishes. I’ll step you through the process of finding these fonts so that you can get to work on your own chalkboard designs.

Chalk Board Backgrounds

To create a chalkboard you’ll need a background. I have a couple of recommendations here. There are some nice backgrounds available from foolishfire.com – these are available in black, blue, and green: foolishfire chalkboards. If you wish, you can do a search and find your own. I like to use Compfight (www.compfight.com) – it’s an easy way to find images with commercial and creative commons licences and many of them are a good size. Just be sure to check the licence for any image you download. If you want a fast solution, lots of choices and you’re prepared to shell out a few bucks, then buy a chalkboard background from shutterstock.com.

Of course, if you’d like to make a chalk board design for commercial purposes you’ll have to ensure the image owner has given you the right to do so – in this situation cases using a Shutterstock stock image might be the prudent choice.

Chalk Board Fonts

Fortunately there are many great fonts available for free on the web. The following list contains only free fonts (although some charge for commercial use) that I think look great on a chalk board. If you don’t know how to add new fonts to your computer check out my font installation tutorial first. It’s really easy and once you do it a couple of times you’ll be an ace at doing it!

Chalk Hand Lettering Shaded

Appleberry

Grutch Shaded

Return to Sender

Drawing Guides

These two fonts are comprised of symbols that are perfect for breaking up text and adding some extra flair to your design.

Adhesive Nr. Seven

From this Moment


And that’s it! With these wonderful fonts and a chalkboard background the possibilities for your chalkboard designs are endless. If you find yourself wanting more, a quick Google search for chalkboard fonts should turn up lots of fun fonts to use.


Helen Bradley

Helen Bradley

Friday, March 21st, 2014

How to Fix Excel Printing a Workbook to Multiple PDF Files

Learn how to  make sure that printing multiple sheets to a pdf gives one pdf and not many

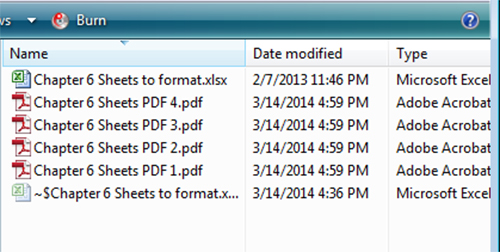
If you have ever tried to print a large Excel workbook to a PDF file, you’ve probably run into this issue. You press print, Excel asks you to name the PDF, and then it begins to print. Everything seems fine, but then Excel asks you to name another PDF, then another, then another, ad infinitum. When the operation finally finishes, Excel has properly printed the workbook to a PDF format, but your worksheets have been split into several different PDF files. Some PDFs contain multiple worksheets, others only a single one, but all you really wanted was one PDF file with the entire workbook.

It turns out this issue is caused by having different Page Setup options on each worksheet. For example, Excel can’t print two pages with different paper sizes to the same “piece of paper” (actually a PDF in this case). Instead, it insists on having two different PDFs to print to, one for each paper size. So, to resolve this issue, you must make sure each worksheet’s page setup agrees with the others.

Fortunately, doing this is very simple. To begin, in your Excel workbook, right click one of your worksheet tabs at the bottom of the window and choose Select All Sheets. Any changes to the Page Setup options will now be applied to every worksheet.

This means we don’t have to check each worksheet to make sure it has the same settings as the others; we simply choose which settings we want and all the worksheets will automatically match. To do this, go to the Page Layout tab in the ribbon. In the Page Setup section, click the small arrow in the bottom right corner to open the Page Setup dialog.

The Page tab of the dialog contains the critical options that can lead to this issue, namely the paper size and print quality settings. Change these to whatever you wish, typically something like letter paper at 300 dpi. Other settings, such as orientation and scaling, do not cause the multiple PDFs issue so if you wish you can change them for individual worksheets. Still, it’s best to have all worksheets print with the same settings. Once you have chosen your desired settings click OK and they will be applied to every worksheet.

You can now print your workbook to a single PDF file.

Helen Bradley

Helen Bradley

Wednesday, October 16th, 2013

A Comment on Comments

Sometimes you’ll want to add a comment to a piece of text but not so that it actually appears in the text.

For example you may want to ask someone else who is working on the document with you a question about something mentioned in the text or you may want to remind yourself to check the source of a quote you have used. The best choice for this task is Word’s Comment option. Select the text to attach the comment to and select Review > New Comment. A comment box will open to the side of the document with your initials and a comment number in brackets (eg [HB1]).

If your initials or name are incorrect, alter them by selecting File > Options > General and changing the Username and Initials text boxes.

If you’re viewing a document which contains a number of comments you can move from one to the next quickly by using the Previous and Next. Use the Delete Comment button to delete a comment, leaving the text it’s attached to intact – right clicking a comment and selecting Delete Comment works the same way. You can edit the text in a comment simply by selecting the comment and typing.

You can choose to print with or without comments by selecting the print range dropdown menu under print settings and checking or unchecking Print Markup.

Using comments is particularly useful when you’re working on a document with someone else as they effectively allow you to ‘carry on a conversation’ about the document.

Helen Bradley

Monday, May 13th, 2013

Word 2010 and 2013 Tip – Misssing Page Numbers

Finding and Fixing Page Numbers that Can’t be Seen and/or Won’t Print

If you have included page numbers at the foot of a page and find that they’re missing from your printouts the problem lies with your page settings. The footer text is being forced to print so far down the paper that your printer is ejecting the paper before this point is reached.

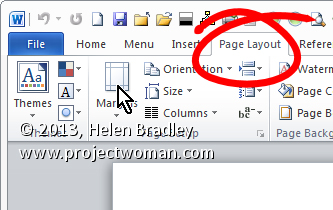
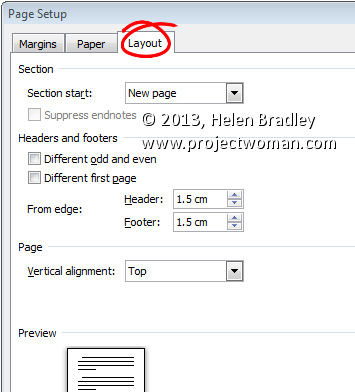
Solve the problem by selecting the Page Layout tab, click the Margins dropdown list, and click Custom Margins. Now, in this dialog select the Layout tab. Finally, increase the From edge: Footer measurement slightly. Experiment to find the smallest increase which will allow your page numbers to print.


Helen Bradley

Tuesday, April 16th, 2013

Word 2010 and 2013 Tip – Return Address Labels


Using Word to Create Multiple Return Address Labels

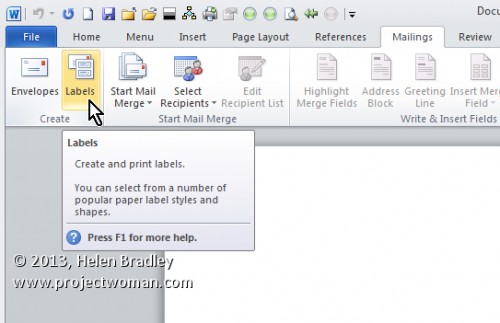
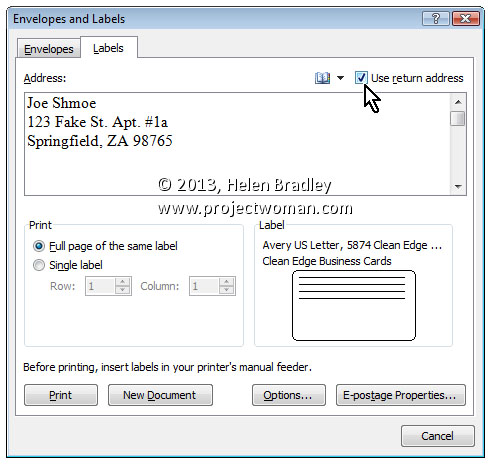
Create your own return address labels in Word 2010 or 2013 by selecting the Mailings tab and clicking the Labels button. Type your address into the text area under Address.

Alternately, select the ‘Use return address’ checkbox and select the address to use from your address book or from your Outlook contact list.

Select the ‘Full page of the same label’ option button and select Options to select your paper from the list.

Select New Document to create a document full of your labels or click Print to send the job straight to the printer.

Helen Bradley

Friday, May 25th, 2012

Add a Photo Border in Lightroom

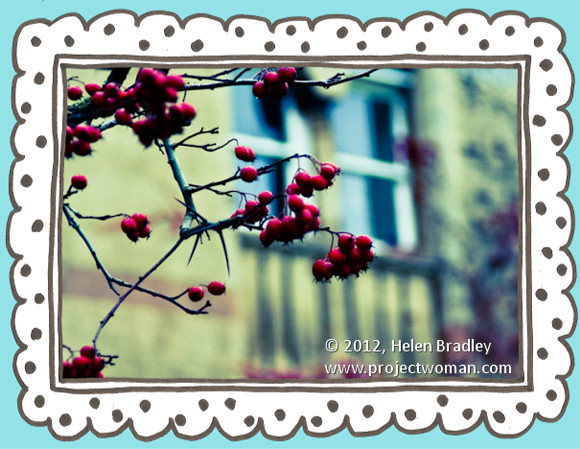
One hidden feature of the Lightroom print module is the ability to add a frame to an image. In this post I’ll show you how to add a frame to an image before exporting it as a JPEG image ready for uploading to the web or printing.

In Lightroom 3 you can create an image and export it as a JPG image from the Print module – however before you set this up, it’s a good idea to create a frame to use. I’m going to use a hand drawn border but you can use anything of your own design.

Step 1

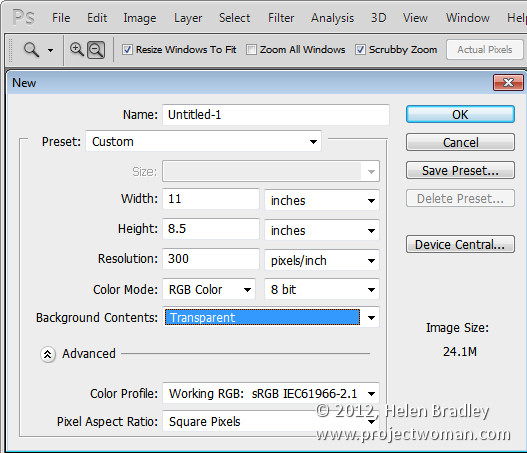
Start in a program like Photoshop and create a new image the size that you want to print from Lightroom. This is a critical step because the border image that you’re about to create cannot be resized any larger in any dimension than the Lightroom file dimensions that you plan printing to.

So, for example, if you want to print a landscape image on letter paper you need to create a frame image of the exact dimensions (or at least the exact ratio of dimensions) of an 11 x 8.5 inch sheet of paper. If you do this, the frame can be sized to the full size of the image in Lightroom.

Set the resolution of the new image as desired – I do this so it matches the resolution that I want to print from Lightroom at – so I use 300 dpi

Step 2

Design your frame making sure the inside of the frame is transparent if you plan for your frame to be placed over the image in Lightroom.

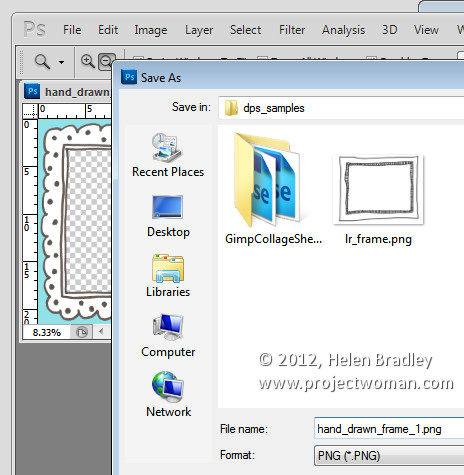
When you are done, choose File > Save As and save the image as a PNG format file so that the transparency information is retained – the JPEG image file format doesn’t support transparency.

Step 3

Close Photoshop, open Lightroom, select the image to print and click to open the Print module.

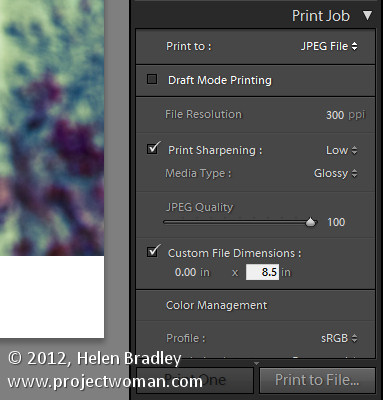
From the Layout Style panel select Custom Package. In the Print Job panel select Print To: JPEG File. Select Custom File Dimensions and set the size to the same 11 x 8.5 inches that you set the frame to be.

Set the File Resolution to the desired resolution – I’ve used 300 dpi.

Step 4

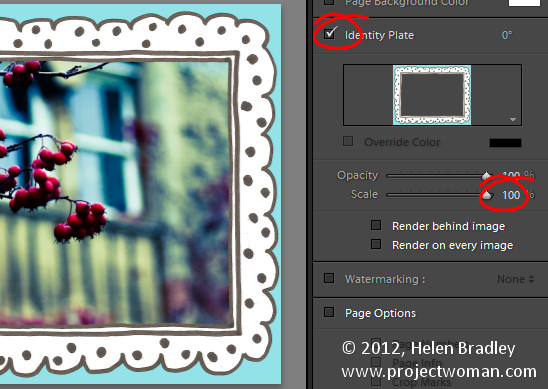
You will add the frame as a graphical Identity Plate. So open the Page panel and select the Identity Plate checkbox. Click on the identity plate box and, from the menu which appears, choose Edit then select the Use a Graphical Identity Plate option button. Click Locate File, select the frame png file you just saved and click Choose. You will most likely be warned that the file is very large – if so, click Use Anyway and click Ok.

The frame will appear as an Identity Plate over the top of the image. Adjust the Scale slider to size it up to 100 percent which should ensure the frame fills the page size that you are working with.

Step 5

As the middle of the frame image was created as transparent, the image underneath it shows through it.

You can use the Render Behind Image option to place the frame under the image if that’s the way you have designed it to work.

Once you’ve added your identity plate select to print to file and the framed image will be printed to a new file.

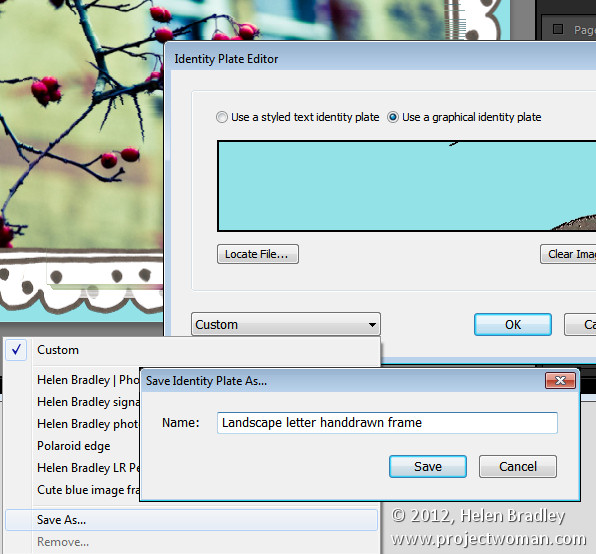
Before I am done, I click the Identity Plate box again and choose Edit and then from the Custom dropdown list I choose Save As to save the graphic frame as an Identity Plate I can use at any time in the future.

Armed with Photoshop you can create any sort of frame and import it as an identity plate to add a border to an image in Lightroom.


Helen Bradley

Friday, March 30th, 2012

Print Contact Sheets in Lightroom

By Helen Bradley

Historically a contact sheet was a page of images each printed at the same size as the film negative – they were used as a reference for the images on the film roll. They were called contact sheets because the film was placed in close contact with the paper when printing them.

These days the term contact sheet loosely means an arrangement of multiple, small, same size images on a single page usually with some identifying information such as the image filename placed under the image. The purpose is to provide reference to a larger number of images. You may print them to keep or give to a client as a catalog of the images from a shoot, for example.

You can create a contact sheet inside Lightroom and here’s how to do it:

Select a template

Start by selecting the folder or the collection that contains the images that you want to add to the contact sheet.

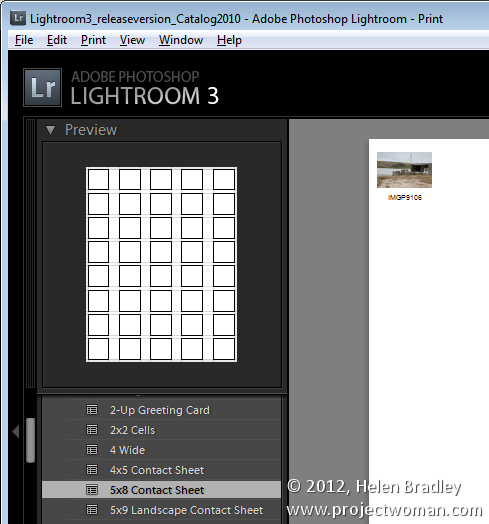
Launch the Print module and, from the Template Browser, select one of the contact sheet options. There are a few grid layouts including two with square image cells – a 4 x 8, and a 5 x 8. There are two with landscape orientation cells – one 5 x 9, and one 5 x 11.

I chose the 5 x  8 one.
Set up the print job

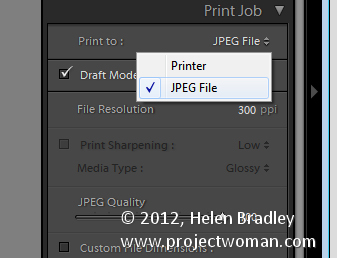
If you plan to ‘print’ the contact sheet to a jpg file, from the Print Job panel on the right of the screen, choose Print to JPG File. As contact sheets are just that – a contact sheet and not full scale images – select to use Draft Mode Printing to speed up their creation.

The page dimensions will be preset for 8.5 x 11in. You can set your own Custom File Dimensions but increasing the size of the page simply changes the page size not the size of the cells – you have to adjust them separately.
Adding images

If you have only one image selected in the Filmstrip then the contact sheet will only display one image.

You’ll need to select all the images on the filmstrip to add them to the contact sheet. To do this, either click on the first image and Shift + Click on the last or select All Filmstrip Photos from the Use: list on the toolbar. If the Toolbar is not visible, press T to display it. You can also select Flagged photos, if desired.

The Toolbar shows you how many pages you will use and you can click the arrow keys on the toolbar to navigate the pages.
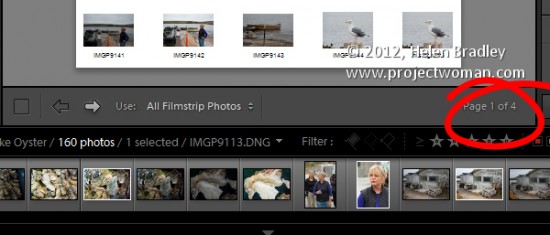
Add image captions

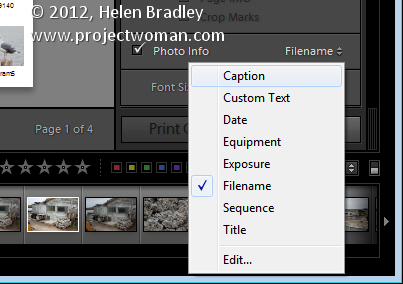
To add information below the images, from the Page panel on the right, select the Photo Info checkbox and choose the field to display. You can use one of the preset options such as Caption, Date, or Filename or click Edit to create your own field.
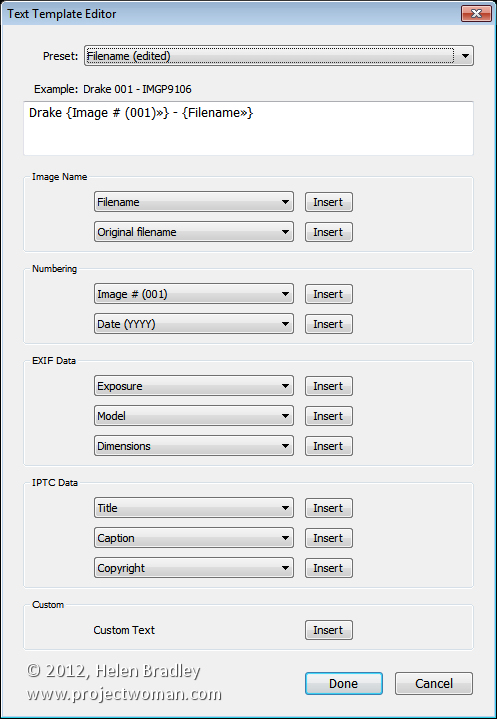
In the Text Template Editor, you can access to fields such as the filename, a sequential numbering or date as well as EXIF and IPTC data. You can also type your own custom text to create detailed photo info to add to the contact sheet. Here I typed some text, added a sequential number and the filename.
Customize the Contact Sheet

The template contact sheets are a starting point but you do not need to strictly adhere to their design if you don’t want to and they can be easily customized.

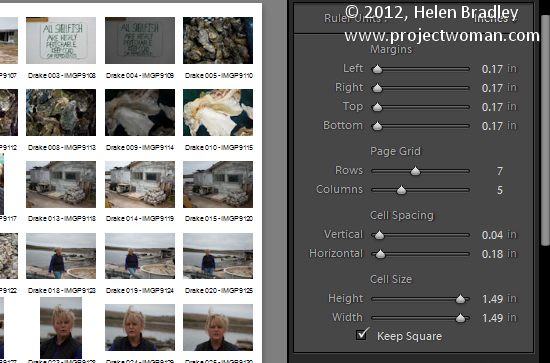
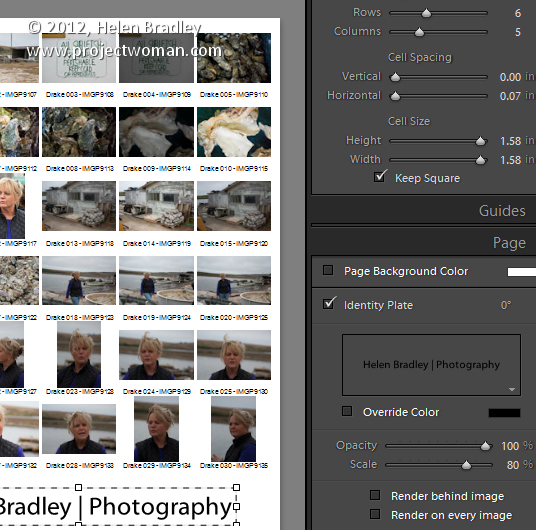
For example, from the layout panel if you click the Keep Square checkbox you will find that in some layouts your images may change orientation so the page will be a mix of portrait and landscape images.

You can adjust the maximum cell size and width using the Cell Size Height and Width sliders in the Layout panel. As you adjust the cell size, notice that the Cell Spacing values will change.

You can decrease the number of rows and/or columns using the Page Grid options. By decreasing the number of rows or columns, you can increase the cell size.
Adjusting margins

If you increase the Bottom or Top margin you can give yourself room to, for example, place an Identity Plate on the page.

Here I’ve reduced the number of rows and increased the bottom margin and added an Identity Plate from the Page panel options. In the Page panel, select the Identity Plate checkbox and then select the Identity Plate to use.

The Identity Plate will appear, by default, in the middle of the page so drag it into position on the page. Adjust its scale by dragging on the Scale slider.

You can adjust its Opacity if desired and, if it is a text identity plate (rather than a graphic), you can also select Override Color to make it any color you like.
Print the result

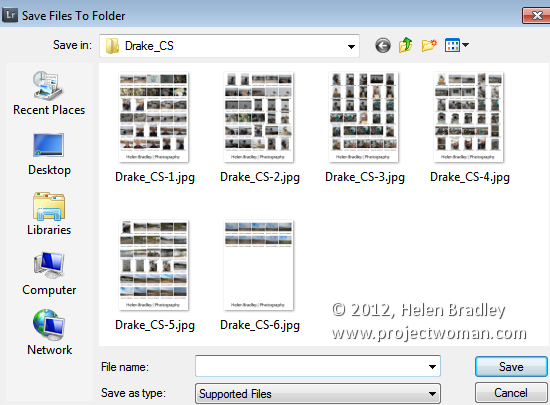
When you’re done, you’re ready to output the result. If you selected to print to a JPG file click Print to File and type a name for the file and select a location for them. The pages will be printed to a JPG file and if there are more than one they will be sequentially numbered.
Print to PDF

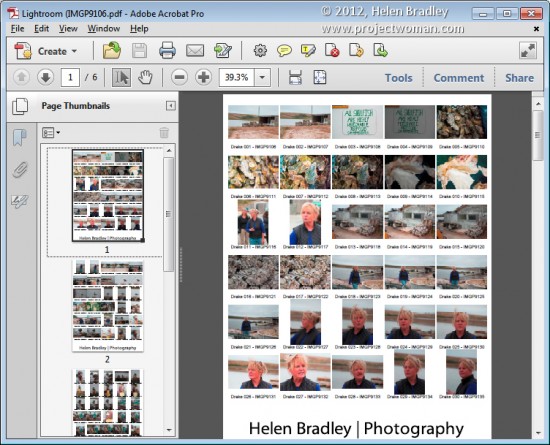
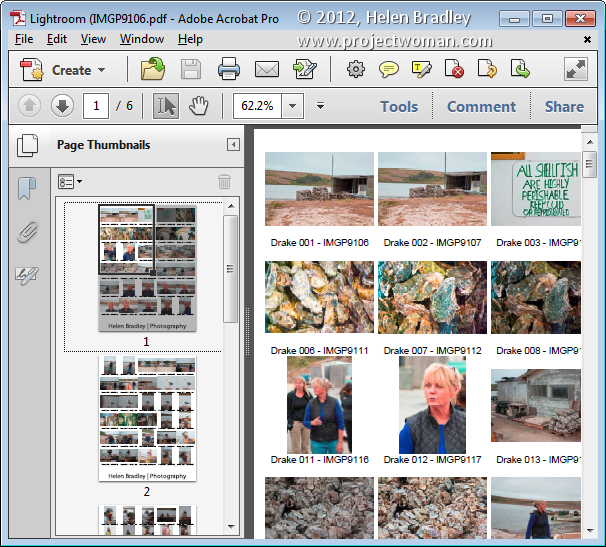
If you want to print to a PDF on a Windows machine you will need to have a PDF printer driver installed such as Adobe PDF or one you have downloaded from the web.

Select Page Setup, select the pdf printer driver and configure the page size so it matches the template size – such as letter paper portrait orientation. Then set the Print to: option in the Print Job panel to printer and click Print to print to a pdf.
Save the Template

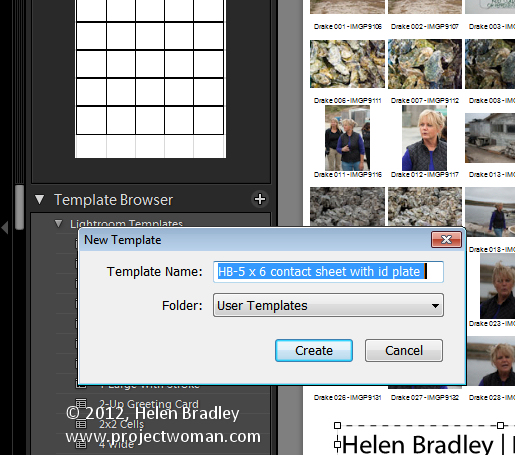
If you have customized a template and want to be able to use it again in future, save the design as a new template.

Click the plus symbol opposite the Template Browser panel header and type a name for your template. You can store it in User Templates or create a new folder for it. Click to create it.

In future you can save yourself the time setting up the template by starting with your customized version.
Helen Bradley

Friday, September 30th, 2011

Secrets of the Lightroom toolbar

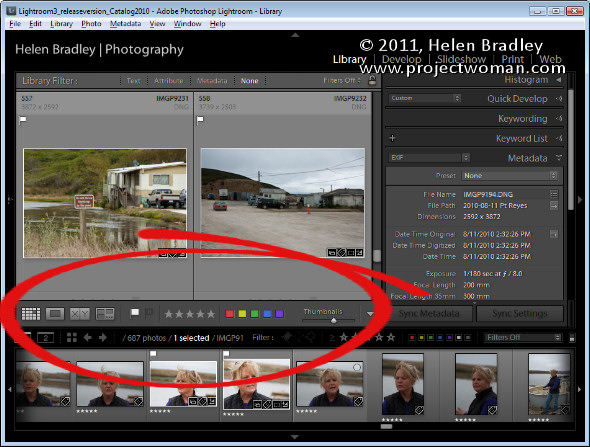
If you’ve seen items come and go in your Lightroom interface and if you’re confused about what exactly is happening chances are you hit a keyboard shortcut that displays or hides one of the interface features. When I was new to Lightroom it was the Toolbar – I could make disappear in a heartbeat – problem was it took a lot longer to work out what had gone and how to get it back.

As I soon learned, the toolbar can be hidden and displayed using the T shortcut or you can choose View > Toolbar. The toolbar is visible in Library, Develop, Slideshow, Print and Web view – but here’s the catch – there is a separate toolbar for each module and hiding one doesn’t hide them all – likewise displaying a toolbar only does so for the current module not all of them.

That said, you’ll want to have the toolbar visible in most of the modules most of the time because it has some handy features that you will use regularly.

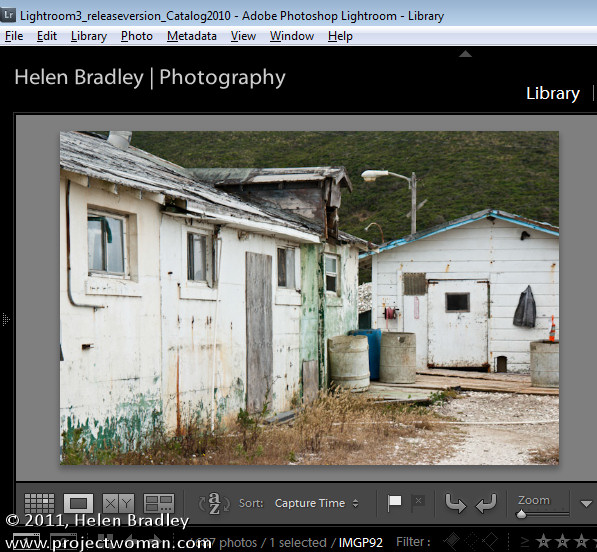
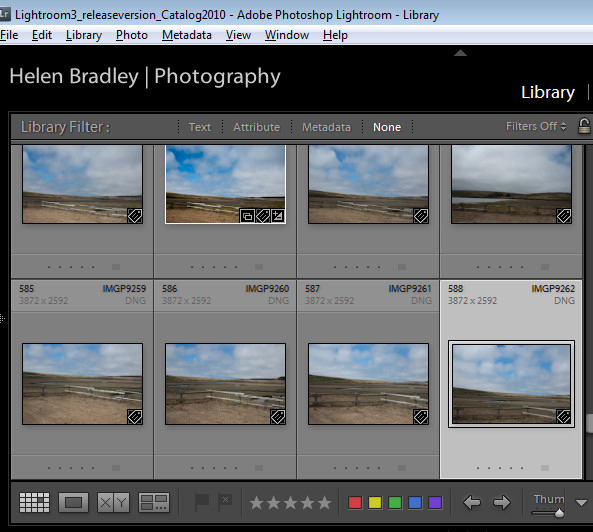
The toolbars in the Library and Develop modules are customizable – those in the other modules are fixed in what they display. To add to the general confusion, the toolbar you see in Grid view and the one you see in Loupe view in the Library module are both toggled on and off as if they were the same toolbar but they are separately customizable so you can select which tools appear in which view and they can look very different in each view as shown in these images of firstly Loupe view then Grid view:

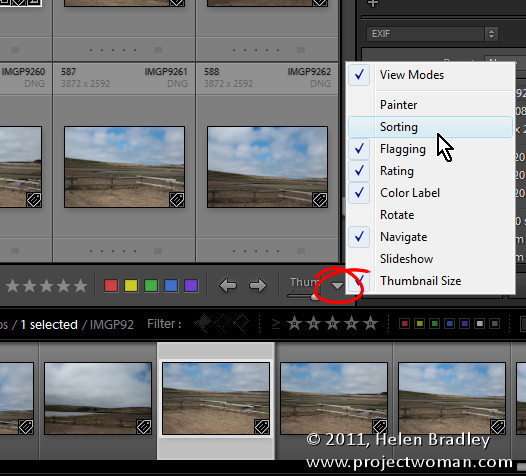
To customize a toolbar click the down pointing arrow at its far right and select the options to display and hide. When you are working on a laptop, for example, and where screen real estate is a valuable commodity, you’ll need to be judicious about what tools are visible and which are not.

One option on a laptop that I like to disable is the rotation tool in Grid view in the Library. The reason is that I can set the thumbnails in Grid view so they show rotation icons so I don’t need the additional tool on the toolbar. However, in Loupe view this rotation tool doesn’t appear so I add it to the toolbar.

If you often resize your thumbnails then including the Thumbnail Size slider is a good idea – if you need the space it takes up for other tools then hide it and learn the = and – shortcut keys for managing the thumbnail size instead.

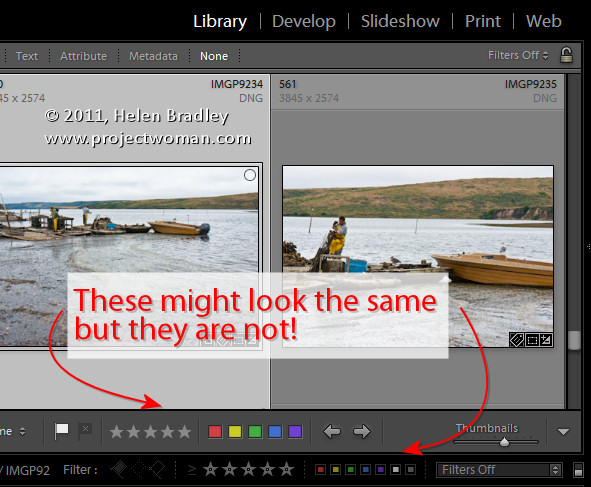
One gotcha that is a guaranteed disaster in the making for new Lightroom users is the apparent duplication of rating, color and flags on the Toolbar and on the bar across the top of the Filmstrip. These are NOT duplicates and instead they are each very different options. The tools on the Toolbar are used to apply a flag, color and rating to images in the Grid or Loupe views. Those above the filmstrip are filters that you use to filter your images based on the flags, colors and ratings you have applied to them. It is important to understand the difference. If you get into trouble and some of your images disappear, selecting Filters Off from the drop-down list above the filmstrip will display all your images again.

Helen Bradley

Monday, June 11th, 2007

Print from Outlook 2007

Ok, I’ll fess up, I had an email today in Outlook that I needed to print. I sat looking at the screen and that beautiful ribbon for a few minutes wondering how a hapless new user is ever going to remember that, inspite all the pretty buttons you see in front of you, there is no Print button visible. Ok , yes, it’s on the Office button (that multicolored thing in the top left corner of the screen) but it’s simply not easy to find and certainly far from intuitive. I wonder how many millions of words both spoken and typed will be spent telling students and new users to click the Office button – “you know, that funny colored button in the top left of the screen” – why didn’t it get a name? Like Tools, or File or Something, – Anything. Clearly no one on the design team has ever taught a class of students any application at all – because if they had, they’d have given that stupid button a name.

Ok, so back to my print dilemma. I obviously hadn’t had enough coffee because I blanked out and thought GD! How am I going to print this thing! There’s no print button! Yikes! All was saved by a trusty shortcut key… Control + P – write it down, remember it. When it seems like you can’t print something, in any application, give Control + P a go. It worked in Outlook, of course, it also works in Internet Explorer windows that open without menus or buttons. It’s one to remember, it can get you out of big fixes as well as little ones.

Helen Bradley