If you’re like me, you have some presets that you’ve created in Lightroom that you would like to use in Adobe Camera Raw. Unfortunately the format of the preset files in each program is different so you can’t just install a Lightroom preset in ACR. However you can make an ACR preset from a file that has had that same preset applied to in Lightroom. Here’s how:
Apply the Preset
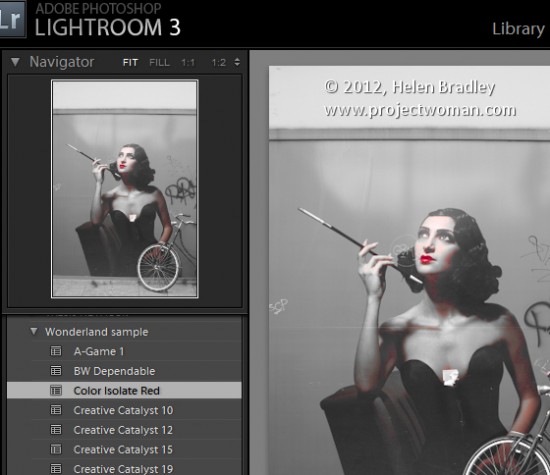
To begin, open an image in the Develop module in Lightroom. Without applying any other changes to the image, apply the Preset that you want to take to ACR. Here I have applied one of the free Wonderland presets from wonderlandpresets.com.
Export the Image
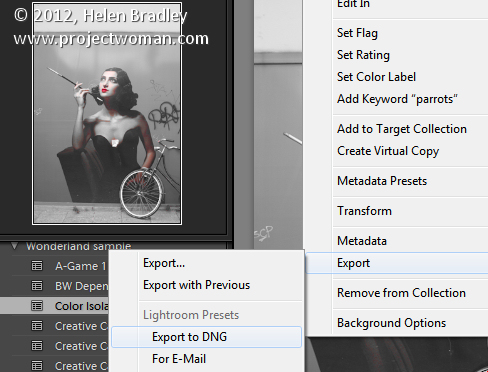
Now export the image as a DNG file so that the changes will be written to the file. To do this, right click the image and choose Export > Export to DNG and export the image to folder of your choice.
Open in ACR
Launch Windows Explorer and locate the image on disk. Right click it and choose Open With > Photoshop CS5. Because it is a DNG file, it will open automatically in ACR.
Create the Preset
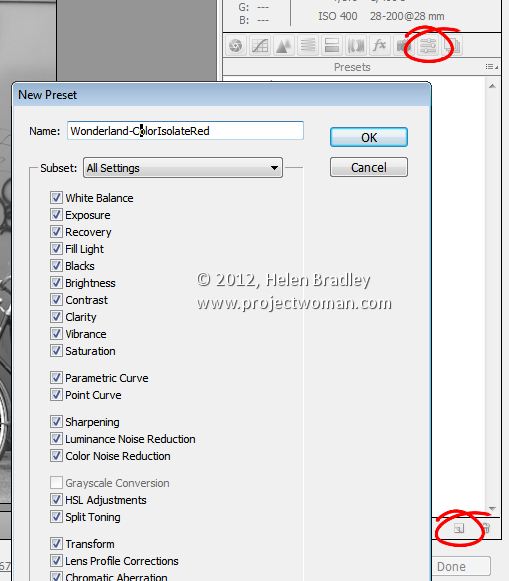
Click the Presets tab and click the Create New Preset option at the foot of the Presets panel. Type a name for your preset and then select the options that you want to include as part of the preset. Type a name for the preset and click Ok.
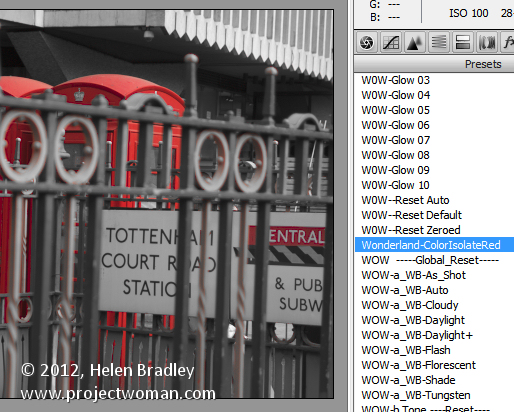
The preset will now be available from the Presets panel in ACR and will be able to be used to adjust any image.
Features not included
You should note that while most of the Lightroom adjustments that can be stored in a Lightroom Preset can also be saved as an ACR Preset, one exception is any Graduated Filter adjustment.
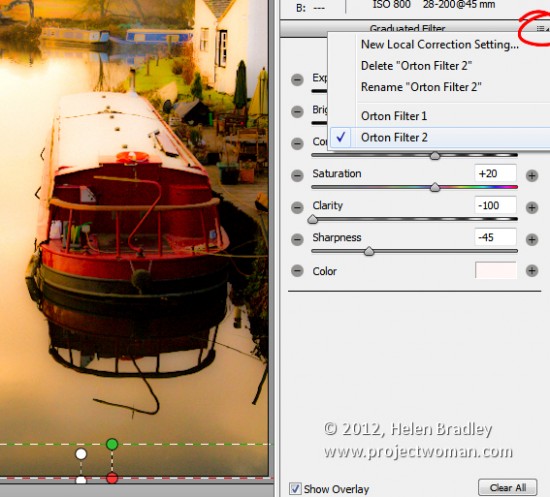
In Lightroom any adjustments you make using the Adjustment Brush cannot be saved in a Lightroom preset and in ACR those made using the Graduated Filter cannot be saved either. You will see the Graduated Filter adjustments that you made in Lightroom in ACR if there are any but you cannot save them in your preset as a Graduated Filter adjustment. What you can do however, is to save the settings for the Graduated Filter but not its placement as a separate setting. To do this, click the Graduated Filter icon in ACR to select the tool then click the Graduated Filter to save the settings for. Click the icon in the top right of the Graduated Filter panel and choose New Local Correction Setting and save it giving it a name.
You can apply this to an image in future using the Graduated Filter tool – just select the setting to use from this menu and drag to create the Graduated Filter for the image. The solution isn’t perfect but it can save you some work as shown here with the two Graduated Filters which are part of my Orton Preset for Lightroom. I can apply the preset then switch to the Graduated Filter and quickly apply the two Graduated Filter adjustments with their individual settings.
Advantages of taking Lightroom presets to ACR
One of the reasons you may want to take presets from Lightroom to ACR using this process is to take advantage of the free presets available for Lightroom. There are lots more of these than there are presets for ACR. If you use ACR as well as Lightroom then having your favorite presets available in both program will be useful.



Post a Comment
Please feel free to add your comment here. Thank you!