Saturday, October 10th, 2015


When the Mac keyboard shortcut doesn’t work – here’s how to fix it!
In Word on the PC you can click in a paragraph or select a paragraph or two (or even a row in a table) and move it up and down the document using Shift + Alt + Up Arrow of Shift + Alt + Down Arrow.
Sadly on the Mac this doesn’t work the same. The Mac keystroke is a little different – press Shift + Control + Up Arrow or Shift + Control + Down Arrow. So far so good – problem is that these are the exact same keystrokes that display Mission Control and Application Windows on the Mac so they don’t work. That is until you fix them to work.
Now I don’t use Mission Control at all so I have no need to go backwards and forwards between Mission Control and Application Windows and, worse still, I often hit those keys by mistake so I can easily live without this shortcut. Turns out, if you disable that Mac default shortcut then the Word one works.
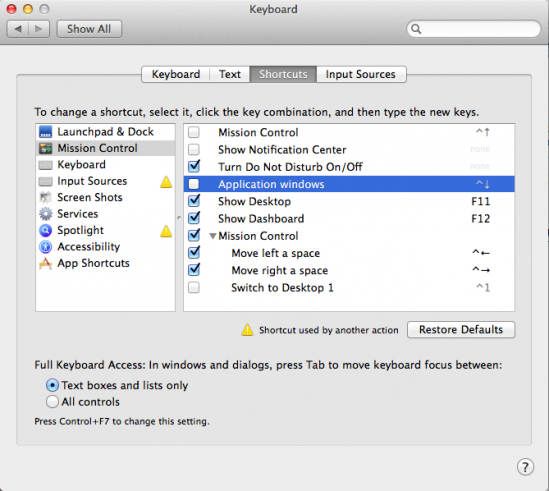
To do this, launch System Preferences and select Keyboard > Shortcuts. You need to disable two options here – Mission Control and Application Windows so deselect the two checkboxes and close the window. That’s all there is to it. Now the keyboard shortcuts Shift + Control + Up Arrow and Shift + Control + Down Arrow work just fine in Word for the Mac.
It’s the small things that put the biggest smile on my face. This is a small change but I use it every day and I love it – hope it works for you too!
Labels: disable mission control, keyboard shortcut, mac keyboard shortcuts, Microsoft Word, move paragraph, preferences, shift control down arrow, shift control up arrow, shortcut, word mac
Categories:Mac, office
posted by Helen Bradley @ 8:56 am12 Comments links to this post
Monday, July 22nd, 2013
Five Must Know Features of the Photoshop Brush Tool
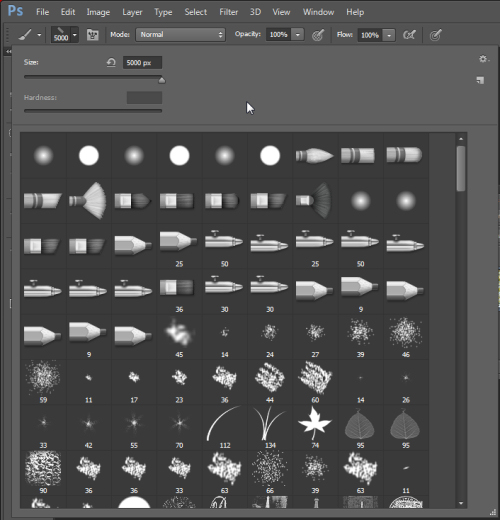
Brushes are used a lot in photo editing from removing blemishes and smoothing skin to dodging and burning and painting on masks. Here are five important features of the brush tool in Photoshop.
1. Adjust Size, Opacity and Hardness from the Keyboard
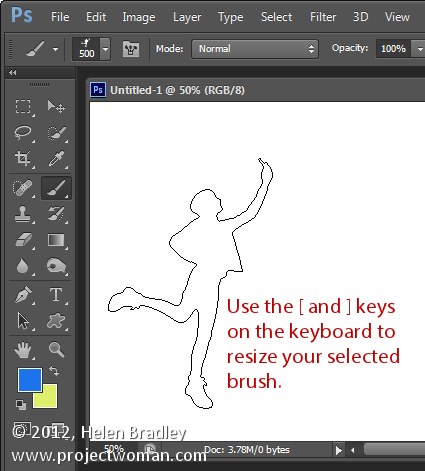
When a brush is selected you can adjust its size without having to open the Brushes palette by clicking the [ and ] keys on your keyboard.
Provided a brush is selected you can change its Opacity by typing a number. For example, type 5 to set Opacity to 50%, type 1 for 10% and 0 for 100%.
To adjust the hardness of the brush hold the Shift key as you tap either the [ or ] keys on the keyboard. Each tap increases or decreases the hardness by 25% in the range 0%-100%. The results of doing this are harder to see as there is no hardness indicator on the tool options bar. However, if you have the Painting Cursor set to Normal Brush Tip in preferences you will see a difference in the brush size as you do so
2. Save the Brush
When you have a brush configured with your preferred settings, save it as a Tool preset. To do this from the Brush Preset list in the top left of the screen click the Create New Tool Preset button and type a name for the preset. Click Ok.
In future you can select this saved preset from the list and just start painting with it.

3. Disappearing Brushes
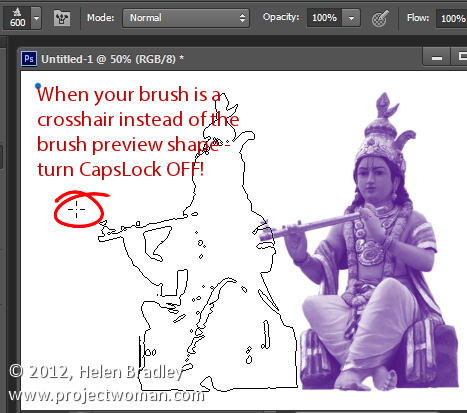
One of the very annoying things that will happen to most of us at one time or another is to have the brush appear to disappear. Instead of the regular brush cursor which shows the size and style of the brush you will see a crosshair cursor.
The issue is not with the brushes themselves but is with the Caps Lock key. If you disable Caps Lock on your keyboard the more visual brush cursor will reappear.
4. Paint a Straight Line
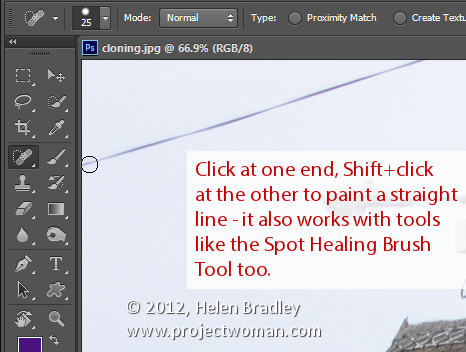
To paint in a straight line, click at one end of the line, hold the Shift key and click at the other end of the line. This draws a continuous brushstroke between both points.
If you adjust the spacing of your brush by using the Brush panel Spacing option to make it more than 100% you can create a line of dots this way.
This can also be used to remove power lines with the Spot Healing Brush Tool. Click at one end of the power line, Shift + Click at the other end to paint a straight line over the power line and it will be removed automatically.
5. Quickly Show the Brush Panel
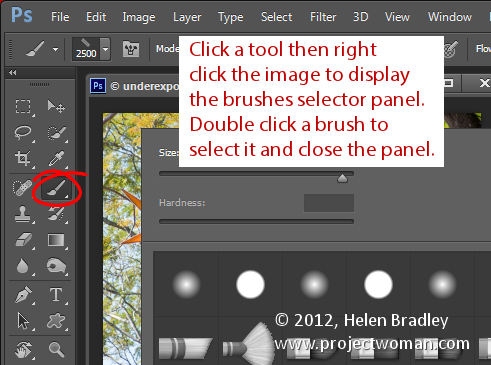
You can quickly show the Brush panel so you can choose a brush to use by first selecting a tool that uses a brush such as the Brush Tool, Dodge, Burn, Eraser tool and so on.
Then right click on the image and the brush panel appears automatically. To select a brush and exit the panel in one step, double click the brush to use.
And now it is over to you. What other features of Brushes do you think are valuable for photographers to know?
Helen Bradley
Labels: [, ], 5, adjust, annoy, brush, Brush Panel, brush tip, caps lock, Create New Tool Preset, disappear, disappearing, Five, hardness, key, keyboard, Keyboard Shortcuts, must know, opacity, Paint, Photoshop, Photoshop brushes, preset, quick, right click, save, shift, shortcut, size, straight line, tip, tool, trick, Tutorial
Categories:photoshop
posted by Helen Bradley @ 5:55 amNo Comments links to this post
Thursday, May 30th, 2013
A Quick Guide of Shortcut Keyboard Combinations to Accent Marks over Characters
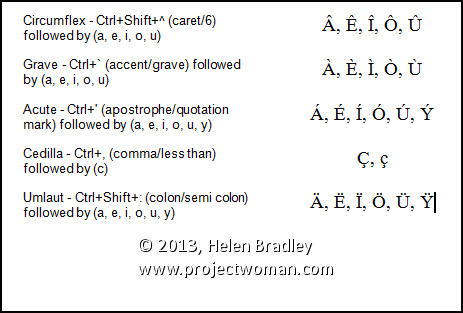
Word allows you to create accented letters quickly using its inbuilt accent shortcuts. To do this, press the accent shortcut key combination, then release, and follow it up with the letter to accent.
Some of the more commonly used shortcuts are:
Circumflex – Ctrl+Shift+^ (caret/6) followed by (a, e, i, o, u)
Grave – Ctrl+` (accent/grave) followed by (a, e, i, o, u)
Acute – Ctrl+’ (apostrophe/quotation mark) followed by (a, e, i, o, u, y)
Cedilla – Ctrl+, (comma/less than) followed by (c)
Umlaut – Ctrl+Shift+: (colon/semi colon) followed by (a, e, i, o, u, y)
Helen Bradley
Labels: ^, ;, :, ', ", <, 2010, 2013, 6, a, accent, Acute, c, Cedilla, character, Circumflex, Combination, CTRL, e, follow, following, Grave, i, inbuilt, key, keyboard, letter, Microsoft Office, Microsoft Word, o, shift, shortcut, tip, trick, u, Umlaut, Word, y
Categories:office
posted by Helen Bradley @ 6:02 am6 Comments links to this post
Tuesday, May 21st, 2013
Learn more about the formatting applied to text in your document with this handy Keyboard Shortcut
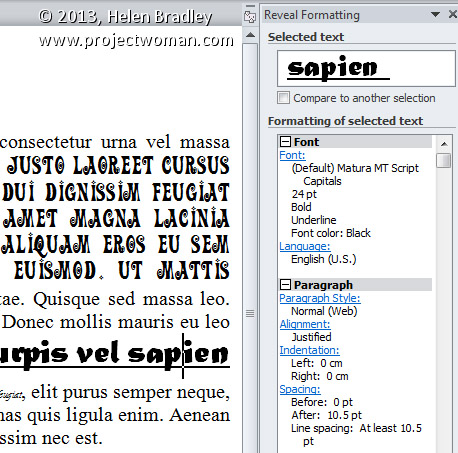
If you want to quickly find out what formatting has been applied to any piece of text, click in the text and press Shift + F1. A task pane will open in the right of Word window. This Reveal Formatting task pane displays details about the text format being used for the word that your insertion point is closest to.
With this task pane open you can click on any piece if text to learn more about its formatting.
Helen Bradley
Labels: 2010, 2013, Combination, F1, format, formatting, insertion, key, keyboard, Microsoft Office, Microsoft Word, pane, point, Reveal, Reveal Formatting, right, shift, shortcut, task, text, tip, trick, Word
Categories:office
posted by Helen Bradley @ 5:53 am1 Comment links to this post
Monday, April 29th, 2013
Show/Hide Panels with the Function Keys
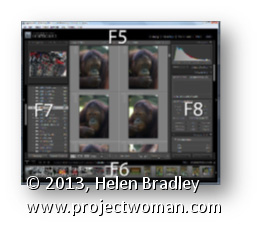
Use the function keys F5, F6, F7 and F8 to clean up your Lightroom screen.
F5 controls the visibility of the top panel, F6 controls the bottom (Filmstrip) panel, F7 controls the left panel, and F8 controls the right panel. Pressing any one of these keys will hide or display the appropriate panel.
To hide all the panels, press Shift + Tab. To bring them back again, press Shift + Tab again.
Helen Bradley
Labels: bottom panel, F5, F6, F7, F8, filmstrip, function, Function key, Hide, key shortcut, keyboard shortcut, left panel, Lightroom, panel, right panel, shift, Shift+Tab, shortcut, show, show/hide, Tab, top panel, visibility
Categories:Lightroom, photoshop
posted by Helen Bradley @ 7:38 amNo Comments links to this post
Thursday, January 10th, 2013
 Photo Credit: Kriss Szkurlatowski
Creating multiple new folders in windows can be a pain, since it forces you to click through multiple context windows every time. It can, however, be bypassed with a nifty set of keyboard commands that navigate those windows for you.
While in the Windows Explorer view, simply hold Alt and press F+W+F. This opens the File menu, selects New, and chooses Folder almost instantly. This is extremely useful because it allows you to create and rename multiple new folders without taking your hands off of the keyboard.
You can use these commands to open other menus as well. While holding Alt you will notice certain letters of menu selections become underlined. Pressing these letters on your keyboard will select that menu option. For example, Holding Alt and pressing F+W+S will create a new shortcut. This functionality extends to Microsoft Office as well. The next time you’re in Word, press Alt and see what you can start controlling with a few key strokes.
Helen Bradley
Labels: explorer, folder, keyboard, Microsoft, new, Office, shortcut, windows
Categories:hunter, office
posted by Hunter Delattre @ 9:00 amNo Comments links to this post
Thursday, July 26th, 2012
 (Photo by: Jorge Vicente)
Change the size of your brush, eraser, or any tool that is brush based quickly by press the ] key to increase the size and the [ key to decrease the size.
Helen Bradley
Labels: brush, brush size, Photoshop, shortcut, size change, tip, trevor adobe, trevor payne
Categories:photoshop, trevor tip
posted by Trevor Payne @ 8:00 amNo Comments links to this post
Friday, April 20th, 2012
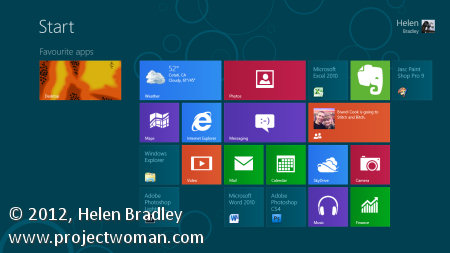
Windows 8 makes a lot of use of keystrokes – more use than other versions of Windows ever has. Here is a list of handy keystrokes, you won’t use all of them but some are totally awesome for getting around. My fave? This week it is Windows + E! yeah instant access to My Computer – you gotta love it!
Windows key display the Start menu
Windows + tab display the task switching panel
Windows + C reveal Charms
Windows + D switch to the desktop
Windows + M switch to the Desktop
Windows + H Share charm
Windows + I Settings charm
Windows + K Devices charm
Windows + L Lock the screen
Windows + P shows second monitor options
Windows + Z display an app’s application bar
Windows + T Cycle through small images of open apps – press Enter to switch
Windows + Q Open Metro search charm
Alt + Tab Cycle through open apps
Windows + , (comma) Show desktop (temporarily)
Right click an application window reveal the application bar
Windows + PrtSc Capture a picture and save it to the Pictures folder
Windows + Space change input language and keyboard
Windows + R Display the Run dialog
Windows + T Cycle through programs on the taskbar
Windows + F Find other computers on your network
Windows + E Open Windows Explorer and show My Computer
Windows + left arrow Dock a desktop app to the left of the screen
Windows + right arrow Dock a desktop app to the right of the screen
Windows + Shift + Up arrow maximize desktop app’s height (width is unchanged)
Windows + Shift + Down arrow restore/minimize desktop app’s height (width is unchanged)
Windows + 1 (or 2, 3…) Launch or switch to the application at this position on the taskbar
Windows + Shift + 1 (or 2, 3…) Launch a new instance of the application at this position on the taskbar
Windows + + (plus) Magnifier – zoom in
Windows + – (minus) Magnifier – zoom out
Helen Bradley
Labels: Helen Bradley, help, how to, keystrokes, must know, short cut, shortcut, tips, Windows 8
Categories:Uncategorized
posted by Helen Bradley @ 8:00 am1 Comment links to this post


 (Photo by: Jorge Vicente)