Monday, April 29th, 2013

Lightroom Tip – Show/Hide Panel Shortcuts

Show/Hide Panels with the Function Keys

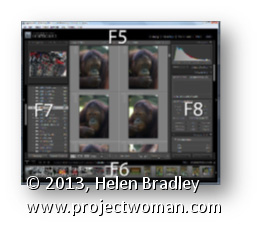
Use the function keys F5, F6, F7 and F8 to clean up your Lightroom screen.

F5 controls the visibility of the top panel, F6 controls the bottom (Filmstrip) panel, F7 controls the left panel, and F8 controls the right panel. Pressing any one of these keys will hide or display the appropriate panel.

To hide all the panels, press Shift + Tab. To bring them back again, press Shift + Tab again.

Helen Bradley

Monday, October 24th, 2011

Lightroom toolbar techniques

If you’ve seen items come and go in your Lightroom interface and if you’re confused about what exactly is happening chances are you hit a keyboard shortcut that displays or hides one of the interface features. When I was new to Lightroom it was the Toolbar – I could make disappear in a heartbeat – problem was it took a lot longer to work out what had gone and how to get it back.

As I soon learned, the toolbar can be hidden and displayed using the T shortcut or you can choose View > Toolbar. The toolbar is visible in Library, Develop, Slideshow, Print and Web view – but here’s the catch – there is a separate toolbar for each module and hiding one doesn’t hide them all – likewise displaying a toolbar only does so for the current module not all of them.

That said, you’ll want to have the toolbar visible in most of the modules most of the time because it has some handy features that you will use regularly.

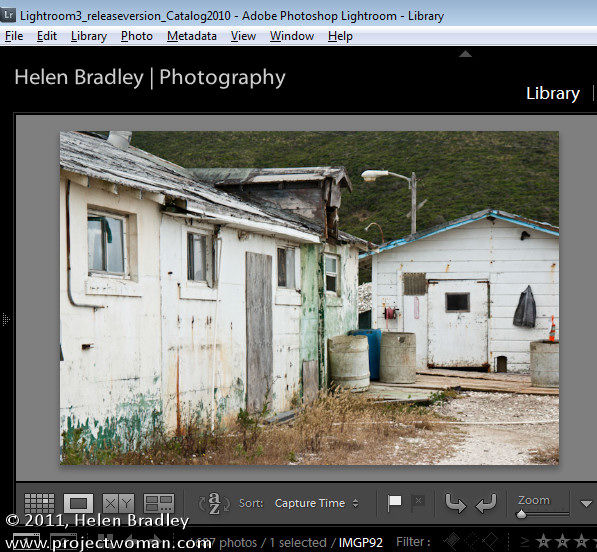
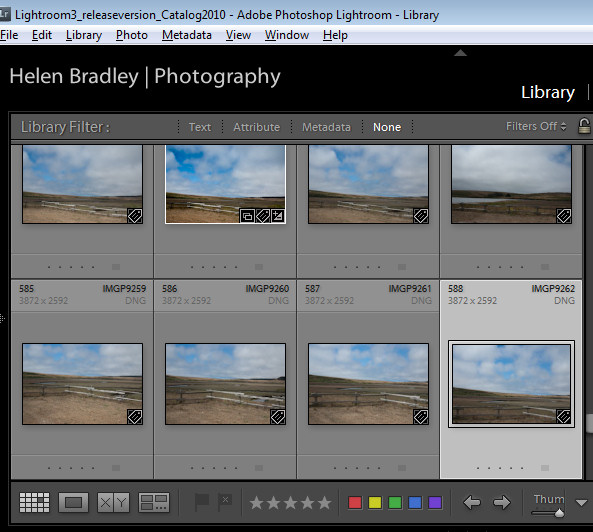
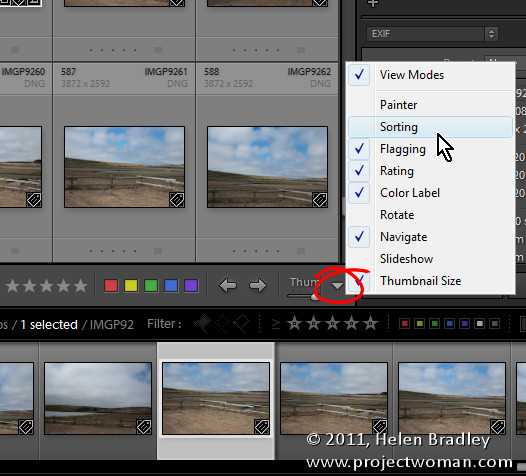
The toolbars in the Library and Develop modules are customizable – those in the other modules are fixed in what they display. To add to the general confusion, the toolbar you see in Grid view and the one you see in Loupe view in the Library module are both toggled on and off as if they were the same toolbar but they are separately customizable so you can select which tools appear in which view and they can look very different in each view as shown in these images of firstly Loupe view then Grid view:

To customize a toolbar click the down pointing arrow at its far right and select the options to display and hide. When you are working on a laptop, for example, and where screen real estate is a valuable commodity, you’ll need to be judicious about what tools are visible and which are not.

One option on a laptop that I like to disable is the rotation tool in Grid view in the Library. The reason is that I can set the thumbnails in Grid view so they show rotation icons so I don’t need the additional tool on the toolbar. However, in Loupe view this rotation tool doesn’t appear so I add it to the toolbar.

If you often resize your thumbnails then including the Thumbnail Size slider is a good idea – if you need the space it takes up for other tools then hide it and learn the = and – shortcut keys for managing the thumbnail size instead.

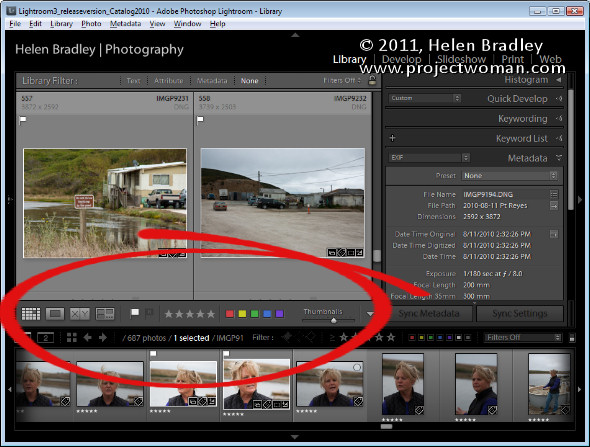
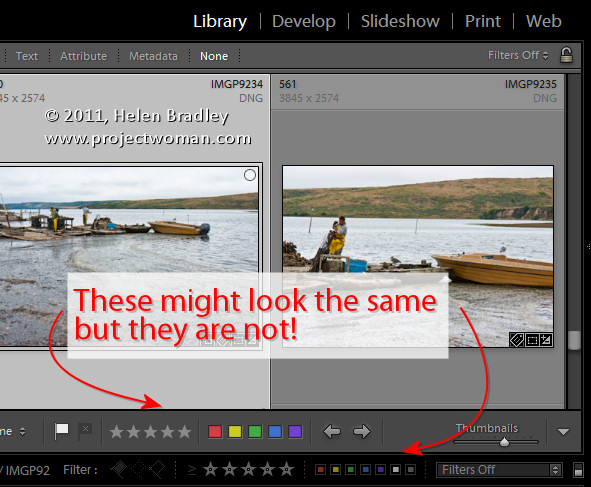
One gotcha that is a guaranteed disaster in the making for new Lightroom users is the apparent duplication of rating, color and flags on the Toolbar and on the bar across the top of the Filmstrip. These are NOT duplicates and instead they are each very different options. The tools on the Toolbar are used to apply a flag, color and rating to images in the Grid or Loupe views. Those above the filmstrip are filters that you use to filter your images based on the flags, colors and ratings you have applied to them. It is important to understand the difference. If you get into trouble and some of your images disappear, selecting Filters Off from the dropdown list above the filmstrip will display all your images again.

Helen Bradley

Thursday, August 26th, 2010

Get creative with Photoshop Actions

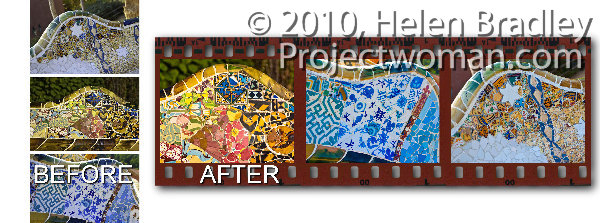
Actions are a feature of Photoshop that allow you to automate tasks. So you can record your steps as you work as an action and then play them back to make repetitive tasks more simple to perform. You can also find actions on the web that others have created and download them to use yourself. In this post I’ll explain how to find, download, install and play an action.

To find actions on the web, search for “Photoshop Actions” in your favorite search engine. You can also go to Adobe Marketplace and Exchange site at: http://www.adobe.com/cfusion/exchange/ where you can find a lot of actions for downloading. These are rated by other users so it is a good place to find good actions.
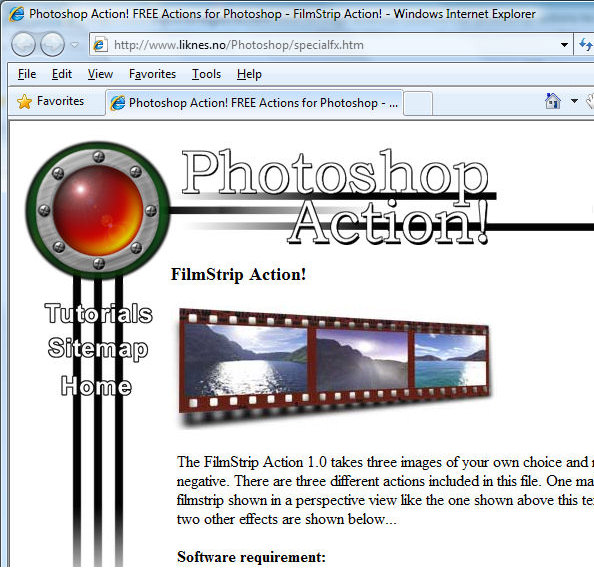
The action I will show you how to install and use is a filmstrip action for the PC that you will find at http://www.photoshop-action.no/specialfxgallery.htm. Download the filmstrip action to your computer and then unzip the file to expand the contents. Although this action states that it’s suitable for Photoshop 6, 7 or CS, it works in versions up to CS4. As a rule of thumb, most older actions work just fine in later versions of Photoshop.
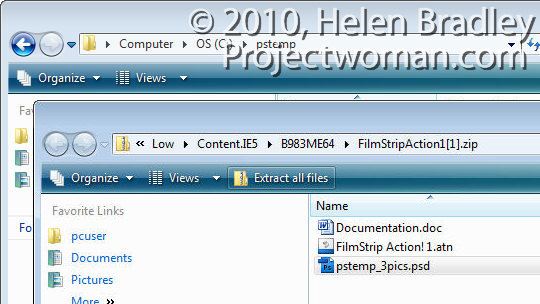
The zip file contains a .doc documentation file, a .atn action file and a .psd Photoshop file. Always read the documentation as it often contains an explanation of what you need to do to make the action work correctly.

In this case you must create a folder called \PStemp in the root directly of drive C and copy the file pstemp_3pics.psd from the zip file into that location. Do this now and leave the folder of extracted files open on your screen.

The instructions go on to tell you to close all open images and to open the three images to use for the filmstrip. It says these will be resized to approximately 730 x 530, (in reality they are resized to approx 735 x 575 pixels).  The developer suggests that the finished filmstrip looks best when you use landscape images. The order of the images as you open them is the left to right order of images in the filmstrip.
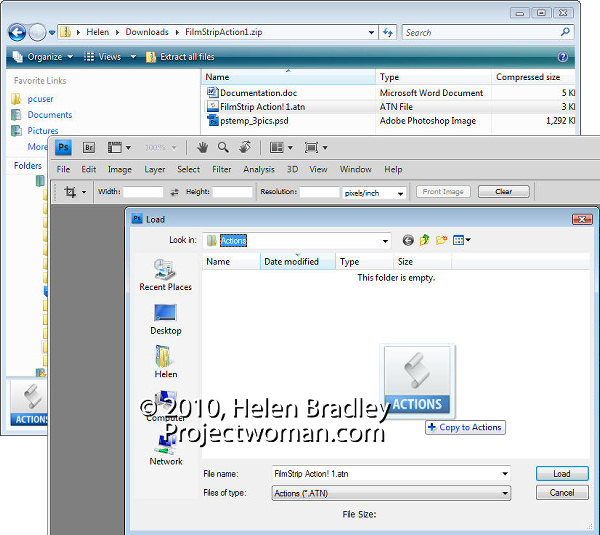
Launch Photoshop and make sure there are no open images. Make duplicates of the images you plan to use in the filmstrip and open the three duplicate images.

You must now load the filmstrip action and the smart way to do this is to place the file in your Presets\Actions folder so you can always find it easily. To do this, view the Actions palette by selecting Window > Actions. Open the fly-out menu and choose Load Actions.

The folder that opens is the Presets\Actions folder so drag and drop the .atn file from the dialog containing the unzipped files into this dialog to copy it into place.  Click the filmstrip!1.atn file and click Load to load it into your Actions palette.
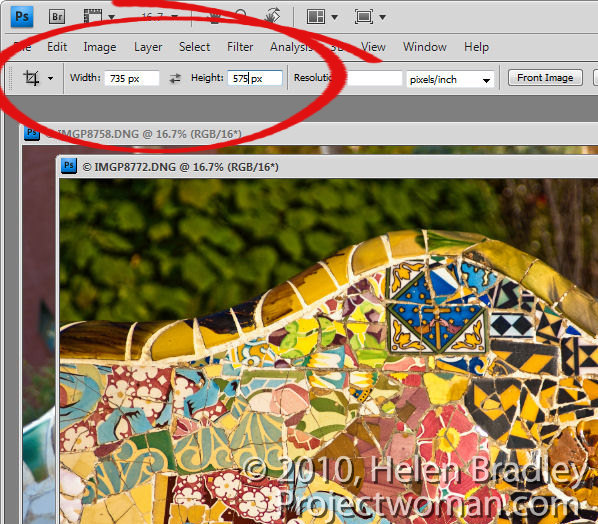
I find it best to crop the three images ahead of time to 735 x 575 pixels in size. To do this, select the Crop tool, set the Width to 735 px, the Height to 575 px and drag over the image to create the crop rectangle at the desired size. Double click to crop the image to that size. Repeat this for the other two images.
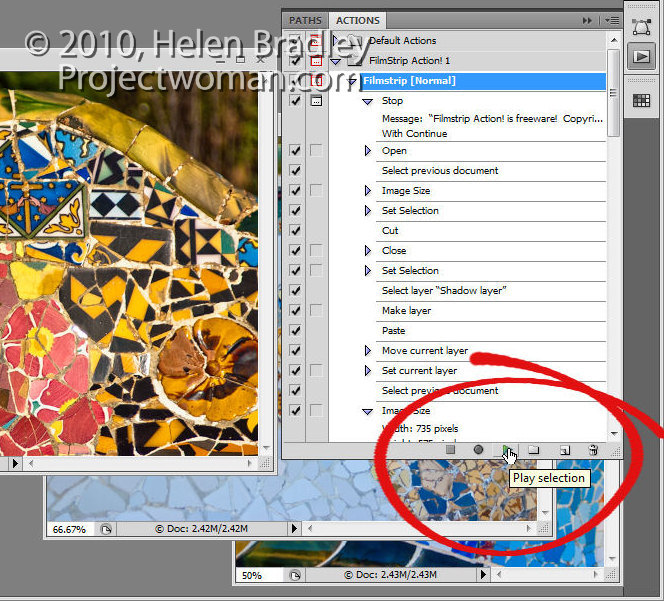
Now run the action by opening the Actions palette, locate the Filmstrip Action 1 action and click either Filmstrip [normal], Filmstrip [wavy] or Filmstrip [perspective] to run one of the three actions.
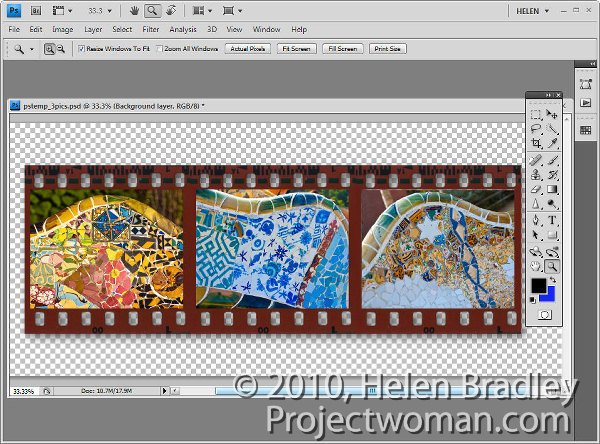
The action will stop and prompt you with a dialog telling you it is running. Click Continue and wait as the filmstrip is created for you. The action closes each of your images as it is finished with them. When you’re done, you can save the filmstrip image.

There are a few things to be aware of when you run an action. Always work with duplicate files and never with your originals, as you cannot be sure that an action will not crop or resize a file to a smaller size or change its resolution and then save it. Working with duplicate images ensures your originals won’t be damaged.

Always close all open files except those that are required by the action to be open. This will prevent you from losing unsaved work or having changes be applied to files you did not mean to be altered.

Always read the instructions for running an action before using it and make sure that any files required by the action are located in the correct place before running it.

Helen Bradley

Friday, May 22nd, 2009

Keywords and Lightroom – the basics


As with any photo management tool Lightroom 2 offers you the ability to add keywords to your images. In this way you can make it easier to find images later on by searching for them by keyword. One simple way of adding keywords to your images is to do this as you import your images into Lightroom. Of course this requires that you’re importing a series of images which all share the same keywords. As this is not always the case, you may need to add keywords from inside Lightroom and I’ll show you how to do this.

Start in the Library module in Lightroom. While it appears possible to select multiple images in the Filmstrip whilst in Loupe view and add keywords to them this is not the case. The keywords will be added to only the first of the selected images and not all of them. Not only is this frustrating but it also is a little misleading.

Step 1
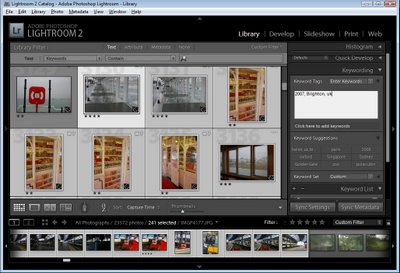
Instead, to add keywords to multiple images at the one time you need to select Grid view (G). Select the images to add the keyword to and type a keyword in the Keyword Tags panel on the left of the screen (open Keywording) to access this. You can also drag and drop a keyword from the Keyword Suggestions onto the selected images.


Step 2
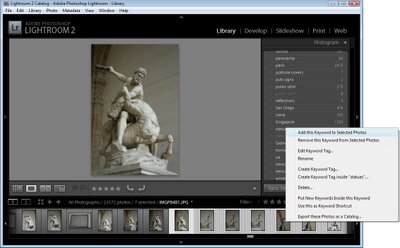
You can add keywords to any image from the Keyword List by selecting the images, then right click the keyword in the Keyword List and choose Assign this keyword to Selected Photos.

Step 3
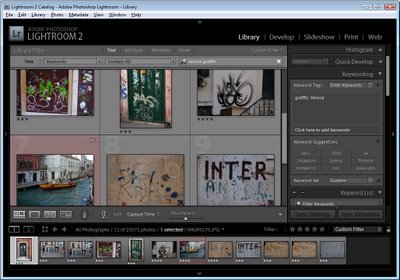
Once you have added keywords to your images you can find the images by keywords by accessing the Filter panel. Press \ to toggle the display of this panel which appears above the Grid panel of images. Select Text, in the first box, select Keywords in the second box select Contains All (or Contain) and type the keywords in the last box. Contains All is an AND search and requires that an image contain both keywords such as Florence and Church. Contain is used for an OR search which would return all images with either or both the keywords, Florence or Church. To cancel the search, click the X button in the search field.

While keywords aren’t the easiest thing to get a grip on, in Lightroom they are key to being able to index and find your images quickly.

I contribute to the Digital Photography School blog and this post first appeared on that site.

Helen Bradley