Saturday, July 26th, 2014

How to Find, Install and Use Free Photoshop Brushes

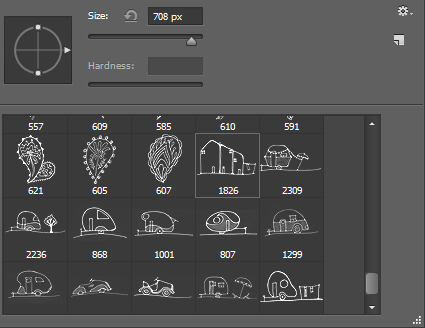
Find Free Brushes Online to use in Photoshop

Learn how to find and download free and for fee brushes for Photoshop. See how to install these brushes into Photoshop and use them in your work.

This video covers all the steps in downloading and installing the brushes so you can ensure they are  always available to you.


 Helen Bradley

Friday, December 20th, 2013

Where to Install Photoshop Brushes on the PC and Mac

Curious or confused about where brushes go? Here’s the info you need and how to do it

It’s pretty easy to find the wrong place to install brushes on the PC and the Mac. The Adobe program file folders are more accessible than the user areas where you really should be installing your brushes. So, to help you out, here is where the brushes should go and a couple of tips for showing the hidden and hard to find folders on the PC and the Mac:

In Mac OS X:

Photoshop CS4
~/Library/Application Support/Adobe/Adobe Photoshop CS4/Presets/Brushes

Photoshop CS5
~/Library/Application Support/Adobe/Adobe Photoshop CS5/Presets/Brushes

Photoshop CS6
~/Library/Application Support/Adobe/Adobe Photoshop CS6/Presets/Brushes

Photoshop CC
~/Library/Application Support/Adobe/Adobe Photoshop CC/Presets/Brushes

The tilde (~ ) indicates your hidden user library.

You can open it this way:

1 Launch Finder
2 Choose Go > Go to Folder
3 Type ~/Library and click Go
4 This opens the ~/Library folder and you can now navigate to the appropriate folder listed above.

On a Windows PC:

Follow these instructions to install the brushes where they can be found by both 32 and 64 bit versions of Photoshop (this is the prefered method of installing downloaded brushes):

Photoshop CS4
C:\Users\<your name>\AppData\Roaming\Adobe\Adobe Photoshop CS4\Presets\Brushes

Photoshop CS5
C:\Users\<your name>\AppData\Roaming\Adobe\Adobe Photoshop CS5\Presets\Brushes

Photoshop CS6
C:\Users\<your name>\AppData\Roaming\Adobe\Adobe Photoshop CS6\Presets\Brushes

Photoshop CC
C:\Users\<your name>\AppData\Roaming\Adobe\Adobe Photoshop CC\Presets\Brushes

To locate your c:\users\<your name>\AppData folder, launch Windows Explorer and type this in the address bar :

%USERPROFILE%\AppData

This automatically opens the AppData folder for you so you can now navigate to the desired folder as detailed above.

Helen Bradley

Monday, July 22nd, 2013

Photoshop Tip – 5 Things to Know About Photoshop Brushes

Five Must Know Features of the Photoshop Brush Tool

Brushes are used a lot in photo editing from removing blemishes and smoothing skin to dodging and burning and painting on masks. Here are five important features of the brush tool in Photoshop.

1. Adjust Size, Opacity and Hardness from the Keyboard
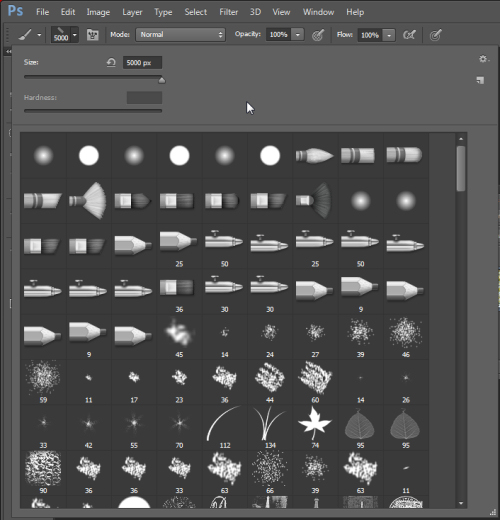
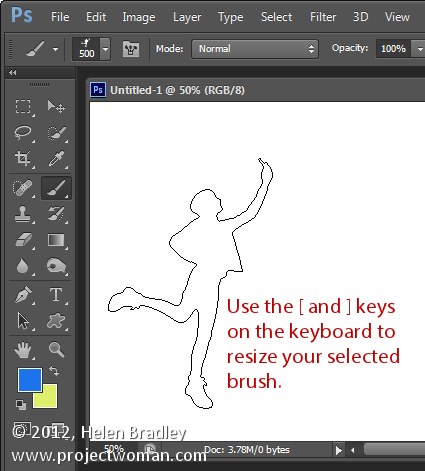
When a brush is selected you can adjust its size without having to open the Brushes palette by clicking the [ and ] keys on your keyboard.

Provided a brush is selected you can change its Opacity by typing a number. For example, type 5 to set Opacity to 50%, type 1 for 10% and 0 for 100%.

To adjust the hardness of the brush hold the Shift key as you tap either the [ or ] keys on the keyboard. Each tap increases or decreases the hardness by 25% in the range 0%-100%. The results of doing this are harder to see as there is no hardness indicator on the tool options bar. However, if you have the Painting Cursor set to Normal Brush Tip in preferences you will see a difference in the brush size as you do so

2. Save the Brush
When you have a brush configured with your preferred settings, save it as a Tool preset. To do this from the Brush Preset list in the top left of the screen click the Create New Tool Preset button and type a name for the preset. Click Ok.

In future you can select this saved preset from the list and just start painting with it.

3. Disappearing Brushes
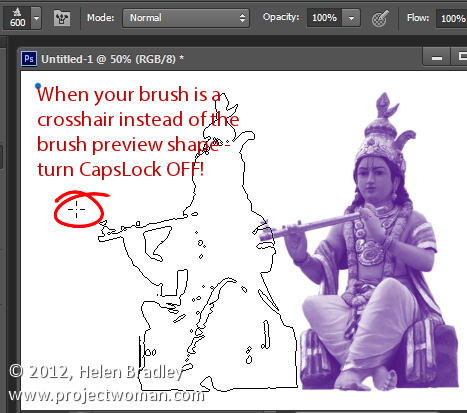
One of the very annoying things that will happen to most of us at one time or another is to have the brush appear to disappear. Instead of the regular brush cursor which shows the size and style of the brush you will see a crosshair cursor.

The issue is not with the brushes themselves but is with the Caps Lock key. If you disable Caps Lock on your keyboard the more visual brush cursor will reappear.

4. Paint a Straight Line
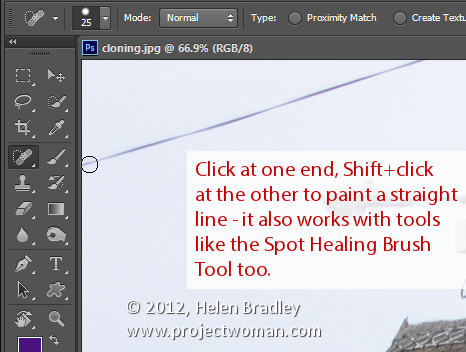
To paint in a straight line, click at one end of the line, hold the Shift key and click at the other end of the line. This draws a continuous brushstroke between both points.

If you adjust the spacing of your brush by using the Brush panel Spacing option to make it more than 100% you can create a line of dots this way.

This can also be used to remove power lines with the Spot Healing Brush Tool. Click at one end of the power line, Shift + Click at the other end to paint a straight line over the power line and it will be removed automatically.

5. Quickly Show the Brush Panel
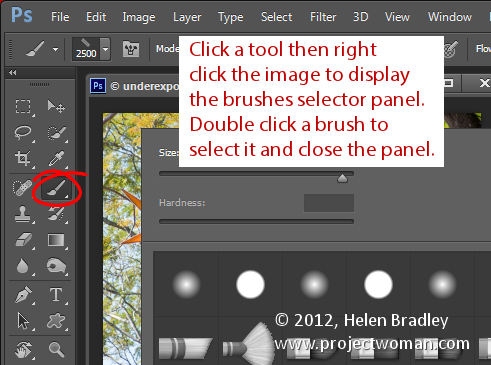
You can quickly show the Brush panel so you can choose a brush to use by first selecting a tool that uses a brush such as the Brush Tool, Dodge, Burn, Eraser tool and so on.

Then right click on the image and the brush panel appears automatically. To select a brush and exit the panel in one step, double click the brush to use.

And now it is over to you. What other features of Brushes do you think are valuable for photographers to know?

Helen Bradley

Friday, May 1st, 2009

Make Your Own Photoshop Brushes


One of the most popular searches involving Photoshop on the web is, perhaps not unsurprisingly, for free Photoshop brushes. Photoshop brushes can be used for a range of editing and creative tasks and while it’s fun to find and download great looking brushes it’s also possible to create them yourself and to do this very easily.

Here’s how to create your own Photoshop brushes from your photos:

Step 1
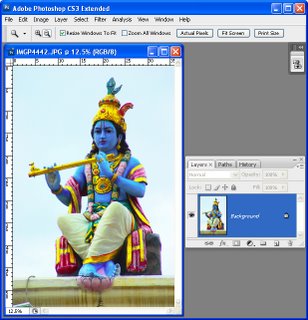
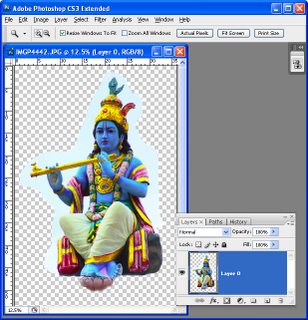
Open an image that contains something that you want to create as a brush. It can be something as simple as a coffee stain on a piece of paper or a photograph that you’ve taken of a texture, statue, graffiti or other shape. The best brushes are made using high quality images so plan your brush to be around 1,000 to 1,500 pixels in width and height. The maximum allowable size is 2500 x 2500 pixels.

Step 2
To make your brush you’ll need to isolate the area that you want to turn into the brush. So start by double clicking the background layer and click Ok to turn it into a regular layer. Make a selection around the area to make a brush from, choose Select > Inverse and press Delete.

Step 3
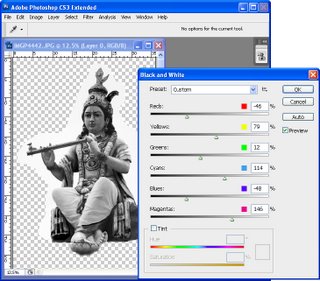
Brushes are grayscale images so you can control the contrast and the look of the brush by converting the image into black and white using your preferred method of doing so.

Here I have selected Image > Adjustments > Black & White. This adjustment lets you tweak the black and white result to get the desired amount of contrast in the brush and to determine which colors are taken towards black and which are taken to towards white.

Step 4
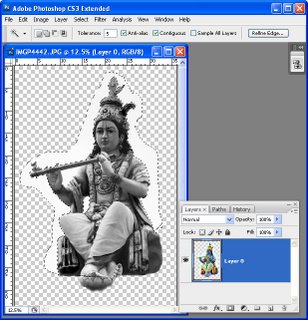
Select any light areas around the image that aren’t to be included in the brush and remove them. If you don’t do this, anything that isn’t white will actually pick up paint when you use the brush later on. I selected these areas using the Magic Wand tool with a Tolerance of 5 to get everything which was white or nearly white.

Step 5
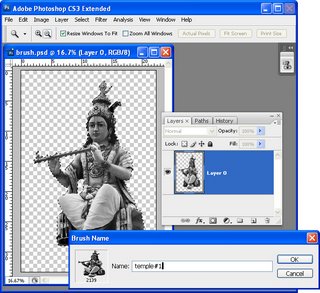
Select the area to include in the brush. If you have removed from the image everything except what you want to include in the brush Control + click (Command + Click on the Mac) on the layer to select the image.

Choose Edit > Define Brush Preset, type a name for the brush and click Ok. If the option doesn’t appear in the menu, your proposed brush is too big so size the image a little smaller and try again.


Step 6
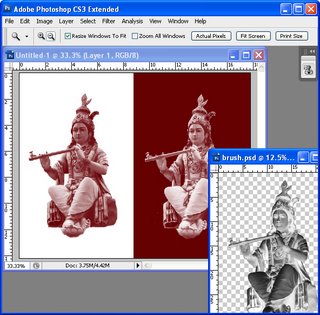
Create a new image and test your brush. It is the last entry at the foot of the brushes palette. It’s a good idea to test it at 100% Opacity using black or dark “paint” on a white background and “white” paint on a black or dark background. If it needs fixing, return to the brush image, make your changes and select and create the brush again. You will need to reselect the new brush in the Brushes palette – it is always the last one in the list. Even if you name the two versions the same name the second one doesn’t overwrite the first.

For brushes like this which has a photographic quality, select the image layer, press Control + I (Command + I on the Mac) to invert the image, select it and make a second brush that you can use to paint with white.

Step 7
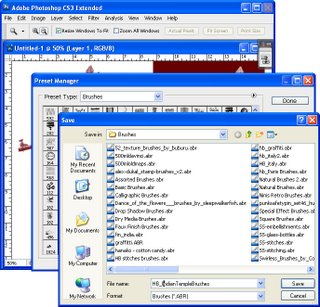
When your brushes are complete, save them to a file so you have them on disk. If you don’t do this, you will lose them if you replace your brushes. Choose Edit > Preset Manager and select Brushes in the Preset Type list. Select the brushes to save, choose Save Set and type a name for the set.

Helen Bradley