Wednesday, February 6th, 2013

Lightroom Presets for Adding Punch to your Images

 These downloaded presets will kick start your image processing.

I don’t buy a lot of presets for Lightroom – I prefer to create them myself. However I had a student the other day who had some images he was very unhappy with. They had been shot in the desert and they should have looked wonderful and they didn’t. In part this might have been the choice of white balance setting used in the camera and the fact that he shot in jpg, but in part the images just needed a real boost.

In the interests of having something to help him with I went hunting around the web and finally tripped over the very wonderful Trey Ratcliff’s presets. These cost $19.97 but if you have images that need a real kick ass fix it could be the best $20 bucks you spend.

You can find the presets here at his Stuckincustoms.com website: Trey Ratcliff’s Ligthroom Presets. There are 75 presets in the collection in all. 


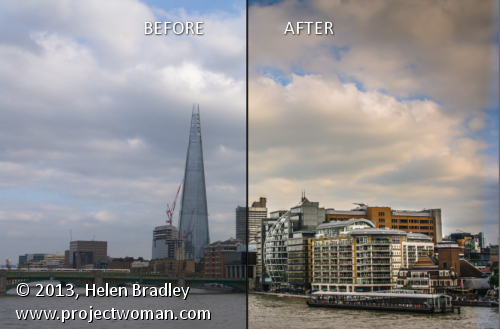
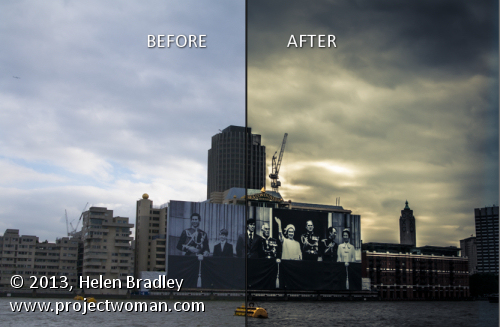
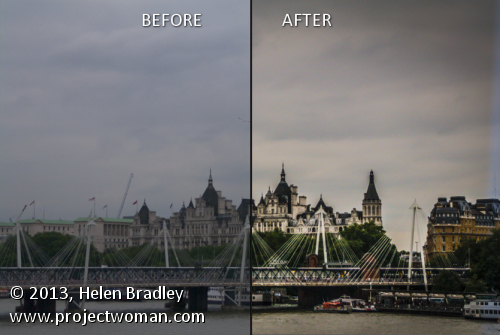
I downloaded them, installed them and then put them to work on some images I had that had good skies and some potential but which really needed some serious work. These can be one click solutions and in some cases I took Trey’s presets as a starting point and added a few tweaks of my own but the presets really got the images well on their way. More so, they are quick to use and the results are fantastic.

The collection includes a heap of cross process and gradients, a collection of funky fixes and the HDR presets. It is the HDR ones I wanted to use to test for my student, but seriously all the presets are good and you’re sure to find some you like. One I love is the Flatjack HDR adjustment – it really works a treat.


Helen Bradley

Tuesday, January 17th, 2012

5 Top Tips for Lightroom Develop Presets

Develop Presets are powerful Lightroom tools. You can use them to quick start your editing in Lightroom and to apply creative fixes to your images. You can create your own presets and you can download them from the web. Here are my top five tips for harnessing the power of Develop Presets.

1 Create Disconnected Presets

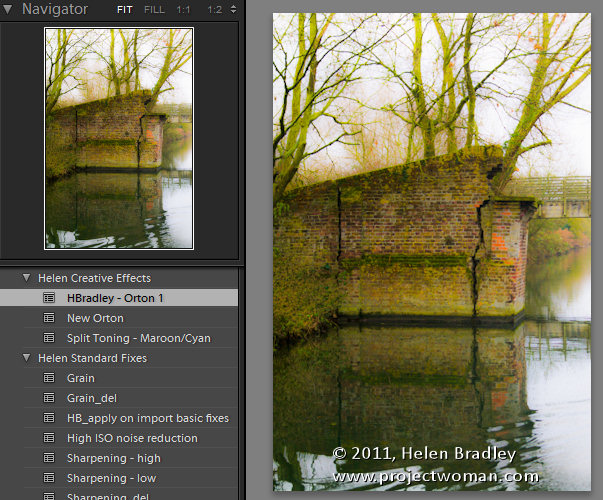
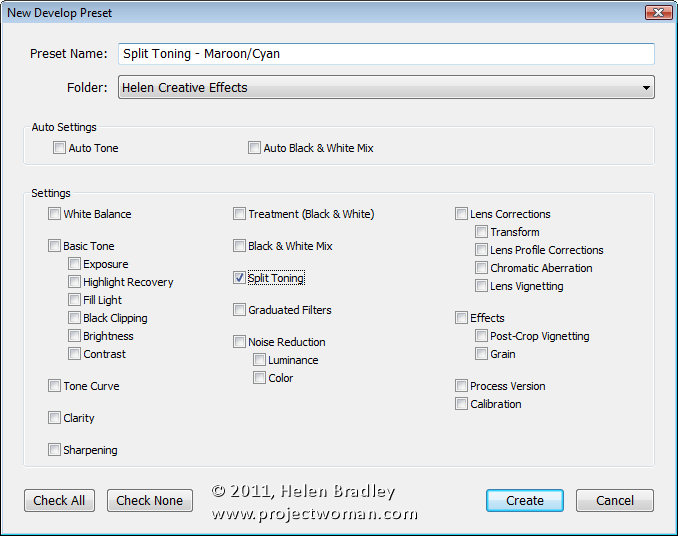
Instead of creating a preset which, for example, applies a split toning effect as well as a vignette to an image, split this into two separate presets. Then you can use the split toning effect as well as the vignette if you want to do so but you also have the ability to apply one and not the other. If both effects are applied with one preset, you’ll have some work ahead of you to undo one of the effects. In addition when they are separate presets the vignette, for example, could be used on images where you would not consider also using the split toning effect.

2 Create Undo Presets

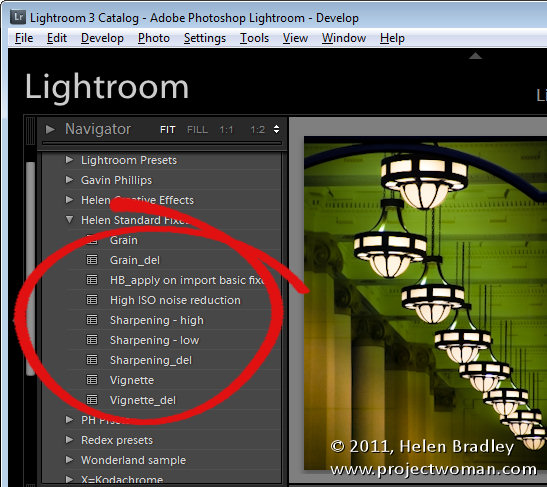
When you create a preset that adds, for example, grain or a vignette to your image, consider at the same time creating a preset that removes that effect. If you call the two presets the same name such as Grain_heavy and the delete preset Grain_heavy_del they will appear side by side in the list and it will be obvious that the second preset cancels out the effect of the first. Then, when you apply the preset and subsequently make other changes to the image you can easily remove the effect of the preset without having to wind back all the changes you’ve made.

3 Choose the Right Tools

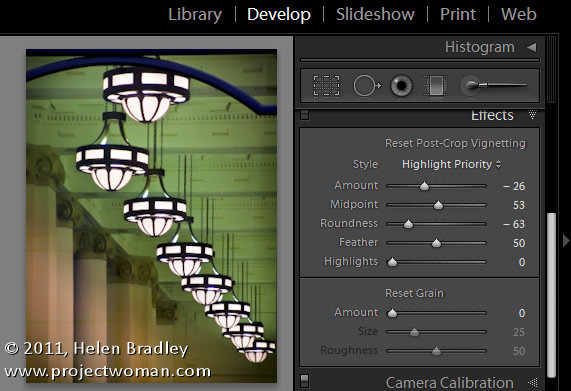
I recently downloaded a great preset which applied a cool effect as well as a vignette. Unfortunately the designer applied the vignette using the Lens Vignetting tool in the Lens Correction panel. This isn’t a post crop vignette so, while the preset worked fine on some images it failed spectacularly on images which had been cropped. When you want to add a vignette, do this using the Effects panel’s Post Crop Vignetting options so your preset will work on any image cropped or not. Testing your presets with a range of images will tell you if they have problems that using a different solution may avoid.

4 Organizing Presets

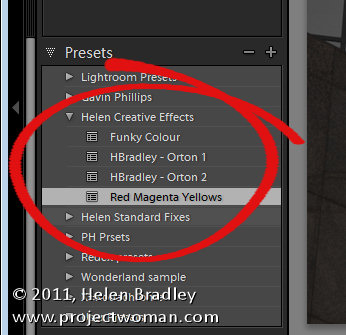
If you’re creating a lot of presets or downloading a lot of presets from the web, it will help to organize them neatly. For this purpose, I like to create separate folders for preset sets that I download from the web. This allows me to open or close a folder of presets to display all its contents or shrink the list to show just the folder title. Be aware that the folder  hierarchy for presets is very flat and you cannot create folders inside folders for example.

If you have a lot of your own presets consider grouping them in folders too – so you might have a folder of editing presets and then a second folder of more creative presets. You can drag and drop presets from one folder into another in the Develop module.

If you download or create presets and you know you will never use them, right click the preset and choose Delete to remove it from Lightroom and from your disk.

5 Apply them on Import

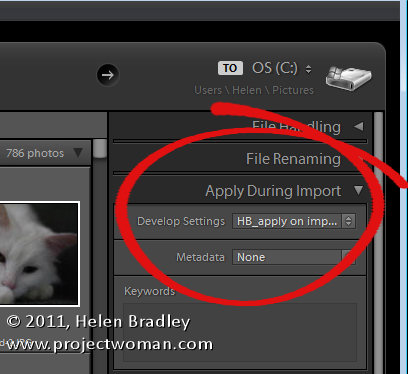
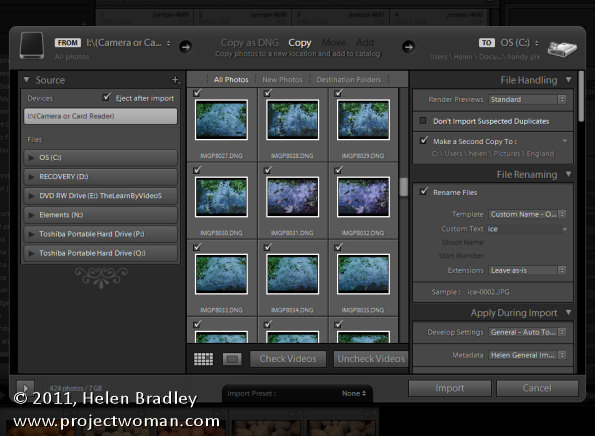
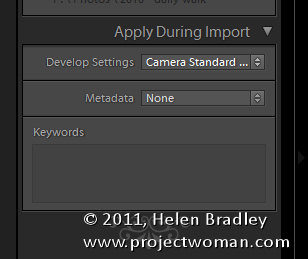
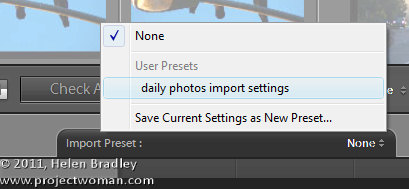
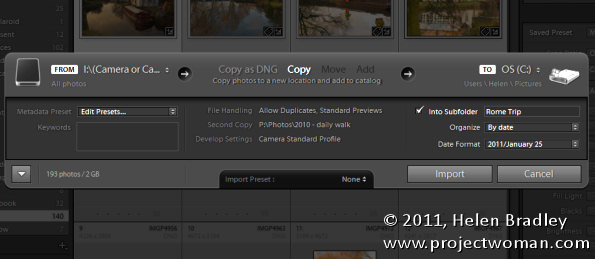
Here’s a good reason for ignoring Tip #1 (at least for now) and for creating a Develop Preset that applies all the changes you typically apply to your images. So, if you typically apply some extra Brightness, Clarity and Vibrance and some noise reduction to your images, make all these changes to an image and save them as a preset. Now, in the Import dialog’s Apply During Import panel you can choose this preset and have it applied automatically to all images as you import them.

Helen Bradley

Monday, December 5th, 2011

Work in the Lightroom Quick Develop panel


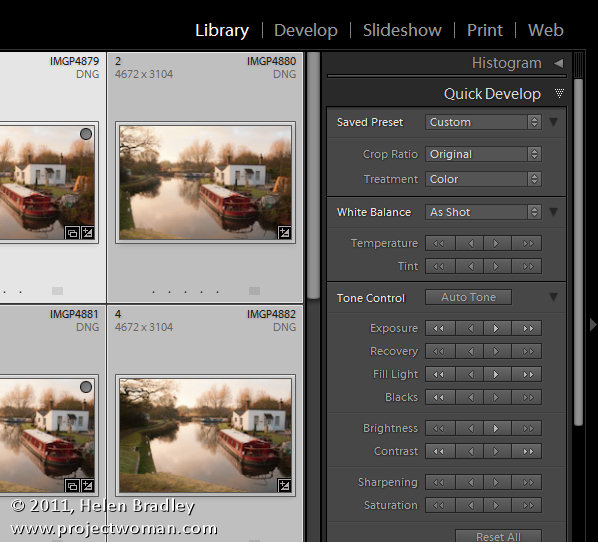
In Lightroom you can fix a series of images all at once using the Quick Develop Panel in the Library Module. While this tool lacks the precise adjustments you can make to an image in the Develop Module, it offers a quick solution for getting started fixing your images.

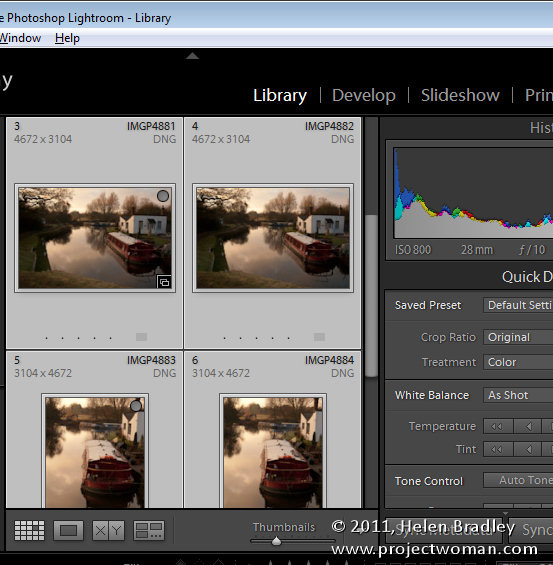
To make use of the Quick Develop panel you should be working in the Library Module, in Grid View. So open the Library module and click G to select Grid view. If you are in Loupe view the changes you make will be applied only to the most selected image regardless of how many images you have selected in the Filmstrip.

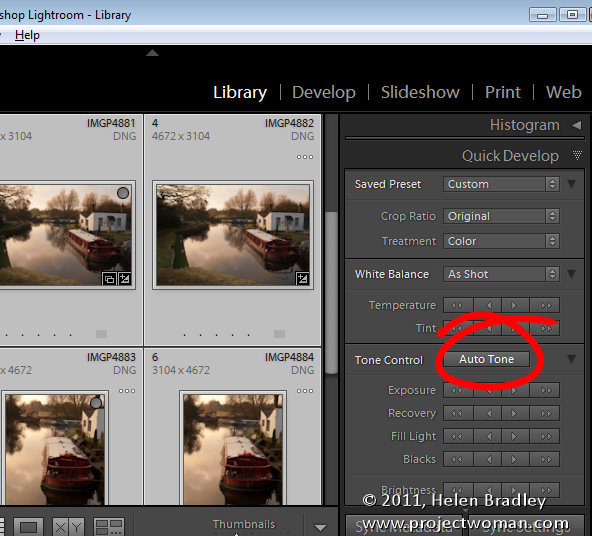
If you typically use the Auto Tone feature in the Develop module to quick start fixing your images, select all the images to fix in grid view and click the Auto Tone button. Every image will be assessed and then adjusted according to its particular needs.

How fixes are applied

In the Quick Develop module, when you choose to adjust, for example, the Exposure on a series of selected image, each image will be adjusted by the same relative amount. So, if you select a series of images and click the single right pointing arrow, you will add +0.33 to the current Exposure value for each image. So, if an image had a starting Exposure setting of 2.00 it will be increased to 2.33. The single left pointing arrow moves Exposure -0.33. If you click the double arrows you will increase or decrease exposure by 1.0 for every image. Each adjustment works in a similar way although the relative values will vary.

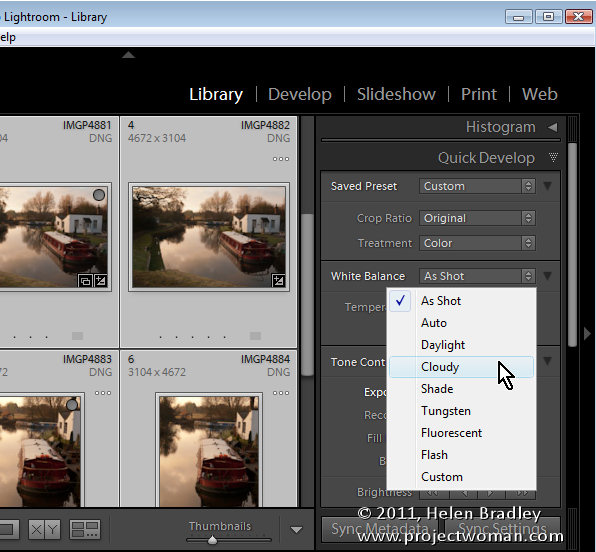
One feature of the Quick Develop module which is useful is the White Balance tool. If you have a series of images all shot in similar light you can select them and adjust the white balance for all of them by choosing a different White Balance setting from the dropdown list or by adjusting the Temperature (Blue/Yellow) and/or Tint (Green/Magenta) sliders.

Hidden Options

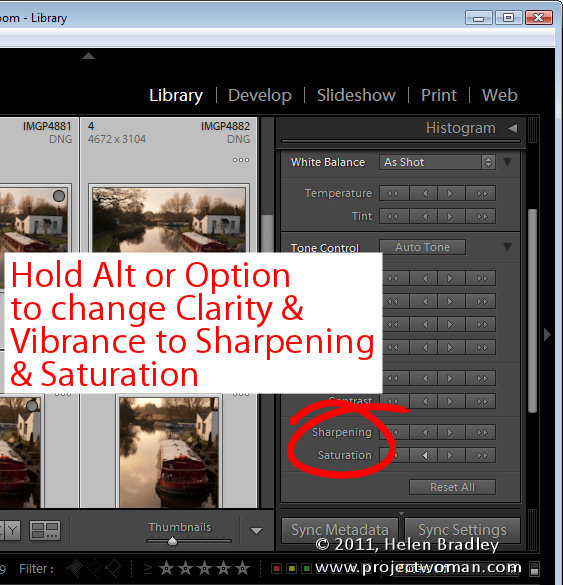
There are some options hidden in the Quick Develop panel. If you hold the Alt key (Option on a Mac) the Clarity and Vibrance adjusters change to allow you to adjust Sharpening and Saturation. Notice that Sharpening is an all in one setting and that it lacks the ability for you to alter the Radius, Detail and Masking which you can do with the Detail panel sliders in the Develop module.

How I use it

I use the Quick Develop panel to make quick edits to a series of images at one time. I’ll assess the images to see if they need a particular adjustment such as increasing the Exposure if they are all a little underexposed. I also like to increase Clarity and Vibrance.

So, I’ll select the images in the Grid, click to increase Exposure and then again increase Vibrance and Clarity.

Using the Quick Develop panel to make fixes to all images saves me a little time later on when I switch to the Develop module and apply additional fixes on an image by image basis.

One Gotcha to be aware of

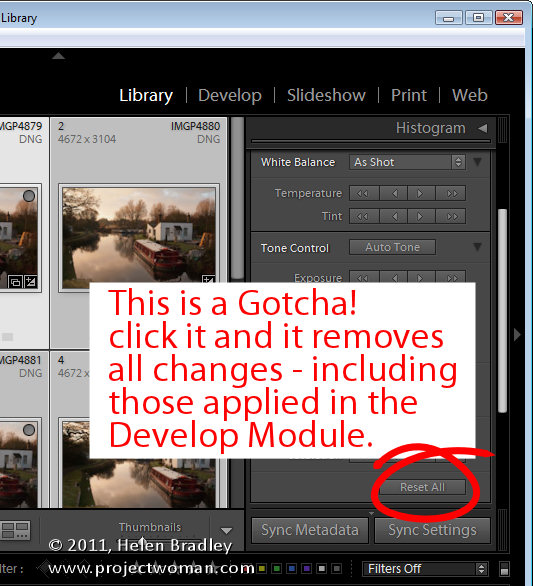
If you want to remove the settings applied to an image you can do so using the Quick Develop panel. Select the image and choose Reset All. However, be aware that when you do this, you will remove not only all settings applied to the image using the Quick Develop panel but also any changes made to it using the tools in the Develop module.


Helen Bradley

Thursday, April 1st, 2010

Create a Lightroom Slide Show


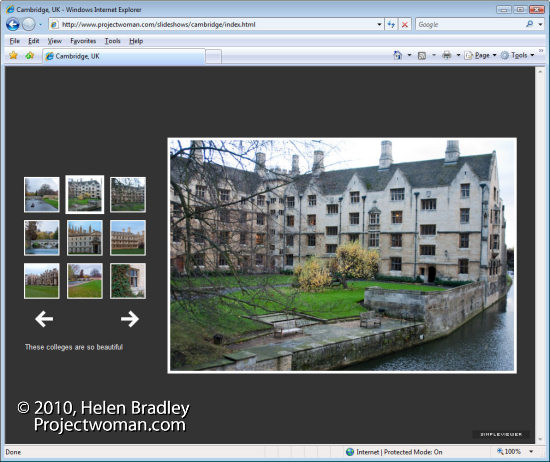
One of the really handy features of Lightroom is its ability to create web slideshows quickly and easily. There are various options you can use and I’ll show you how to use the SimpleViewer slideshow which is good looking and very functional.

Step 1
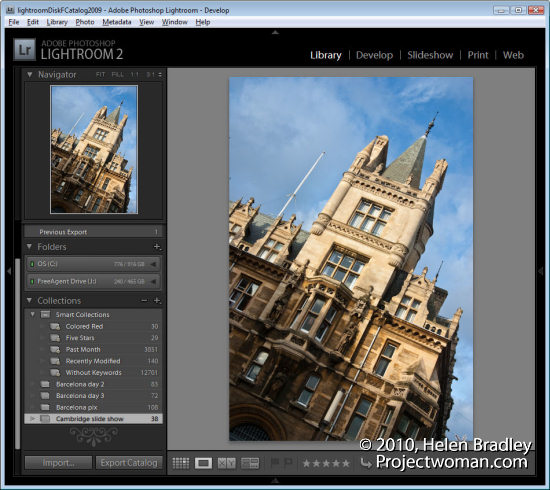
To get started, prepare all your images and save them as a collection. Use a Collection rather than a Smart Collection so you can arrange the images in the order that you want to see them in the slideshow by dragging them into position using either the grid or the filmstrip.

To create a collection, select the images to use, click the (+) plus symbol to the left of the Collections panel and choose Create Collection. Type a name for it, enable the Include Selected Photos checkbox and click Ok. You can then drag and drop additional images into the collection and order them as desired.
 

Step 2
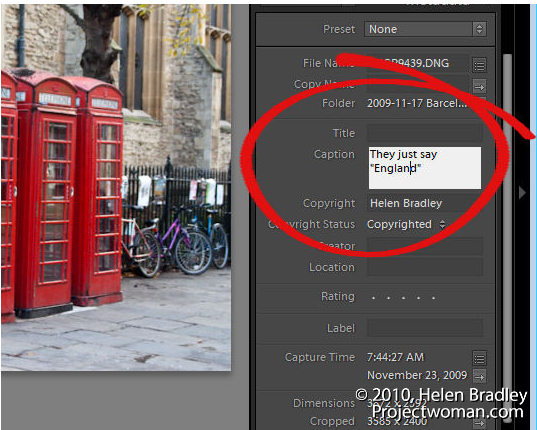
In Library view add a caption to each image so you can include the caption in the SimpleViewer slide show. To do this, open the Metadata panel and locate the Caption box. Type a caption for the first image, move to the next image and type a caption for it and so on.
 

Step 3
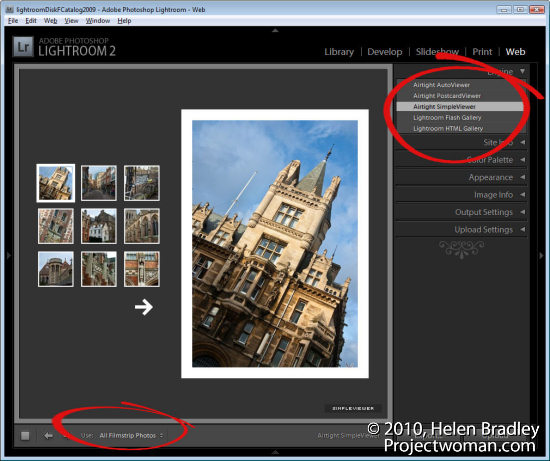
Click to open the Web module and, from the Engine options in the top right of the screen, choose Airtight SimpleViewer. This is an attractive and functional slideshow tool. From the options across the bottom of the screen choose All Filmstrip Photos.
 

step 4
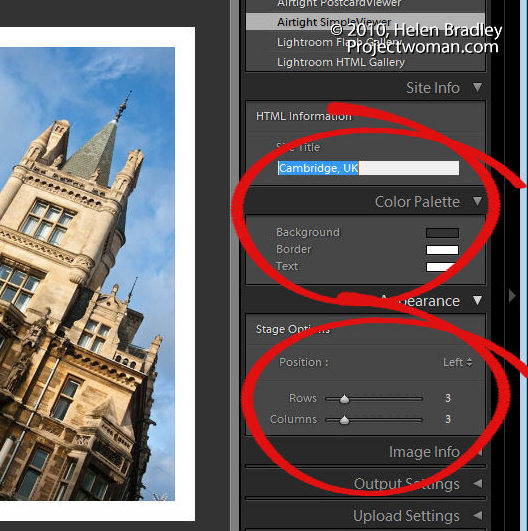
In the Site Info area type the title to use for your slideshow, this is the page title and it appears in the browser title bar. In the Color Palette options, set a background color and border color for your images and a text color. In the Appearance Options select the position of the thumbnails and the number of rows and columns of thumbnail images. You may find that by increasing the number of rows beyond 3 you will lose the captions so it is best to use a smaller number of rows so you have the benefit of including captions.
Step 5
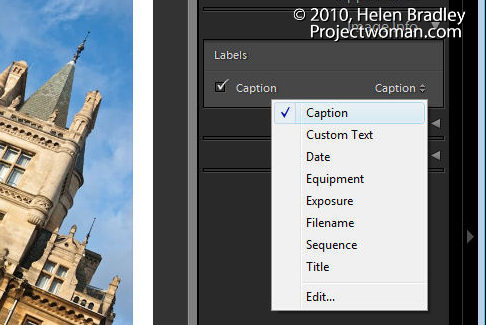
In the Image Info panel select the Caption checkbox and then from the dropdown list, select what you will use as captions. If you followed step 2 and typed caption information in the Metadata then chose Caption for this option.
Step 6
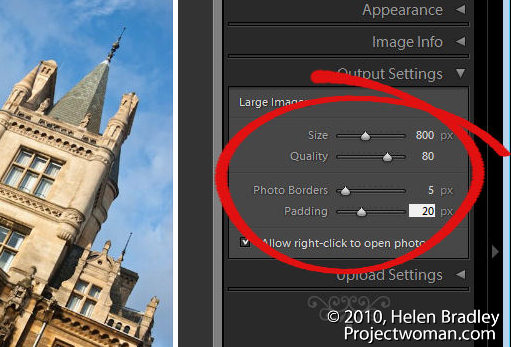
In the Output Settings panel, specify the size of the larger images which is the size of the selected image in the slideshow. You can also specify the quality of that image. The Photo Borders option controls the size of the border around the images, which by default is set to 20, but which you can increase or decrease as desired. The Padding Value controls the offset of the image from the remainder of the page. You can enable or disable the option to allow the viewer to right click to view a photo.
Step 7
In the Upload Settings area select the FTP server dropdown list click Custom Settings > Edit and enter the details for the ftp account for your website. You must type your server name, your user name and password – you can, if desired, include the password in the preset so that you won’t have to type it each time. Include the server path for storing the files and, if necessary, adjust the protocol port and the mode used for data transfer although these defaults should work in most circumstances.

Once you have created your settings, from the Preset dropdown list, select Save current settings as new preset so that these will be available next time you use the program.

Step 8
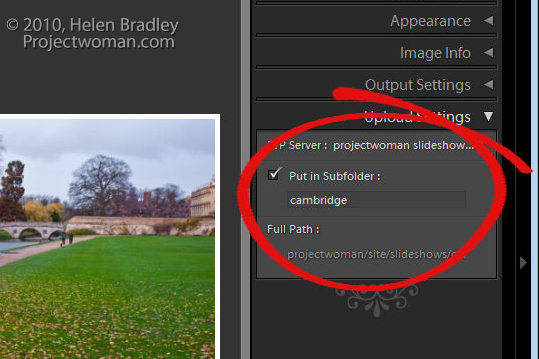
By selecting a subfolder, you can separate the slideshow and its files from other files on your server. This is a good idea as it will eliminate any possibility that files that you upload will overwrite or conflict with files used elsewhere on your website.
Step 9
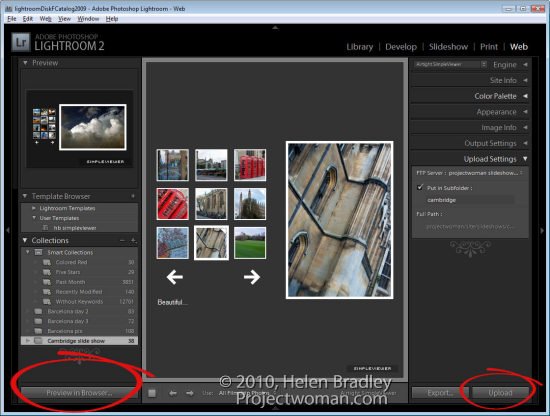
Click Preview in Browser in the bottom left of the screen to preview the slideshow or simply click the Upload button and upload the files to your server.
Step 10
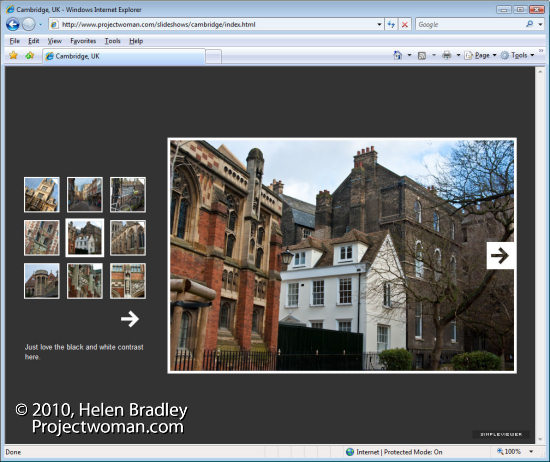
When the upload is complete, launch the slideshow by pointing your browser to your website to the folder that you created and to the file index.html.
Step 11
Once you have checked your slideshow and if it is all working correctly you can save the template by clicking the plus sign opposite the Template Browser and create a new template in your User Templates folder. This will automatically give you access to your preferred slideshow setup at any time in the future. All you will need to do is to change the Slide Title and the Folder in which the images should be saved on your server.

Helen Bradley

Friday, May 1st, 2009

Make Your Own Photoshop Brushes


One of the most popular searches involving Photoshop on the web is, perhaps not unsurprisingly, for free Photoshop brushes. Photoshop brushes can be used for a range of editing and creative tasks and while it’s fun to find and download great looking brushes it’s also possible to create them yourself and to do this very easily.

Here’s how to create your own Photoshop brushes from your photos:


Step 1
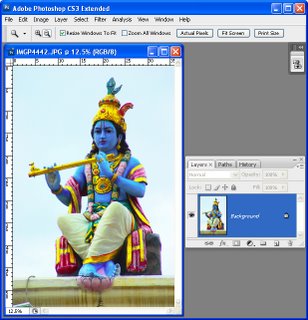
Open an image that contains something that you want to create as a brush. It can be something as simple as a coffee stain on a piece of paper or a photograph that you’ve taken of a texture, statue, graffiti or other shape. The best brushes are made using high quality images so plan your brush to be around 1,000 to 1,500 pixels in width and height. The maximum allowable size is 2500 x 2500 pixels.


Step 2
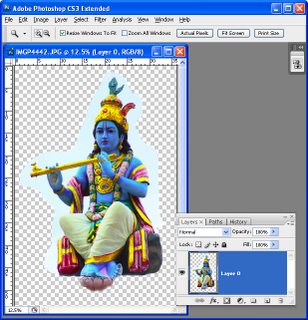
To make your brush you’ll need to isolate the area that you want to turn into the brush. So start by double clicking the background layer and click Ok to turn it into a regular layer. Make a selection around the area to make a brush from, choose Select > Inverse and press Delete.


Step 3
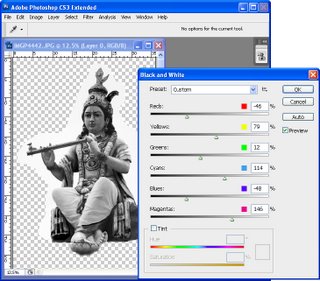
Brushes are grayscale images so you can control the contrast and the look of the brush by converting the image into black and white using your preferred method of doing so.

Here I have selected Image > Adjustments > Black & White. This adjustment lets you tweak the black and white result to get the desired amount of contrast in the brush and to determine which colors are taken towards black and which are taken to towards white.


Step 4
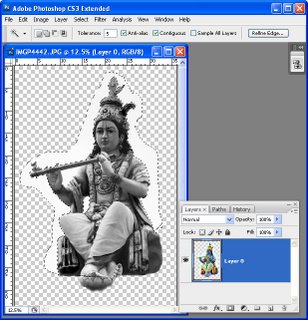
Select any light areas around the image that aren’t to be included in the brush and remove them. If you don’t do this, anything that isn’t white will actually pick up paint when you use the brush later on. I selected these areas using the Magic Wand tool with a Tolerance of 5 to get everything which was white or nearly white.


Step 5
Select the area to include in the brush. If you have removed from the image everything except what you want to include in the brush Control + click (Command + Click on the Mac) on the layer to select the image.

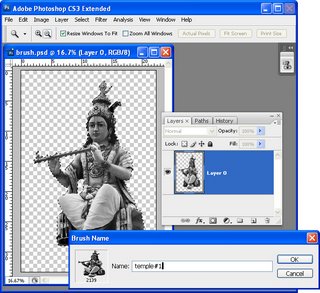
Choose Edit > Define Brush Preset, type a name for the brush and click Ok. If the option doesn’t appear in the menu, your proposed brush is too big so size the image a little smaller and try again.


Step 6
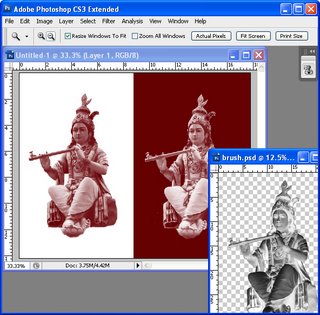
Create a new image and test your brush. It is the last entry at the foot of the brushes palette. It’s a good idea to test it at 100% Opacity using black or dark “paint” on a white background and “white” paint on a black or dark background. If it needs fixing, return to the brush image, make your changes and select and create the brush again. You will need to reselect the new brush in the Brushes palette – it is always the last one in the list. Even if you name the two versions the same name the second one doesn’t overwrite the first.

For brushes like this which has a photographic quality, select the image layer, press Control + I (Command + I on the Mac) to invert the image, select it and make a second brush that you can use to paint with white.


Step 7
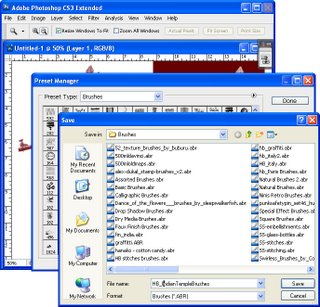
When your brushes are complete, save them to a file so you have them on disk. If you don’t do this, you will lose them if you replace your brushes. Choose Edit > Preset Manager and select Brushes in the Preset Type list. Select the brushes to save, choose Save Set and type a name for the set.

Helen Bradley