Friday, November 8th, 2013

Depth of Field – how to use it in your photography

Once you  know how to achieve  different depths of field, the question then becomes when would you use this in your photography?

Once you understand how you can achieve different depths of field in your photography – the question then becomes when would you use this knowledge to craft better photos?

Portraits and a shallow depth of field

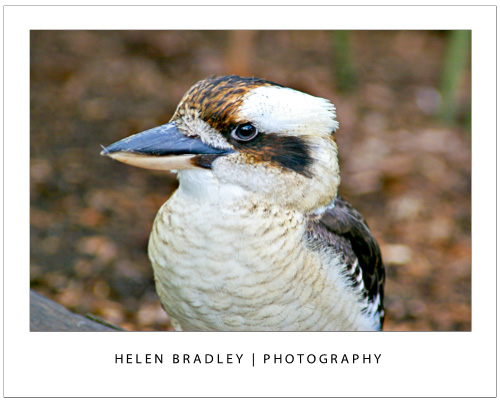
There are a number of situations where it is a good idea to have a shallow depth of field and one of these is for portrait and pet photography. In this case you will want to remove any distracting background from around your subject. When the background is cluttered or distracting, a shallow depth of field helps you to isolate the subject from the background.

To achieve this effect, you would do one of these things or a combination of them:

1    Use a zoom lens and zoom in to your subject,

2    Get closer to the subject, and

3    Set your camera to use a large aperture, such as f/2.8 – f/3.8.

When you do this, take care to focus carefully on the subject. One disadvantage of working with a very shallow depths of field is that the amount of the area in the image that is in focus is very small so if you don’t get your focus right, your subject will be out of focus. You need to make sure that what you want to see in focus is the area you are focusing on.

Photographing flowers and products

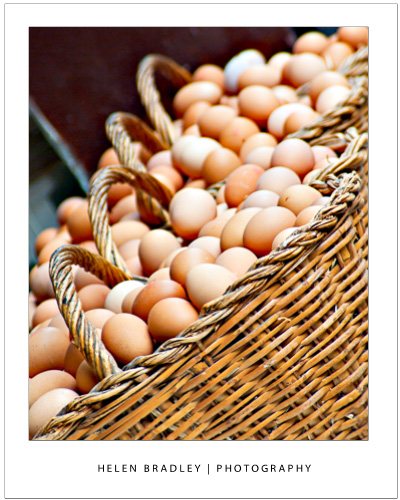
Another situation in which you may want to use a shallow depth of field is when photographing flowers. The closer you get to the flower the more likelihood the background will be attractively blurred.

In product photography, you may also want to get a shallow depth of field and you’ll find that in many cases, the shallower the depth of field, the more attractive the image is. The difference between a shallow depth of field and a deep depth of field can often be the difference between an attractive photograph and one that looks more like a snapshot.

Landscapes benefit from a deep depth of field

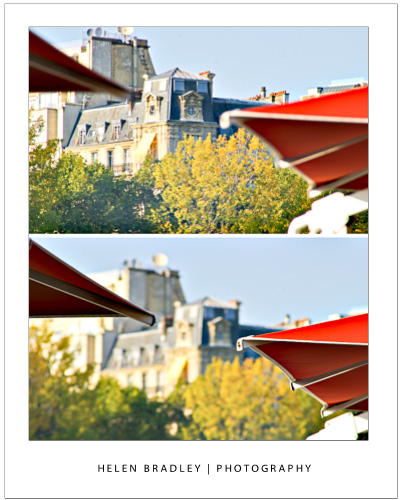
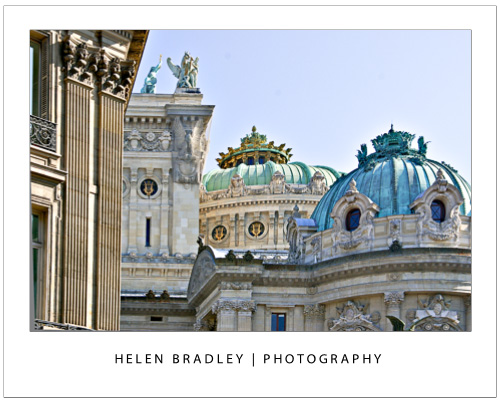
While a shallow depth of field is extremely attractive for portraits and many other types of photographs, when you’re shooting landscapes and cityscapes you will typically want the opposite to be the case and you will want a deep depth of field. For landscape photography, you’ll typically want everything in the image to be in focus.

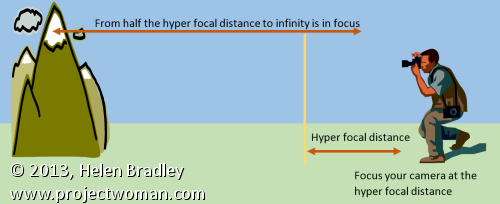
When photographing landscapes photographers often talk about hyper-focal distance. The hyper-focal distance is the point at which you point your camera at to focus the shot so that everything from that point to infinity is in focus and, in addition, an area halfway from the hyper-focal distance to your camera is also in focus. The image shows you how this hyper-focal distance affects the depth of field.

For landscape photography, you’ll typically want to use a small aperture such as f/9 – f/11, a short focal length such as 17mm and be a good distance away from your subject. Calculating the hyper-focal distance then becomes the issue. In many cases, people simply opt to focus the camera at infinity as this typically gives good results without needing technical calculations.

Too much of a good thing

If you’re tempted to increase the depth of field by simply dialing down your aperture to the smallest possible size such as f/35 or so, think again. While it may seem that this will give you a very deep depth of field it can be counterproductive. At very small apertures an effect called diffraction kicks in and this can cause a decrease in quality in your images. Instead you need to find the sweet point at which the smaller aperture gives you a good depth of field but stop short of where it gets so small that light is diffracted decreasing the image quality.

DSLR vs Point and Shoot for controlling Depth of Field

When you’re looking to achieve different effects with different depths of field, you’ll find that a digital SLR will give you much better results than a point and shoot camera. The reason for this has to do with the relative sensor size of the cameras – the larger the sensor size – the more control you’ll have over the depth of field.

Understanding depth of field and how it impacts the images that you take is a key way that you can impact the quality of your images. Choosing the right option for each shooting situation and knowing how to set your camera to achieve the desired result will enhance your photos.


Helen Bradley

Tuesday, October 29th, 2013

Controlling Depth of Field in your Photographs

Learn what depth of field is and how your camera settings affect it

Some subjects need to be fully in focus to be shown at their best and others need dreamy out of focus backgrounds to create the right setting. The feature that is key in both situations is called depth of field – it gives you both that ‘everything in focus’ look and it also gives you soft out of focus look. Depending on what you are photographing getting the depth of field right is often the difference between a snapshot and great image.

I’ll explain what depth of field is and how to control it with your camera settings.

What is depth of field?

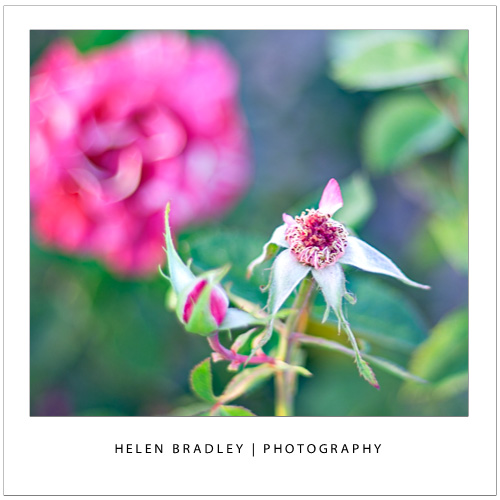
At its simplest, depth of field is the zone of sharp focus in front of, around and behind the subject in your photo when you are focused on that subject. When you have a shallow depth of field, only a small area around the subject will be in focus and quite often only a small part of the subject will be in focus. Everything else in the image will be out of focus with things further away from the subject, either in front of or behind the subject, being more out of focus the further away they are. This image has a shallow depth of field – it’s a great way to shoot flowers:

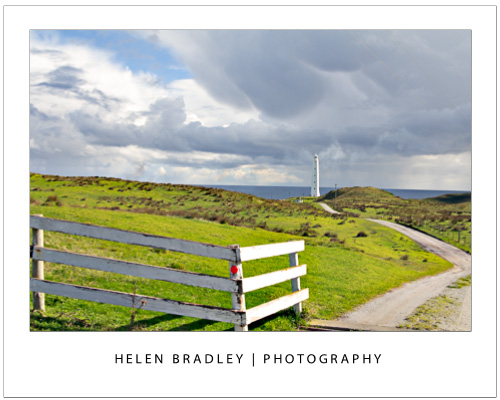
When the depth of field is deep, nearly everything in the shot is in focus. You control the depth of field in your images by adjusting the camera’s settings for aperture, adjusting the focal length of the lens and the distance you are from the subject. This image has a deep depth of field – that’s important as we want to see everything in this scene from the grass in front of us to the horizon miles and miles away.

Let’s look at each of these in turn.

Control depth of field with aperture

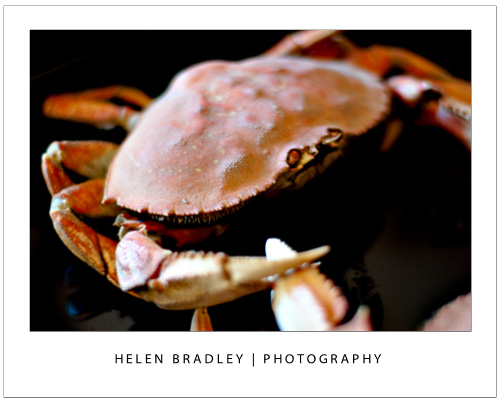
One way that you can control the depth of field in an image is to change the aperture that you are using. For this, you will need to have your camera set to Aperture Priority or Manual mode. Selecting an aperture that is very large, such as f/1.4 to f/2.8 will give you a shallower depth of field around your subject. The aperture used for this image was a huge f1.4 so only a small portion of it is in focus:


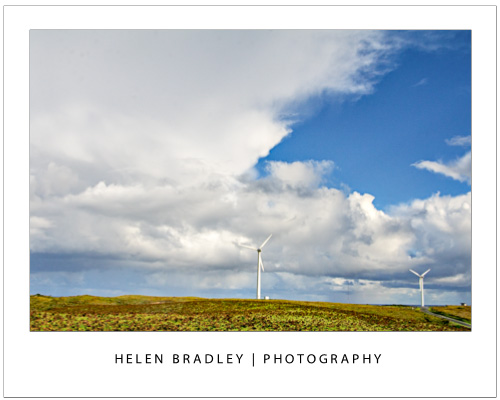
If you shoot with a small aperture, such as f/9 to f/11 or more you will find that more of the image will be in focus, which gives you a deeper depth of field. If everything else stays the same, the difference in the aperture setting you use can result in a very different image. The aperture used here was a small f11:

One benefit of shooting with a large aperture, such as f/1.4 to f/2.8, is that a lot of light is getting into the camera so you can use a fast shutter speed. Conversely, a down side of shooting with a small aperture such as f/9 to f/11 or more is that less light gets into the camera so you will need to use a slower shutter speed  or a higher ISO value. In some cases you will be shooting with such a slow shutter speed that you will need to use a tripod.

Control depth of field with focal length

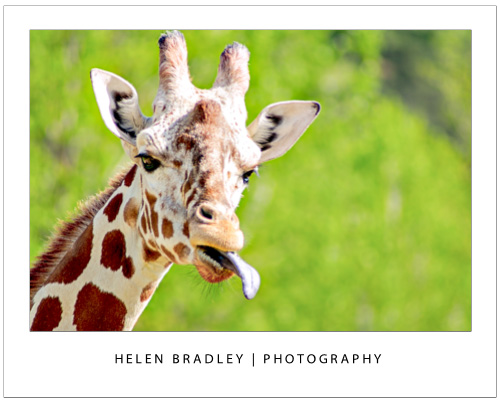
The focal length of your lens can also have an impact on the depth of field when you use this to make a subject bigger. So, if you are shooting with a 50 mm lens, you will get a much deeper apparent depth of field than you would if you were capturing an image with a 200 mm lens at the same aperture and if, in both situations the subject size is the same. The depth of field is actually not significantly different but it looks different because there is more background in an image when you capture it with a 50mm lens than you will get when you capture it with a 200 mm lens. So a rough rule of thumb is that the more zoomed into the subject that you are, the shallower the depth of field will appear to be. This giraffe was shot at f5.6 which isn’t a particularly large aperture but it was shot at 300mm zoom so the giraffe is quite sharp and the background is nicely out of focus:


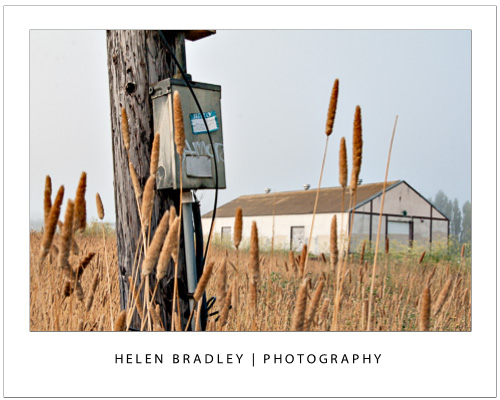
If you are shooting landscapes you will get best results when you use a short lens such as a 28 mm lens as the image will appear to have a much deeper depth of field. On the other hand, a zoom lens can be a good lens to use when shooting portraits because the further you’re zoomed in to the subject the less background will be in the image and the shallower depth of field you will appear to have. This image was shot at f11 with a 28mm lens so everything from the lamp post to the building is in focus:

Control depth of field by varying the distance from your subject

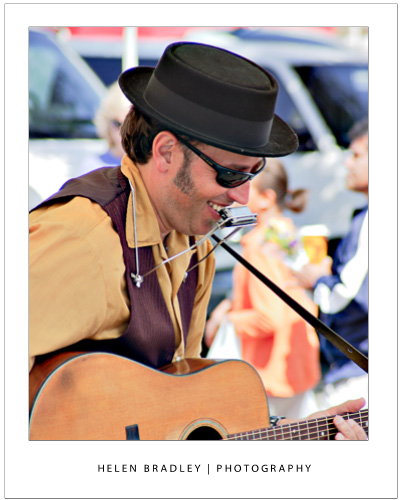
The distance between the subject and the camera is another way that you can impact depth of field. So, for example, if you photograph a subject close up, such as in the region of up to 10 feet away, then the depth of field will be much shallower and more of the image behind the subject and a little in front of the subject will be out of focus. On the other hand, if you move the subject further away from you so that the subject is 20 feet away then the depth of field will be much deeper and there will be a lot more of the image in front and behind the subject in focus. This image was shot with a 200mm lens – the singer was relatively close to the camera  and the background was some distance behind him so the musician is in focus and the background nicely out of focus:

Whenever you’re considering depth of field, you should also note that, when the subject is in focus, the amount of the image that is in focus behind the subject will be greater than the amount of the image that is in focus in front of the subject. The ratio is approximately one-third to two-thirds, so the depth of field will extend roughly one-third in front of the subject and two-thirds behind the subject.

Helen Bradley

Friday, October 26th, 2012

Trevor’s Quick Photoshop tip – Zoom with your scroll wheel

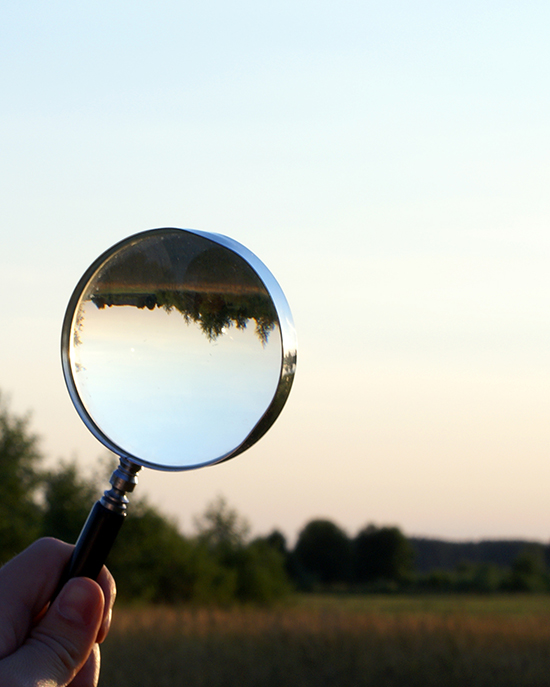
 photo by: Cierpki via sxc.hu
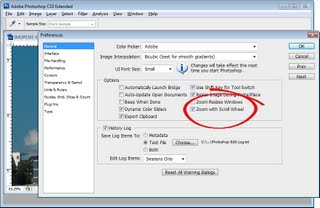
Do you want to fluidly zoom in and out of your project with the scroll wheel of your mouse? Well you’re in luck because in Photoshop this can be activated in Preferences. To go to your General Preferences, press Ctrl + K on a PC and Command + K on a Mac and check the Zoom with Scroll Wheel checkbox and press OK. Now you can zoom in and out of your images using just your mouse.

Helen Bradley

Wednesday, October 24th, 2012

Trevor’s Quick Illustrator Tip – Simple Zoom

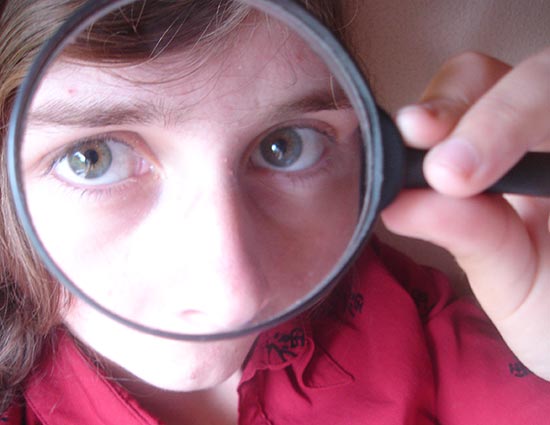
Photo By: Joana Croft
It’s true you can press Ctrl + + and Ctrl + – to zoom in and out on a PC or Command + + and command – on a Mac, but I find this tricky to do on a small keyboard such as the one on my laptop. If you have a mouse with a scroll wheel you can hold the Alt key and scroll up to zoom in or scroll down to zoom out. This works no matter which tool is selected at the time. The tool you were working with gets targeted again when you release the Alt key. I find this an easier way to zoom in and out when I am working on an image.

Helen Bradley

Thursday, June 28th, 2012

Trevor’s tip of the Week – 100% zoom

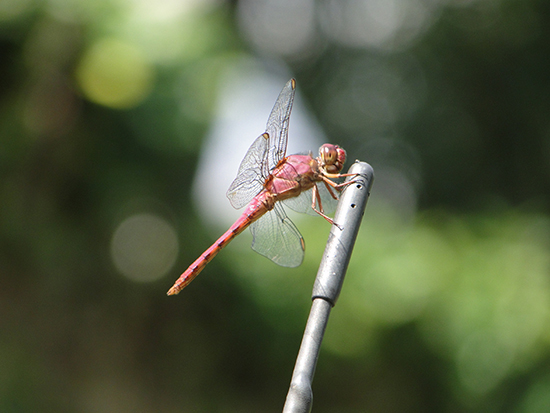
(photo by: Luis Gustavo)

A quick tip for Photoshop that will save you some time.  To see an image at 100% size all you have to do is double click the zoom button in the tool bar.

Helen Bradley

Thursday, January 12th, 2012

Ten best Photoshop shortcuts

Photoshop has a huge range of shortcut keys for speeding up your day. Here are my ten best shortcut keys that I suggest you add to your Photoshop toolkit:

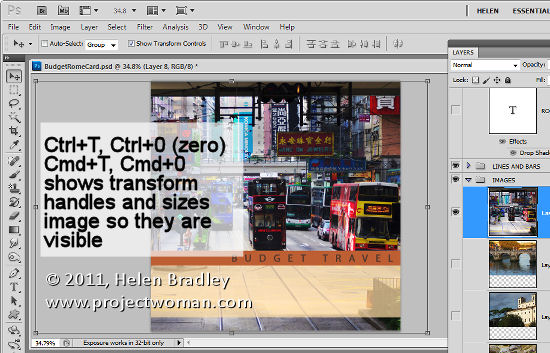
Find the sizing handles

When you paste a layer or selection into a Photoshop image – if it is larger than the current image it can be difficult to find the sizing handles.

To find them, press Ctrl + T, then Ctrl + 0 (zero) or on the Mac – Command + T, Command + 0. This selects Transform and sizes the image inside the window so you can see the sizing handles.

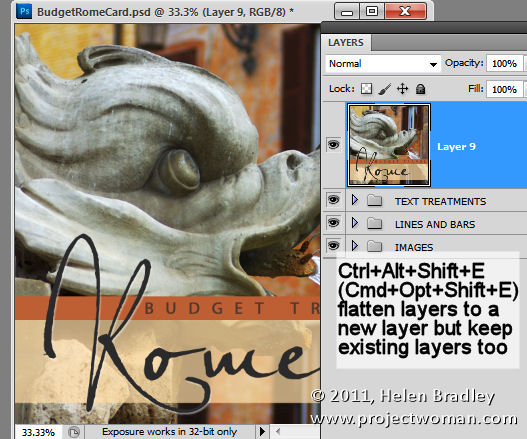
Flatten layers but keep them too

Sometimes you need, for example, to flatten the layers in an image to sharpen the result but you don’t want to get rid of the layers either. Here’s how to have your cake and eat it too (or more accurately, flatten your layers and keep them too).

Add a new empty layer to the top of the layer stack, click in it and press Ctrl + Alt + Shift + E (Command + Option + Shift +E on the Mac). This adds a flattened version of the image to the new layer but leaves the layers intact too.

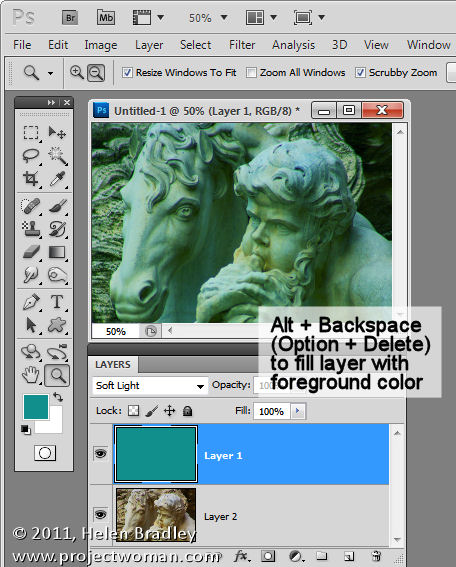
Fill a layer

To fill an empty layer with the current foreground or background color use Alt + Delete or Option + Backspace on the Mac to fill the layer with the Foreground color or Ctrl + Delete or Command + Backspace on the Mac or to fill with the Background color.

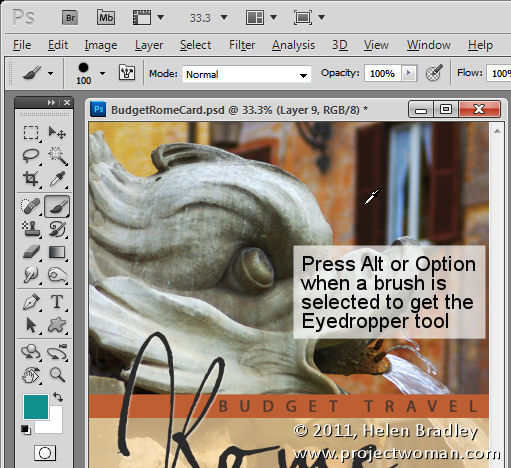
Select a color from the image

When you’re working with a Photoshop brush and you want to sample a color from the image, instead of clicking the Eyedropper tool and then the Brush tool again, you can do it with a keystroke.

Hold the Alt the key (Option on the Mac) to switch temporarily to the Eyedropper tool and click to select a new foreground color. Let go the Alt/Option key to return to the brush.

Move a selection

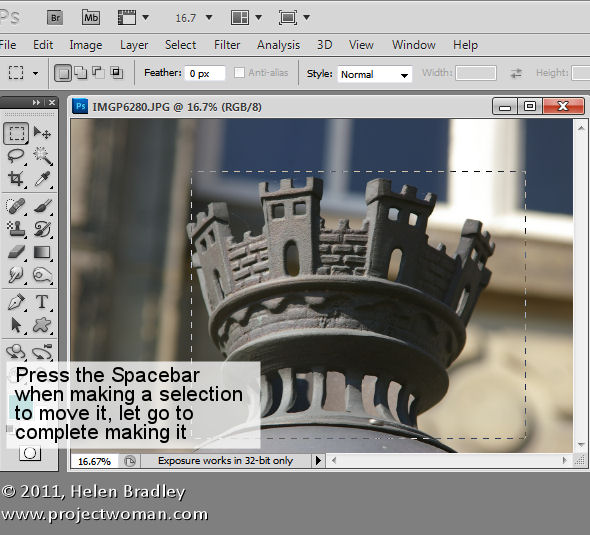
Moving a selection is notoriously cumbersome without this keystroke: to move a selection while you are still drawing it, press and hold the Spacebar. Continue to hold the it while you move the selection and let it go when the selection is in the correct place.

Adjusting brush size

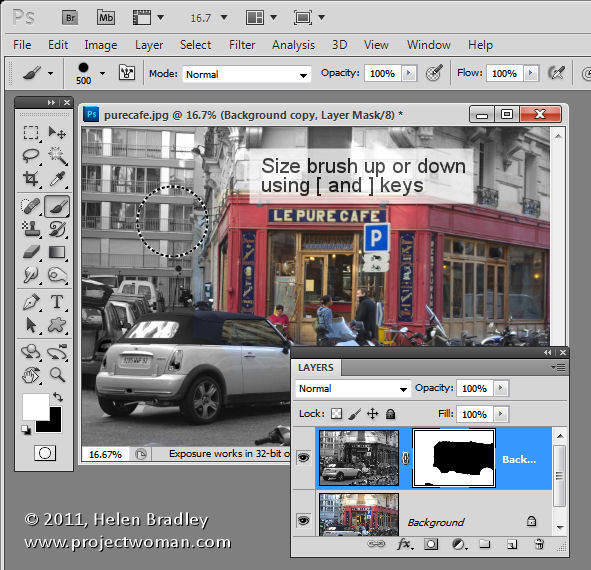
When you’re using a brush as an eraser, to paint with or in any tool that uses brushes, you can size the brush up or down using the [ and ] keys on the keyboard. In Photoshop CS5, you can hold the Alt key and the right mouse button (on the Mac use the Control + Option keys) and drag up to increase or decrease brush hardness and drag left and right to size the brush.

Scrubby sliders

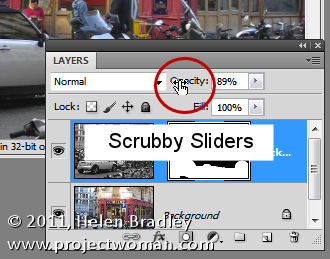
Not technically a keystroke but a “must know” tool are scrubby sliders. In Photoshop CS3, and later, most options in most dialogs that can be adjusted using a slider can also be adjusted using a scrubby slider. Scrubby sliders appear as a hand with a pointing finger icon when you hold your mouse over the slider name. Drag on the name to adjust the slider value.

Zoom and Move with dialogs open

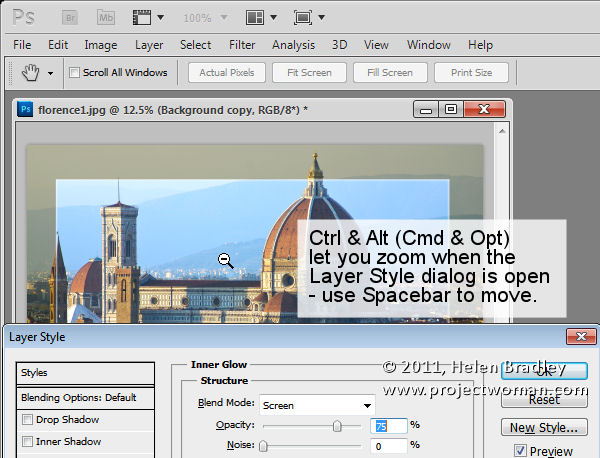
When a dialog such as the Layer Style dialog is open you can access the Zoom and Move tools by using Ctrl (Command on the Mac) to zoom in and Alt (Option on the Mac) to zoom out of the document. Use the spacebar to access the Hand tool to move the document around.

Hidden tools

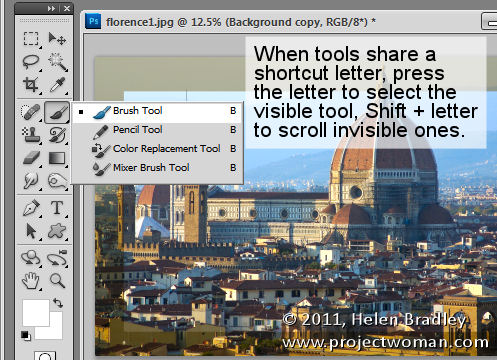
Tools that share a tool palette position and a shortcut keystroke letter can be easily selected using the keystroke letter. So, for example, to access the Mixer Brush which shares a tool position with the Brush tool and if the Mixer Brush is hidden, press B to get the Brush tool. The press Shift + B until the Mixer Brush appears. In a similar way press M to get the Rectangular Marquee tool and Shift + M to get the Elliptical Marquee tool.

Precise and crosshair cursors

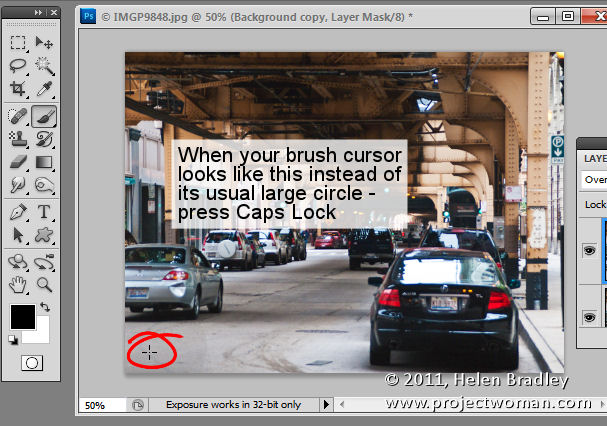
Finally, not so much a keyboard shortcut as something that can go horribly wrong –  pressing the Caps Lock key switches the Brush cursor into precise mode. This is a small crosshair cursor and hides the actual size of the brush. To return to the regular normal or standard brush tip, press the Caps Lock key again.

If I were helping a new user learn Photoshop, these are ten keystrokes I’d be teaching them. Do you agree or what keystrokes do you think are the most important to learn in Photoshop?

Helen Bradley

Saturday, December 26th, 2009

8 secrets of the zoom tool


Continuing with my ‘tool’ secrets posts, here are 8 secrets of the Photoshop Zoom Tool.

Quick toolbar shortcuts
The Zoom tool can be selected by pressing the letter Z – it’s an easy and handy shortcut to remember because it saves you from having to click the Zoom tool to select it.

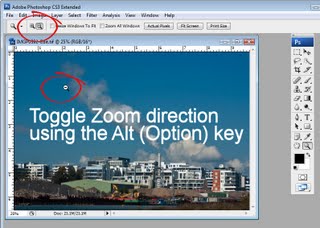
However, once engaged, the Zoom tool operates in only one direction, in or out depending on the option you have selected on the Tool Options bar. You can toggle the Zoom direction by holding the Alt key (Option on the Mac) as you zoom.

Zoom as you work
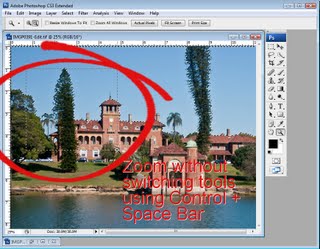
If you’re in the middle of painting, erasing or selecting an item and if you need to get access to the Zoom tool, press Ctrl + Space Bar (Command + Space Bar on the Mac) and you’ll get access to the Zoom tool’s current setting – which will be either Zoom In or Zoom Out depending on what you have selected. Use Ctrl + Alt + Space Bar (Command + Option + Space Bar on the Mac) to zoom the other way.

Zoom to a specific place
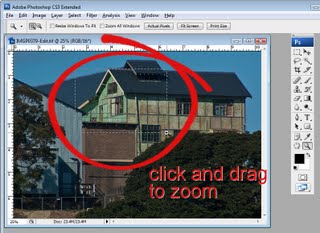
If your Zoom tool is set to Zoom In, you can zoom to a particular location in the image by dragging with the zoom tool over that location rather than simply clicking on it. If your tool is set to Zoom Out, press Alt (Option on the Mac), and drag over the place on the image that you want to focus on.

Size the window as you zoom
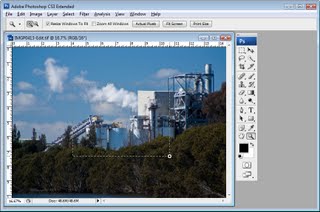
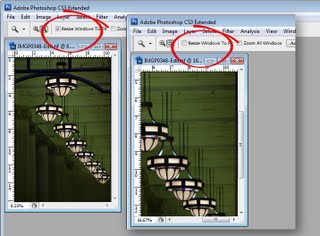
When the Zoom tool is selected, the Tool Options bar has a checkbox for Resize Window To Fit. Enable this and the window around the image will be resized to fit the zoomed image so you won’t have any space between the image and the edge of the window. With this option disabled, if you shrink the image, the window stays the same size and grey area is added around the image between it and the window edge. If you zoom in with this option disabled the window stays the same size as you zoom.

Other zoom options
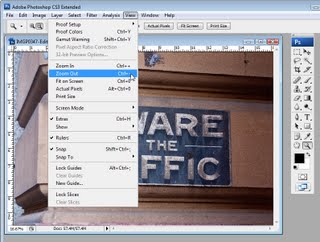
Some Zoom options can be selected from the View menu such as Zoom In, Zoom Out, Fit On Screen, Actual Pixels and Print Size. Each of these can also be selected using keyboard shortcuts such as Ctrl + + to zoom in, Ctrl + – to zoom out. Keystrokes appear in the menu opposite each item.

Zoom via the Status Bar
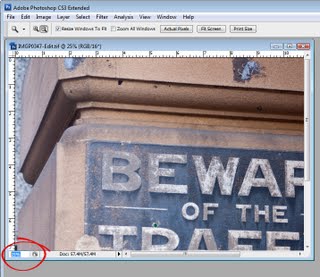
The current zoom percentage is shown in the left side of the image window’s Status Bar. To zoom to a particular percentage level such as 150%, type 150 in the Status Bar box and press Enter.

Hidden Zoom Options
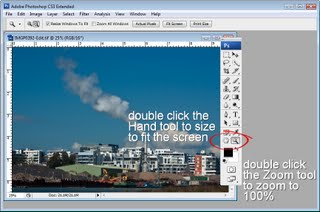
To quickly zoom an image to 100% size, double click the Zoom tool in the Tool Palette. The Hand tool can be used to size the image to fit the screen – to do this, double click the Hand tool. Exactly how big the image is when it is set to “fill the screen” depends on the position of toolbars and palettes.

Zoom with the mouse
To zoom with your mouse wheel, choose Edit > Preferences > General and enable the Zoom with scroll wheel checkbox. Then you can roll the mouse wheel to zoom in and out of the image.

Helen Bradley