Friday, May 3rd, 2013

Lightroom Tip – Understanding Import Options

Understanding Import Options

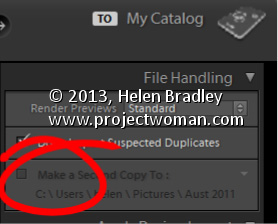
You have four import options for your photos – Copy as DNG, Copy, Move and Add. In some circumstances, not all these options are available – for example, you may choose Copy or Copy as DNG when importing from a camera card but you cannot select Move or Add when you are importing images from a card.

When you select one of these options that choice may affect the other options you have. For example, if you choose Add to add images to the catalog from a folder, you cannot choose to back up your files at the same time. You can also not convert RAW images to DNG if you are adding them to Lightroom.

So, if you want to convert images, or back up, or rename images as you import them, it is best to import them direct from your camera card. Copying them into a folder on your disk before adding them to your Lightroom catalog diminishes your options when working with your images.

Helen Bradley

Tuesday, April 30th, 2013

Word 2010 and 2013 Tip – Quickly Move Paragraphs

 Move a Paragraph, at Any Time, with Ease!

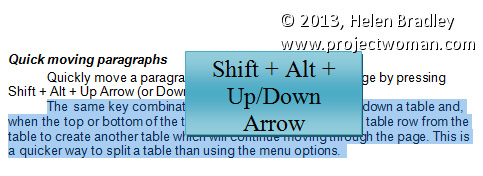
To quickly move a whole paragraph up or down a Word document, click in the paragraph and press Shift + Alt + Up Arrow (or Down Arrow).

The same key combination will move an entire table row up or down a table and, when the top or bottom of the table is reached, it detaches the table row from the table to create another table which will continue moving through the page. This is a quicker and simpler way to split a table.

This tip works in just about any version of Word.

Helen Bradley

Tuesday, April 16th, 2013

Help! My images disappeared from my iPad and iPhone

Understand the limits of the Photo Stream and how to save images from it so they aren’t removed from your iPad or iPhone

Sometimes you may know that you had some images on your iPad or iPhone but suddenly you find that they’ve gone.

This happens to me when I drop some images into my Photo Stream on my Windows PC that I want to use on my iPad. I drop images into the Uploads folder on my PC and, via the iCloud, they are synced automatically to my iPad. I know the images got there safely – I put them there months ago and I know that I saw them on my iPad but suddenly today they aren’t there. Confusing? Happened to you? It probably has and here is the explanation as to why they disappear and how to stop them from doing so.

The issue is the Photo Stream. The photo stream on the iPad and iPhone only store the last one thousand images – if you shoot lots of images and, say have your iPhone and iPad synced then you’ll run out of space pretty quickly. When you do then images are knocked out of the Photo Stream to make room for more recent ones.

The issue doesn’t happen on your Mac or PC because they have plenty of space so photos in your Photo Stream folders there are always there – it is just a protection against junking up your iPhone or iPad with ‘stuff’.

So, what do you do when you want to keep some of the images from your Photo Stream permanently and you don’t want to lose them? The answer is to move them to an album or to your Camera Roll. The images in your camera roll and in albums are there to stay. And just to clarify, you don’t have to move images from the Photo stream that you captured with that device – because images you capture on the iPad for example are in the Camera Roll and stay there. The images you want to save are those that get synced to the iPad via iCloud from other devices such as your iPhone or PC or Mac – they are the ones that only hang around for a short time.

How to move images from your Photo Stream to an album

So, to move a lot of images to an album (an easy solution for lots of images that you want to save to somewhere that isolates them from all your other images), tap Photos, tap Photo Stream, tap My Photo Stream.

You should now see all the thumbnails of images in your photo stream. Then tap Edit.

In this mode you can now tap the images that you want to save – each of them should have a blue checkmark on them. Now tap Save and choose to Save to an Existing Album or Save to New Album.

I have an album for images I want to edit and play with on the iPad called Editable Pix so I typically tap that to select it. This lets me store those images so they are isolated from all the other images in my Camera Roll.

How to move images from your Photo Stream to your Camera Roll

It is also possible to save photos from the Photo Stream to the Camera Roll. The advantage of this is that they are in the Camera Roll itself and in some situations that might work best for you.

To do this, again tap Photos, tap Photo Stream, tap My Photo Stream so you see all the thumbnails of images in your photo stream. Again tap Edit. In this mode you can now tap the images that you want to save – each of them should have a blue checkmark on them. Now, tap the Share button in the top left of the screen:

And choose Save to Camera Roll. (It is very confusing that these two processes that really are so similar are handled so differently in iOS6).

How to save one image from your Photo Stream to your Camera Roll

Now, if you just want to save one image from the Photo Stream to the Camera Roll, tap Photos, tap Photo Stream, tap My Photo Stream so you see all the thumbnails of images in your photo stream. Tap the one image that you want to copy to the Camera Roll so it is showing full screen. Now tap the Send to button that is a box with an arrow coming out of it in the top right of the screen and choose Save to Camera Roll from the menu.

Now you will never again lose images off your iPhone or iPad that you really want to keep.

Helen Bradley

Sunday, March 17th, 2013

Add images to your iPad & iPhone photo stream from your Mac

See how to upload images from your Mac to your iPad or iPhone

Sometimes you will get images on your Mac that you want to share with your devices such as your iPad or iPhone. To do this you can add them to your photo stream and they will be synced automatically next time you are connected using a wifi connection.

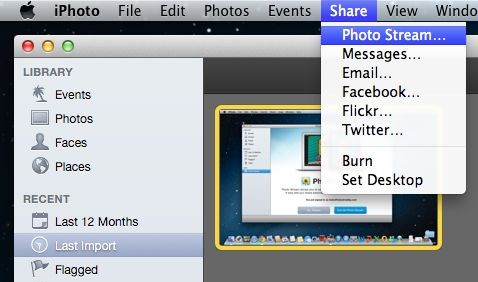
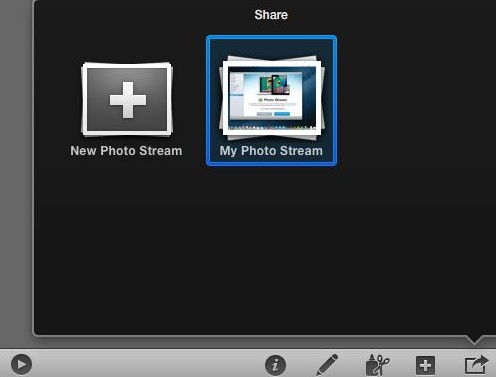
To do this, from inside iPhoto, click the image(s) to add to the photo stream then click the Share option on the toolbar, click Photo Stream > My Photo Stream. The images will be uploaded to your photo stream and then downloaded to other devices when they next update via a wifi connection.

Of course, for this to work the images have to be in iPhoto. If an image is not, for example, it is on the desktop – you can add it to iPhoto by dragging and dropping it into iPhoto and then add it to your photo stream.

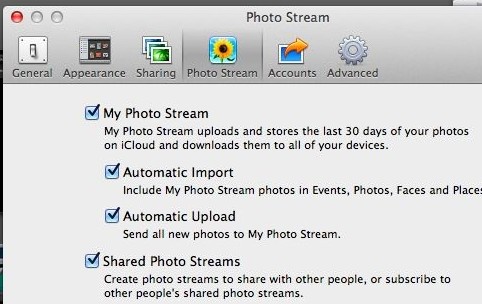
Of course if you have your iPhoto set up to automatically send all new images to your photo stream the very process of adding images to iPhoto will add them to your Photo Stream. To do this in iPhoto, choose iPhoto > Edit Preferences > Photo Stream and, under My Photo Stream (which should already be enabled), check Automatic Import.

Helen Bradley

Monday, December 3rd, 2012

Lightroom – harness the power of your scroll wheel

In Lightroom, using the scroll wheel on your mouse has some distinct advantages over using other methods for adjusting sliders. It might take a little getting used to but when you see just what it can do you might be surprised.

Develop module and the Wheel

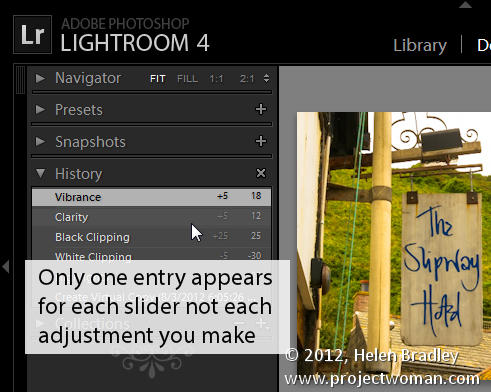
In the Lightroom Develop module you might have used the + and – keys to adjust sliders to fix your images. If you do this, whenever you pause to see how the change looks when applied to the image, Lightroom writes the change value in the history even if you’re not done. If you readjust the same slider a few times, each time you adjust it a new history entry is made.

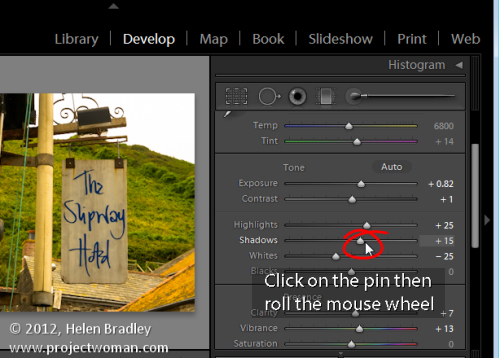
By contrast, you can use the scroll wheel to adjust the slider. Begin by clicking on the pin on the slider and then rolling the scroll wheel up to drag it to the right or down to drag it to the left. Not until you let go and go to the next tool will the change be written to the History. This means that you can experiment with different values rolling your mouse wheel left and right as you please – and until you move away from that control nothing is recorded. Your history list will be a whole lot neater and you have a much easier way to adjust the sliders.

Spot removal and the wheel

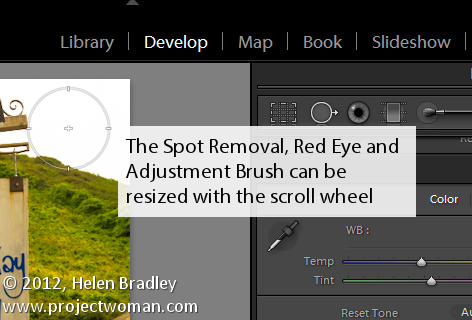
When you have the Spot Removal Tool, Red Eye Tool or the Adjustment Brush Tool selected you can size the brush to the desired size using the mouse scroll wheel.

To see this at work click any of these three tools to target it and then hold your mouse over the image. Roll with the scroll wheel to adjust the brush size. If you have the Adjustment Brush targeted then hold the Shift key as you roll with the scroll wheel to adjust the feathering on the brush.

Move with the Wheel

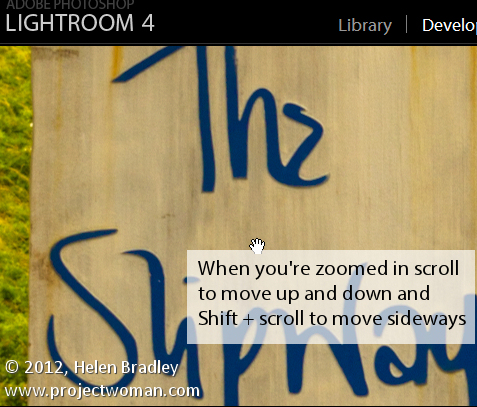
If you’re have used the Zoom feature to zoom into the image then rolling the mouse scroll wheel will move the zoomed image up or down in the work area. To scroll to the left or right use the Shift key with the mouse wheel.

A caveat…

It seems that some Mac users have experienced difficulty with the scroll wheel on various machines so your mileage with this technique may vary. On a Windows 7 machine, with Lightroom 4 and a standard two button mouse with a scroll wheel, everything worked as explained and it’s a whole lot easier than dragging sliders around to make your changes.

Thanks to Frank Schophuizen for his gracious contribution to this post.

Helen Bradley

Monday, November 12th, 2012

7 Cool Photoshop Layer Tricks

When you’re using layers in Photoshop for photo editing and composting you can speed up the process of working with them if you know these cool layer tricks.

1          Unlock the Background

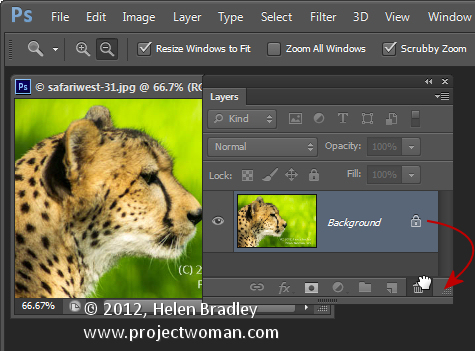
You will already know the Background of any photo is locked and you can’t do anything much with it until you unlock it. The quickest way to unlock a background layer is from inside the Layers palette. Drag the lock icon to its right and drop it in the Trash and the Background layer will be automatically converted to a regular layer.

2          One click add a Layer

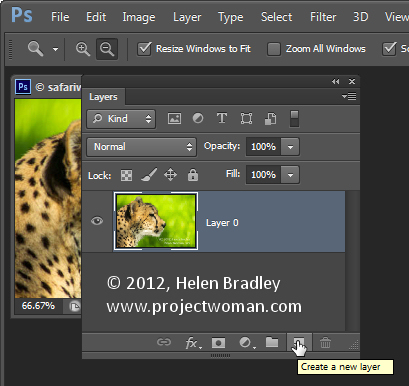
To create a new layer above the current layer click the Add New Layer icon at the foot of the Layer palette.

To add a new layer directly below the current layer Ctrl or Command Click on that icon. Both options add a layer but without displaying the Layer dialog.

3          Merge Everything to One Layer but Keep the Layers too

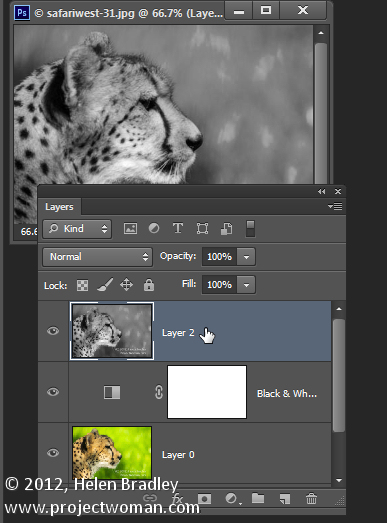
To merge all the current layers in the document to a single layer and at the same time to keep all the layers intact below it, click the topmost layer of the document and press Ctrl + Shift + Alt + E (Command + Option + Shift + E on the Mac). In case you are curious – it’s called Stamp Visible.

4          Select the Content on the Current Layer

To select everything on the current layer Ctrl + Click on the layer thumbnail in the Layers palette.

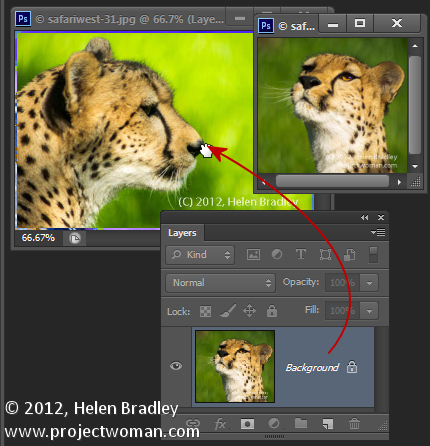
5          Copy a Layer to Another Document

To copy a layer from one document to another drag the layer from the Layers palette in one document and drop it into the other document. If you hold Shift as you drag the layer will be centered in the middle of the second document.

6          Quick Layer Moves

To quickly move a layer up the layer stack press Command + ] and to move it down, press Command + [.

7          Instant Delete a Layer

To instantly delete a layer, click the layer and press Delete.

Bonus Layer tip

To fill a layer or a selection with the foreground color press Alt + Backspace (Option + Delete on the Mac). Use Control + Backspace (Command + Delete on the Mac to fill the layer or selection with the Background color.

So, over to you now… what are your favorite Layer tips and tricks?

Helen Bradley

Thursday, November 1st, 2012

Lightroom – Edit in Photoshop

Learn how to take an image from Lightroom to Photoshop and back again. This will ensure that the image appears back in Lightroom, automatically added to the catalog, with the original version backed up. I also demonstrate the different possible settings so that you may customize this process.

Transcript:

Hello, I’m Helen Bradley. Welcome to this video tutorial. In this tutorial I’m going to show you how you can take an image from Lightroom to Photoshop and back successfully. I’m here in the Develop module in Lightroom and I’ve already done some work on this particular image. And I’m pretty happy with it. The problem is in this animal’s eye though you can see that there’s a little shape here that I want to get rid of.

Now I could get rid of this in Lightroom but it’s going to be a whole lot easier to take this image into Photoshop. So we’re going to do that now. To take an image from Lightroom into Photoshop I’m going to let Lightroom control the process. I’ll right click and choose Edit in. Because Photoshop has already been installed and Lightroom is aware of that I’m going to click Edit in Adobe Photoshop CS6. If I was using a different version of Photoshop I would select that from the list. I’ll click here. And now what’s happening is that Lightroom is asking me what I want to edit, either a copy of this image with the Lightroom adjustments, just a copy of the original or the original itself. In this particular case I want to edit this image with the Lightroom adjustments. So I’m going to edit a copy with Lightroom adjustments and click Edit.

If Photoshop is not already open Photoshop will be opened now. But here’s our image inside Photoshop and I’m just going to size it so that we can see the area in question. And now I’m going to bring in the tools. I have here the spot healing brush tool which is going to be the tool that’s going to help me fix this problem. I think I need to zoom in a little bit closer still so let’s get right into this problem area. And now with the spot healing brush tool I can size it down to suit the problem area and just start working over it. I could also use the clone tool if I wanted to. Any of these tools are going to help me fix this issue. And working with this tool in Photoshop is going to be a whole lot easier than working with the similar tools in Lightroom because I can just be a whole lot more accurate in Photoshop. If I want to undo it I just press Ctrl Alt Z to undo the change.

So when I’m happy with the resulting eye I’m just going to zoom out, make sure it all looks fine, which it does for this particular eye. I’ll probably fix this one while I’m here, but let’s call this good for now. And because I’m ready to go back to Lightroom now I’ve fixed the problem, I’m just going to close this image. So I’m just going to click the X button to close it. I’ll get a message which will say do you want to save changes to the document and I’ll say yes. The important thing at this point is not to choose File, Save as because you want to send the image back to Lightroom in the format that Lightroom sent it to Photoshop.

Now we’re back in Lightroom. The image that we’re looking at is the one that has been the fixed eye. And you can see here it’s called lionanimaleyes edit.tif. What Photoshop has done in conjunction with Lightroom is it’s taken the image, applied the edits to it and then sent it back as a TIF file with -edit after it. This is the original file. We haven’t lost the original. We’ve just got a copy back with the edits applied to it. Now the settings that Lightroom uses when exporting to Photoshop and receiving the image back are in the preferences setting.

I’ll choose Edit and then Preferences. And we’ll go to External Editing. You can see here that edit in Photoshop CS6 is set up as a TIF file. If we wanted to we could bring it back as a PSD file but TIF was selected here. It’s being sent out as proPhoto RGB with a 16 bit depth, a resolution of 240. And here’s the file naming. It’s coming back with the same file name with -edit on it. You can see that we’re using custom settings. Here’s the edit and here are our custom settings, the original file name with –edit applied, and then either PSD or TIF depending on what it is that we have set here for the file format. So all of this is customizable and this is where it’s being controlled as to what it goes out to Photoshop as and what it comes back into Lightroom as. And provided you use that process of just choosing File, Close or File, Save from Photoshop and not Save As so you don’t give it a name, you let Photoshop and Lightroom deal with it, then you’re going to be able to work seamlessly between Lightroom and Photoshop and back again.

I’m Helen Bradley. Thank you for joining me for this video tutorial. If you enjoyed this tutorial place click Like. You can subscribe to my channel and hear more about videos that are launched regularly every week in future.

Thursday, January 12th, 2012

Ten best Photoshop shortcuts

Photoshop has a huge range of shortcut keys for speeding up your day. Here are my ten best shortcut keys that I suggest you add to your Photoshop toolkit:

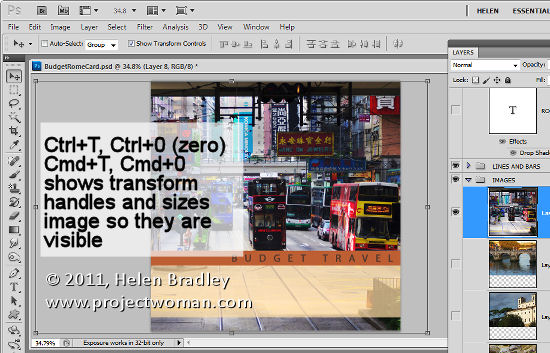
Find the sizing handles

When you paste a layer or selection into a Photoshop image – if it is larger than the current image it can be difficult to find the sizing handles.

To find them, press Ctrl + T, then Ctrl + 0 (zero) or on the Mac – Command + T, Command + 0. This selects Transform and sizes the image inside the window so you can see the sizing handles.
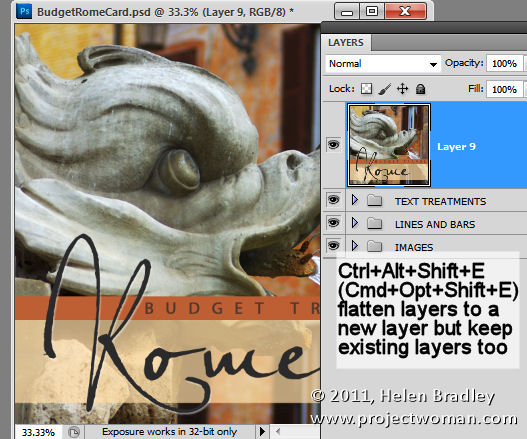
Flatten layers but keep them too

Sometimes you need, for example, to flatten the layers in an image to sharpen the result but you don’t want to get rid of the layers either. Here’s how to have your cake and eat it too (or more accurately, flatten your layers and keep them too).

Add a new empty layer to the top of the layer stack, click in it and press Ctrl + Alt + Shift + E (Command + Option + Shift +E on the Mac). This adds a flattened version of the image to the new layer but leaves the layers intact too.
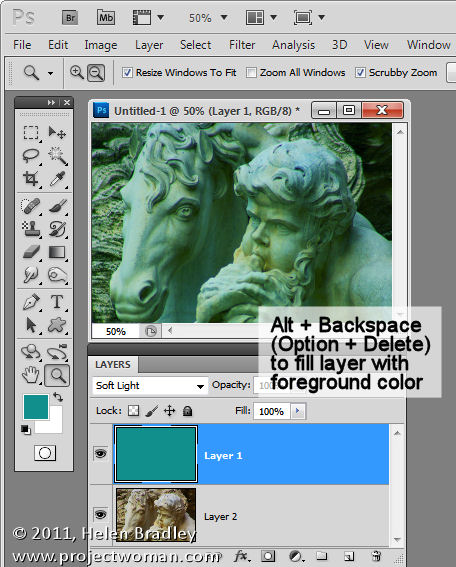
Fill a layer

To fill an empty layer with the current foreground or background color use Alt + Delete or Option + Backspace on the Mac to fill the layer with the Foreground color or Ctrl + Delete or Command + Backspace on the Mac or to fill with the Background color.
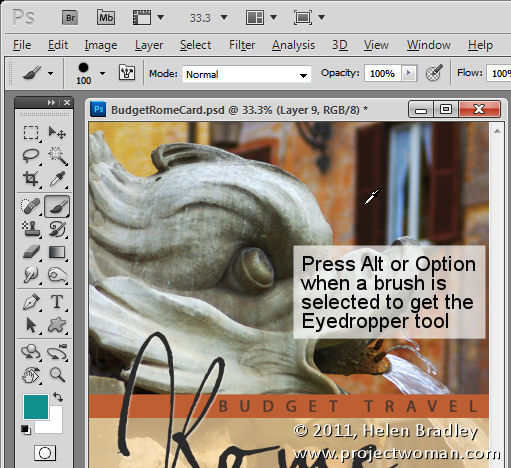
Select a color from the image

When you’re working with a Photoshop brush and you want to sample a color from the image, instead of clicking the Eyedropper tool and then the Brush tool again, you can do it with a keystroke.

Hold the Alt the key (Option on the Mac) to switch temporarily to the Eyedropper tool and click to select a new foreground color. Let go the Alt/Option key to return to the brush.
Move a selection

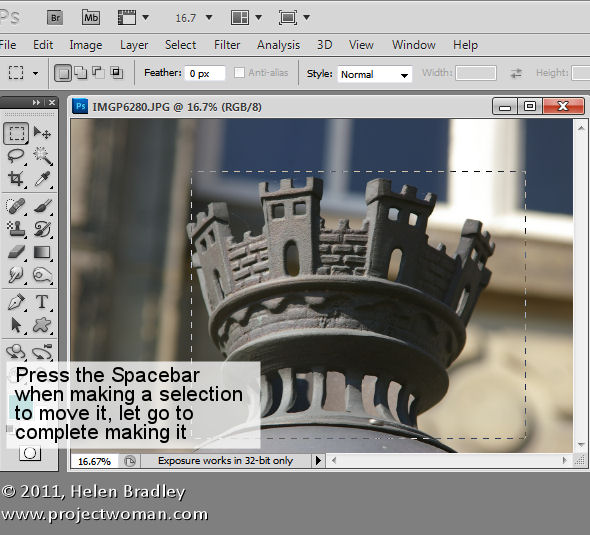
Moving a selection is notoriously cumbersome without this keystroke: to move a selection while you are still drawing it, press and hold the Spacebar. Continue to hold the it while you move the selection and let it go when the selection is in the correct place.
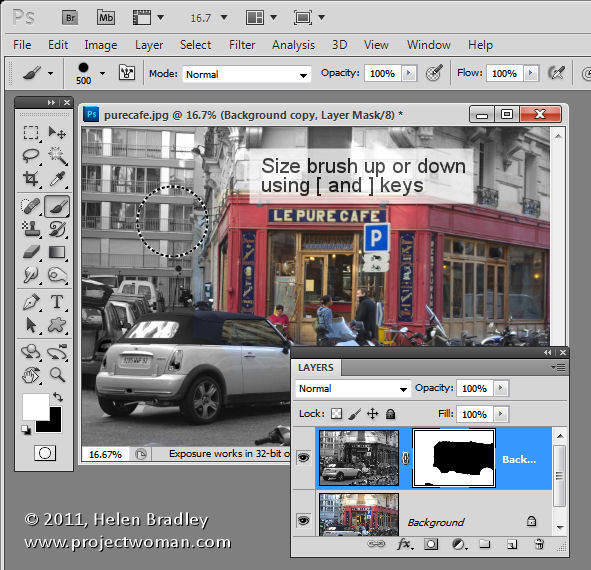
Adjusting brush size

When you’re using a brush as an eraser, to paint with or in any tool that uses brushes, you can size the brush up or down using the [ and ] keys on the keyboard. In Photoshop CS5, you can hold the Alt key and the right mouse button (on the Mac use the Control + Option keys) and drag up to increase or decrease brush hardness and drag left and right to size the brush.
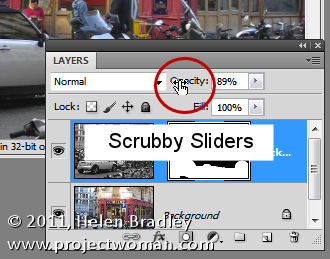
Scrubby sliders

Not technically a keystroke but a “must know” tool are scrubby sliders. In Photoshop CS3, and later, most options in most dialogs that can be adjusted using a slider can also be adjusted using a scrubby slider. Scrubby sliders appear as a hand with a pointing finger icon when you hold your mouse over the slider name. Drag on the name to adjust the slider value.
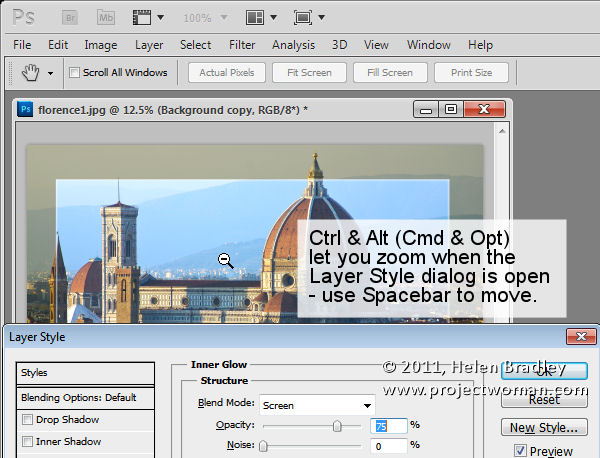
Zoom and Move with dialogs open

When a dialog such as the Layer Style dialog is open you can access the Zoom and Move tools by using Ctrl (Command on the Mac) to zoom in and Alt (Option on the Mac) to zoom out of the document. Use the spacebar to access the Hand tool to move the document around.
Hidden tools

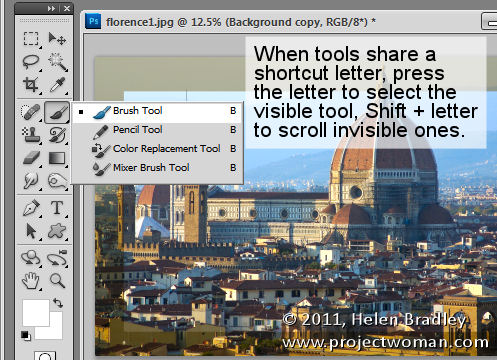
Tools that share a tool palette position and a shortcut keystroke letter can be easily selected using the keystroke letter. So, for example, to access the Mixer Brush which shares a tool position with the Brush tool and if the Mixer Brush is hidden, press B to get the Brush tool. The press Shift + B until the Mixer Brush appears. In a similar way press M to get the Rectangular Marquee tool and Shift + M to get the Elliptical Marquee tool.
Precise and crosshair cursors

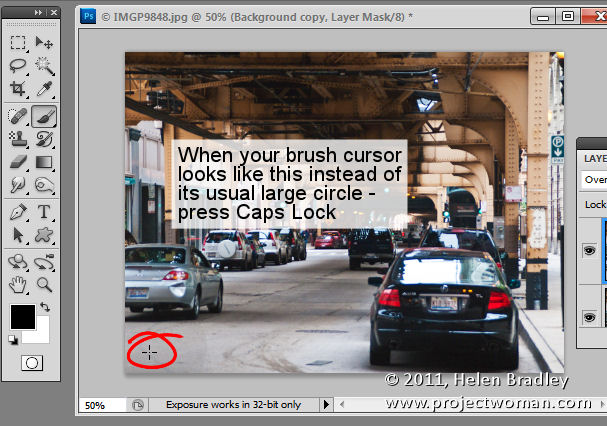
Finally, not so much a keyboard shortcut as something that can go horribly wrong –  pressing the Caps Lock key switches the Brush cursor into precise mode. This is a small crosshair cursor and hides the actual size of the brush. To return to the regular normal or standard brush tip, press the Caps Lock key again.

If I were helping a new user learn Photoshop, these are ten keystrokes I’d be teaching them. Do you agree or what keystrokes do you think are the most important to learn in Photoshop?
Helen Bradley

Tuesday, February 8th, 2011

Lightroom Maximize, Minimize, Restore, Size, Move and Close buttons missing?

Lightroom maximize minimize close restore size title bar missing

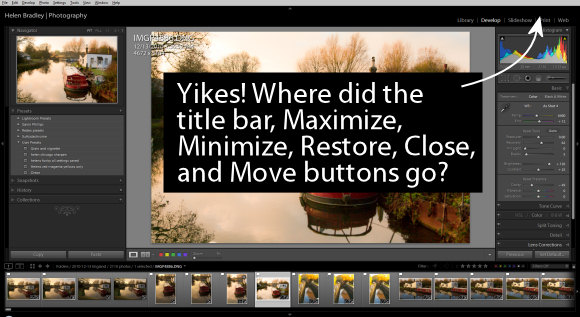
One of the most frustrating things that you’ll encounter with Lightroom is when your entire title bar for the application disappears. You’ll see your menu but everything else including the Close, Minimize, Maximize and other buttons will be missing.

The problem is that you’ve pressed the F key to get to full screen mode.

The solution is to press the F key repeatedly until the screen returns to normal. Too easy? Maybe but it sure is frustrating when you don’t know what happened and how to fix it.

Helen Bradley

Wednesday, November 10th, 2010

Lightroom: Back up images on import

You know how important it is to back up images but the actual task of doing so can be a real pain. Luckily Lightroom makes it a breeze.

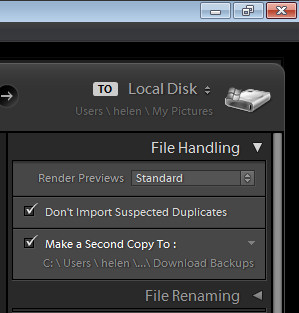
When you’re importing images into Lightroom in the Import dialog open the File Handling Panel on the right. Here you can select to make a duplicate of the images on import to a second location. That is provided you’ve chosen Copy to DNG, Copy or Move as your import preference. If you choose Add the option isn’t enabled and you can’t choose it.

By selecting to make a duplicate of your files you can then select the folder or drive and folder to place the copies in. If you’re converting to DNG as you import the copies will be raw files not DNG but you’ll still have copies. If you choose Add or Move then the copies will be the same format as the original files.

Now there’s  no excuse not to back up – is there?

Helen Bradley
Page 1 of 212