Thursday, August 8th, 2013

Split Toning a Black and White Image – learn how to make the Highlights and Shadows Different Colors
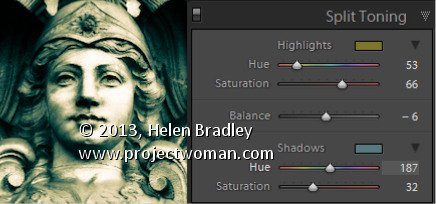
Split Toning applies one color to the highlights and another to the shadows in an image.
Good color choices when applying a split tone are colors that are opposite each other on the color wheel such as magenta and green, blue and yellow, or red and cyan – although you can choose any combination you like.
To apply the split tone effect, drag on the Hue slider or click the color picker to choose a color to use for the Highlights and then choose something else to use for the Shadows.
Adjust the Saturation of the colors as desired.
Balance allows you to fine tune how the colors are applied to the image – drag to the left to adjust the balance towards the shadow color and drag to the right to add more of the highlight color.
Helen Bradley
Labels: adjust, b & w, B&W, balance, Black, Black & White, Black & White Mix, black and white, color, color a black and white image, Develop, Develop Module, highlights, Hue, Lightroom, Photoshop, saturation, shadow, slider, split, split tone, splittone, tip, trick, Tutorial, white
Categories:Lightroom, photoshop
posted by Helen Bradley @ 6:48 amNo Comments links to this post
Tuesday, April 30th, 2013

Move a Paragraph, at Any Time, with Ease!
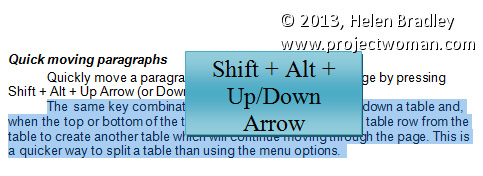
To quickly move a whole paragraph up or down a Word document, click in the paragraph and press Shift + Alt + Up Arrow (or Down Arrow).
The same key combination will move an entire table row up or down a table and, when the top or bottom of the table is reached, it detaches the table row from the table to create another table which will continue moving through the page. This is a quicker and simpler way to split a table.
This tip works in just about any version of Word.
Helen Bradley
Labels: 2010, 2013, Alt, bottom, down, down arrow, key, key combination, Keyboard Shortcuts, Microsoft Office, Microsoft Word, move, moving, Paragraph, quick, row, shift, split, table, tip, top, up, Up Arrow, Word
Categories:office
posted by Helen Bradley @ 6:20 am1 Comment links to this post
Wednesday, March 28th, 2007

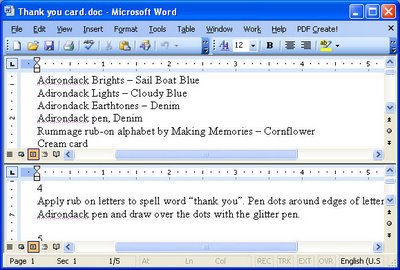
Long documents are harder to manage than short ones, and it can be difficult to cut and paste an item on page 1 all the way to page 20. I find it easier to do when I can see the source and target area on the screen all at once. That’s why I love the Split window tool.
Here’s how to use it, position the document on the screen where you want it to be split in two and choose Window, Split. Now click where you want should be. You’ll get two horizontal panes each with its own scroll bars and you can move around the panes independently and show different places in the document in each. You can also drag and drop between panes.
When you’re finished editing, choose Window, Remove Split.
Helen Bradley
Labels: Microsoft Word, split
Categories:Uncategorized
posted by Helen Bradley @ 3:36 pm2 Comments links to this post


