Learn how to create and use layers in Photoshop, in all versions. Includes how to unlock the background layer and how to add and fill new layers.
Transcript:
Hello, I’m Helen Bradley. Welcome to this video tutorial. In this tutorial we’re going to look at some tips, techniques and tricks for working with layers in Photoshop. When you’re working with an image in Photoshop CS4 and later you’ll probably be working in this tabbed interface. It’s not my personal preference but we’re going to look at working in it and then also why you might look at other ways of working in Photoshop.
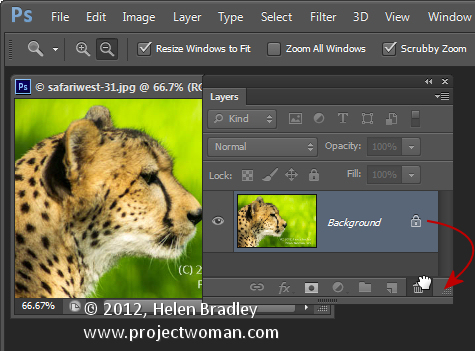
The first thing we’ll look at is the Background Layer. Now any image that you open from your camera is always going to have just one layer and it’s always going to be the Background Layer and it’s always going to be locked. In addition if you add a layer, I’m just going to add a filled layer to this image, I can’t drag this layer below the Background Layer. I can’t move the Background Layer above it. The Background Layer is in a sense fixed and there’s nothing much we can do with this image until we unlock the Background Layer. There are few a few ways to do that and the easiest I think is just to grab this little icon here which is the Lock icon and just drag and drop it into the trash and then this converts the Background Layer to a regular layer. Let’s just undo that and see some other ways. We can right click and choose Layer from Background. That has the same effect except that this time we get a chance of naming our layer. We can just click Ok. Let’s undo that again. We can also go up here with the layer selected and choose Layer, New and choose Layer from Background and again click Ok. But honestly I think dragging and dropping this Lock icon is probably the easiest way to convert a Background Layer into a regular layer.
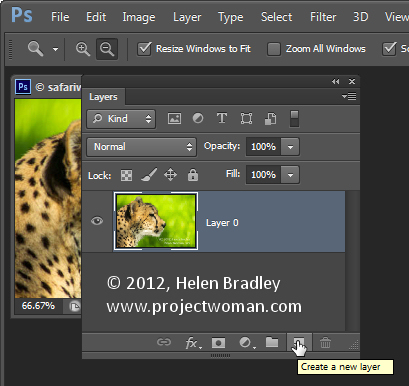
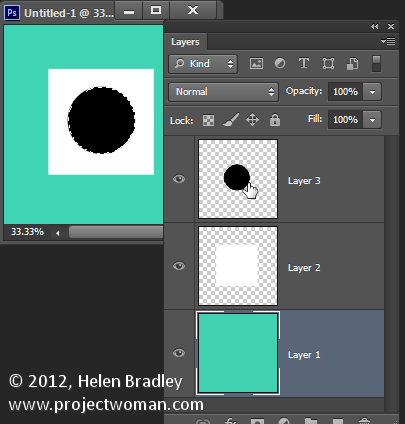
Now you saw me earlier create a new layer. There are lots of ways again that you can create a new layer in Photoshop. You can do Layer, New, Layer or if you have a selection you can choose Layer, New, Layer via Copy so the selection will be copied to a new layer or Layer via Cut where your selection will be cut from the current layer and copied to a new layer. But another way of doing that is just clicking here on the New Layer icon that just creates a brand new layer. And you can drag it into position. You can also delete it by just dropping the layer onto the Delete icon. If I hold the Ctrl key as I click this New Layer icon the layer that I add is below the current layer. So just clicking on this icon adds a layer above. If we Ctrl Click on the icon we add a layer below. So you can target exactly where the layer goes. Let’s add one below this image, Ctrl and click on this icon.
Now I want to fill this layer with this green color which is the current foreground color. A quick and easy way to do that is to hold the Alt key and press Backspace on the PC. That’s Option and Delete on the Mac. That fills this layer with the currently selected foreground color. If I do Ctrl Backspace, Command Delete on the Mac, we fill this layer with the background color. Now we could do that just as easily using this Paint Bucket tool, target the layer and click on the layer that we want to add the color to. But it’s whatever suits you. I find those Alt and Option, Ctrl and Command, Backspace and Delete keys really easy to remember and very easy to do. I’m Just going to trash this layer.
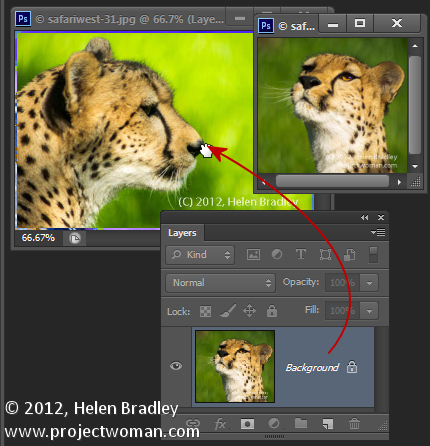
Now I have another image open here and I want to start creating a collage from these two so I want to take this particular layer and drop it onto this image here. Now previous to Photoshop CS4 that used to be easy. Now it’s a pain in the neck but we live with it. I’ve created this as a new layer so it’s not the Background Layer any longer. I’m going to target the Move tool and I’m going to with this layer content selected I’m going to drag on it. And I’m going to drag it up here to the image that I want to paste it into and then I’m going to bring my cursor down. And because I want this centered I’ll hold the Shift key to center it over the middle. And now you can see I have two images, one on one layer, one on the other layer.
Now previous to Photoshop CS4 we didn’t have this tabbed interface. What we had was documents that were just floating and that made life just I think a lot easier. So I’m just going to trash this layer now and see. If you want to unfloat your windows by dragging them off the top bar here then you can simply target this layer and just drag and drop it into another image that easily. So I find that an easier way to work. If you do like the tabbed interface then let’s go back into this tabbed interface.
What we could do is choose Arrange two up Vertical and this would allow us to drag and drop. So in this case I’m going to take this Background Layer and drop it into here. So you can do it with the tabbed interface. It’s just your preference of ways of doing it.
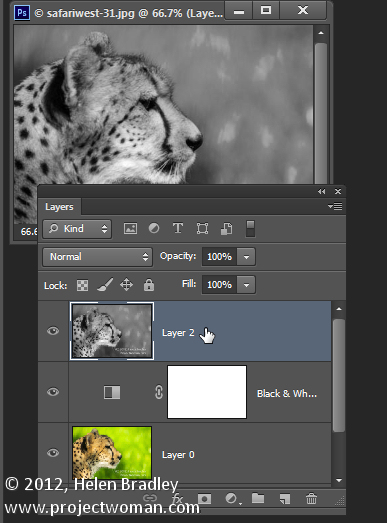
Now we’re back with these two images. I’m going to close down one of them. Well actually I’m going to go back and arrange these images so I’m seeing just the images on a tab and I want this particular one which has two layers on it. I’m going to add a layer mask so I’ll just click the layer I want a Layer Mask on and click the Layer Mask. I’m just going to fill this mask with a Gradient because I want to show you a trick with layers. So let’s just blend these two layers together using a mask to do so. I’ve got my mask selected, a black and white gradient and I’m using a linear gradient. I’m just going to drag a simple linear gradient into the image. So we’ve now got these two images blended together, not particularly attractive, but that’s not really a big problem right now. I’m going to add an adjustment layer so let’s just add an Adjustment Layer. We’ll convert this to black and white just so that we have something to look at here. And I’m going to just make the blues a little bit lighter. Now we have this image.
Now if I wanted to sharpen it for example more appropriate to the web or something I would need to flatten it because you can’t sharpen multiple layers at once. So I would typically go and flatten this image. But if I hold Ctrl and Alt and Shift and press the letter E, that’s Command Option Shift E on the Mac, look what happens. I get a layer which is the merged image. It’s called stamp but what I also have is the original layers still underneath so I could use those later if I for example wanted to come back here and make this layer a little bit transparent so we got some of the color removed but not all of the color. So then I could go back and recreate my merged layer with Ctrl Alt Shift E, Command Option Shift E on the Mac. And then I could sharpen this layer. So this is a sort of have your layers and eat it too so you’ve got everything on one layer but you’ve also got the existing layers in case you ever need them.
Now up until now I’ve been dragging and dropping a layer onto the trashcan to remove it. Let’s just undo that. There’s also a way to delete a layer and that is just pressing the Delete key on the keyboard. You want to be in the layer itself. Right now I seem to be stuck in the opacity area here so let’s just click in the layer, press Delete and the layer has been deleted.
So there are some layer tips and tricks for you in Photoshop. I’m Helen Bradley. Thank you for joining me for this video tutorial. Look out for more of my tutorials here on this YouTube channel and visit projectwoman.com for more tutorials, tips, tricks and techniques for Lightroom, Photoshop, Photoshop Elements and lots more.


