Tuesday, September 17th, 2013

Uninstall All Windows 8 Start menu Apps

If you’ve upgraded to Windows 8 you may have found that you have no use for Window’s new tiled Start menu apps. You might, like we have, found yourself frustrated when files automatically open in these apps instead of the programs you’ve been using for years. Well fear no more! You can uninstall apps permanently with just a few easy steps.

First, search for Windows PowerShell using Windows 8’s program search.

Right click it and, from the options that appear choose Run as an administrator.

With PowerShell open, type the following command and press Enter to delete all apps from all accounts on your computer:

Get-AppxPackage -AllUsers | Remove-AppxPackage
 
If you wish to remove the apps from your user account only then remove “-AllUsers” from the statement above.
Windows 8 will also automatically install the apps on any new user accounts you create in the future. To prevent this, type this command:

Get-AppxProvisionedPackage -online | Remove-AppxProvisionedPackage -online
 
You will now find that only programs that you have actually installed will appear in the Start menu tiles.

Helen Bradley

Monday, November 12th, 2012

7 Cool Photoshop Layer Tricks

When you’re using layers in Photoshop for photo editing and composting you can speed up the process of working with them if you know these cool layer tricks.

1          Unlock the Background

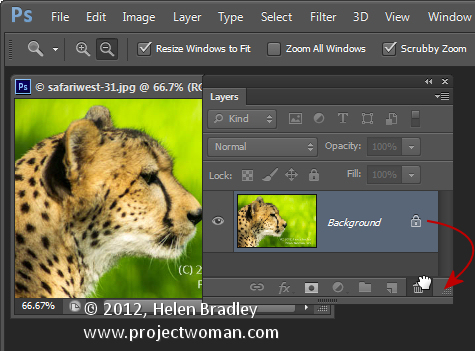
You will already know the Background of any photo is locked and you can’t do anything much with it until you unlock it. The quickest way to unlock a background layer is from inside the Layers palette. Drag the lock icon to its right and drop it in the Trash and the Background layer will be automatically converted to a regular layer.

2          One click add a Layer

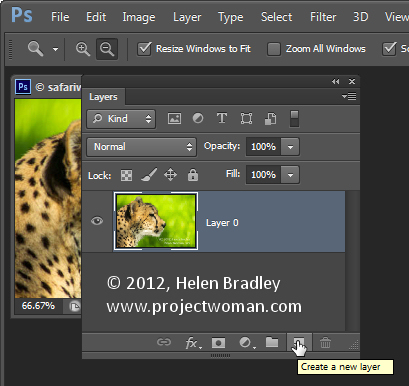
To create a new layer above the current layer click the Add New Layer icon at the foot of the Layer palette.

To add a new layer directly below the current layer Ctrl or Command Click on that icon. Both options add a layer but without displaying the Layer dialog.

3          Merge Everything to One Layer but Keep the Layers too

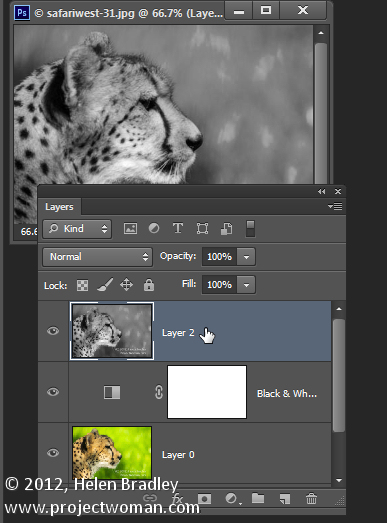
To merge all the current layers in the document to a single layer and at the same time to keep all the layers intact below it, click the topmost layer of the document and press Ctrl + Shift + Alt + E (Command + Option + Shift + E on the Mac). In case you are curious – it’s called Stamp Visible.

4          Select the Content on the Current Layer

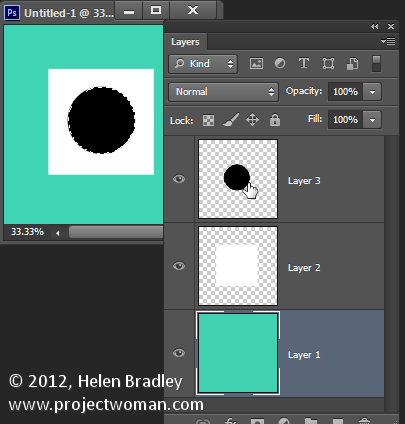
To select everything on the current layer Ctrl + Click on the layer thumbnail in the Layers palette.

5          Copy a Layer to Another Document

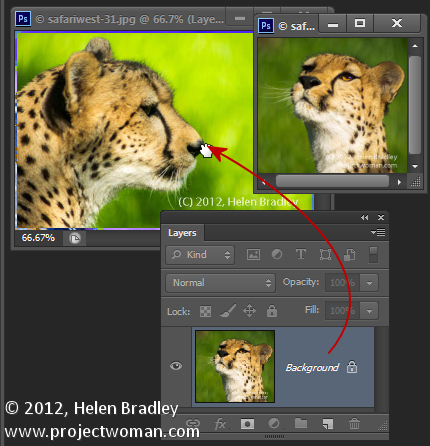
To copy a layer from one document to another drag the layer from the Layers palette in one document and drop it into the other document. If you hold Shift as you drag the layer will be centered in the middle of the second document.

6          Quick Layer Moves

To quickly move a layer up the layer stack press Command + ] and to move it down, press Command + [.

7          Instant Delete a Layer

To instantly delete a layer, click the layer and press Delete.

Bonus Layer tip

To fill a layer or a selection with the foreground color press Alt + Backspace (Option + Delete on the Mac). Use Control + Backspace (Command + Delete on the Mac to fill the layer or selection with the Background color.

So, over to you now… what are your favorite Layer tips and tricks?

Helen Bradley

Thursday, June 28th, 2012

Bulk delete photos from the iPad


I’ve been taking a lot of screenshots lately and I have over 1,200 photos on my iPad – a lot more than I really want to store there.

When I went to delete the photos in bulk, I banged my head pretty quickly up against a problem with the iPad. It’s not immediately apparent how you delete a lot of images at one time and deleting them one at a time will get very cumbersome very quickly.

Here’s how to do it:

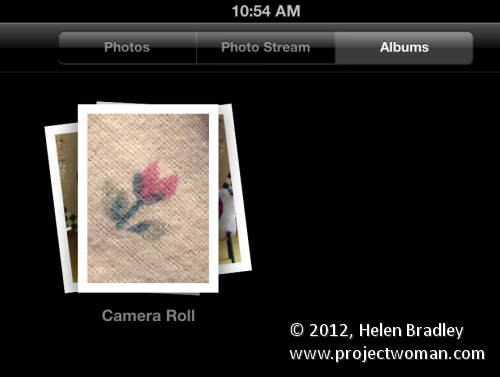
To begin, launch the Photos app, tap the Albums link and then make sure you’re viewing the Camera Roll or the place where your image are stored. I wanted to remove them from the Camera Roll so I tapped that.


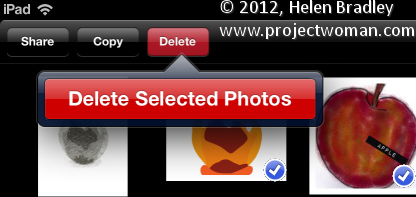
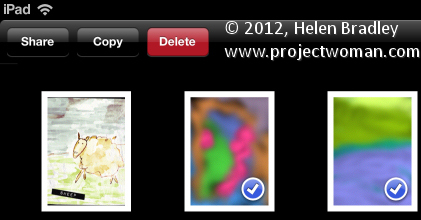
Now press the bent arrow icon in the top right corner of the screen and you’ll see options on the left for Share, Copy and Delete.


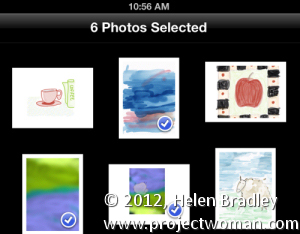
Tap an image to select it and then go ahead and select each of the images to delete – they’ll get checkmarks on them to show they are to be deleted. To undo the setting, tap the image again.


Then when I you have those you want to delete selected, tap the Delete button and choose Delete Selected Photos to remove them.


It is, as you might have expected this is ridiculously simple once you know how to do it but difficult until you do.

The good news is that the images aren’t removed from your iCloud download folder on your PC. So, for example, if you’ve previously had the images synched so they appear on your PC in a folder of iPad downloads, the images will still be on your PC at the end of the process – they’re just removed from your iPad.

Helen Bradley