Whether you are using a Point and Shoot or a DSLR camera here are seven camera settings that will help you capture better photos:
Tip 1 – Adjust for light
Most digital cameras, in particular SLRs, let you select ISO film equivalencies. Choose 100 – 200 sensitivity for photographing in bright light conditions and use 400 – 800 when there is less light. In very poor light you can capture at 3200 – 6400 or higher but you will find that, as a result, there will be more film grain visible in the final image a a result.
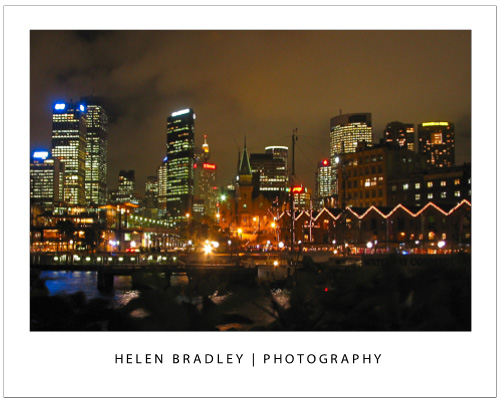
To capture an image like this at night you should have an ISO setting of at least 800 -1600 or higher and a tripod to steady the camera.
Tip 2 – Choose your mode
Most cameras, in particular point and shoot cameras have settings for portrait, landscape, night shooting, sports, etc. Choose the correct mode for the type of conditions and the camera will automatically configure the ideal settings to ensure the best shots in the available light conditions.
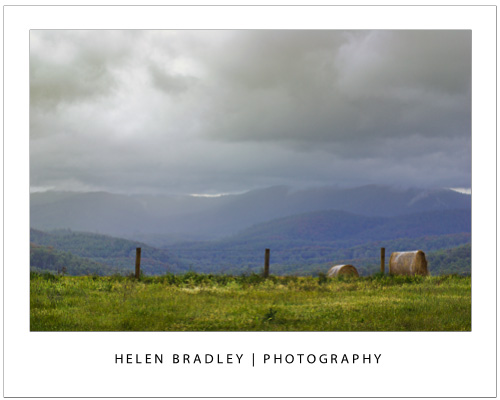
For an image like this choose Landscape mode so it is all in focus.
Tip 3 – Depth of field
Use your camera’s Aperture Priority setting and set the aperture to a small f stop such as 2.8 to capture photographs with an interesting depth of field. Focus the camera on the object to appear in focus and, when you do, objects in front and behind this object will appear pleasingly out of focus.
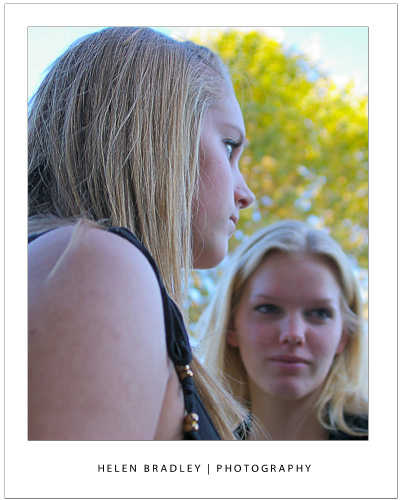
Here I focused on the girl in front with a very small f stop and she is in focus – the girl facing us is not.
Tip 4 – Axe the digital zoom
Of the two types of digital camera zoom, which you will find in both point and shoot cameras and camera phones only Optical Zoom is a true zoom . If your camera offers digital zoom it is best to disable it or avoid using it. Digital zoom merely increases the size of the image captured and crops away the area not required. Optical zoom actually zooms into the scene to capture it at full size.
Tip 5 – Adjust exposure
Avoid over or under exposed photos using your camera’s exposure compensation settings. These can usually be adjusted to somewhere between -2 to +2EV. To lighten a shot use + values and to darken one, use – values.
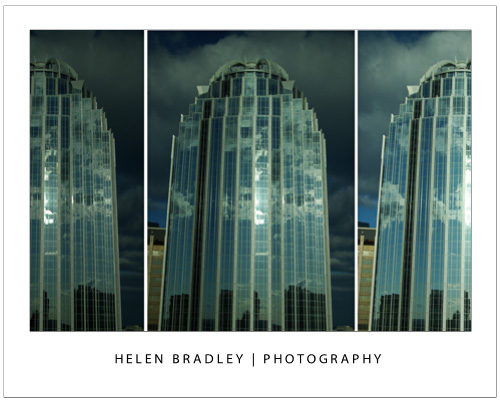
Here is the same Boston building captured at -2, 0 and +2 exposure – the one on the right is the better exposed shot.
Tip 6 – Set the correct White balance
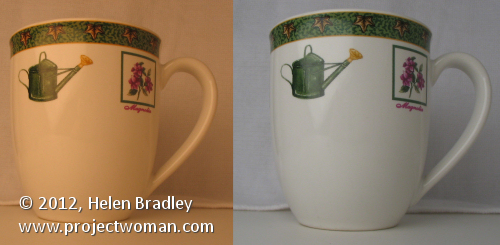
Different light sources throw different color casts onto your photos. For instance, inside lighting such as florescent and tungsten globes will throw blue/green or orange tints onto your image. When shooting indoors without a flash, set the white balance mode to match the light source, to remove any undesirable color cast.
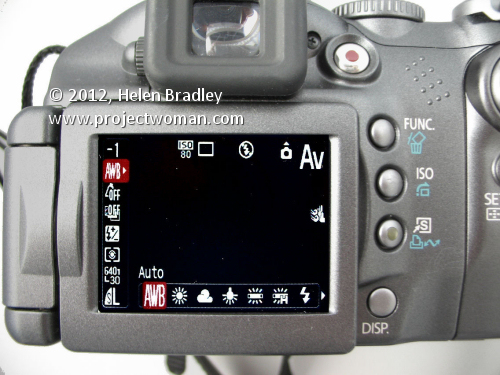
This camera is set to an ISO of 80 (suitable for a very bright day) and AWB – Auto White Balance – this means the camera will adjust the white balance – not good for indoor shooting but should be fine out of doors in full sun.
The image on the left was shot in tungsten light with no white balance adjustment. The one on the right was shot in the same position but with white balance set to tungsten light – the color is much improved.
Tip 7 – Set the Flash
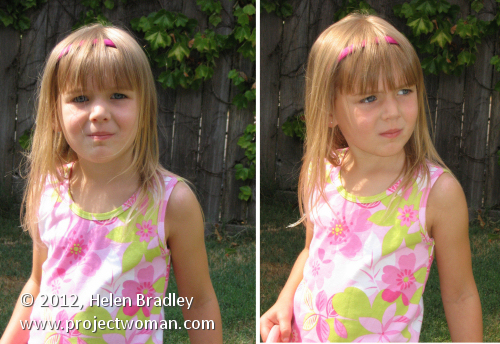
Use your flash when capturing portraits on a very bright day. While it may seem counter productive, the flash will light your subject’s face and avoid the deep shadows that the overhead sun will cast on their face.
On the left the little girl is captured with no flash and over head sun. On the right I fired the flash and her face and clothes are more evenly lit.


