

Often you will encounter difficulties when fixing colour problems in an image where there are significant areas of skin tones. Skin tones are more difficult to fix than general colour casts, in part because we’re all so familiar with what skin tones should look like that we ‘know’ immediately when they look wrong.
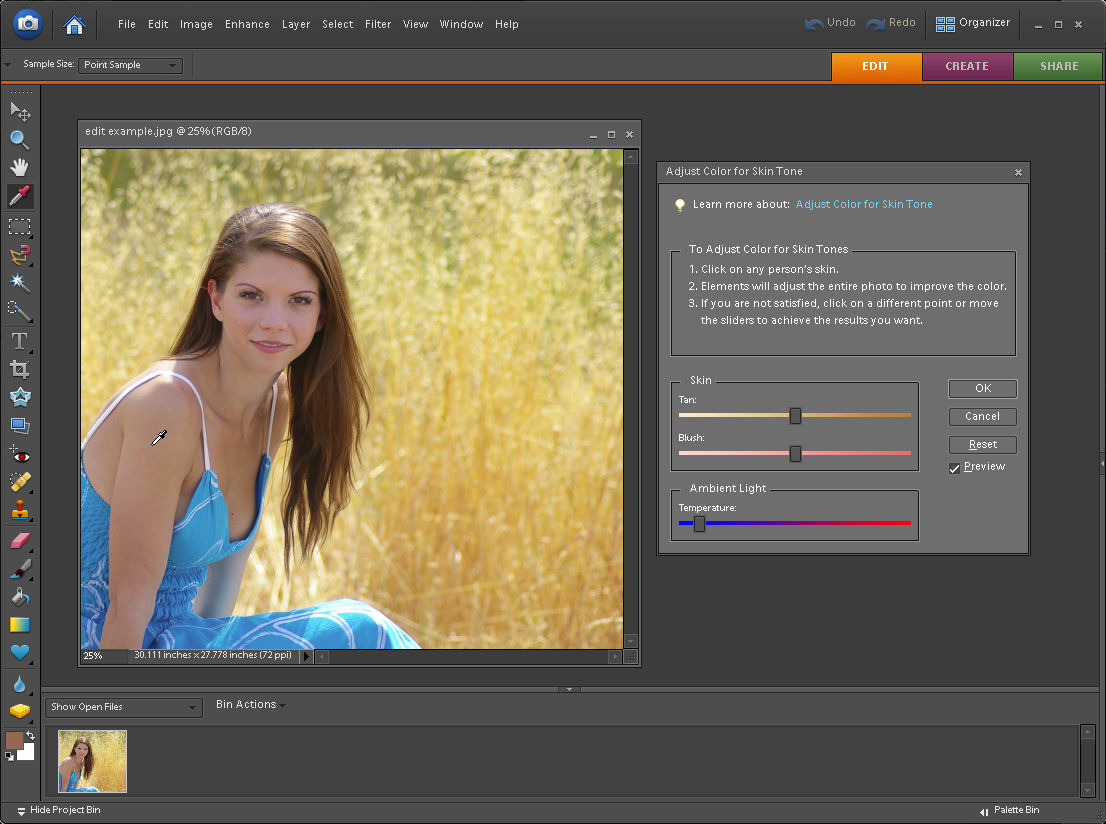
Luckily Photoshop Elements has a good tool for fixing skin tones. To apply this fix to your image choose Enhance > Adjust Color > Adjust color for skin tone. The mouse cursor will change to an eyedropper and you should use this to click on an area of skin tone in the image.
If you don’t get good results sampling from a person’s face, try sampling on their neck or arm – sometimes makeup on the face can give poor results and skin not covered in makeup gives better results.
Once you have selected the skin tone, if the fix isn’t good enough, use the Blush and Tan adjustments until you match what the skin should look like. The Ambient Light temperature slider lets you warm up or cool down the colour fix.
Any equivalent to this in the full version of Photoshop?
Unfortunately not. It is something that would be good to see in Photoshop. Interestingly enough many Photoshop photo editing features start out in Elements and then arrive in Photoshop – tools like the Spot Healing Brush tool and the Red Eye tool were in Elements before they appeared in Photoshop.. here’s hoping this skin tool makes the cut one day soon.
nice post. thanks.