Wednesday, October 28th, 2015

Turn any Jpeg image into a repeating pattern in Photoshop

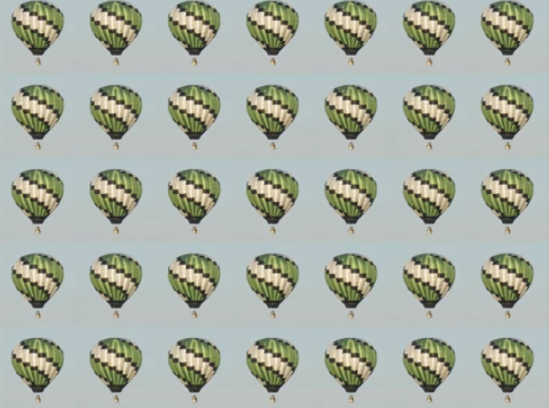
Sometimes I get so wrapped up in complex design solutions I forget the simple things. Like making patterns! So here is a quick and easy solution to turning any jpeg image (or indeed any image you can open in Photoshop) into a repeating pattern. These aren’t seamless repeats – but not everyone wants them to be seamless – sometimes all you need is to make a repeating pattern from something! So here’s how to do it – just make your selection – save it as a pattern and fill a new document with it – it is quick and easy.

I’ll show you how to do this with text and with a photo, they both work exactly the same.

Wednesday, November 13th, 2013

JPEG vs RAW – what’s the difference and what should you use?


Learn the difference between capturing in jpg and raw and when to use each.

One key decision that every photographer needs to make is whether to capture images in jpg or raw formats. With newer and more advanced tools on the market for processing raw images, the incentive to move to capturing in raw is attractive. However, raw images will require additional processing and they are very large so, to help you understand the issues behind the question “jpeg or raw?” I’ll explain the difference between capturing in jpg and raw and why you might choose one over the other and when to do so.

What is in a format?

Before exploring when you might want to capture an image in jpg or raw, it’s worthwhile looking at the differences between these two file formats. The raw file format is a format which is a camera specific so the format of raw images from a Canon camera is different to the format of a raw image from a Nikon camera. The reason for this is that a raw format image contains the data captured by the camera’s sensor and it is unprocessed. Because each camera’s sensor is different, the basic raw format is proprietary to that camera manufacturer and it may even vary from one camera to another within a camera manufacturer’s own range.

Before you can use a camera raw image in a program such as Photoshop, you need to process it using either your camera manufacturer’s raw processing application or a tool such as Adobe Camera Raw. One downside of  capturing images in the raw format is that you need to do this preprocessing before you can use your images. If you capture in camera raw, you will be reliant on special software to be able to read your raw images in future in, say, 10 or 15 years’ time.

As a move away from the notion of a proprietary raw formats that are created by each camera manufacturer, Adobe recently released the dng or Digital Negative file format. This is an open format which can be used by camera manufacturers as an alternative to their own proprietary raw formats. It frees photographers from being tied to a specific manufacturer’s raw format and offers protection for the future simply because of the sheer number of people who will have images stored in this format. The format’s popularity should ensure that there will be programs available in future for most operating systems that can read and process these files.

Camera raw images, when captured in the camera manufacturer’s own format such as crw, cr2, nef or pef cannot be written to and can only be read from. For this reason, if you make changes to a camera raw image in a program such as Adobe Camera Raw or Lightroom, then the changes that you make to the image cannot be written to the original image file. Instead, they’re written to what is called a sidecar xmp file which stores details of the changes that you’ve made to the image. Camera raw image processing applications read the original camera raw file and the sidecar xmp file and display the image with the changes you have made to it. However you need to be careful that you do not move a raw file to another location and leave its sidecar xmp behind – if you do, you will lose any changes that you’ve made to the image. The Adobe dng file format avoids this problem as it is a file format that can not only be read from but also written to so changes can be stored in the original file.

Differences in data

The advantage of recording all the data captured by your camera’s sensor in a raw file whether it be your camera manufacturer’s own raw format or Adobe dng is that you have a wider range of image data than you would have if the image was saved as a jpg image. When an image is saved as a jpg image by your camera, it is scaled down considerably so that it is no longer a 32-bit image but is now a 8-bit image with only 256 levels of brightness.

Other changes that are made to the image include sharpening the image and the camera will also apply any white balance setting you have selected to the image. If you have other “in camera” settings configured such as variations to the image saturation, contrast and brightness then these adjustments will be made to the image before being saved as a jpg file. In addition because the jpg file format is a lossy and compressed file format you will lose some detail in saving the image even if you opt for saving at the highest quality.

In contrast, a dng or raw image is not adjusted and all the data that was available from the camera’s sensor will be in that file. Situations in which this can save you some grief is where you have under or over exposed the image or configured an incorrect white balance setting. If you capture in a raw format then you have a larger range of exposure adjustments available to be made inside a camera raw processor than you would have with the corresponding jpg image. In addition, because the white balance setting is not applied to a raw image, you can change the white balance setting later on without compromising the image.
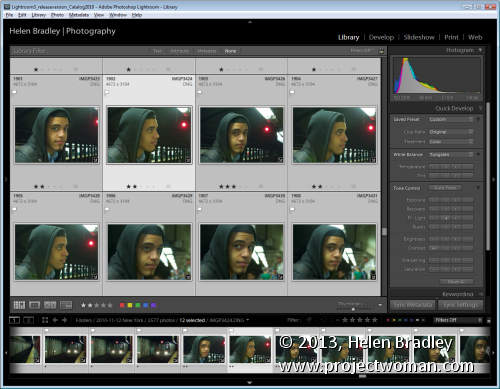
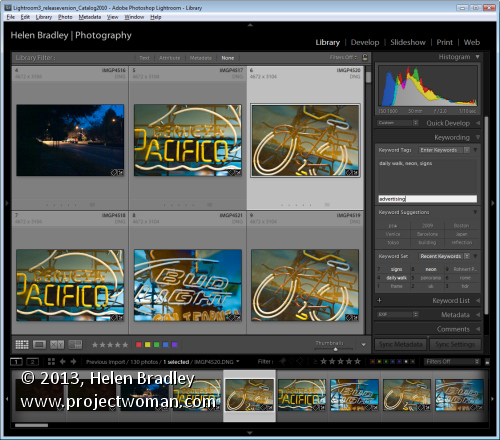
The tools in Lightroom make it easy to apply changes to a range of raw images all at once.

File size differences

Because jpg images include only a subset of the data that the camera captured and camera raw images contain it all, there are significant file size differences between images captured in the jpg and the raw format. For the equivalent pixel size image, a raw image might be around 20MB in size where the corresponding jpg image would be around 5Mb in size. The reason is, of course, that the jpg image has less data in it and the data is also compressed.

One drawback to capturing raw images in the past has been the difficulty of processing these images. Many programs simply couldn’t read the wide range of raw image formats in use by the varying camera manufacturers. This meant that you were either limited to using your camera manufacturer’s own software to preprocess raw images or you needed to purchase an expensive application like Adobe Photoshop to do so. These days the dng format and many proprietary raw formats can be read by a number of applications including the free applications: Picasa and IrfanView.
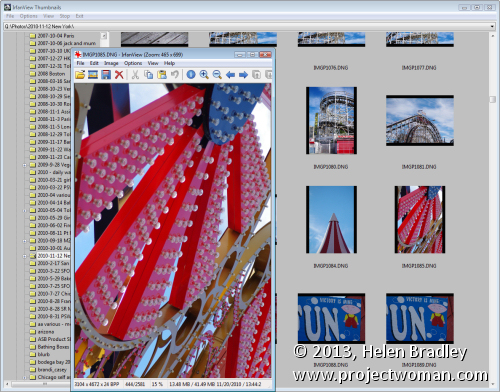
IrfanView is one of the popular free programs that can display and edit dng and some other popular raw format images.


However, operating systems like Windows Vista and Windows 7 still do not include native support for dng or other raw formats so, when viewing a folder full of dng images you will see icons instead of thumbnails. There are some downloadable codecs available from http://labs.adobe.com/wiki/index.php/dng_Codec but they have limited application.

When to use which format

Now that we’ve investigated the difference between capturing in jpg, raw or dng, it’s time to look at when you might opt for one in preference to the other. If you already use a program that includes built-in support for camera raw images such as Picasa, Lightroom, Photoshop, Photoshop Elements or Corel Paintshop Photo Pro then you may opt to always shoot in raw or dng because of the ease at which you can work with your images – this is particularly the case with programs like Lightroom and Picasa.

On the other hand, if you typically shoot images to share online on sites like Facebook or Flickr and you don’t usually do much, if any, processing then jpg may be the best option as the files are smaller and you can quickly download them and then get them uploaded to your sharing site. For example, Flickr will let you upload full size jpg images but you can’t upload raw or dng images.

One advantage of capturing in jpg is that you have the flexibility of being able to determine the pixel dimensions of the image you will be capturing in the camera. Most cameras have varying size options available when capturing in the jpg format and also different compression options. If you’re only shooting snapshots for uploading to the web, then you don’t need very big images and you may find smaller jpg format images work as well.

That said, you need to accept that if you are capturing jpg format images you’re reducing the amount of image data that you have available and, if in the future, you decide that you want to do something special with a particular image, you won’t have the full range of image data there to do anything with..

If you’re shooting to sell images for stock, then you absolutely must capture images using the camera raw file format so that you have all the data in the image available to you. Many stock agencies will not accept images captured as jpg images because of the processing that’s applied to those images by the camera including the image sharpening. Stock agencies prefer unsharpened images so that the purchaser can then determine the amount of sharpening they want to apply in each specific case.

There is a way to “have the best of both worlds” and you can capture in both jpg and raw formats. Most cameras can capture jpg and raw or jpg and dng so you’ll get both files for each image that you shoot. You can then download both formats – use the jpg images for your day to day use and store the raw originals in case you ever need to work with those images in future.
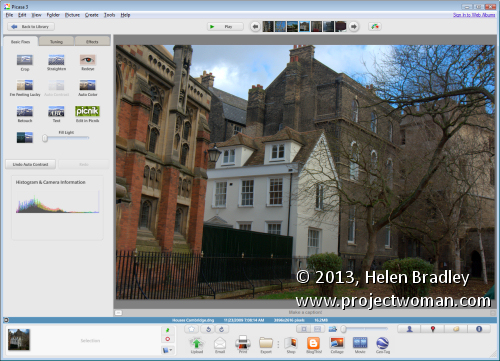
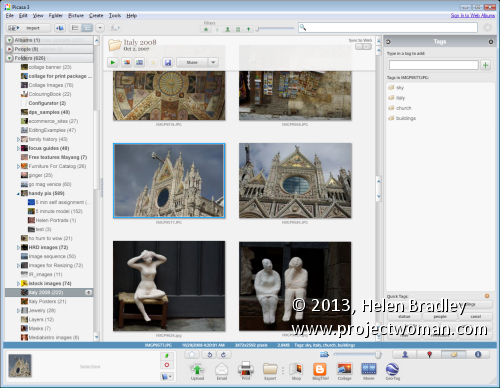
 Picasa supports many raw formats so you can view and work with raw images in the same way as jpg images.

Helen Bradley

Wednesday, May 22nd, 2013

Lightroom – Copyright Watermark Bulk amount of Images

If you have thousands of images to add a copyright watermark to, you can use Lightroom to do this very quickly. This video shows the workflow to use to import thousands of images into Lightroom and how to export them and create your own watermark to add to them. This is a minimalist workflow designed to process a lot of images very quickly.

Transcript:
Hello, I’m Helen Bradley. Welcome to this video tutorial. In this tutorial I’m going to show you how you can copyright in bulk the images as you export them from Lightroom. One of my blog readers recently contacted me and asked me how easy it would be to add watermarks to a series of images that they had. And so this video is for them and for anybody else who’s considering applying a watermark to a lot of images all at once. And my suggestion is, and she had something like two and a half to three and a half thousand images, is that Lightroom is the tool to use.

So I’m going to get started and I actually have a folder of images that I am going to import into Lightroom to show you exactly how it will work. So I’m going to click on Import and then I’m going to select the folder that contains the images that I want to import in. So this would be the folders that contain the two and a half thousand or so images that this particular reader has. So I’m just looking for my particular set of images. And I know they’re here. So all I’m going to do to start off with is just to select the folder of images. And it’s these Cornwall images that I’m going to import. Now I’m going to add them to Lightroom. And in this case because I want to do this very quickly because all I want to do is to add watermarks to them, I’m going to select Minimal as my previews because that’s going to render everything very, very quickly. And because I want lots of images I’m going to deselect Don’t import selected duplicates. So all I’m going to do at this stage is now to click Import and bring those all into Lightroom.

Now the images are coming into Lightroom and I can start getting ready as soon as they’re in to export them with their watermarks. Now some of these are portrait orientation and some of them a landscape. That may or may not be an issue. I’m going to select the first image and Shift click on the last so that we can export them. I’m going to Right click and choose Export and then Export again. And this takes me to the Export dialogue. So the first thing I need to do is to determine where I want to export them to. So I’m just going to put them into a folder in my My Documents folder. And I’m just going to create a brand new folder for them. But I’m going to select My Documents as the location, and I’m going to put in a subfolder called watermark. And then I will check if I want to rename my files. I don’t want to rename them. The idea of this is to get in and out as quickly as possible.

I can convert them if they were not JPGs and I could select the quality for them. Again 85 percent quality might be sufficient. If you’re that particular reader 100 percent quality might be your preferred quality. I can resize them or not. So if I want to leave them at the exact same size I just deselect everything.

What we’re most concerned about here is this Watermark option. So I’ve got it selected, and I’m going to click it, and I can choose Edit Watermarks. So this means that I can now create my own watermark. So I’m just going to delete what’s here. I’m going to press and hold the Alt key as I type out 0169 on the keyboard because that gives me the copyright symbol, and I’m going to type my copyright text. And I’m going to do two lines. And it’s Helen Bradley, projectwoman.com. And you can see it up here and it’s up there because that’s where I’ve got it positioned right

now. Here’s the anchor. If I wanted it down the bottom corner I could place it there. And then there’s an inset which is inset off that option.

So I could push it further down into the corner if I wanted to or not. It looks like it’s also centered right now. And no it isn’t. It’s right justified. So we could left justify it or center it if we wanted to. And we can also resize it either by dragging on its sides or we can drag it just to make it bigger if we wanted to. So I’m going to inset this a little bit horizontally and a little bit vertically. But you could see that we have a lot of power in where we place it.

Its opacity is 100 percent. And I always suggest that you do apply a shadow to your text because the shadow will help its readability if it’s over a lighter background. So I would normally put a very, very small shadow. And you can change the angle so that you can make the shadow come from whatever angle that you want it to come from. I prefer mine to come from about 30 to 45, something like that, so it’s coming in from this angle here. And if you’re happy with that that’s all you need to do. So you click Save. And we’re going to save this. And we’ll call it test watermark, you can call it whatever you want your watermark to be called, and I’ll click Create. And it’s now being selected as the watermark for my images.

I’m going to select to after export to show in Explorer. But literally at this point we could have two and a half or three and a half thousand images selected and they would all be ready for export. And all I do is click Export and now they’re going out. They’re exported out of Lightroom. And when they appear in that folder in My Documents, which we’re going to see in a minute, here it is now, they’re all going to have the watermark on them. So if I double click on this image we’re going to see that the watermark is in place.

So that’s how easy it would be to apply a watermark. If that were all you wanted to do and you had thousands of images to do it with, that’s all you need do to watermark your images. Bring them into Lightroom, don’t even bother rendering big previews, just use the minimal, select to export them, click and create your watermark and then just click Go and Lightroom will just go and do it all for you.

I’m Helen Bradley. Thank you for joining me for this video tutorial. Please if you have any questions feel free to pose them to me. I’m quite happy to make videos to answer questions. Look out for more of my videos on this YouTube channel. And follow me at projectwoman.com where you’ll find more tips, tricks and tutorials for Lightroom, Photoshop, Illustrator and a whole lot more.

Helen Bradley

Wednesday, July 11th, 2012

Using Adobe Camera Raw presets in Bridge


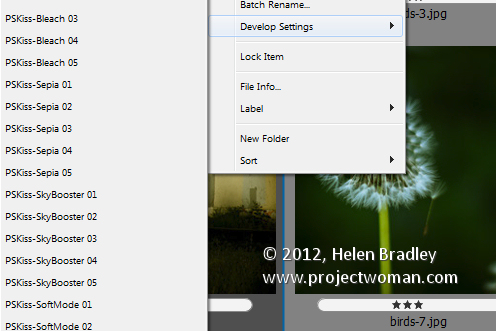
If you have a preset, for example a preset that applies an auto tone correction to an image in Adobe Camera Raw then you can apply this to an image in Bridge without needing to open Camera Raw.

Right click the image in Bridge, choose Develop Settings and then select the preset from the list.

Any preset can be applied automatically simply by selecting it. If you need to undo it, choose Develop Settings > Clear Settings. This will remove the settings from the image.

This strips out any ACR changes that you’ve made to the image.

A bonus of this feature is that the fix can be applied to jpg as well as raw images direct from Bridge.

Helen Bradley

Friday, July 6th, 2012

Editing JPG images in Camera Raw from Photoshop Elements


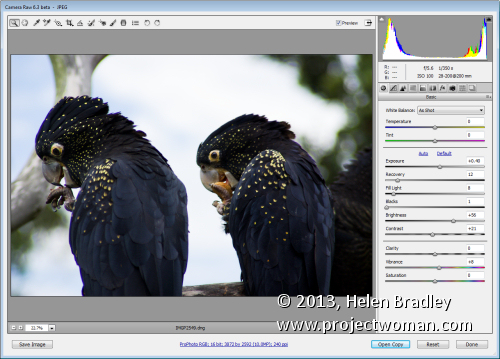
If you capture in jpg you may believe that you cannot take advantage of the Camera Raw processing features built into Photoshop Elements. This is because, by default, when you open a jpg image in Photoshop Elements it will open automatically in Elements bypassing the Camera Raw tool.

Only when you open a raw or dng file does will the Camera Raw tool appear allowing you to use its features to edit your image.

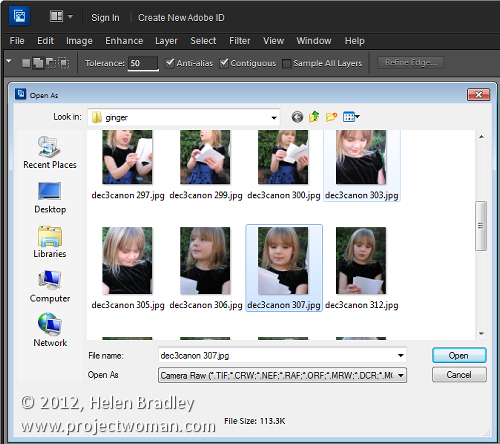
You can, however, get Photoshop Elements to open any image including a jpg image as a Camera Raw file. To do this, choose File > Open As and locate the jpg image to work with. From the Open As dropdown list, select Camera Raw as the option and click Open.


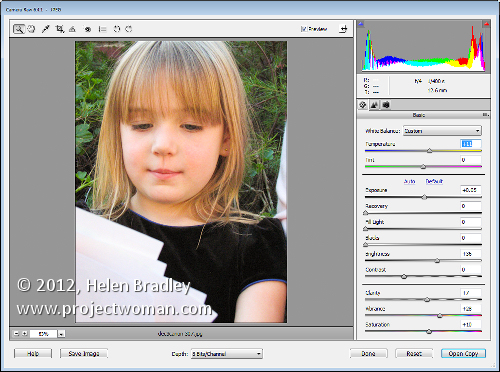
This treats the jpg image as a Camera Raw image so you have access to the superior processing tools available in Camera Raw for processing the image.

When you’ve finished with Camera Raw, click Open Image to move the image to Photoshop Elements with the Camera Raw adjustments in place. If you don’t want to go into Photoshop Elements then just click Done to save the fixed version of the image.

Helen Bradley

Wednesday, May 18th, 2011

Converting PDF to JPG

pdf to jpeg jpg online conversion free

If you’re a follower of my blog, you’ll know that I often need to convert a PDF file to some other format. I’ve showed you in the past how to extract data from a PDF file direct to Word but today my problem was that I wanted a well laid out pdf document to retain its look.

Unfortunately, the way it was created I couldn’t edit it to add my signature but I could do this in Word if I could get it there.

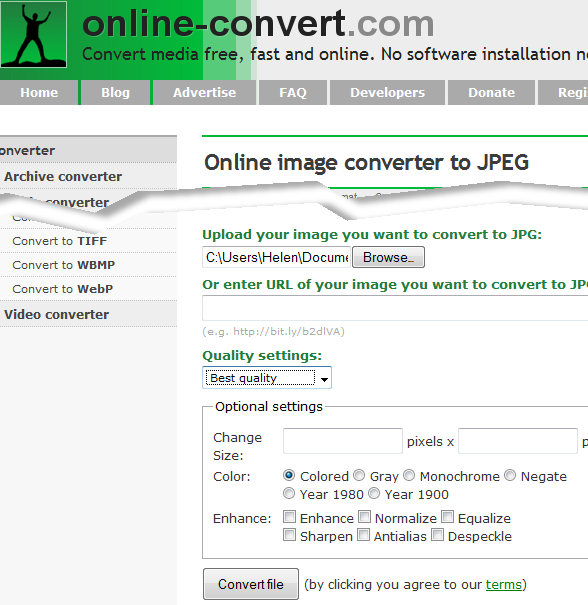
The solution was to convert it online using http://image.online-convert.com/convert-to-jpg. This easy to use site converts from 120 or more formats to JPG which is exactly what I wanted. It even allows you to upload a hefty file – up to 100 MB which means that it’s pretty damn big.

All you need do is to either enter a URL of the file to convert or click Browse and grab a file from your computer. You can set the quality settings – I selected Best Quality, and then optionally set the final image size, color and even apply some enhancements such as sharpening, anti-alias, despeckle and so on.

For a simple PDF to JPEG conversion, I left everything as it was and clicked Convert File. In less than a minute I had a zip file ready for download.

I could also have opted to have it emailed to me. You can, once you’ve downloaded your file, select to delete it or download it up to ten times within a 24-hour period. I opted to delete my file which is a nice option when a file may contain sensitive information,

If you visit the home page at http://image.online-convert.com you’ll have lots more options for converting to and from different formats.

This site is dead easy to use and it does the job – you simply can’t ask for more than that.

Helen Bradley

Wednesday, March 12th, 2008

PowerPoint to Go – on your mobile or iPod

You can put a PowerPoint presentation on almost any mobile device including your iPod.

Provided your mobile device supports JPEG format images – most will – open your presentation in PowerPoint and choose File, Save As and select the JPEG format, choose All Slides and PowerPoint will save the slides as JPEG format files that you can now upload to your mobile device as you do any other photos.

If your mobile lets you play images as a slideshow – voila! PowerPoint to go!

Helen Bradley