Thursday, June 26th, 2014

It’s not easy to find, but you can strip away the camera raw edits from a photo
Sometimes I look at the edits I’ve made to a photo a few months later and I think – What was I thinking? I simply hate what I did to the photo. I want the original image back so I can work on it again. But how to do that? You see there is no reset button in Adobe Camera RAW that matches the Reset button in Lightroom. It’s easy to do in Lightroom but not obvious how to do it in ACR.
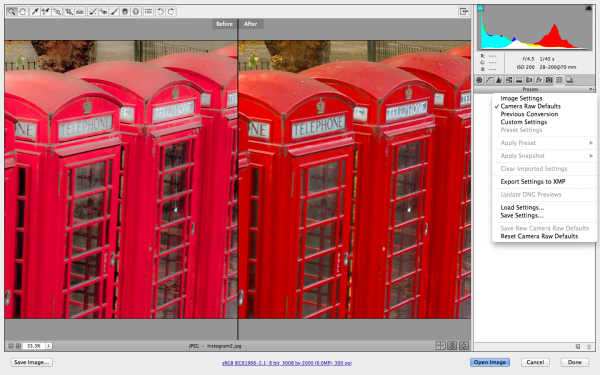
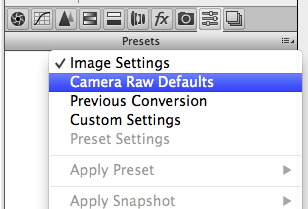
If you get stuck like this and you want to reset an image in Camera RAW, first open the image in Camera RAW and then go to the Presets panel:

Open the flyout menu and choose Camera RAW Defaults. Instantly all your fixes will be removed from the image – whether they were applied in Camera RAW or Lightroom and the image will be back to how it looked out of the camera – Yeah!
Labels: ACR, Camera Raw, reset, reset a raw file, undo changes
Categories:Lightroom, photography, photoshop
posted by Helen Bradley @ 6:54 amNo Comments links to this post
Saturday, October 12th, 2013

Remove all the edits you’ve made to a raw or dng image in Adobe Camera Raw
No doubt you’ve encountered the situation where you have a raw file or a dng that you’ve worked on in Adobe Camera Raw or Lightroom and you one day look at it and think – “what was I thinking?”
You decide you want immediately to remove all the changes you’ve made to the image. Easy? Not really!
If you’re working with a raw image then you can locate the image on disk and alongside it will be its sidecar xmp. Shall I say that again, because to the uninitiated ‘sidecar xmp’ just sounds so cool doesn’t it. What it is is an .xmp file with the same name as the raw file and it contains the edits you made to your image. The sidecar xmp file is used because you cannot write data to a camera raw file so the edits have to go somewhere. They go in this little xmp file as a set of text entries – delete the file and you remove the edits, permanently – in fact just remove the xmp file to another folder where ACR can’t find it and you’re done.

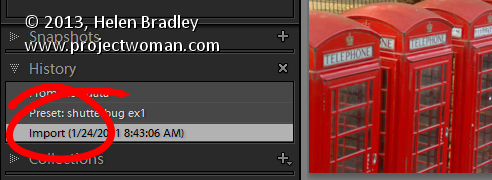
In Lightroom you can wind back edits to an image from the Develop module in the History panel on the left of the screen. Open the panel and select the bottom-most entry to wind back the changes you made to the image.

Unfortunately this won’t work if you made changes in a program that wrote an .xmp file and it won’t work if the changes were made to a dng file, written to that file and then the file was imported into Lightroom.
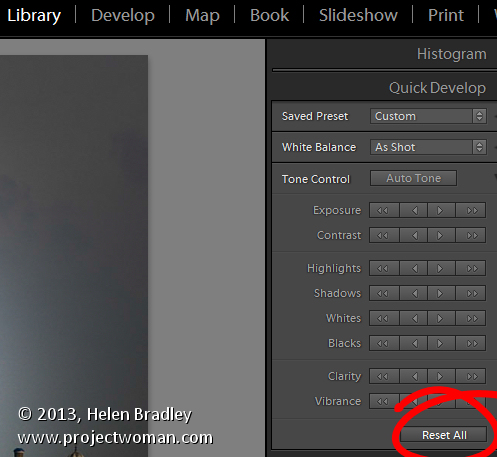
In that case, go to the Library panel and open Quick Develop and click Reset All – that removes all the edits.

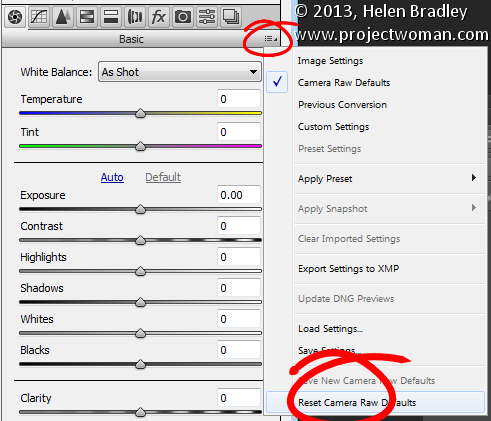
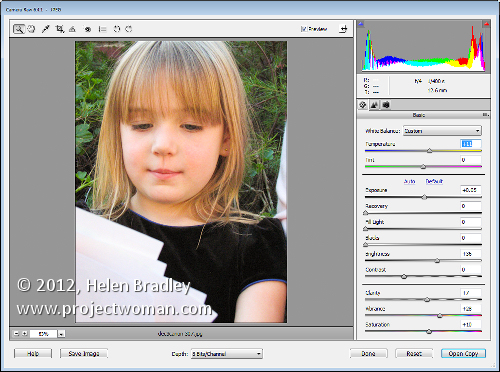
In ACR, go to the small menu in the top right of the edit pane and choose Reset Camera Raw Defaults. This removes the edits and returns the image to its out of camera state (see image at the top of this post)
This is also very handy for teachers who teach using a set of images – if you need to start over editing an image with a new class, this option will help you start over with a clean image.
Helen Bradley
Labels: ACR, adobe camera raw, Camera Raw, dng, History, Lightroom, Photoshop, quick develop, raw+, remove edits, reset, reset all, xmp
Categories:Lightroom, photoshop
posted by Helen Bradley @ 3:57 pmNo Comments links to this post
Friday, July 6th, 2012

If you capture in jpg you may believe that you cannot take advantage of the Camera Raw processing features built into Photoshop Elements. This is because, by default, when you open a jpg image in Photoshop Elements it will open automatically in Elements bypassing the Camera Raw tool.
Only when you open a raw or dng file does will the Camera Raw tool appear allowing you to use its features to edit your image.
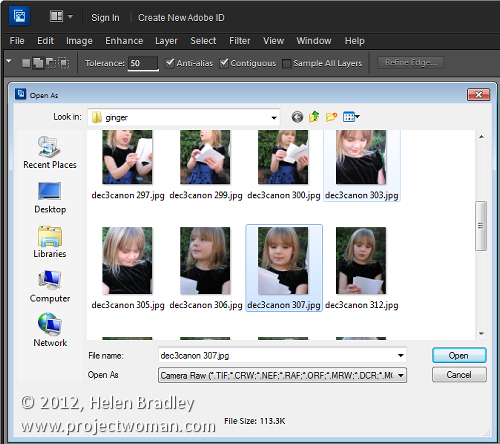
You can, however, get Photoshop Elements to open any image including a jpg image as a Camera Raw file. To do this, choose File > Open As and locate the jpg image to work with. From the Open As dropdown list, select Camera Raw as the option and click Open.

This treats the jpg image as a Camera Raw image so you have access to the superior processing tools available in Camera Raw for processing the image.
When you’ve finished with Camera Raw, click Open Image to move the image to Photoshop Elements with the Camera Raw adjustments in place. If you don’t want to go into Photoshop Elements then just click Done to save the fixed version of the image.
Helen Bradley
Labels: Camera Raw, dng, editing jpg, Helen Bradley, how to, images, jpg, jpg file, Photoshop Elements
Categories:photoshop
posted by Helen Bradley @ 8:00 amNo Comments links to this post
Tuesday, July 3rd, 2012

You can learn a lot about black and white photography using your favourite photo editing program as most have tools for converting from colour to black and white.
Avoid the adjustments that do the work for you such as by choosing Image > Mode > Grayscale as you won’t be able to make any creative changes to the image.
Instead, in Photoshop Elements, choose Enhance > Convert to Black and White and experiment with the sliders and options. There are different options down the left of the screen to select from and you can then adjust the red, green and blue sliders to fine tune the result.
In Photoshop, choose Layers > New Adjustment Layer > Black & White and adjust the sliders for the colors – this lets you control how the colours are converted to either black or white. In this way you can separate colors like Green and Red for example making them significantly different to what they would look if you do a regular conversion.
For more information on making a detailed colour to black and white conversion in Photoshop Elements visit this blog post: An Adjustable Black and White conversion http://projectwoman.com/2009/08/an-adjustable-black-and-white-conversion.html
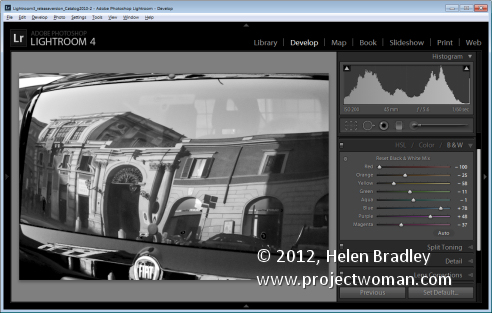
In Lightroom and in Adobe Camera Raw you can convert to black and white and then adjust the color sliders to create a good looking black and white image.
Helen Bradley
Labels: b & w, b and w, B&W, black and white, Camera Raw, camera settings, color, colour, convert, desaturate, digital SLR, dslr, film, grayscale, greyscale, Helen Bradley, monochrome
Categories:photography
posted by Helen Bradley @ 8:11 amNo Comments links to this post
Friday, June 29th, 2012

Traditionally, when shooting with black and white film, photographers use filters to enhance the colours in the image.
Using red, yellow or orange filters when shooting landscapes or shots where the sky has interesting detail can help darken the blues in the sky giving them more punch than they would otherwise have.
You can purchase coloured filters that screw onto the lens of a digital SLR or which can be placed over the lens of a point-and-shoot camera using an adaptor ring.
The images captured with these filters will show different conversion of colours to black and white than you would see if you were to shoot in regular black and white without the filter.
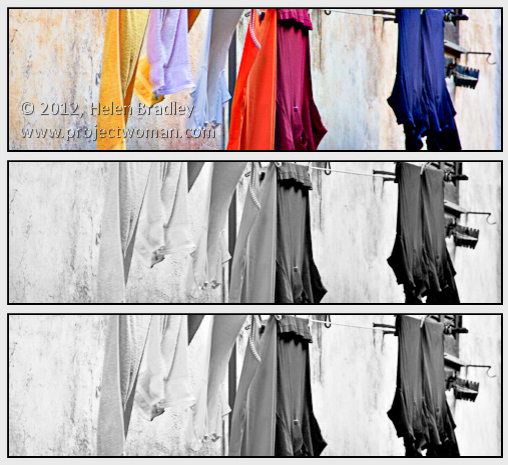
The image at the top shows two different renderings of a single image the first with a red filter and the second with a blue filter.
Helen Bradley
Labels: b & w, b and w, B&W, black and white, Camera Raw, camera settings, color, colour, digital SLR, dslr, film, filters, Helen Bradley, monochrome
Categories:photography
posted by Helen Bradley @ 8:09 amNo Comments links to this post
Tuesday, June 26th, 2012

The same rules for composing an image in colour apply when you are shooting in black and white. Make sure the subject of the photo is placed in an interesting position in the shot, make sure the camera is square to the horizon and that the subject is in focus.
When you are photographing in black and white pay attention to how the colours are converted.
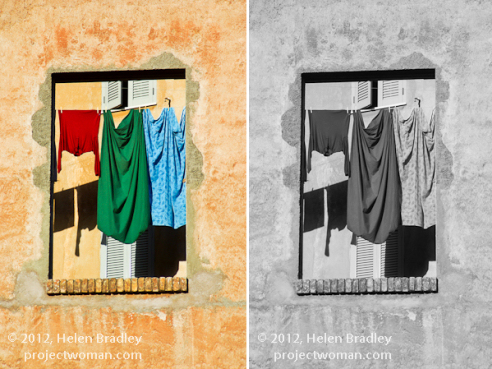
Some colour pairs like green and red which contrast so strongly in colour photos convert to the same shade of grey in a black and white image. Depending on what you are shooting this can be an advantage or a disadvantage.
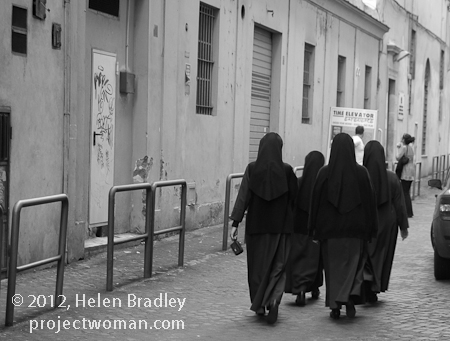
In the image above the solid black of the nuns’ habits ensures that the image will be a strong one and placing the subjects off center makes the image more dynamic.
If you are unsure how the image will convert, check the camera’s viewfinder or on a digital SLR take a reference shot and look at the result in the LCD screen to evaluate the composition and to check that what you are seeing in the scene will render well in black and white.
Helen Bradley
Labels: b & w, b and w, B&W, black and white, Camera Raw, camera settings, color, colour, composition, digital SLR, dslr, film, Helen Bradley, monochrome
Categories:photography
posted by Helen Bradley @ 8:06 amNo Comments links to this post
Friday, June 22nd, 2012

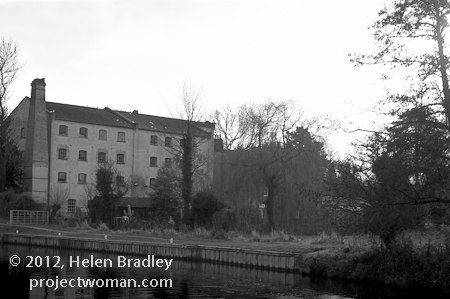
When the light is lacklustre because the weather is overcast it is often a bad time to shoot in colour because the colours are bleak and uninteresting.
These are times when black and white works particularly well because, by removing the colour problems, you can focus on the interesting things in the scene.
If the scene is monochromatic anyway and even flat but shooting it in black and white you can reinforce the desolation and age of the scene.
However, that’s not to say that a sunny day or sunrise and sunset is not also a good time to capture photos in black and white – when the sunlight is strong, the contrast between areas of light and shadow become very obvious and black and white is a wonderful way to capture this.

Helen Bradley
Labels: b & w, b and w, B&W, black and white, Camera Raw, camera settings, color, colour, digital SLR, dslr, film, full sun, Helen Bradley, light, monochrome, sunrise, sunset
Categories:photography
posted by Helen Bradley @ 8:03 amNo Comments links to this post
Tuesday, June 19th, 2012

Black and white is particularly attractive for use in portraits photography. You can use it when your subject is dressed in or surrounded by colours that are not complimentary to them or which are distracting to the eye.
By shooting in black and white, you remove the impact of the clashing colours allowing the subject to become the focus of the image and not their clothes or, worse still, the background.
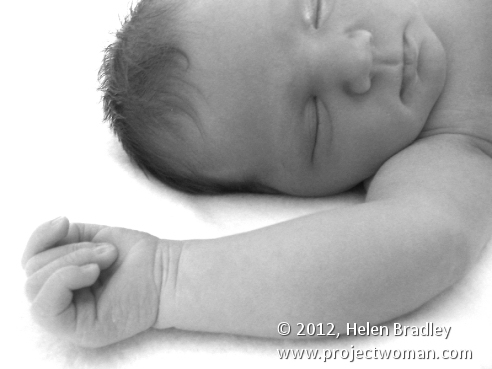
Bathed in soft light, babies captured in black and white look wonderful and the impact of jaundiced skin or blemishes is reduced.
For subjects that have facial details that can handle harsh light, try capturing your portraits with strong side lighting such as sunlight pouring in through a window. The dramatic contrast between light on one side of the face and shadow on the other can bring a portrait to life.
This type of setup is best used for a subject who has very strong facial features such as older subjects with lots of wrinkles or for subjects who live life hard as it reinforces their personalities and lifestyle.

Children’s and baby’s portraits captured in black and white do away with distracting colours and blemishes and allow you to focus on the child.
Helen Bradley
Labels: b & w, b and w, B&W, baby, black and white, Camera Raw, camera settings, child, children, color, colour, digital SLR, dslr, film, Helen Bradley, kid, monochrome, skin tone
Categories:photography
posted by Helen Bradley @ 8:00 amNo Comments links to this post
Friday, June 15th, 2012

What to capture?
When you remove the colour from an image, you are left without one of the key elements that attracts the eye to an image – the differing colours in it.
However, colour is also distracting so removing colour removes a distractive element allowing the eye to focus on other elements in the image.
This image isn’t a good one to shoot in black and white as most of the interest in it is colour:

As photographer it’s your job to find other elements of interest to capture.
Look for different shapes, textures, tones and contrast in the scene that will be visually interesting and make these your subject matter.
For example, one element that works particularly well in black and white is repetition.
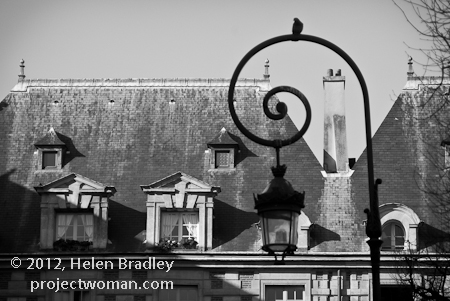
When you capture a series of repetitious elements such as trees, fence posts, light poles; then by removing the colour, you’ll be able to focus the viewer’s eyes on the repeated elements.
Helen Bradley
Labels: b & w, b and w, B&W, black and white, Camera Raw, camera settings, capture, color, colour, digital SLR, dslr, film, Helen Bradley, monochrome
Categories:photography
posted by Helen Bradley @ 7:50 amNo Comments links to this post
Tuesday, June 12th, 2012

Artistically black and white photos take a lot of beating. There is something about a good black and white image that invokes a level of appreciation that many colour images can never achieve.
In days of film, shooting in black and white meant that you had to commit to an entire roll of film for your black and white photos. Today you have a lot more choices and black and white is only a setting away in your camera.
However, shooting in black and white is a little different to shooting in colour so here is what you need to know:
Camera settings for black and white shooting
The first thing to do is to work out how your digital camera captures in black and white.
Most cameras have a setting that allows you to switch to monochrome or black and white capture.
You’ll need to be familiar with how to switch the camera into this mode, how to identify from its display that you are in this mode and how to return to full colour mode when you’re done.
When you capture in JPEG using a point and shoot camera or a digital SLR, your camera will discard all the colour information before saving the image. You can’t go from monochrome to colour later on.
However, if you shoot with a digital SLR and capture the image using Camera RAW you can generally configure your camera to capture monochrome images but, behind the scenes, the camera will still capture all the RAW data it would capture if you were shooting in colour and this will be available later when you process the RAW image.
Helen Bradley
Labels: b & w, b and w, B&W, black and white, Camera Raw, camera settings, color, colour, digital SLR, dslr, film, Helen Bradley, monochrome
Categories:photography
posted by Helen Bradley @ 7:39 amNo Comments links to this post


