I’ve never used an upsizing or enlarging program before. Instead, when I need to enlarge an image, I perform the age old trick of increasing an image’s size by 110 percent multiple times in Photoshop to enlarge it. It seems to do a reasonable job of the enlarging process.
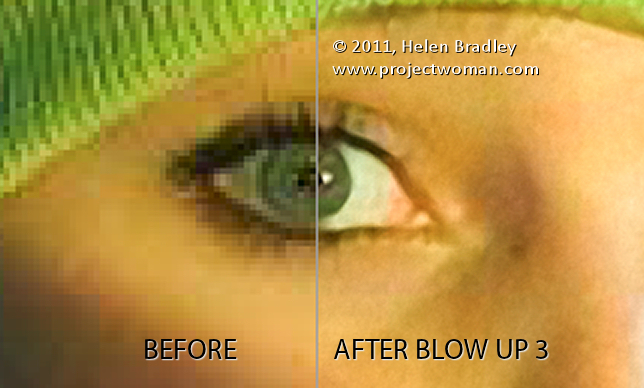
However, recently I was offered Alien Skin’s Blow Up 3 to test – since the folks at Alien Skin make some really cool applications I thought I’d give Blow Up 3 a try. I actually had an image that needed of blowing up for a magazine article. The image I had was a totally cool image but from a very old camera phone so it was a tiny 479 x 640 pixels in size. Not only was it very small but it had some very obvious jpg artifacts so when I enlarged it 300 percent it showed not only those artifacts at an enlarged size (the result was horrible) but the image also showed some distinct pixelization.
This was a perfect image to try out with Blow Up 3 – if I succeeded with the task the image would be acceptable quality for the magazine, if not, I needed to find something else.
Alien Skin Blow Up 3 with Lightroom
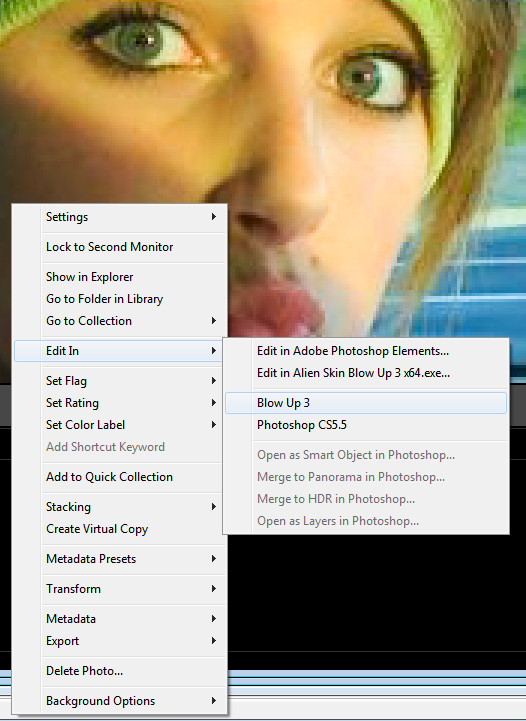
I had already installed Alien Skin Blow Up 3 for Lightroom, so running it is as simple as right clicking the image in Lightroom and choosing and choose Edit In > Blow Up 3. You get a choice of opening the image from Lightroom either as a copy with Lightroom adjustments, you can edit a copy or edit the original. You just select the option to use and click Edit and it opens automatically in Blow Up 3.

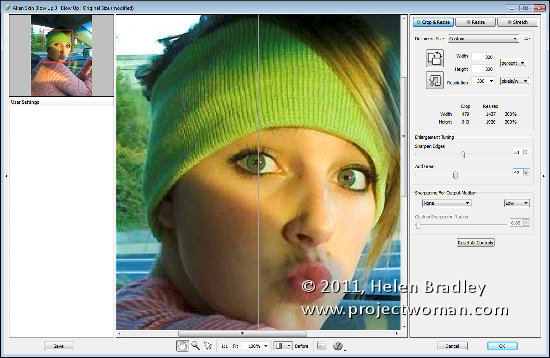
Blow Up 3 really couldn’t be easier to use. In fact I was a little confused at first because I kept looking for more options where there really weren’t any. I selected the Before/After option at the foot of the main screen so I could see the before version on the left and the after version on the right. I wanted to see as I worked just how effective the program would be. I then selected the Crop & Resize option and set it to Percent. I selected 300 percent for width and height and a resolution of 300 pixels per inch.

With the Before/After view on the screen, it was clear that the result would be a significant improvement for this image. The settings you can choose from include grain and sharpening. I checked out the grain slider. For this image, if I didn’t add grain, the jpg artifacts were still very apparent and they really detracted from the image because they were so visible. I opted to add a lot of grain to the image so I set the value to around 30 to soften and blend the artifacts.
I also checked out the Sharpen Edges setting to see how that would affect the image. For this image, I really didn’t want a lot of sharpening so I opted to set it to 40. This gave me some sharpening around the edges such as in her eyes but not really obvious haloing which the higher values produce.

Then, it is as simple as clicking Ok to blow up the image and be taken back to Lightroom where the blownup version appears in the same folder as the original so I found it alongside the original in the filmstrip.
From its original size the image is now nearly 1500 x 1900 pixels in size well suited to being used in a magazine and way more pleasing to look at than it was originally – sans artifacts. If you need to enlarge images significantly this application has the goods.
Helen Bradley


