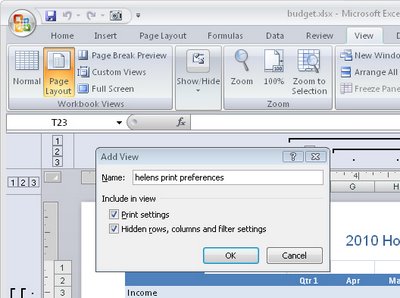
When you need to print one version of a worksheet for yourself and another for the boss and you like it small and he likes it to be – well just how he likes it, then you need Views. The Excel Views tool lets you configure a worksheet for different printing options and to save these so you can use them again later on.
You can set views up so you do one for your boss and one for you. Or, you can set one up to print only the summary part of a worksheet and another to print the lot. Even if the print areas and the print settings change, Views let you preconfigure them so you don’t have to set them up manually every time. Better still, Views are saved with the worksheet so they’re always available.
Step 1
To save a set of printing settings, first set up your worksheet with the print settings you want to use including setting a print area if needed.
Step 2
To save this set up, choose View > Custom Views > Add (in Excel 2007 choose the View tab > Custom Views > Add). Type a name for the view that explains what settings you have selected. Enable the Print Settings checkbox and click Ok. You can now create another view and save it. Do this for as many different settings as you need. Save your worksheet.
Step 3
In future, before you print, choose View > Custom Views > select the View you want to use and click Show. Now go and print the worksheet – your settings were saved so you don’t need to configure them.

