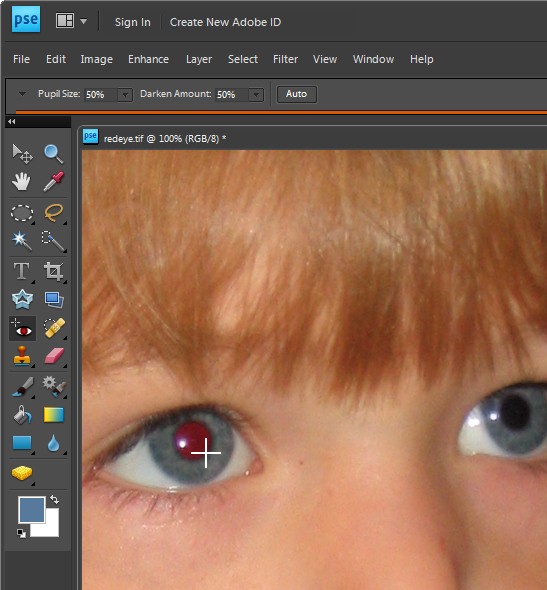
 Redeye is caused by the camera’s flash and is often difficult to avoid. Some photographers, and I count myself in that group, would prefer to have to deal with redeye if that means we get good photos. Often the redeye reduction feature on a camera signals to your subject that the image has been taken before it has – they relax and start moving and you get unwanted movement in the shot. When there is a balance to be struck between redeye and movement – I’ll take redeye everytime.
If your photograph has a subject with redeye you can fix it using the redeye tool in Photoshop Elements.
Click the Zoom Tool and click and drag over the eyes in the image to make them large enough that you see them clearly.
Click the Redeye removal tool and click on the red part of the eye. If necessary, adjust the Darken amount and the Pupil Size on the toolbar to get a good result. Fix each eye and then save the image.


Hi, great site! Really cool info you have here.
I also made a blog that tells you which photo editor options/settings to use in order to enhance your photos and keep them looking natural. The specific settings (values) are listed so everything should be clear.
This is for free photo editors like Picnik or Pixlr or others that I also list – you don’t need to install it or register to use it.
You can see my blog in:
http://www.enhance-photos.blogspot.com/
If you’re interested feel free to also try to enhance your photos and please let me know how that worked for you – you can leave comments in my blog. It did a good job for most of my photos (not all) so I wonder how it will work for other people’s photos.
Thanks!
The idea sounds great but the link to the blog doesn’t work. Helen