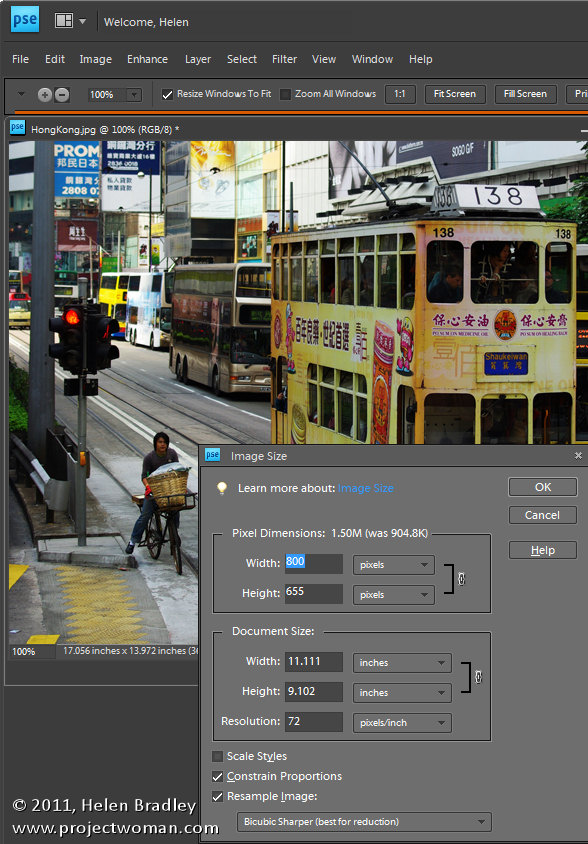
When you’re ready to prepare your photo for printing or sharing on the web. Use the Image > Resize > Image size option to adjust the image size.
Make sure the Constrain Proportions and Resample Image checkboxes are selected so you can set the desired size correctly.
For web display, set the resolution to 72 pixels per inch and then set the Width and Height dimensions to the desired value. Remember as you do this that even a very large monitor is only 1920 x 1080 pixels in resolution so you don’t generally want an image to be more than that size if you’re just putting it up on your website, for example.
For printing, set the resolution to anything from 150 – 300 pixels per inch and set the size to your desired print size such as 5 x 7in. Because you are resizing the image (not cropping it), it probably won’t resize to the exact proportions but you can get it close to this.
To save the image, choose File > Save As and, if you are planning to display it on the web save it in the JPEG format.
For printing and storing locally on your computer, the TIFF format, Photoshop .PSD format or a high quality JPEG are acceptable.
If you plan to both print a copy of the photo and share one on your web site, for example, size it for printing first, and save that copy and then resize for the web and save this version with a different name.
Other stories in this Simple Photo- Editing Workflow series:
Step 13 – Sharpen
Step 12 – Major Surgery
Step 11 – Getting to black and white
Step 10 – Fixing Redeye
Step 9 – Fixing Imperfections
Step 8 – Fix Skin tones
Step 7 – Fix Color problems
Step 6 – Fix muddy images
Step 5 – Fixing under and overexposed images
Step 4 – Straighten
Step 3 – Crop an image
Step 2 – Make a duplicate
Step 1 – Assess the image


Post a Comment
Please feel free to add your comment here. Thank you!