Most of us have heard of IPTC metadata but not everyone knows what it is, whether it is important to them or how to add it to their photos. In this post I’ll cover some of the basics of adding personal information about you as photographer as IPTC metadata to your images. I won’t be talking about image specific metadata such as keywording or captions – that’s a topic all of its own – this post is limited to things like your name, copyright status and so on – the type of information that doesn’t change from image to image.
What is all the fuss about?
The IPTC or International Press Telecommunications Council (www.iptc.org) develops industry standards for interchange of news data. It publishes standards for adding to a photograph certain data about who took it, what it is about and its copyright status among other things. This data is stored inside the image as IPTC Photo Metadata and it was originally developed for use by photojournalists. Nowadays many photographers add this to their images on a routine basis and many more probably would if they knew how to do it and why it is important to do so!
The primary reason to add personal details to your images is so that anyone locating that image somewhere on the web can determine who owns copyright in the image and what they can do with it. If the image is copyrighted the metadata can show this and give the finder the information they need to contact you if they would like to get permission to use your photo. Alternately if you prefer to apply a Creative Commons Licence to your work you would state this so that anyone can easily determine what they are licensed to do with the image. Without this data it could be difficult if not impossible for someone to locate the owner of an image. It is also one way to alert people to the fact that this image belongs to you.
Where does the information go?
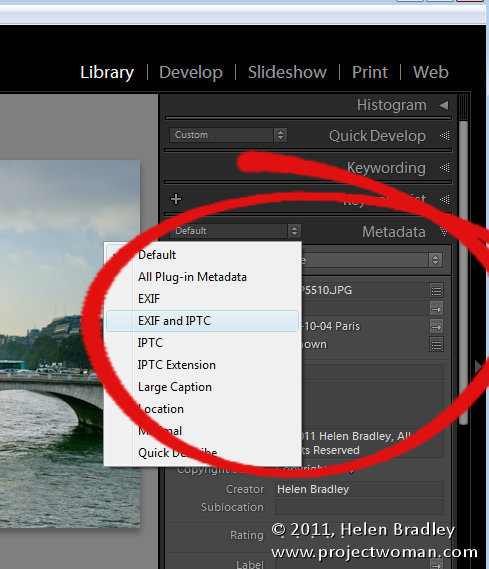
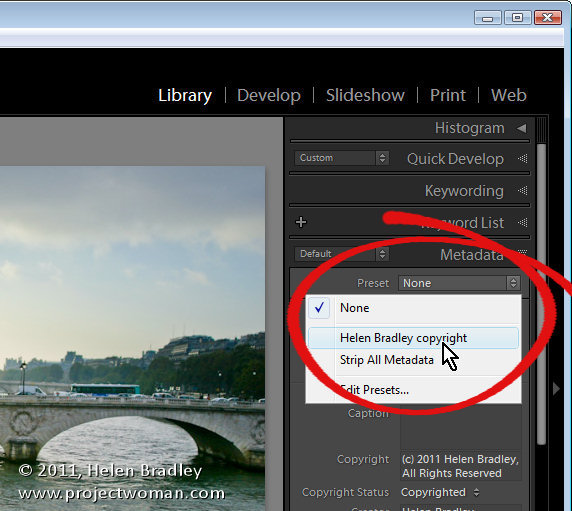
The information added to the image is added inside the file – it doesn’t appear on the image itself so no one will notice any difference in the way the image looks. It is visible only by using a program which can read metadata. These days, most photo editing programs can do this – for example, the Metadata panel in the Library module in Lightroom shows the metadata in your images and it can also be used to add metadata to your images.
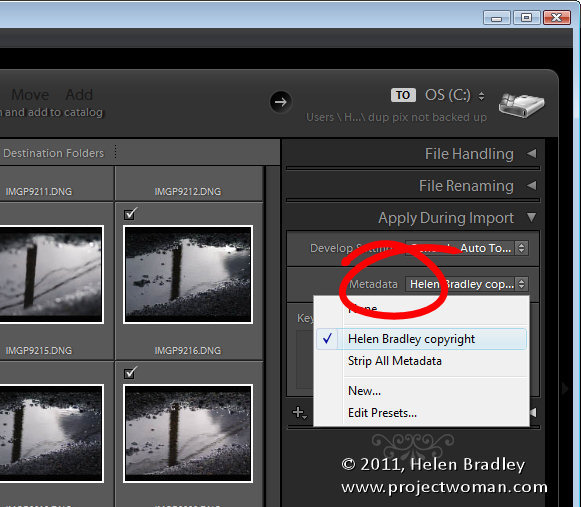
You can also add metadata to your images as you import them into Lightroom. The Apply During Import panel’s Metadata option not only lets you create a metadata preset but also to use it to add metadata to your images as you import them.
Add metadata on import
Before you can add metadata to your images it’s best to create a metadata preset with all the details that you need to apply to a typical image – this saves you having to type it afresh for each image. To create a preset, choose File > Import Photos and open the Apply During Import panel. From the Metadata drop down list choose New and type a name for your preset.
Completing the fields
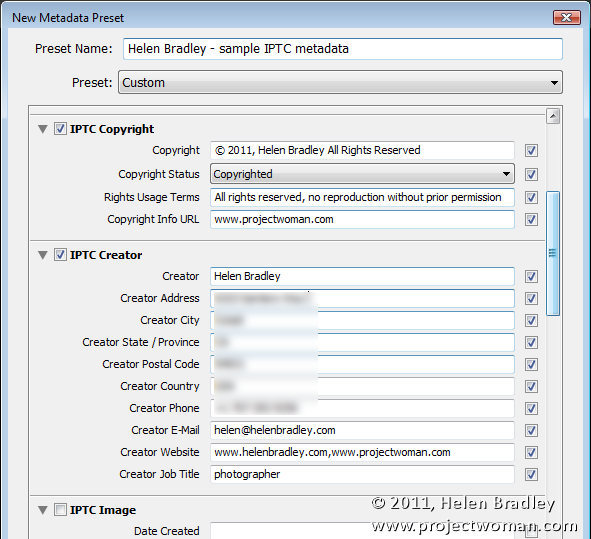
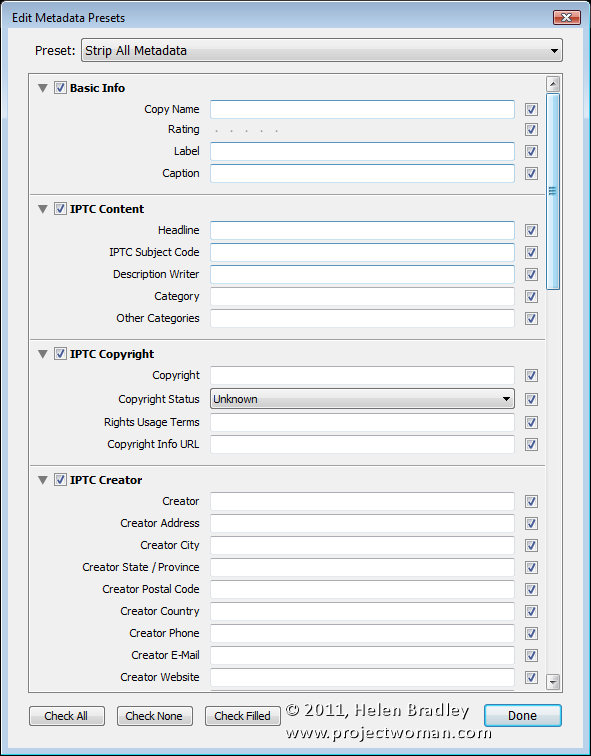
Many of the fields in the panel are fields which relate to an individual image such as Label, Caption and Subject information. You won’t complete these fields in your preset – they’ll need to be added on an image by image basis as each image is usually different. The fields you can complete are in the IPTC Copyright and IPTC Creator Information sections.
Typically in the IPTC Copyright field you will type your copyright text – I type © 2011, Helen Bradley, All Rights Reserved. To get the copyright symbol hold Alt on the Windows keyboard and type out 0169 on the numbers keypad.
In the Copyright Status box choose Copyrighted.
In the Rights Usage Terms field you will explain how the image can be used – for example type no reproduction without prior permission.
Copyright Info URL is a field which is not recognized by a lot of other programs – you can complete it but you should be aware of this.
The IPTC Creator section is where you add your details including your name, address, email address, website and so on. If you have multiple email addresses or websites – separate them with commas.
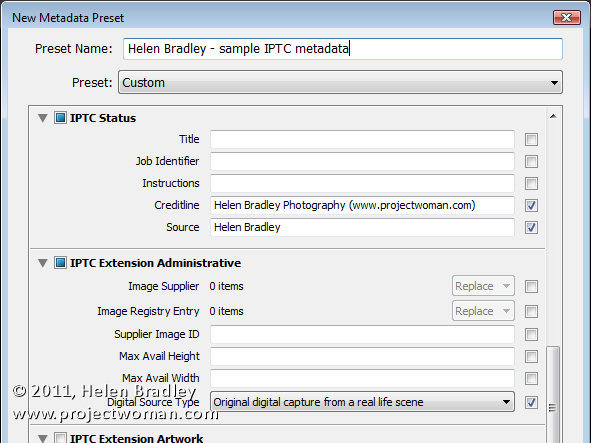
Some other fields you may complete are in the IPTC Status and in the IPTC Extension Administrative sections and are Credit Line which shows how you should be credited when the image is used – for example Helen Bradley Photography.
In the Source field you can add your name as copyright holder.
In the Digital Source Field you would typically select Original digital capture of a real life scene for a photo taken with a digital camera.
Stripping metadata from an image
You should note that any field that has a checkmark to its right will be added to the image when you apply metadata to it.
For this reason, it’s important that you don’t check any field that is blank or that empty field will be added to the image overwriting any metadata that is already in the image in that particular field when applied.
That said, in some cases you may want to strip the IPTC metadata from an image. In this case you could create a preset that had nothing in it but every checkbox checked. This would then overwrite any corresponding data in those fields in the image’s metadata with ‘nothing’ effectively stripping that metadata from the image.
Save and apply a metadata preset
When you’ve finished creating your preset, click Create to create it. If you are editing a preset you will choose Update Preset <preset name> from the Preset dropdown list at the top of this dialog. Click Done to exit the dialog.
You can apply the metadata preset to images as you import them by making sure that the preset is selected in the Metadata box in the Apply During Import panel.
You can also apply a metadata preset that you’ve created to any image by viewing that image in the Library and from the Metadata panel select the preset to apply to the image. If you are in Grid view (press G) then you can select multiple images and apply metadata to them all at once.
More information
The topic of IPTC Metadata is big and understanding it can be very overwhelming. I’ve tried to give you a simple approach that will work for most amateur and hobbyist photographers in most cases.
There are some good resources online and some I like for their ability to explain what the fields mean include these pdfs:
http://www.iptc.org/std/Iptc4xmpCore/1.0/documentation/Iptc4xmpCore_1.0-doc-CpanelsUserGuide_13.pdf
This is a 22 page pdf that contains a lot of useful information on interpreting what the field names mean and what goes in them and has some examples.
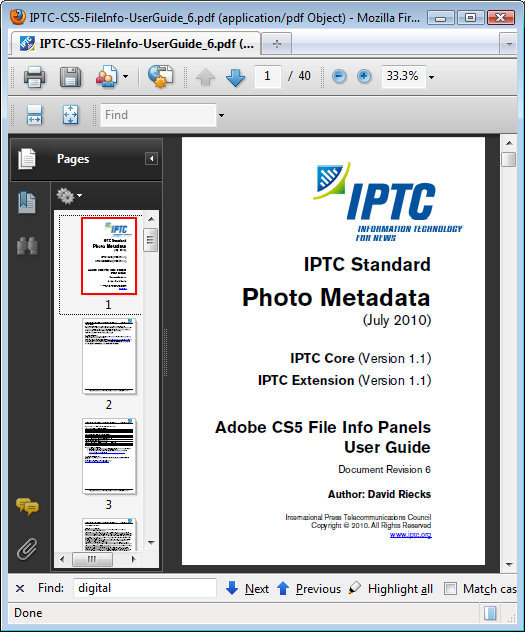
http://www.iptc.org/std/photometadata/documentation/IPTC-CS5-FileInfo-UserGuide_6.pdf
This 40 page pdf guide has a lot of information specific to Photoshop CS5 (and by extension is relevant to Lightroom users) and is more recent than the previous guide.
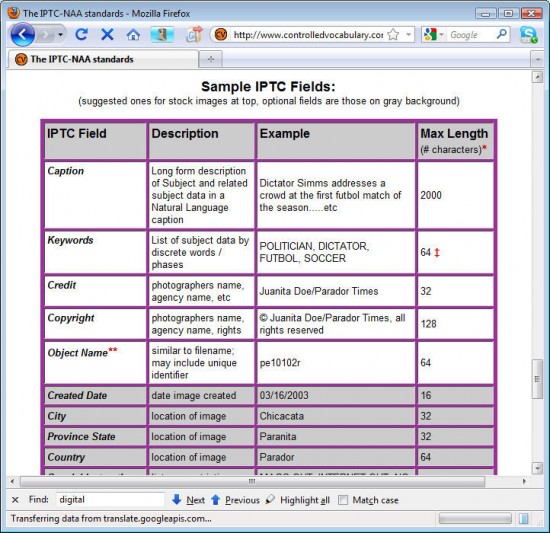
http://www.controlledvocabulary.com/imagedatabases/iptc_naa.html
This webpage has a set of sample IPTC fields in a table – scroll down to find them.


Post a Comment
Please feel free to add your comment here. Thank you!