Not all good applications come in big shinny boxes like Photoshop and Photoshop Elements. Many cool photo apps are available on the web and they’re free.
These apps do things that other programs don’t. They are fun to use and practical. In this Cool Photo Apps series I’ll show you some of these, today it will be how to create an HDR image.
Once of the limitations of digital cameras is that they are only capable of capturing an image with a fairly narrow dynamic range. You can, however, create images that have a higher dynamic range if you take a series of images at different exposures and combine them by selecting the best exposed pieces of each.
To do this, ideally, you need images shot using a tripod so there is no movement between images. In addition, the camera settings should not change from one image to the next – except, of course for the exposure settings.
While you can assemble the series of images manually, good software makes it much easier to do. Programs such as PhotoImpact and Photoshop have built-in tools to do this but you can also purchase standalone programs to do the work.
One specialty program is Photomatrix Pro 3 which you can find it at www.hdrsoft.com. Download and install the trial version and, if you don’t yet have suitable images to work with, download a set of sample images at the same time and unzip them.
Step 1
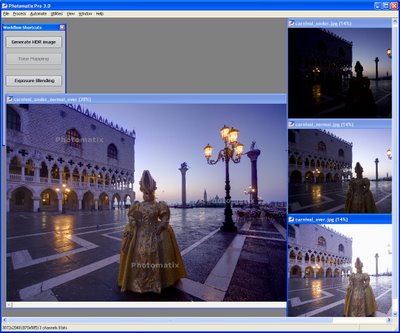
Launch Photomatrix, select Exposure Blending > Browse and load the images shot with different exposures.
Step 2
When the Exposure Blending dialog appears you will see the composite image appear and you can select fine tuning options such as Average, Highlights & Shadows – Auto, Highlights & Shadows – Adjust etc.. Select and compare the various options and adjust the sliders until you find a result you like.
Step 3
Once you’re done, click Process and the images will be compiled into a final HDR image.
Step 4
The program also includes a Generate HDR Image option which involves a more complex process than Exposure Blending.


