Tuesday, May 12th, 2009

Lightroom: Spot fixing with the Adjustment Brush

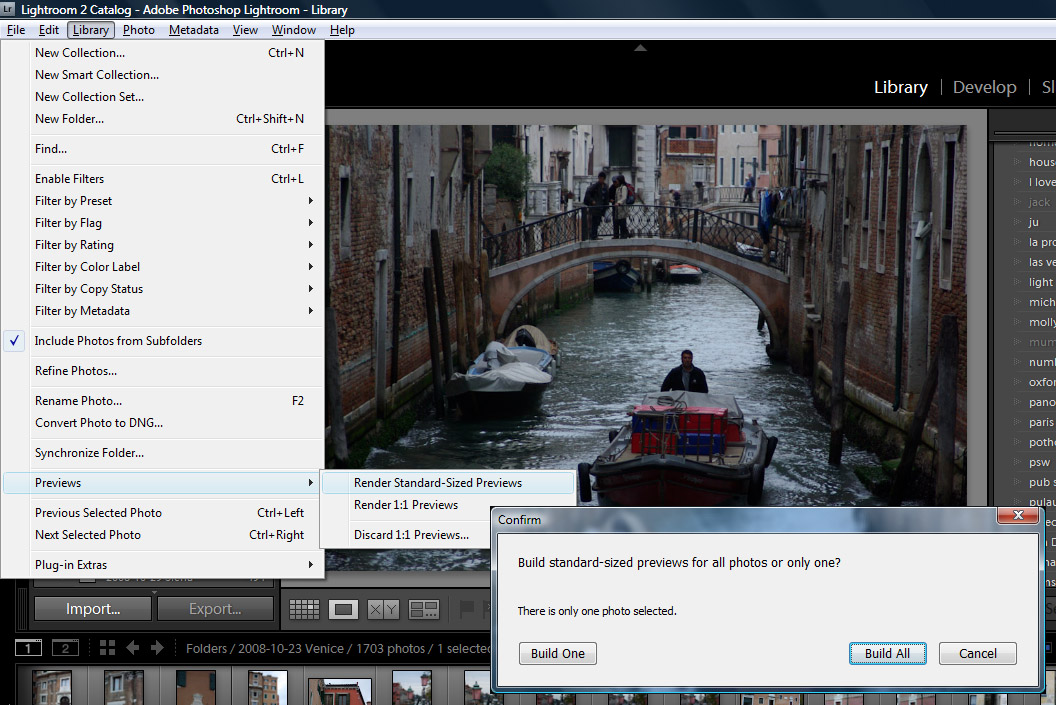
One of the exciting new features in Lightroom 2 is the adjustment brush which lets you to make spot fixes to your image in Lightroom. These fixes apply to only the area you select rather than the entire image. This means you can make local adjustments for contrast, saturation, exposure, brightness, clarity and sharpness without having to take the image to Photoshop to do this.

In this post I’ll show you how to get started using the adjustment brush in Lightroom. 2
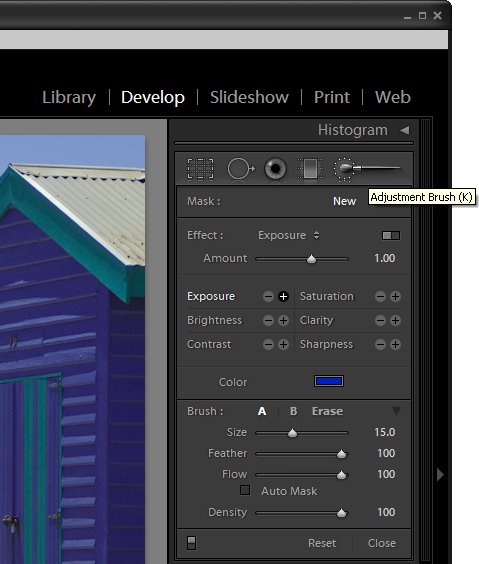

Step 1
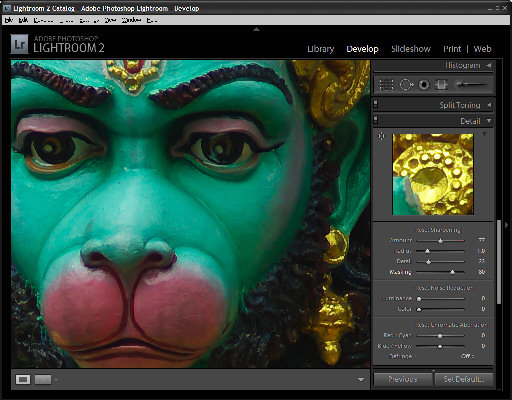
Open Lightroom and click the Develop module. Locate the Adjustment Brush and click it to select it. Hold the brush over the image to check its size. The inner circle is the hard part of the brush and the outer circle shows the edge of the feathering. To adjust the brush size use the [ and ] keys or adjust the Size and Feather using the sliders.


Step 2
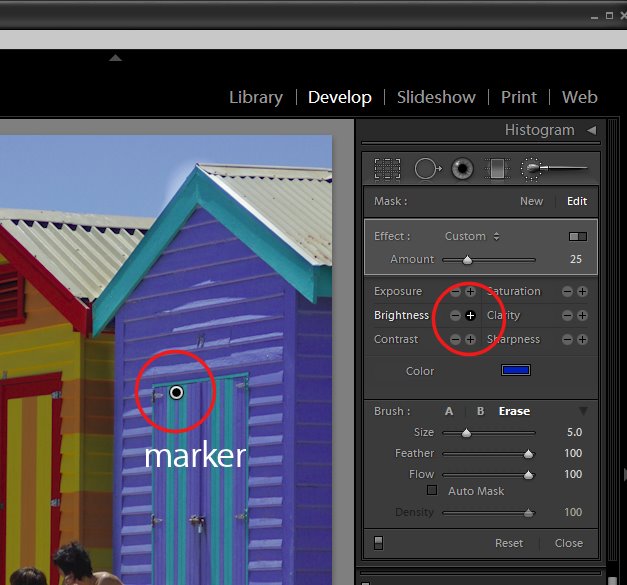
Select the adjustment to make, such as Brightness or Saturation by clicking its + symbol to increase its value or the – symbol to decrease it. Then start painting on the image to adjust that part of the image. When you start painting the effect onto the image, Lightroom places an identifying marker on the screen. Here I have Brightness selected and the marker is visible.


Step 3
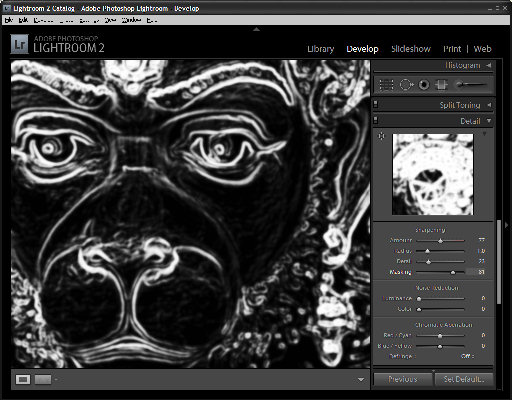
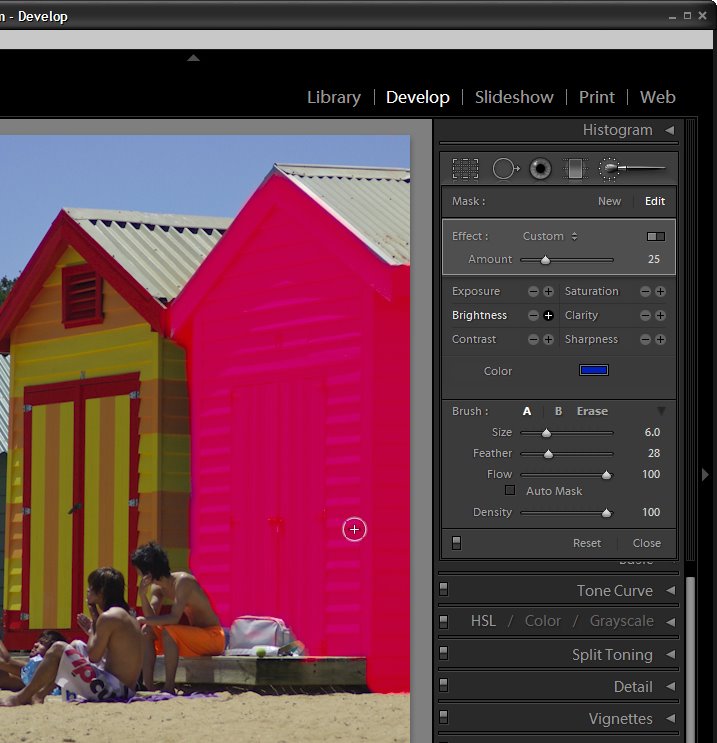
If you don’t know where you have painted – and it’s often very hard to know exactly – press the O key to view or hide a mask which shows the area you have painted on. If you prefer to, you can display the mask as you work. The mask also appears if you hold your mouse over the marker.

To erase the brush strokes, click the Erase option in the brush area and erase over the area to remove the strokes. To return to painting click brush A which is the default brush and continue to paint over the area. You can also use the brush with the Alt (Option on the Mac) to remove the painted areas rather than switching between the brush and eraser.


Step 4
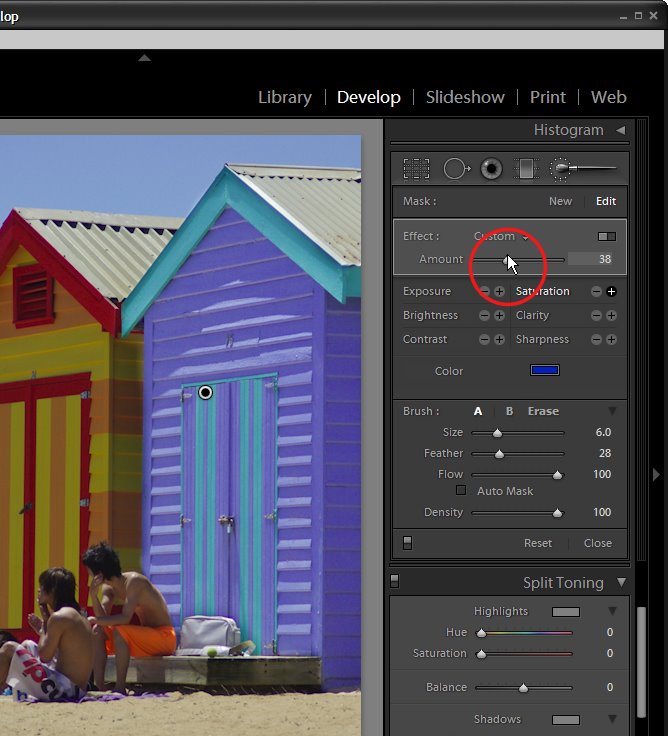
If the effect is too much or too little you can adjust the intensity of the effect using the slider.


Step 5
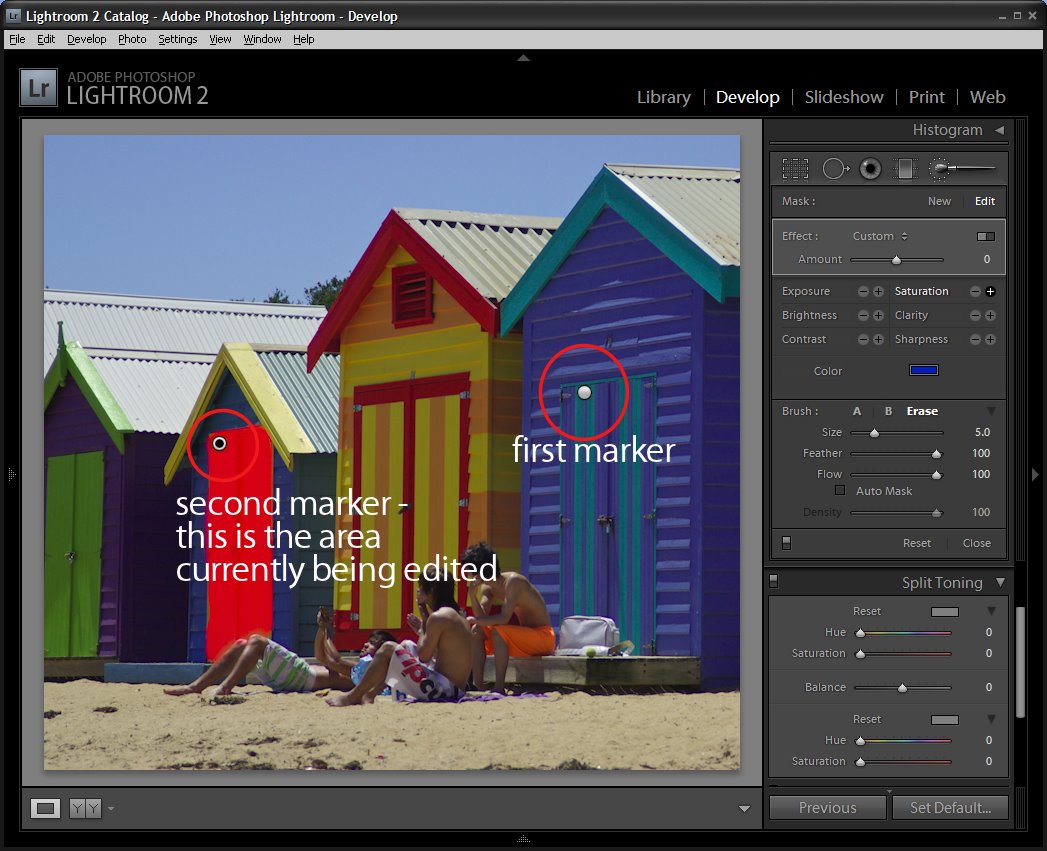
If another area of the image requires fixing, click the New option and then repeat the steps to select a fix and then paint it onto that part of the image. Later on you can adjust either of the fixes by first clicking the Adjustment Brush tool to select it and then click on the marker for the area to change – you will see that the word Edit is now highlighted – and you can now adjust the painted area or adjust the amount of the fix.

In a future post I will look at some more advanced functions of the Adjustment Brush.

Helen Bradley

Sunday, April 12th, 2009

Update Lightroom Previews


I travel with a laptop and I take most of my photos when travelling. All this adds up to me wanting to get my images into Lightroom quickly so I can see what I have but so I can do it on the run in the airport lounge, for example.

Because of this most of my images are imported using the Minimal previews which are, let’s face it, pretty awful but they are fast. When I get home and I have the time, I want to update the previews to Standard which is a good working size for me.

To change and update the preview size for a folder of images, choose Library > Previews and choose to render 1:1 previews or standard size ones. You’ll be asked if you want to apply this to one image or all of them – choose All and go do something else while Lightroom grinds away at the task.

In the top left corner of the screen you’ll see how many previews it has to make and how far through the process it has got. If you have multiple folders needing updating repeat the process and Lightroom will continue to work on multiple tasks at once.

To change the actual preview defaults, choose Edit > Catalog Settings > File Handling tab and set the Preview size – it won’t need to be any larger than your screen and Medium quality is a good compromise between speed and quality.

Helen Bradley

Wednesday, March 4th, 2009

Sharpening in Lightroom 2

Sharpening is the last step in editing an image. If you’re working in Lightroom then you have a very sophisticated Sharpening tool at your disposal. It’s hard to determine what the coolest part of the process is – the Detail and Masking sliders or the fact that sharpening is applied to only the image luminosity so it doesn’t mess up the image colors.

To sharpen in Lightroom, open the Develop module and the Detail panel to show the sharpening tools. A good starting point for most images is to set the Amount to 100, set the Radius to 1.0 and the Detail to around 25. As an aside, it’s nice to see that Lightroom is realistic about the appropriate radius to use and it limits you to a value between 0 and 3 which takes some of the guess work away from determining what value you should use.

Now you have a starting point, adjust the Detail and Amount sliders to see how they affect the sharpening. To see the before and after, press the backslash (\) key. The Detail slider is unique to Lightroom – it doesn’t appear in Photoshop. What it does is to remove halos around the sharpened edges. Low values for Detail reduce halos and higher values allow them.

The Masking slider is a way cool tool. It lets you remove the sharpening from texture areas of the image and areas that you typically would not want to be oversharpened such as skin tones. To use it, drag the Masking slider to around 75 and compare the results. You should see less sharpening in areas that don’t typically need it the larger the Masking value. To see what the mask looks like, hold the Alt key (Option on the Mac) as you drag on the slider and you’ll see a grayscale mask in place of your image. The white areas of the mask are the areas that will be sharpened – they are the edges in the image – and the black areas are those that will not be sharpened or which will be sharpened with less intensity.

The mask gives you a lot of control over how the sharpening is applied to the image and it prompts the question “why isn’t this in Photoshop too?”

Helen Bradley

Page 3 of 3123