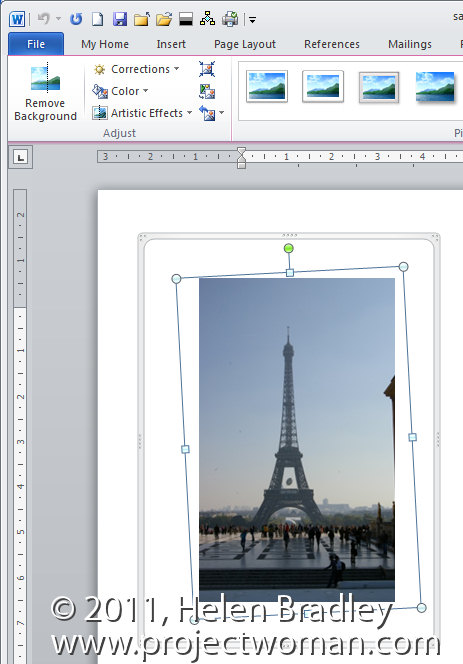
While Word 2010 has no tool for straightening an image, you can create the same effect.
step 1
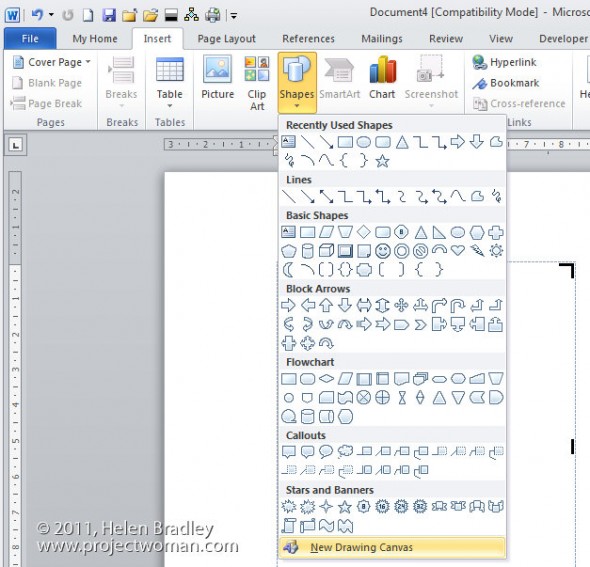
To do this, I’d suggest you start with a new drawing canvas which is Insert > Shapes > New Drawing Canvas to draw a canvas on the screen.
step 2
Adjust it to just larger than the image that you want in your document and then click inside the canvas and choose Insert Picture to select an image to insert.
Size the image once it’s placed inside the drawing canvas.
Step 3
Now with the canvas selected but not the image, choose Insert > Shapes and select a rectangle shape.
Draw the rectangle shape over the top of the image.
From the Drawing Tools> Format tab, set the Shape Fill to No Fill and the Shape Outline to White and set the Outline Weight to a large weight. To do this, you’ll probably need to select the format shape options so that you can set the shape outline to something like 40 points. You need something that will cover the edges of the shape that you are about to crop.
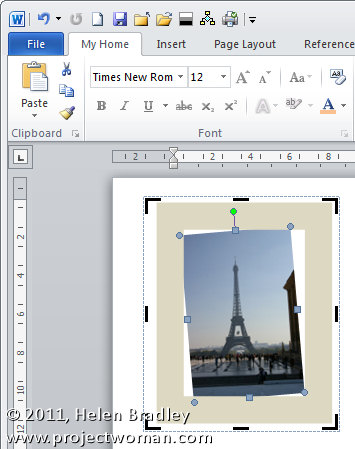
In this image, I’ve set the outline of the rectangle to a light grey so you can see what you’re aiming to achieve:
Step 4
Now with the image selected rather than the shape, rotate the image until it is straight. Select the image and click the Crop button crop away a little bit around the edges of the image. You don’t need to crop too much but you might need to crop a little bit.
Click outside the image and now adjust the shape itself the white border you created so that it covers the area of the image that you want to hide because you’ve rotated the image.
In some cases, you may still not have enough border so you can adjust it to make it wider or narrower as required not by selecting the rectangle and choose Drawing Tools > Format tab > Shape Outline > Weight> More Lines and now increase the size of the line until you have enough border to hide the outside of the image.
The border grows from the middle out so you need to add about half as much extra border than you think you need.
Once you’ve added the extra border, click on the border and drag it outwards until it covers the uneven edges of the image.
Essentially what you’re doing here is rotating an image then using a white frame with no fill placed over the top of the image to mask out the area of the image that is on an angle and that you don’t want to see.
When you’re done, you can resize the drawing canvas until it fits closely around your image. It should not extend over the image or you will distort the frame.
Placing the image and frame inside a drawing canvas means that you can just click and drag on the drawing canvas edge and it will move both the frame and the image in your document.


