I know that a lot of you use Gimp and, in the interests of taking a step away from Photoshop for a minute, here are 5 of my top tips for working with Gimp.
Rounded corners
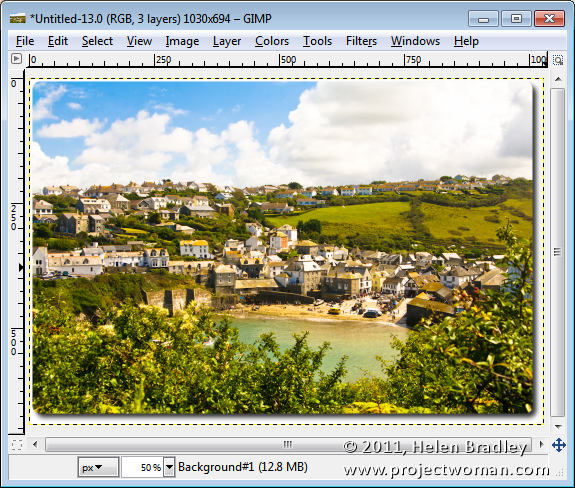
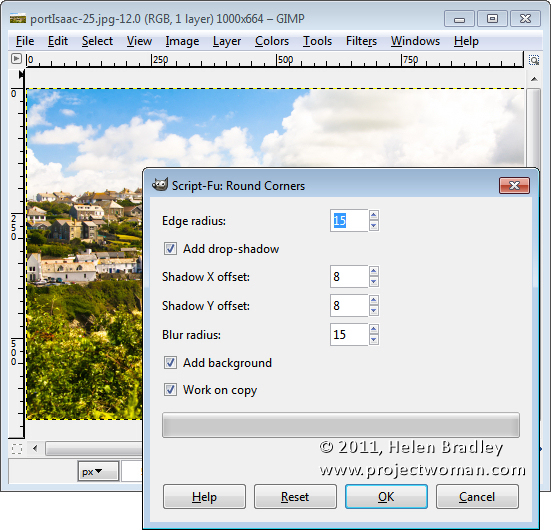
Gimp makes it dead simple to round the corners of an image. To do this, choose Filters > Décor > Rounded Corners. A dialog will open. Select the Edge Radius, which is the amount of curve, and if desired, click to add a Drop Shadow and then set the Shadow Offset and Blur Radius. You can select to work on a copy of the image (rather than the original), and select whether or not to add some background behind the curved corners – the current background color is used for this. Click Ok to round the corners of the image.
Reassign keys
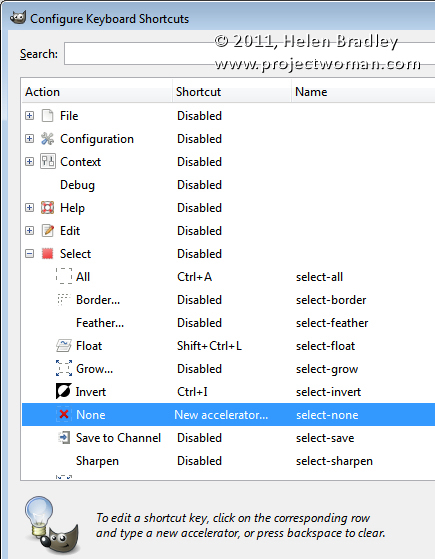
When I use Gimp, I sometimes forget and use Photoshop keys for things like deselect. Unfortunately in Gimp, the Photoshop deselect keystroke duplicates an image! You can, however, remap your keyboard shortcuts by choosing Edit > Keyboard Shortcuts. So, for example, to map the Ctrl + D keystroke to the Select > None option, click to open the Select menu, locate the None option and click it so that the words New Accelerator appear in the Shortcut column. Then press the keystroke to use – I chose Ctrl + D, which is the Photoshop equivalent. Because this key combination is already used a warning appears – if you are ok with replacing the shortcut, then proceed to assign the new shortcut key.
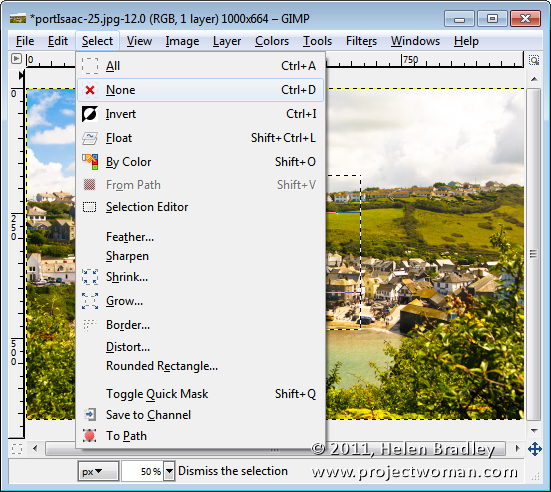
When you change or reassign a shortcut, Gimp is smart enough to add the new shortcut to the appropriate menu so the Select menu here shows the newly assigned shortcut.
Move the selection mask
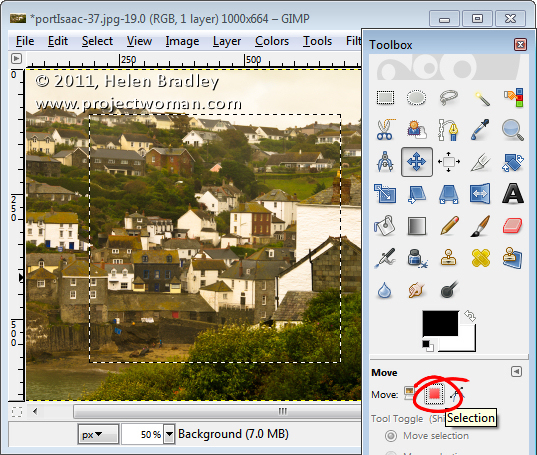
It is so much easier in Gimp than in Photoshop to move the actual selection marquee once you have made it. To see this at work, make a selection, then click the Move tool. Make sure that the Move option is set to Selection in the panel and you can now drag the selection into a new position. This works for circles, rectangles as well as selections made with the free select tool. Once you’re done, return to the tool to perform another task such as Ctrl + Alt + drag to move the selected area or Shift + Alt + drag to copy it.
Merge to a new layer (and keep the original layers)
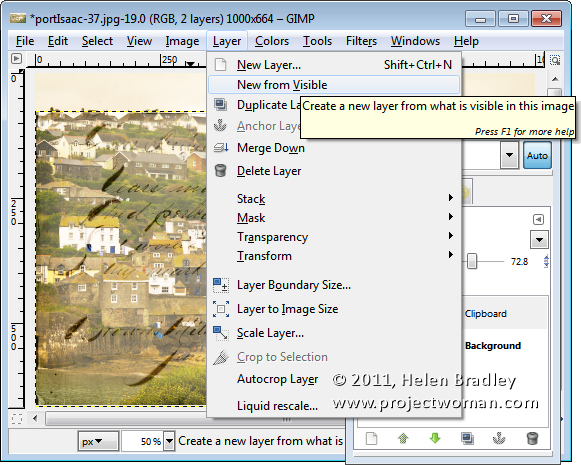
One command that is useful when you need to flatten an image but where you don’t want to lose the layers you have already created is the one which flattens the visible portions of an image to a new layer. This layer is at the top of the stack but is created in a way that leaves the original layers still in place. In Photoshop you do it by pressing Ctrl + Alt + Shift + E. In Gimp, choose Layer –> New From Visible. Now you can, for example, sharpen the image but, if you need to make changes to the image, you can delete the top merged layer, adjust the image on the layers below and then remake the new merged layer and sharpen it.
Crop Tool Smarts
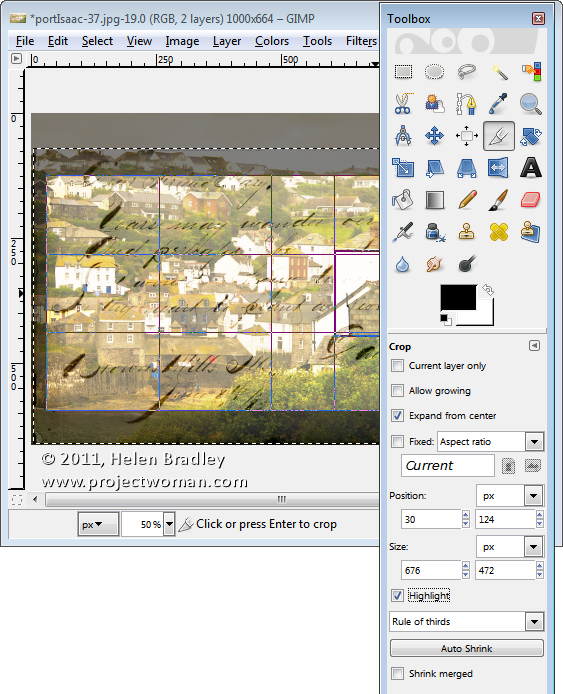
The Crop tool in Gimp includes a range of cool options. When you select it, check out the panel options. You can, for example, crop just the current layer (or all the image) or you can select the crop area from the middle out (rather than drawing from one corner). You can crop to a fixed aspect ratio or a fixed width (height is variable), fixed height (width is variable), or set both height and width. From the list which shows No Guides, you can choose to display a Rule of Thirds overlay, Center lines or Golden Sections to help you create a well composed image. Enable Highlight to see a dark border around the area you plan to crop to.
So, there are my 5 top Gimp tips. It is over to you. What is your favorite Gimp tip to share with others?


i’M SO HAPPY WE MET!