Wednesday, January 30th, 2013

Copy a Channel to a Layer in Photoshop

Want to take a channel and make it into a layer in Photoshop – Easier than you might think, and here’s how…

Sometimes you want to get a high contrast version of your image as a new layer in the image and sometimes the channels palette has just the layer you want. Luckily it is easy to make a channel into a layer.

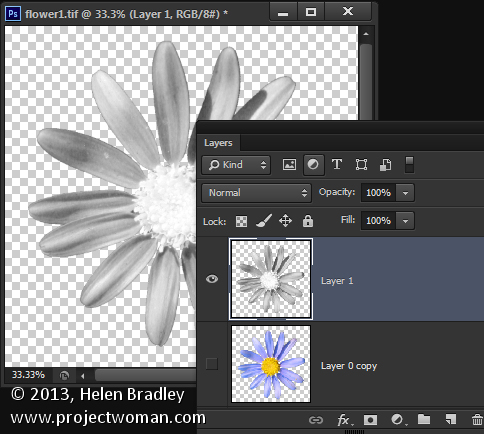
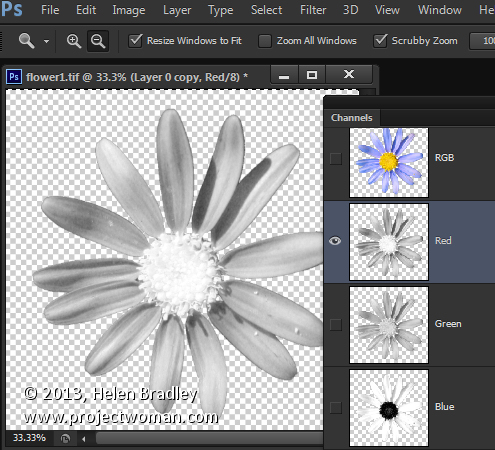
To see this at work open an image – flowers are great for this. Choose Window > Channels and click a channel – typically the Green channel is the best (although for this blue flower red is the best – but that’s unusual). You should see a black and white image.

Press Control + A (Command + A on the Mac) to select the image and press Control (Command) + C to copy it.

Now reselect the RGB channel in the channels layer so you see your image back. This is critical and also the most overlooked step.

Add a new layer to the image by selecting Layer > New > Layer. Click in it and press Control (Command) + V to paste the selection back into the image – it comes in as a new layer. Simple when you know how.


Helen Bradley

Tuesday, September 27th, 2011

Color Correction in Photoshop

One of the most difficult things to do when you’re starting out in digital photography is to recognize and remove a color cast from an image. Not only do you need to work out that you’ve got a color cast, but you also need to find a means of fixing it.

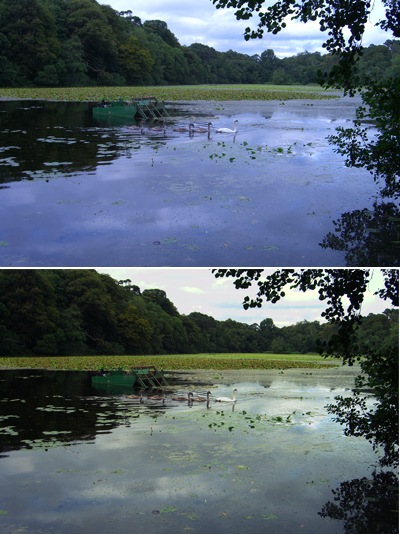
One method of color correction is one that I learned from Photoshop gurus, Dan Margulis and Taz Tally – any errors in this process are mine and not theirs. The process relies on reading data from the image and then adjusting the numbers that the image provides. It’s a way to remove a color cast that is relatively simple and which involves reading and setting RGB values rather than making objective decisions about an image. I’ll show you how to do this using an image shot in the early morning and which is hazy, underexposed and which has very poor color.

Step 1
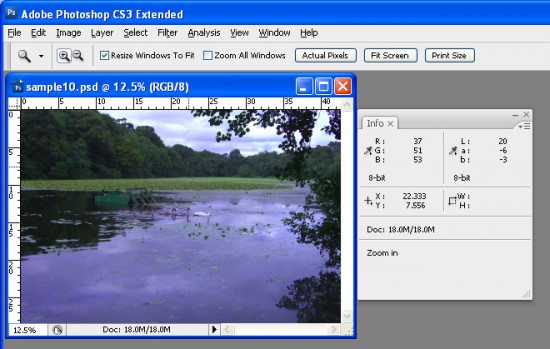
To get started, open an image that you think has a color cast. Choose Window > Info to display the Info palette. This gives you information about the pixels in your image and, if you’re working with a standard photo, you’ll have RGB mode displayed in the upper left corner of the dialog.
Step 2
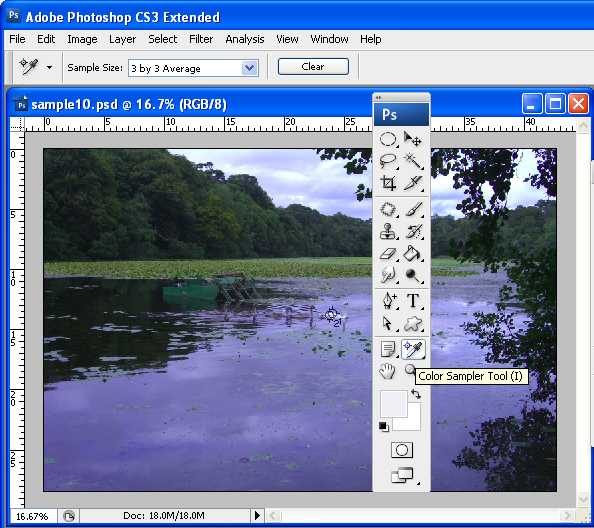
To make the color correction I’ll use the Info palette to display information about the image. To do this I’ll need to make some color sample points on the image and I’ll do this using the Color Sampler tool which shares a toolbar position with the Eyedropper. Click the Color Sampler tool and, from the toolbar, select the 3 x 3 Average Sample. This is important as you’ll want to sample a larger area than just a single pixel.

Step 3
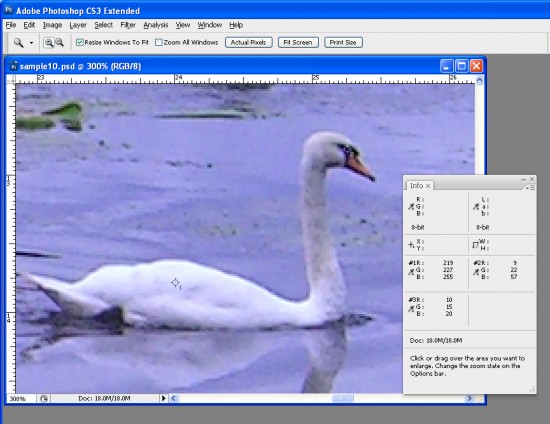
Now locate a place on the image which should be white or a light neutral gray in color. Click on it with the color sampler tool and you’ll see a marker appear on the image with the number 1 beside it. Make sure the point you select is one which should be white or light gray and don’t select an area of the image which is blown out such as a light spot.

Repeat the process, this time clicking on another point which should be either white, black or a neutral gray. This gives you a second sample point. You can continue and add a total of four markers if desired. Each should be placed in an area of the image which should be white, black or a neutral gray.
Step 4
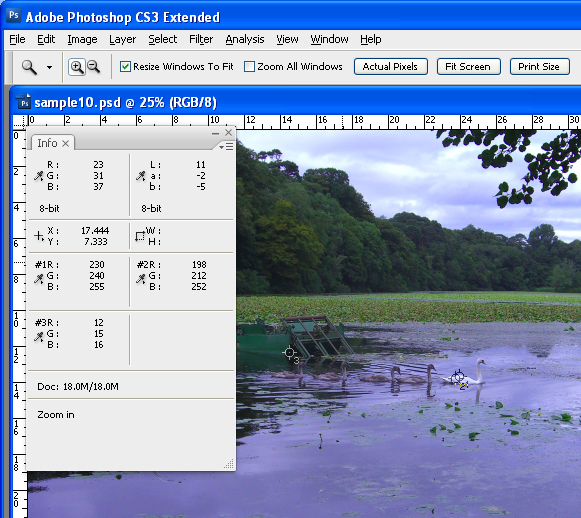
Check back in the Info palette to read the color information for each of these points. For the lightest points you should see values of around 245 for the R, G and B channels. For the darkest points the value should be around 15 for each of the channels. For gray points you should have equivalent values of R, G and B, although they can be any value, they just need to be roughly the same for each.
Step 5
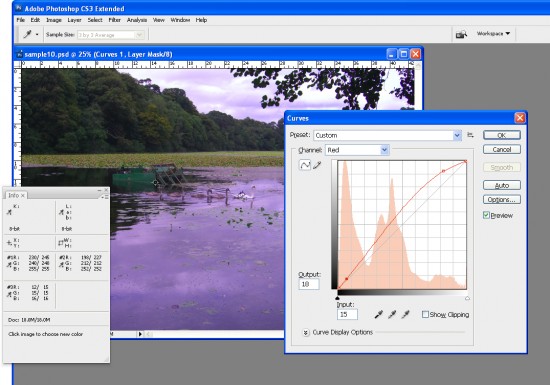
If your image has a color problem you’ll find that the numbers at each point are not within a range of 2 or 3 values of each other. To color correct the image what you’ll do is adjust the curves for each of these channels to bring them closer to each other. Choose Layer > New Adjustment Layer > Curves and click Ok. You’ll be correcting individual channels so from the Channel dropdown list select Red and then Ctrl + Click on the first point that you marked in your image. This adds a small marker on the curve line which shows you where this point in the image appears on the curve.

Identify whether you need to increase or decrease the value at this point. To increase it, drag upwards and to decrease the value drag downwards. You’ll see that you’re not making subjective judgments here; you’re simply adjusting the curve to bring the numbers closer together and closer to the desirable value of 245 for a white point and 15 for a black one.
Step 6
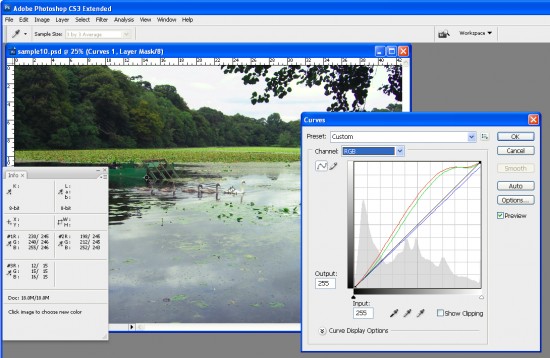
Repeat this last step for all the sample points that you created on the image and then repeat it for the Green and Blue channels so that you end up with all the sample points containing values that are within 2 to 3 values of each other.
Step 7
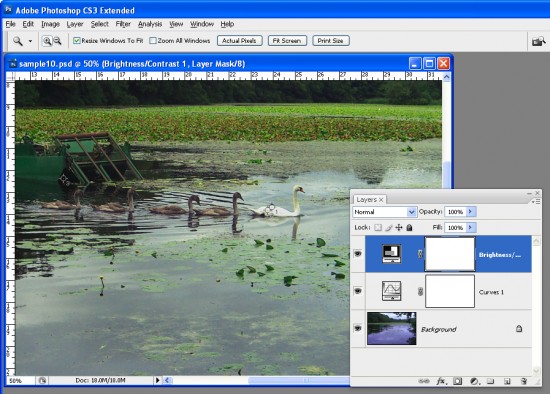
When you’re done, click Ok to close the Curves dialog. You can now apply other fixes such as adding contrast to the image with a further Curves adjustment or use the new Brightness/Contrast tool in Photoshop CS3.

Using the Info palette combined with sample points on the image makes it easier to remove color casts by reading and adjusting numbers.
Helen Bradley

Thursday, October 18th, 2007

Shopping for books by the Seine – No 2

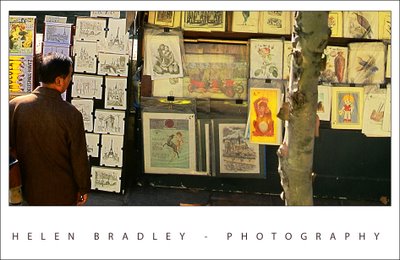
I took yesterday’s image and decided I wanted to look at it another way. So, I cropped it horizontally this time and worked a lot with the colors. I wanted not only to crisp it up but to punch some of the colors.

I’m working on some notes from Dan Margulis from Photoshop World in Las Vegas – his 5 minutes to a picture postcard class.

One of the great tricks I learned there is using the Luminosity channel to add punch to a photo. The idea is to duplicate the main layer in the image and then select this duplicate layer. Then use the Apply Image command. It’s a command most people don’t use because it’s so damn obscure but I’ve used it quite a bit before and I love it. Here you apply a channel such as the Red, Green or Blue to the image but, after you’ve done this, instead of accepting the default blend mode in the Layers palette – which is Normal and which makes the image Greyscale, you use the Luminosity blend mode to take the contrast but drop the color.

It’s a great tool – it’s only one of Dan’s tricks but it is fun to play with. Use the Green channel for portraits and the red channel for skies.

I did a lot to this image to try and recover and enhance the color. I started out by balancing the color to remove the cast. Then used a range of tools including curves and apply image to try to punch up the color.

I quite like the result.

Helen Bradley

Wednesday, February 14th, 2007

5 Hot ways to make grayscale images in Photoshop

There are lots of differnt ways to convert a photo into a grayscale image and each of them offers different benefits such as speed or the ability to customise the results.

Here are five great ways (and one cool extra tip) for making a grayscale image in Photoshop:

(Hot tip) Before you convert an image to black and white, adjust it to ensure there is a good tonal range in the image. Choose Image, Adjustments, Levels and make sure the markers are under the ends of the chart. Adjust the midtones slider (the middle one), until you have a good result. An image with good contrast and a pleasing tonal range will give better results in the steps that follow.

Grayscale – Version 1
The simplest method of converting to Grayscale is to choose Image, Mode, Grayscale. When you do this, you create a grayscale image and color cannot be added back into it unless you convert it back to a color mode. To do this, choose Image, Mode, RGB Color if you plan to do more work with the image. Convert to CMYK color mode only if you intend to send the image for commercial printing.

Grayscale – Version 2
A RGB color image is made up of three color channels Red, Green and Blue. These channels are grayscale images displaying the relative amount of that color in the image at any point. To see the channels, display the Channels palette and click on the channel to view, hiding the others. If you like the grayscale representation of a particular channel display it, hide the rest, and choose Image, Mode, Grayscale and you’ll be asked if you want to discard the remainder of the channels – this turns the current channel into the grayscale image. Answer Yes to do so. To work on the image again in color, choose Image, Mode, RGB Color.

Grayscale – Version 3
Another method of converting an image into grayscale image but which retains the RGB color mode is to choose Image, Adjustments, Hue/Saturation. If you select the Master channel and then drag the Saturation slider to the far left, you’ll remove the color from the image by desaturating it. However, because it is still RGB Color you can add color back without needing to alter the mode.

Grayscale – Version 4
The Channel mixer gives you the opportunity to tweak the final grayscale representation by using more or less of the colors from the image. Choose Image, Adjustments, Channel Mixer and click the Monochrome checkbox. Now adjust the Red, Green and Blue sliders until you get a result you like. Ideally, you should ensure that your percentages add up to 100% although this isn’t a hard and fast rule.

Grayscale – Version 5
One situation you may encounter is where you want to convert a single layer into grayscale but leave the other layers in the image in color. In this case, choose the layer to convert to black and white and choose Layer, New Adjustment Layer, Hue/Saturation and enable the Use previous layer to create clipping mask checkbox and click Ok. Move the Saturation slider to the far left and click Ok.

So, there you have it – more ways to convert an image to black and white than you ever thought possible?

Helen Bradley