Friday, February 19th, 2010

Step 3 Photo-editing workflow – Crop


Use the Crop tool to focus in on your subject and remove unsightly background.

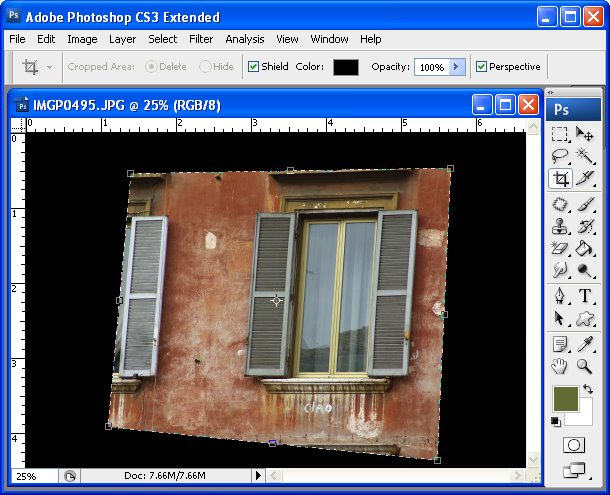
To crop an image and remove the excess, click the Crop Tool on the toolbar and click and drag the crop marquee over the image.

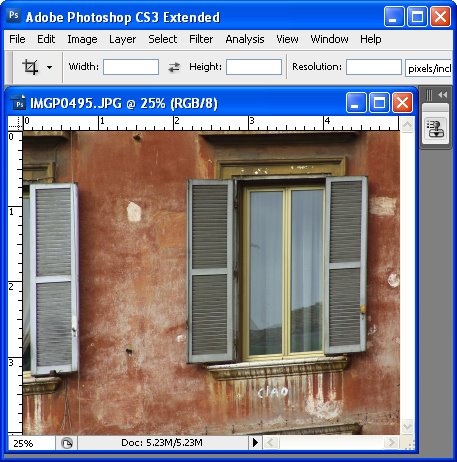
Adjust the edges of the marquee so they surround the portion of the image that you want to retain. Double click on the image to crop the excess away and to leave only the portion of the image that you want to keep.

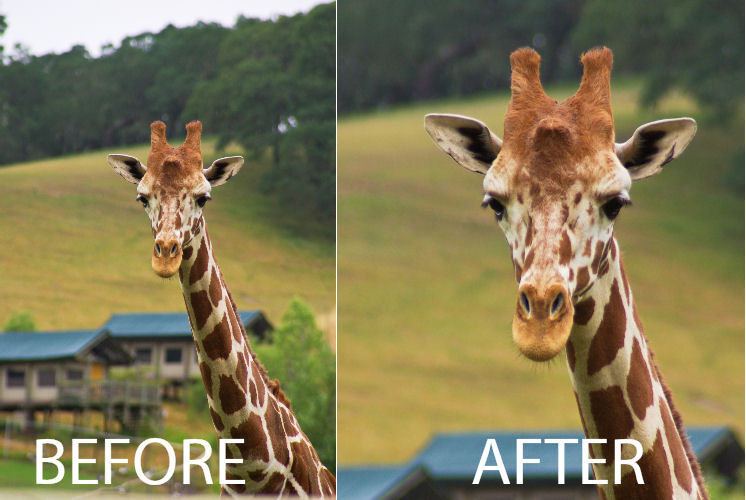
Keep the rule of thirds in mind when you crop your image and, where possible, place the subject off centre for a nicer resulting image.

If your subject is moving such as a car or if it is a person who is looking to the right or the left, make sure to allow plenty of room ‘in front of them’ when you crop.

If you put a moving object too close to the edge of the image it will send your viewer’s eye off the edge of the image in the direction of the movement.

Helen Bradley

Saturday, November 29th, 2008

Smarter Photoshop Crop

Before (above), After (below)

There is more to Photoshop’s crop tool than meets the eye! Read on to learn everything you didn’t know about using it:

Shield color and opacity
When you click the crop tool and drag the crop marquee over an image in Photoshop you will see a shield around the area of the image that will be removed when you commit the change. You can change this shield color from the Tool Options bar to make it any color you want. For example, click in the color selector and make it white, gray, black. You can also Adjust the opacity of this shield to make it, for example, 100% so it totally masks out the unwanted area of the image. This lets you see more clearly the portion of the image you have selected.

Rotate your crop
Rotate the crop marquee by dragging on one of its handles to change the angle of the rectangle and make an angled crop from your image. This way you can make a diagonal crop without having to first rotate the image.

Perspective crop
This option is way too cool! Click the Perspective checkbox on the tool options bar and you can crop an image in perspective. So, drag the corner handles into any four sided shape you like – each corner operates independently of the others when this option is enabled. Then click the Commit button and the unwanted part of the image will be discarded and what remains will be reshaped and deliciously distorted to a rectangle.

You can use this feature to fix keystone perspective problems with images such as tall buildings (which tend to be wider at the base and narrower at the top) or you can use it for creative purposes.

So, next time you select the Crop tool, check out these features and put them to work on your images.

Helen Bradley

Friday, November 21st, 2008

Smarter Photoshop Crop


Before (above), After (below)


There is more to Photoshop’s crop tool than meets the eye! Read on to learn everything you didn’t know about using it:

Shield color and opacity
When you click the crop tool and drag the crop marquee over an image in Photoshop you will see a shield around the area of the image that will be removed when you commit the change. You can change this shield color from the Tool Options bar to make it any color you want. For example, click in the color selector and make it white, gray, black. You can also Adjust the opacity of this shield to make it, for example, 100% so it totally masks out the unwanted area of the image. This lets you see more clearly the portion of the image you have selected.

Rotate your crop
Rotate the crop marquee by dragging on one of its handles to change the angle of the rectangle and make an angled crop from your image. This way you can make a diagonal crop without having to first rotate the image.

Perspective crop
This option is way too cool! Click the Perspective checkbox on the tool options bar and you can crop an image in perspective. So, drag the corner handles into any four sided shape you like – each corner operates independently of the others when this option is enabled. Then click the Commit button and the unwanted part of the image will be discarded and what remains will be reshaped and deliciously distorted to a rectangle.

You can use this feature to fix keystone perspective problems with images such as tall buildings (which tend to be wider at the base and narrower at the top) or you can use it for creative purposes.

So, next time you select the Crop tool, check out these features and put them to work on your images.

Helen Bradley

Saturday, September 8th, 2007

Photoshop World hits Las Vegas

I’m spending the week in Las Vegas taking in all the best that PSW (Photoshop World to those in the know – now you’re included!) has to offer. It’s a great opportunity to take classes from the likes of Scott Kelby, Matt Kloskowski, Jim DiVitale and photographers Moose Peterson, Joe McNally and Vincent Versace.

My best tip and one I’ve seen quite a few instructors embrace is the crop canvas enlargement. It works like this, you use the crop tool to enlarge the canvas – seriously.

To do it, shrink the image down using the Zoom tool then enlarge the window so you have a little image and a big window. Click the Crop tool and drag it on the image, it won’t go any larger than the image right now – don’t panic.

Let go the mouse now drag the crop marquee handles outwards. Do it on all the sides that you need to add canvas. To do it evenly all around, hold the Alt/Option key as you drag on a corner handle. Check your background color as that’s the one that will be used to fill the new area. Press Return/Enter and you’re done.

Wow… one to show your friends just how good you are – you can now use the Crop tool to make an image bigger!

Helen Bradley

Page 2 of 212