Thursday, February 28th, 2013

HDR Presets in Lightroom


Processing an image with HDR presets in Lightroom

As I mentioned in a previous post I am loving working with Trey Ratcliff’s HDR Presets for Lightroom. These presets really rock and for more than just images with great skies.

I have been sorting through a few thousand images I shot in Norway, Sweden and the UK last year and just seeing what is there. I tripped across these two images yesterday and something about them just screamed HDR.

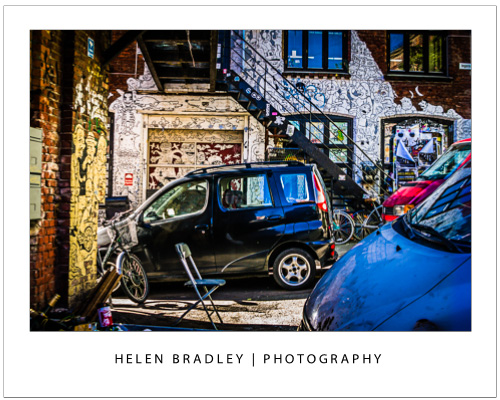
This is the result and I have to say, these images totally rock. In the first, the intensity of the scene is enhanced by the  HDR treatment – it makes this back alley really come to life.

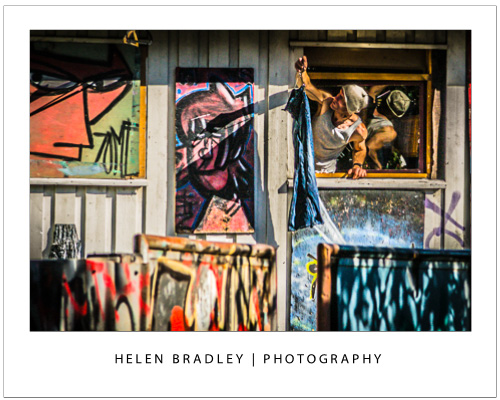
In the lead image for this post, repeated here, I saw something in the HDR version I missed in the original – the guy’s reflection in the window. I  checked back at the original – the reflection is there but it’s not obvious. In this version it is unmistakable and it takes the image from ho hum to wow – it makes it so much more than it was as an unprocessed image.

Now, as with all Lightroom presets there is nothing in the presets that you could not achieve if you adjusted the sliders in Lightroom yourself. However,  these presets are single click fixes – they are quick to apply and they are great.

For me they’ve been an eyeopener and they are helping me to see my images in an entirely new light.


Helen Bradley

Tuesday, August 31st, 2010

Photoshop: Applying Fixes using Adjustment Layers and Masks

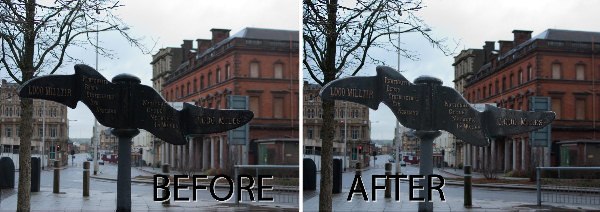
Sometimes a photo need two opposing fixes applied to different areas of the image. This poses a dilemma – if you fix one area you’ll make the other areas far worse than they started out being and vice versa. The solution is to apply both fixes but to do this using adjustment layers and to blend the results together using a mask. Here’s how to do it:
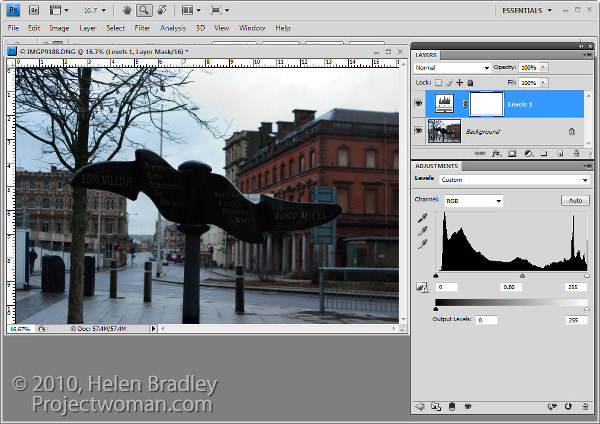
To fix the background of the image, choose Layers > New Adjustment Layer > Levels and adjust the levels to improve the contrast in the lighter areas of the image. Ignore the darker areas of the image as they are not part of this fix.

If desired, you can also adjust the saturation using Layers > New Adjustment Layer > Hue/Saturation.
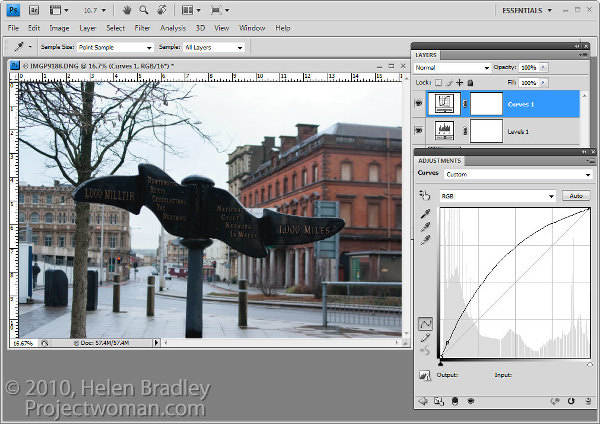
To bring detail out of the darker area in the sign you will use an additional adjustment layer. In the original blog post I used the Shadow/Highlights tool but this is one fix you cannot apply using an Adjustment Layer so you will have to use a different adjustment for this image. I will use a Curves adjustment layer here.

To do this choose Layers > New Adjustment Layer > Curves and adjust the darker end of the curve –on the left side. Drag upwards on the curve line to lighten the shadows.

If you prefer to use another tool, you can do so. However, the important thing is to fix the shadows and ignore any changes to the highlights.

The top adjustment layer contains the adjustment for the darker areas of the image and the bottom adjustment layer(s) contain the adjustment for the lighter areas of the image. To blend these layers, you will use the layer masks attached to the adjustment layers to selectively add the fixes to the image.

Unlike the adjustment layer’s Opacity slider which sets every pixel to the same opacity value, a layer mask lets you adjust the opacity selectively so one area can be 100% opaque and others can be partially or fully transparent.

For this image, as I want to lighten the sign but not anything else, it will be quickest if I start by selecting the sign on the background layer.
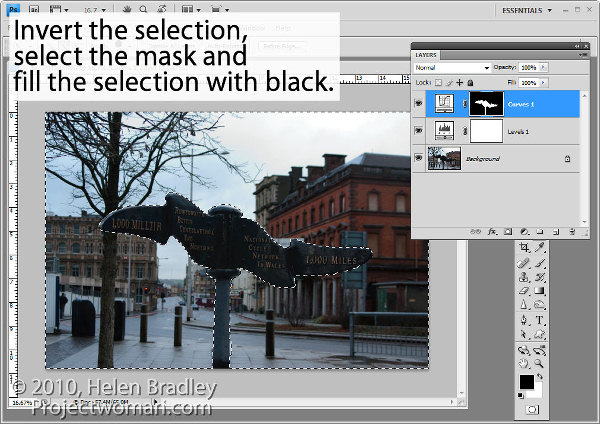
Select the mask on the Curves layer. When you are working with masks remember that “black conceals and white reveals” so painting with white on the mask reveals the adjustment on this layer and painting with black on the mask hides the adjustment.

Press Control + Shift + I (Command + Shift + I on the Mac) to invert the selection so now we have everything except the sign selected. Set the foreground color to black and press Alt + Backspace (Option + Delete on the Mac) to fill the mask except where the sign is with black.

Press Control + D (Command + D) to deselect the selection.
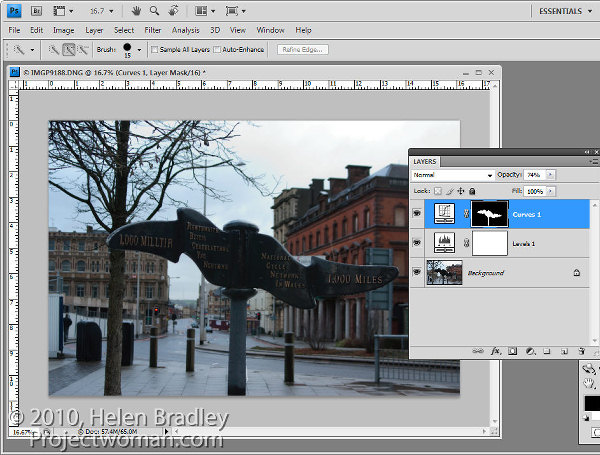
If the fix looks too intense, you can adjust the opacity of the top Curves layer down a little.

When adjusting opacity you may find it easier to judge an ideal value if you drag the Opacity slider to zero and then increase the value until you find a good fix rather than dragging it down from 100% looking for the ideal setting.
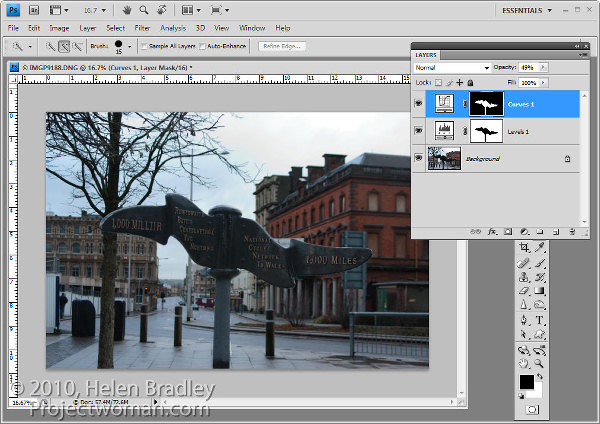
If you want to remove the sign from the Levels adjustment you can do so using an inverse of the layer mask you have already created.

To copy and invert the mask, press Alt + Shift (Option + Shift on the Mac) as you drag the mask from one adjustment layer and drop it on top of the mask on another layer. When prompted to replace the mask, answer Yes. (If you simply want to copy a mask use Control + Alt or Command + Option instead).

If you do this, you’re removing the Levels fix from the pole and you may need to adjust the Opacity of the Curves adjustment layer to compensate for this.
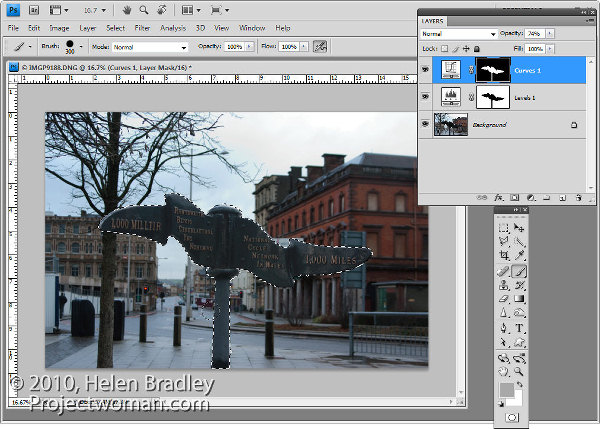
You can also adjust  masks by painting on them in black, white or a shade of grey. Painting in black hides the fix on this layer, painting in white reveals the fix on this layer and painting in grey partially hides the fix.

Here I have Control + Clicked on the mask on the top Curves adjustment layer to select the white areas of the mask, then painted in grey on the mask to hide some of the lightening effect on the pole. By selecting the white area of the mask before painting I limit the paint to only the selected area which lets me work quickly.

If you go too far, switch colors and paint back the effect back.

To finish, I rotated the image to straighten the sign and cropped it to remove the distracting elements on the left side of the image.

Helen Bradley

Tuesday, June 30th, 2009

Lightroom: More Adjustment Brush techniques


You just gotta love the Adjustment brush in Lightroom 2. It makes Lightroom a great tool for quick fixes and, honestly, I’ve used Photoshop a lot less since I started using Lightroom. I love the combination, Lightroom is fast and so smart and Photoshop is there for when I need specialist effects. So, on to today’s post…

In an earlier post I talked about using the Adjustment Brush in Lightroom 2 at a simple level – sort of Adjustment Brush 101. In this post I’ll show you some advanced features of the adjustment brush which help you make multiple adjustments to the image at one time and to do so more easily. Consider this Adjustment Brush 102.


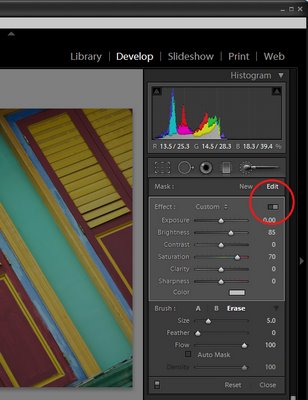
In the Develop module, when you have the Adjustment Brush selected there is a switch that you can click to switch between Button and Slider mode. In button mode you can adjust one of the Exposure Brightness, Contrast, Saturation, Clarity and Sharpness settings at a time. In Slider mode, you can adjust any one or more of these options.


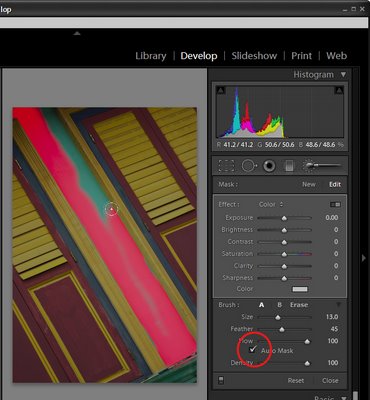
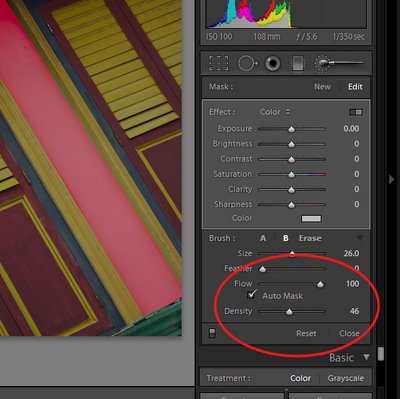
In the Brush area of the panel you will see an AutoMask option. When this is enabled, you can paint around the inside edge of an area and the AutoMask feature will mask the area ensuring your brushstrokes don’t go over the edge. This works best on areas where the edge is distinct and recognizable. When you paint, make sure you have the main part of the paint brush inside the area you want to effect.

To toggle between AutoMask being on or off as you paint, hold the Control key as you paint (Command on the Mac).


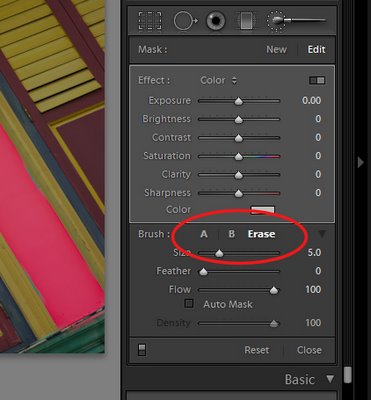
In the Brush area you will see two brushes, A and B. You can switch between the two by clicking on the A or B indicator. Each brush has its own Size, Feather, Flow and Density settings, and AutoMask can be enabled for either or both of the brushes. Having two brushes lets you configure each differently and switch easily between the two.

Each brush can be switched into the third brush mode – Erase mode by holding the Alt key (Option on the Mac) as you paint with either brush.


Setting the brush size defines the area of the brush and it is the central circle which you see when you are painting. The Feather amount adds an additional softness to the brush which is shown by the second outer circle. A hard brush has a Feather of 0 and it shows as a single circle.

Flow specifies the flow for the brush which can be set to less than 100 so you can build up an effect gradually by painting over an area multiple times. The Density slider adjusts the opacity and controls the maximum opacity of the brush strokes. So, if you have Flow set to a low value and Density to 50, the maximum opacity that the brush can reach regardless of how many times you paint over an area is 50.


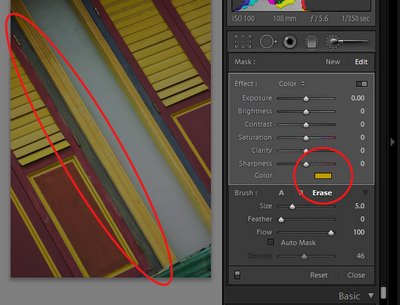
In the Effect area is a Color option which allows you to paint over an image with a color of your choice. To do this, select the color to use and then paint over the area to apply it to. You can use this to colorize a black and white image or, as I’ve done here, paint over a dark blue area with yellow to make it dark green.

Tip: Interested in learning more about Lightroom? Check out my post on understanding Clarity, Vibrance and Saturation in Lightroom 2.

Helen Bradley