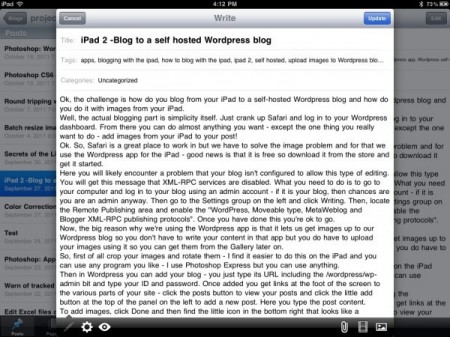
Ok, the challenge is how do you blog from your iPad to a self-hosted WordPress blog and how do you do it with images from your iPad?
Well, the actual blogging part is simplicity itself. Just crank up Safari and log in to your WordPress dashboard. From there you can do almost anything you want – except the one thing you really want to do – add images from your iPad to your post!
Ok. So, Safari is a great place to work in but we have to solve the image problem and for that we use the WordPress app for the iPad – good news is that it is free so download it from the store and get it started.
Then in the WordPress app you can add your blog – you just type its URL including the /wordpress/wp-admin bit and type your ID and password. You only do this once.
Here you will likely encounter a problem that your blog isn’t configured to allow this type of editing. You will get this message that XML-RPC services are disabled.
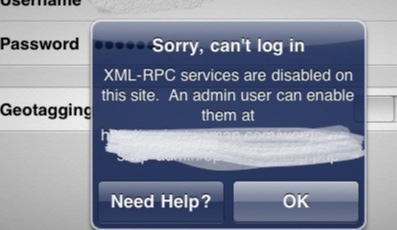
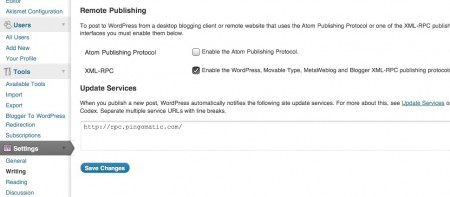
What you need to do is to go to your computer and log in to your blog using an admin account – if it is your blog, then chances are you are an admin anyway. Then go to the Settings group on the left and click Writing. Then, locate the Remote Publishing area and enable the “WordPress, Moveable type, MetaWeblog and Blogger XML-RPC publishing protocols”. Once you have done this you’re ok to go and your blog will be added to the WordPress app. If you have multiple blogs you can add more than one, which is smart.
Now, the big reason why we’re using the WordPress iPad app is that it lets us get images up to our WordPress blog so you don’t have to write your content in the app but you do have to upload your images using it so you can get them from the Gallery later on.
So, first of all crop your images and rotate them – I find it easier to do this on the iPad and you can use any program you like – I use Photoshop Express but you can use anything.
Now click on your blog name to get access to your WordPress site on your server. You will see some links at the foot of the screen which take you to the various parts of your site – click the Posts button to view your posts and click the little Add button at the top of the panel on the left to add a new post. Here you type the post content.

To add images, click Done and then find the little icon in the bottom right that looks like a landscape image – click it and add images from your Camera Roll.
Regardless of where you are when you do this all the images go one after the other into the post… this is the sucky part but it really is a small issue – at least they are there!
Before you leave the WordPress iPad app, click Done and click the Settings button (bottom Left) and set a Schedule for the post – I make this a day or more but at least an hour so ahead of time so I have enough time to fix the image issue back in WordPress in Safari before everything goes live.
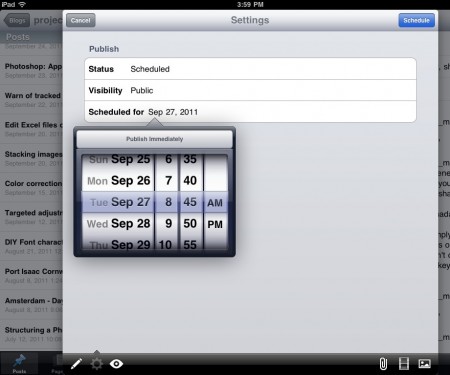
Now, still in the WordPress app, go ahead and Upload and Update everything. Then go back to Safari and log in to your blog.
By the way, I haven’t mentioned it yet, but it really helps to have one of those bluetooth keyboards so you have arrow keys and you can use shortcuts to copy and paste and select stuff. It beats working with your fingers on the screen – if you’re serious about blogging on the iPad you really need one. I use the Zagg one which I really like.
Back in WordPress on Safari I just delete all the code which has been added for the images as they are seldom where I want them to be. Now I move into position in the post and add the images using the regular WordPress Add Image button – the pictures are all in the Gallery – thanks to the WordPress app.
In WordPress in Safari I can do things like add Captions and descriptions and scale any image that need resizing.
On a scale of 1 to 10 it would be easier to be able to do everything from inside Safari or inside the WordPress app but I wouldn’t call this difficult or unnecessarily cumbersome. I can live with the slight workaround for the sake of being able to blog with images from the iPad in WordPress to a self hosted blog.
I’d rate it around a 7/10 ease of use and functionality and I love it. In fact this is the last big issue I’ve had with the iPad and not being able to blog to my WordPress blogs would have been a deal breaker for me. I need to be able to blog on the road and I want to do this with images – in particular as I am doing an apple a day blog over at my design site and looking at heaps of cool iPad apps so not being able to include images would be horrible!
Helen Bradley
