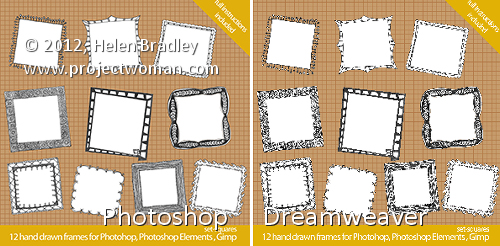
In the images above, you can see that the image on the right looks appalling in comparison with that on the left.
The two images are the same size but the one on the left was scaled down from a large size in Photoshop and the one on the right was scaled down by downsizing it in Dreamweaver.
The results are a great example of why you should never downsize an image in a web editor instead of a graphics program! The resized version on the right is downright nasty in comparison to the one on the left.
If you need to scale down your images – these were reduced from 2,376 x 2,376 pixels in size to 300 x 300 – then it’s vital that you use a proper tool to do so.
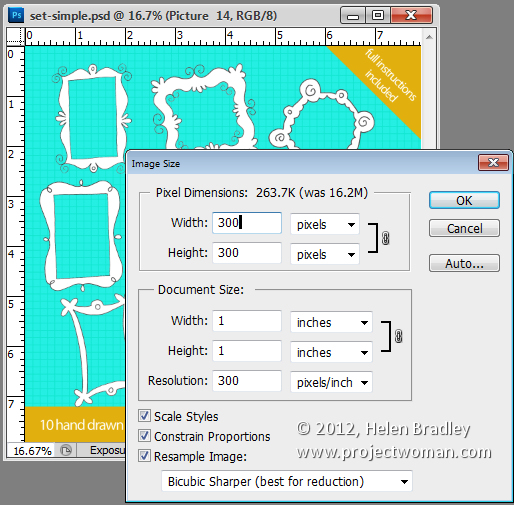
Photoshop has an image resize tool which you can get to by choosing Image > Image Size. Type the width and height of the finished image and then from the Resample image dropdown list select Bicubic Sharper (Best for Reduction). If you compare the results with different settings, you’ll see that the Bicubic Sharper typically gives the best result for downsizing images.

When you use this option the resulting images look as good downsized as they do on the screen in front of you.
Downsize them, save them and then import them into Dreamweaver and use them at that size. You will love your images a lot better when you do this.


Post a Comment
Please feel free to add your comment here. Thank you!