In a previous post, I explained how to create panels for Photoshop using Configurator. This time I want to show you a way to structure panels as something more than just a place to put the tools you use most often.
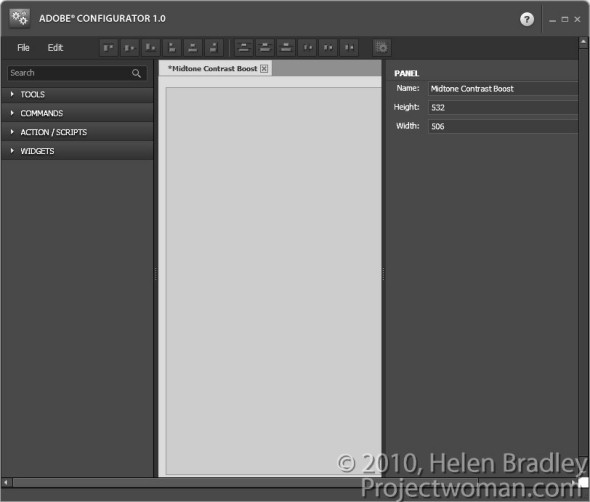
To follow along, you’ll need to download Adobe Configurator 1.0 if you’re using Photoshop CS4 or Adobe Configurator 2.0 if you’re using CS5. You can find both programs for downloading at http://labs.adobe.com/technologies/configurator/. Panels created using Configurator 1.0 only work in Photoshop CS4 so, if you’re using CS5, you must download the new Configurator 2.0. To get started, launch Configurator and choose File > New Panel to create a new panel.
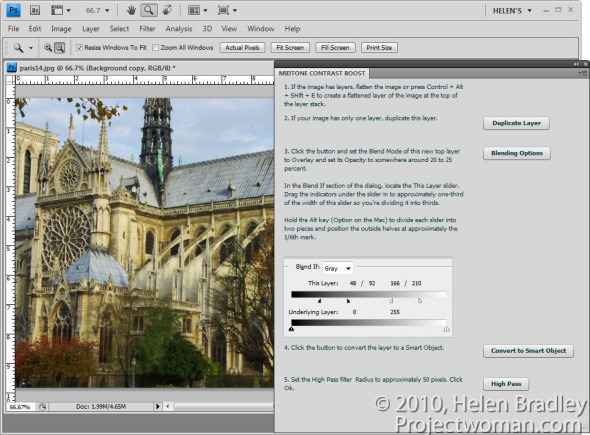
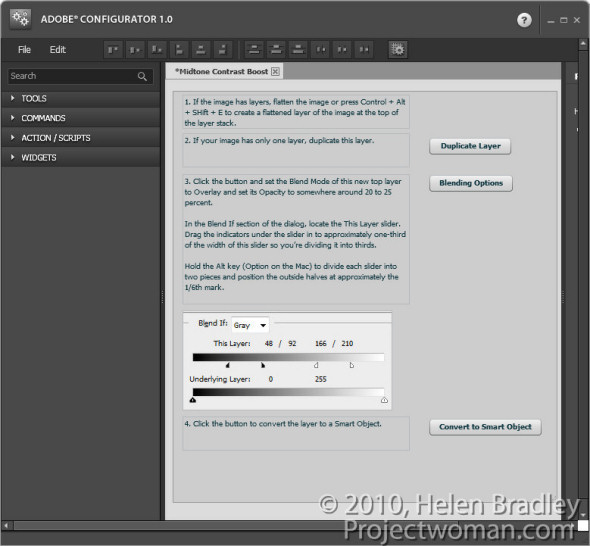
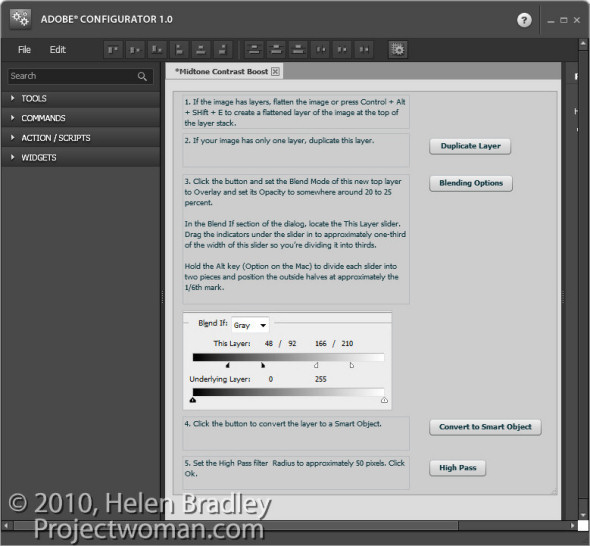
The panel I’ll show you how to create will step you through the process of enhancing midtone contrast in Photoshop that I discussed in a previous blog post. It will contain not only buttons that you press but also text that explains the workflow. You can get the instructions for your panel from the steps in that post.
1 Set the panel title to read Midtone Contrast Boost and size the panel so it is quite large.
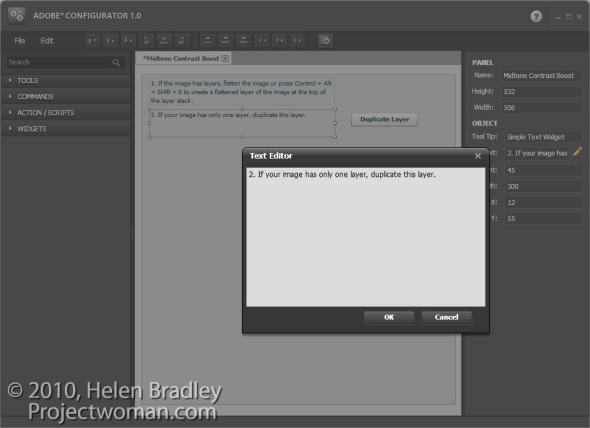
2 The first step in the midtone contrast workflow is to ensure that you have a flattened image or and, if not, you should flatten it. Open the Widgets area in Configurator and double click Simple Text to add a textbox to the panel.
Type number 1 and then the instructions for the first step into the text box.
Add a Simple Text box for the instructions for the second step. If you need to duplicate the background layer then this can be done using a button so add one to the panel by choosing Commands > Layer > New > Duplicate Layer/Group and drag the button onto the panel. Rename this button by typing a new entry in its caption property.
3 Add the instructions for the third step which are to adjust the opacity, blend mode and blending options for the layer. This can all be done with one command so you can add a button to launch the Layer Style dialog at the Blending Options area. To find this button choose Layer > Layer Style > Blending Options and drag the button into position.
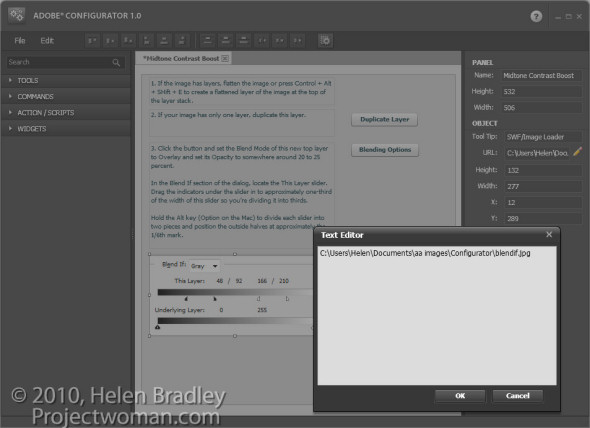
You can also add images to the panel illustrating crucial steps. For example, you could take a screen grab of the Blending Options dialog, crop it to show only the relevant portion of the dialog and save it as a JPG image. Make a note of the image’s width and height in pixels. To add the image to your panel, double click the SWF/Image Loader widget to add it. In the URL box, type the location of the image on your disk. Set the width and height of the Image Loader to match the width and height of the image and position the image in the panel.
4 The next step of the midtones contrast process is to convert the layer to a Smart Object. Add an explanation of this process to your panel and add a button to perform the task by choosing Commands > Layer > Smart Objects > Convert to Smart Object.
5 The next step is again a command, so choose Commands and then Filter > Other > High Pass and drag that command button into the panel. Add a textbox explaining this step.
To line everything up, select each of the textboxes in turn and select an appropriate alignment option from the toolbar.
Once you’ve completed your panel, save the design by choosing File > Save Panel. Saving the design means you can come back at a later date and alter the panel if required.
Export your panel to use in Photoshop by choosing File > Export Panel, select your Panels folder and click Ok.
When you next open Photoshop, you can load your panel by selecting Window > Extensions and click the panel’s name.
Panels like this, which step you through a process, are a handy way to document processes that you want to remember and use. They can also be shared with others as a learning tool.
6 Always test your panel once you have created it to make sure that it works as expected. If it needs to be changed, return to Adobe Configurator, open your saved panel file, make the changes, save it again and then re-export the panel. Back in Photoshop, close the panel and reopen it to get access to the changed form.


