Tuesday, July 12th, 2011

Structuring a Photoshop workflow with Configurator

In a previous post, I explained how to create panels for Photoshop using Configurator. This time I want to show you a way to structure panels as something more than just a place to put the tools you use most often.

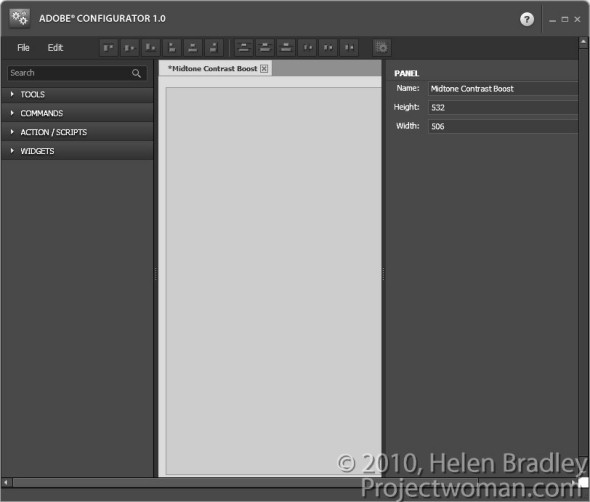
To follow along, you’ll need to download Adobe Configurator 1.0 if you’re using Photoshop CS4 or Adobe Configurator 2.0 if you’re using CS5. You can find both programs for downloading at http://labs.adobe.com/technologies/configurator/. Panels created using Configurator 1.0 only work in Photoshop CS4 so, if you’re using CS5, you must download the new Configurator 2.0.  To get started, launch Configurator and choose File > New Panel to create a new panel.

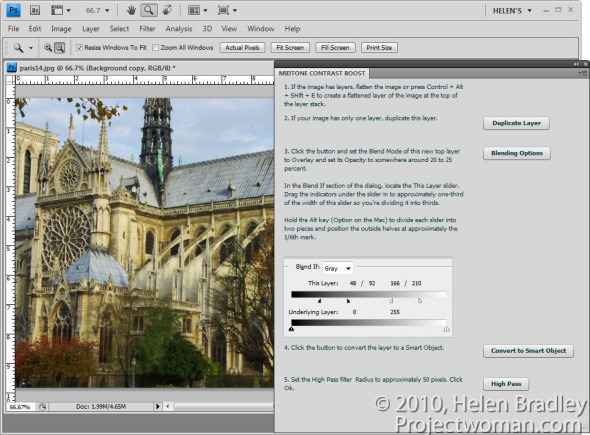
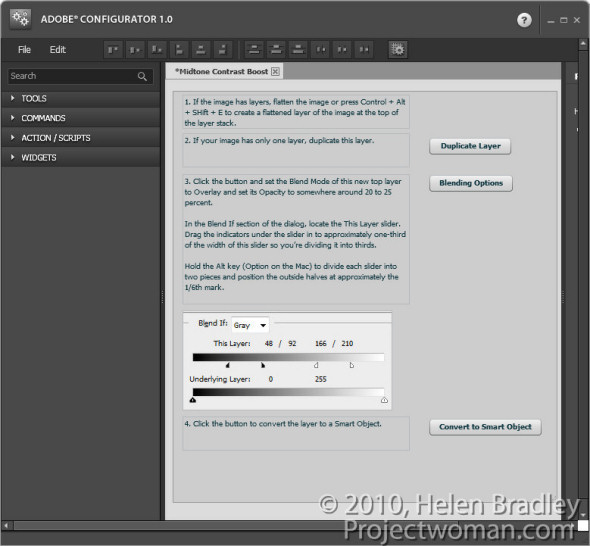
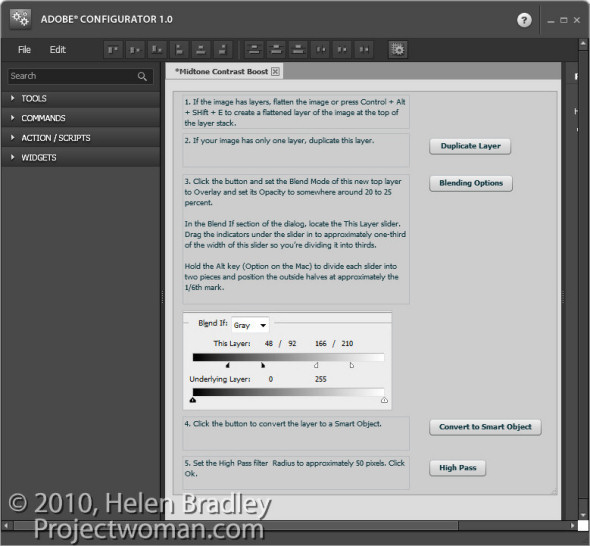
The panel I’ll show you how to create will step you through the process of enhancing midtone contrast in Photoshop that I discussed in a previous blog post. It will contain not only buttons that you press but also text that explains the workflow.  You can get the instructions for your panel from the steps in that post.

1          Set the panel title to read Midtone Contrast Boost and size the panel so it is quite large.

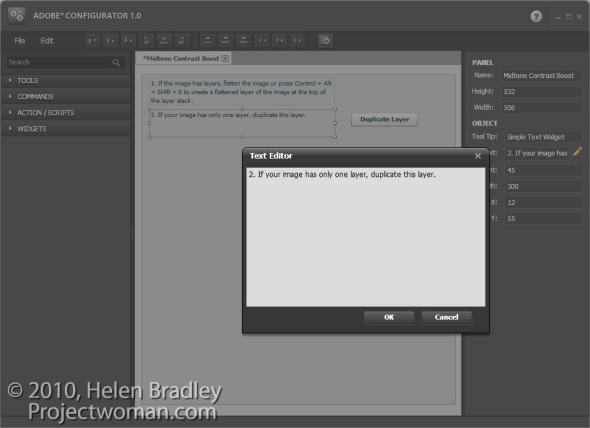
2 The first step in the midtone contrast workflow is to ensure that you have a flattened image or and, if not, you should flatten it. Open the Widgets area in Configurator and double click Simple Text to add a textbox to the panel.

Type number 1 and then the instructions for the first step into the text box.

Add a Simple Text box for the instructions for the second step. If you need to duplicate the background layer then this can be done using a button so add one to the panel by choosing Commands > Layer > New > Duplicate Layer/Group and drag the button onto the panel. Rename this button by typing a new entry in its caption property.

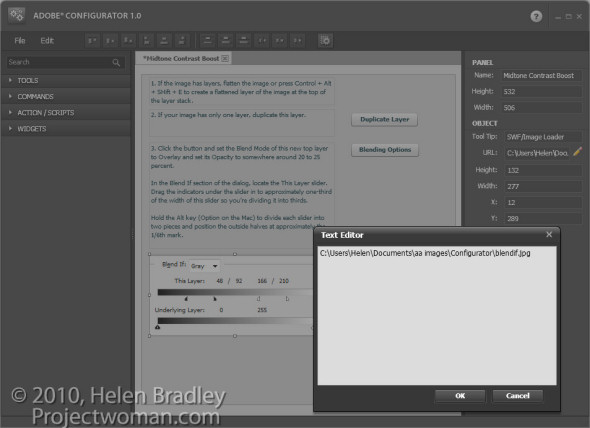
3 Add the instructions for the third step which are to adjust the opacity, blend mode and  blending options for the layer. This can all be done with one command so you can add a button to launch the Layer Style dialog at the Blending Options area. To find this button choose Layer > Layer Style > Blending Options and drag the button into position.

You can also add images to the panel illustrating crucial steps. For example, you could take a screen grab of the Blending Options dialog, crop it to show only the relevant portion of the dialog and save it as a JPG image. Make a note of the image’s width and height in pixels. To add the image to your panel, double click the SWF/Image Loader widget to add it. In the URL box, type the location of the image on your disk. Set the width and height of the Image Loader to match the width and height of the image and position the image in the panel.

4 The next step of the midtones contrast process is to convert the layer to a Smart Object. Add an explanation of this process to your panel and add a button to perform the task by choosing Commands > Layer > Smart Objects > Convert to Smart Object.

5 The next step is again a command, so choose Commands and then Filter > Other > High Pass and drag that command button into the panel. Add a textbox explaining this step.

To line everything up, select each of the textboxes in turn and select an appropriate alignment option from the toolbar.

Once you’ve completed your panel, save the design by choosing File > Save Panel. Saving the design means you can come back at a later date and alter the panel if required.

Export your panel to use in Photoshop by choosing File > Export Panel, select your Panels folder and click Ok.

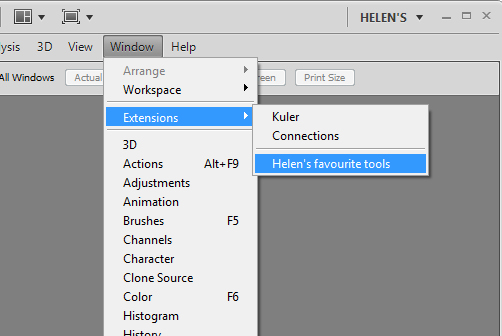
When you next open Photoshop, you can load your panel by selecting Window > Extensions and click the panel’s name.

Panels like this, which step you through a process, are a handy way to document processes that you want to remember and use. They can also be shared with others as a learning tool.

6 Always test your panel once you have created it to make sure that it works as expected. If it needs to be changed, return to Adobe Configurator, open your saved panel file, make the changes, save it again and then re-export the panel. Back in Photoshop, close the panel and reopen it to get access to the changed form.

Helen Bradley

Friday, December 3rd, 2010

DIY Photoshop Panels using Adobe Configurator

Most users don’t realize that you can create your own custom panels for Photoshop CS4 and for the new CS5. You do this using a free download called Adobe Configurator. In this post, I’ll show you how to get started making your first Photoshop CS4 panel using Configurator 1.0.

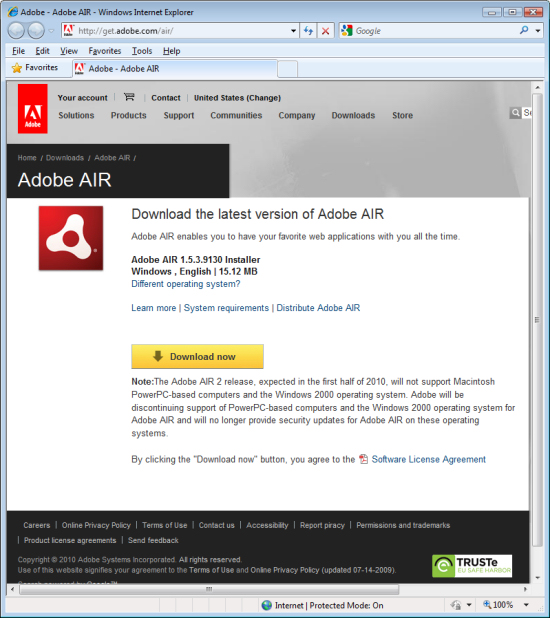
To make your panel you need to make sure that you have AIR installed. If not, visit http://get.adobe.com/air/, download and install it.

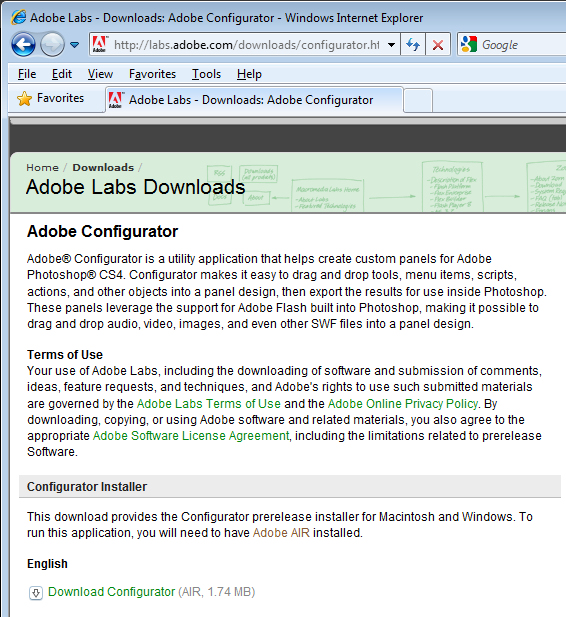
You then need to download the version of Configurator compatible with your operating system and your Photoshop version. Find your version at http://labs.adobe.com/downloads/configurator.html and install it.

Launch Configurator if it does not start automatically once installed.

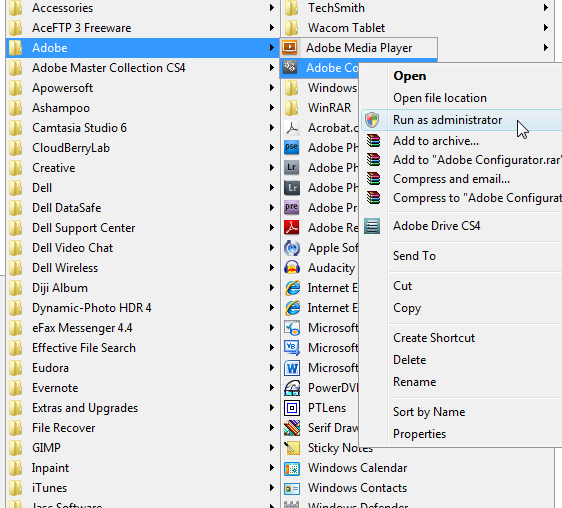
If you are using Windows Vista or Windows 7 you must run the program as administrator – if you do not do so, you will have difficulty saving your panels in the correct location. So, if you are using either of these operating systems, close Configurator, return to your Programs menu, locate Configurator, right click it and choose Run as Administrator. Of course, you’ll need to be using an administrator account to do this.

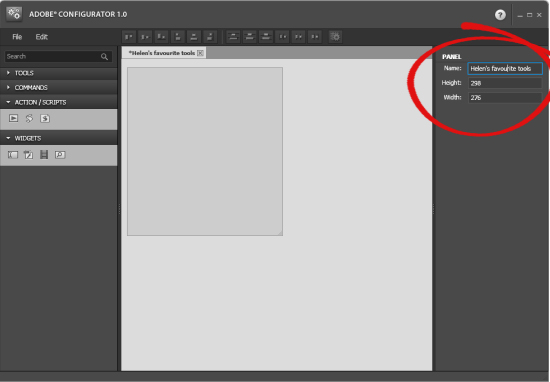
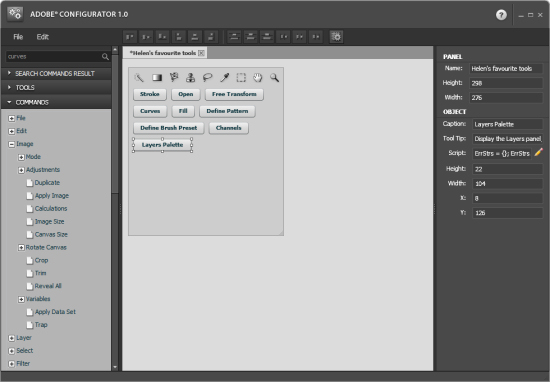
Inside Configurator, choose File > New Panel to create your new panel. The panel doesn’t have a title and it is the default size. On the right of the screen, type a title for the panel and either type a new size or alter its size by dragging on the sizing marker in the bottom right corner of the panel.

On the left are lists of tools and commands as well as action scripts and widgets that you can add to your panel.

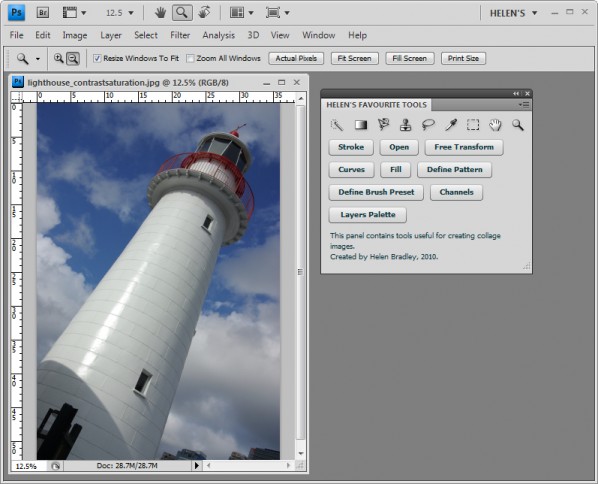
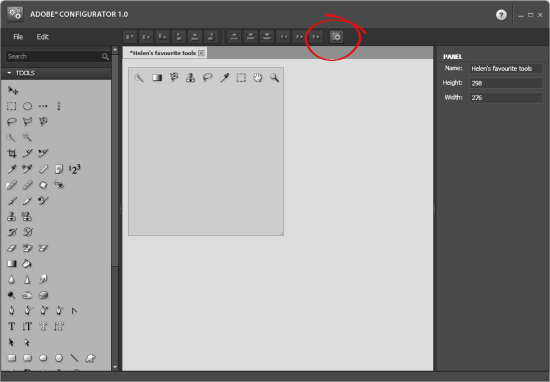
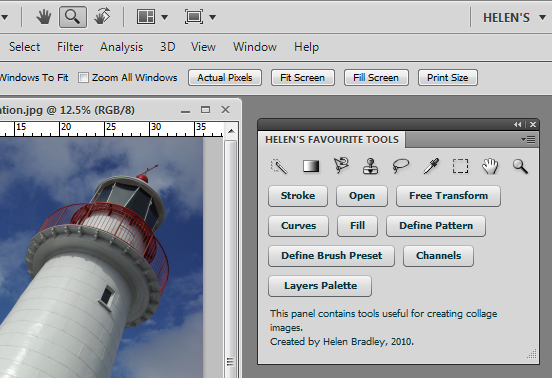
For now go to the Tools list, and drag and drop the tools that you want to include on your panel onto it. For example, if you do a lot of collage work, you can add tools such as the Rectangular Marquee, Lasso Tool, Brush, Clone Stamp, Gradient Tool and all the other tools you regularly use. If you use both the Lasso Tool and the Magnetic Lasso Tool, drag both into your panel as each tool is separate and not stacked as a group as they appear on the regular tool panel.

To align them, click the Auto Layout button on the toolbar.

You can also add menu items to the panel by selecting them from the Commands panel. Open up each menu name in turn to view the commands available. Drag and drop those you want access to onto your panel. Each of these installs as a button.

Change the size of the button by dragging on its sizing handles or adjust its height and width in the panel on the right. You can also change the button caption and tool tip.

Add those commands that make sense for the panel that you’re creating.

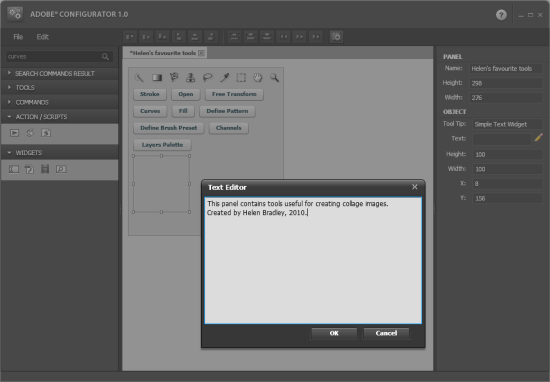
For now, we’ll ignore Action/Scripts and all Widgets except Simple Text. Open the Widgets panel, select Simple Text and drag and drop it into your panel.

Use this control to add some descriptive text to your panel. To do this, click the pencil icon in the right hand panel to open the text editor and type your text into it.

Size and place the text in position. Arrange your panel items by clicking the Auto Layout button.

If you have two or more items selected you can use the other alignment tools on the toolbar to align their edges, centers and so on.

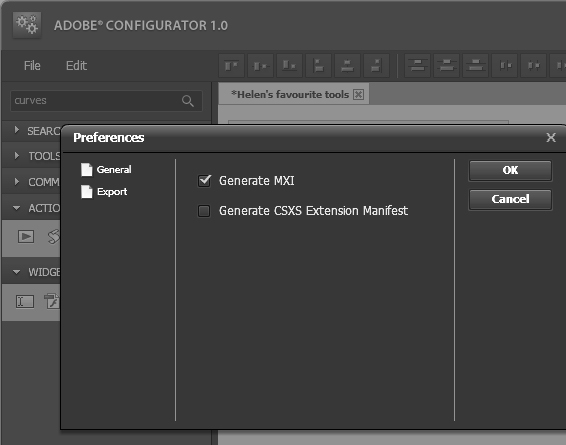
When you are done, select Edit > Preferences > Export and make sure Generate MXI is selected. If you choose Generate CSXS Extension Manifest, you can create your panel as a file that you can share with others. For now, Generate MXI is all you need.

Choose File > Save Panel as and save your panel layout as a .gpc file. You will need this if you want to come back later and edit your panel as you cannot edit the exported panel files.

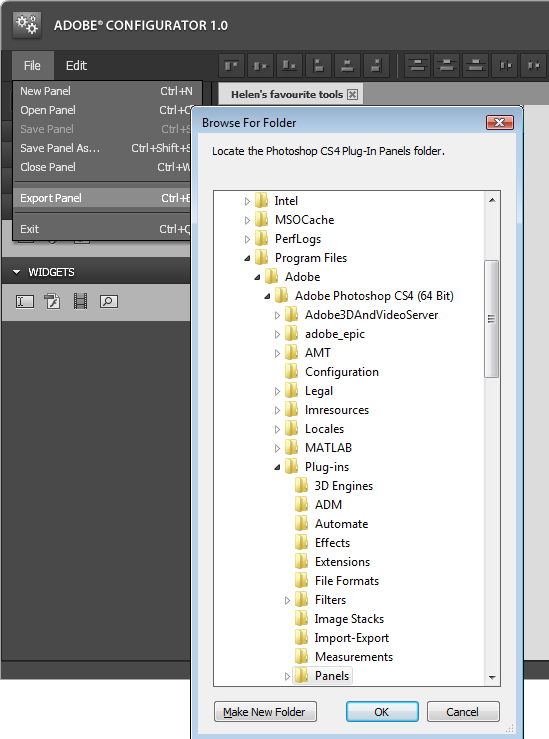
To export your panel in a format that is compatible with Photoshop, choose File > Export Panel and select the your Adobe\Adobe Photoshop CS4\Plug-ins\Panels folder (or the equivalent folder on your Mac).

This is where you’ll strike problems if you are using Windows Vista or Windows 7 and if you do not have administrator privileges because you won’t be allowed to save the files in that folder.

Click Ok and your panel files will be saved to the Panels folder and you’ll see a message confirming this.

Close Photoshop and then reopen it. You’ll find your panel by selecting Window > Extensions and your panel will be listed in the extensions list. Select the panel and it will open and appear as a Photoshop panel.

You can create multiple panels, each for a different purpose. For example, one panel may have all the tools you need for creating collages and another for making vector selections

In a future post, I’ll go into more detail about some of the other elements that you can add to custom Photoshop panels and how you can create panels that support typical workflows and that you can share with others as teaching tools. In the meantime, have fun creating your first panel.

Helen Bradley