Saturday, March 10th, 2012

Pixel Bender Droste Filter video tutorial

I work for Practical Photoshop mag in the UK which is a totally cool job. One of the projects I did recently is creating a spiral image using the Droste filter for the Pixel Bender extension for Photoshop CS4 & CS5 – try saying that quickly 5 times!

The guys at the mag – Ben and James have added my video tutorial to the magazine’s YouTube channel. Here is the video in all its glory and I highly recommend you subscribe to the channel there are some terrific tutorials there (if I say so myself!):

Helen Bradley

Friday, September 23rd, 2011

Photoshop: Applying fixes using masks

Sometimes a photo needs two opposing fixes applied to different areas of the image. This poses a dilemma – if you fix one area you’ll make the other areas far worse than they started out being and vice versa. The solution is to apply both fixes but to do this on different layers and to blend the results together using a mask. Here’s how to do it:

Look at this photo – the sign in the middle is dark and hard to read and the area behind it is lighter than it should or could be. The camera has exposed primarily for the lighter areas in the image but the entire image needs work.

Step 1

Make multiple duplicate layers

To fix the image make two copies of the background layer so that you do your work on duplicate layers. To do this, right click the Background layer in the Layers palette and choose Duplicate Layer and then repeat this step a second time. Disable the visibility icon on the topmost layer and select the middle layer.

Step 2

Using Shadow/Highlights to lighten the darks

To bring detail out of the darker area in the sign, I’ll use the Shadow/Highlights tool. To do this choose Image > Adjustments > Shadows/Highlights and adjust the Shadows but leave the highlights settings untouched. Typically the default setting will be all you need but you can fine tune the settings using the sliders which appear when you click Show More Options if desired. Ignore the impact that this fix has on the lighter areas of the image.

If you prefer to use another tool for this fix, do so. The important thing is to fix the shadows and ignore any changes to the highlights.

Step 3

Levels to fix the highlights

Enable the visibility icon on the top layer and select the top layer – this hides all the changes you have made so far. Choose Image > Adjustment > Levels and adjust the levels to improve the contrast in the lighter areas of the image – this time ignore the darker areas entirely as they are not part of this fix. You can also adjust the saturation using Image > Adjustments > Hue/Saturation if desired.

Again, if you prefer to use another tool, do so. The important thing is to fix the highlights and ignore any changes to the shadows.

Step 4

Blending the results with a mask

The top layer contains the adjustment for the lighter areas of the image and the middle layer contains the adjustment for the dark areas of the image. To blend these layers, I’ll use a layer mask to selectively adjust the opacity of the top layer so I can see the fix applied on the middle layer through it.

Unlike the layer opacity slider which sets every pixel to the same opacity value, a mask lets you adjust the opacity selectively so one area can be 100% opaque and others can be partially or fully transparent.

To add a mask to the top layer, first select the topmost layer and click the Add Layer Mask button at the foot of the layer palette. This adds a white layer mask to this layer. When working with masks, “black conceals and white reveals” so the white mask reveals everything on the top layer and the image is unchanged.

Step 5
Set the foreground color to black, select a soft round brush and set its Opacity to approximately 20%. Click on the mask to select it – it will have a small border around it showing that you have it selected. Now paint over the darkest areas of the image to reduce the opacity of the top layer where you are painting – this reveals the fix from the layer below. Using a low opacity brush lets you reduce the opacity gradually to build up the effect.

Continue and paint over the darker areas of the image to reveal more of the layer below through the mask. It can help to see how much more detail you can still recover if you turn the visibility of the top layer on and off. Make sure to select the layer mask again before painting on the mask – if you don’t do this, you’ll paint on your image.

If you go too far, make white your foreground color and paint on the mask to bring back parts of the top layer of the image. This is one of the benefits of using a mask – simply by painting you can apply or remove the fix. You wouldn’t have this flexibility if you used the Eraser tool on the top layer, for example.

To finish, I rotated the image to straighten the sign and cropped it to remove the distracting elements on the left side of the image.

Helen Bradley

Tuesday, July 12th, 2011

Structuring a Photoshop workflow with Configurator

In a previous post, I explained how to create panels for Photoshop using Configurator. This time I want to show you a way to structure panels as something more than just a place to put the tools you use most often.

To follow along, you’ll need to download Adobe Configurator 1.0 if you’re using Photoshop CS4 or Adobe Configurator 2.0 if you’re using CS5. You can find both programs for downloading at http://labs.adobe.com/technologies/configurator/. Panels created using Configurator 1.0 only work in Photoshop CS4 so, if you’re using CS5, you must download the new Configurator 2.0.  To get started, launch Configurator and choose File > New Panel to create a new panel.

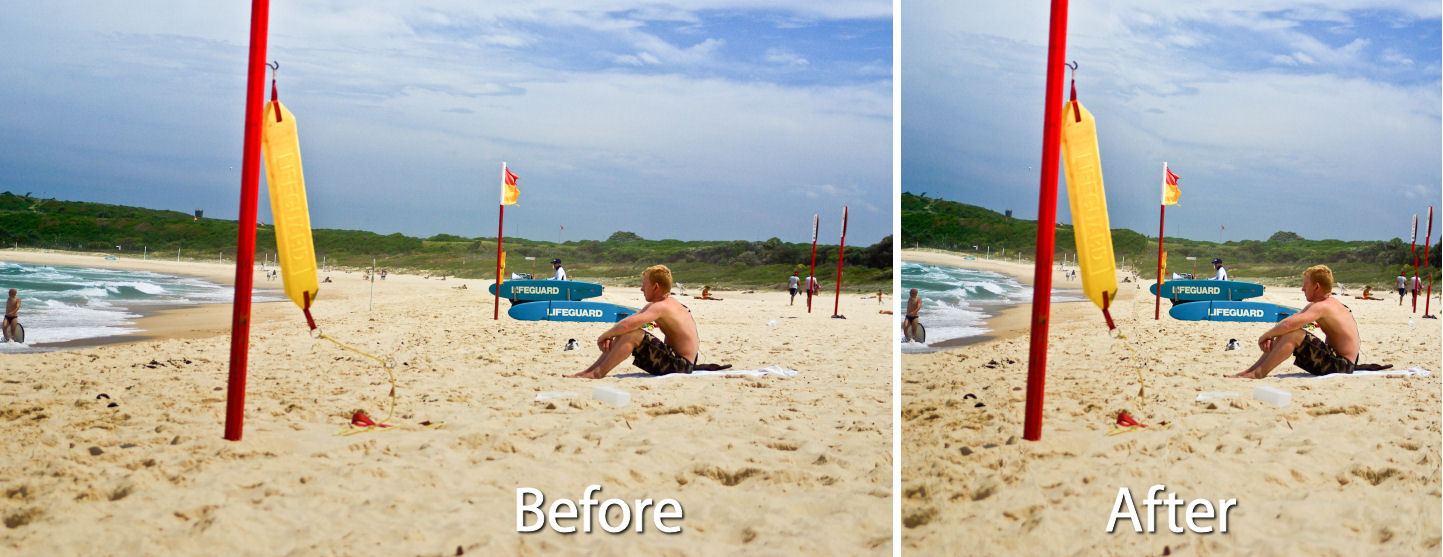
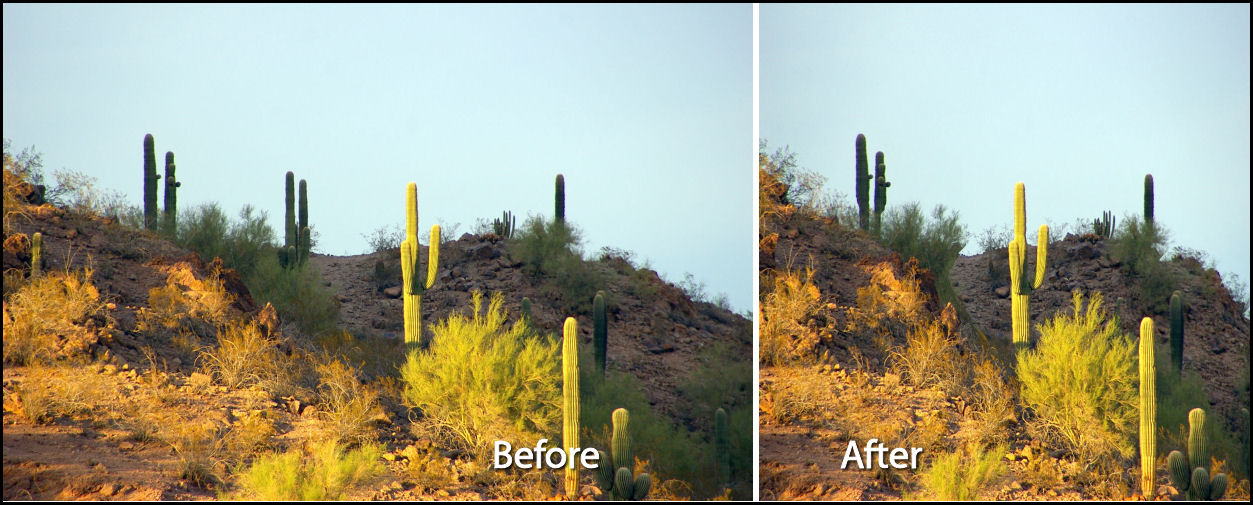
The panel I’ll show you how to create will step you through the process of enhancing midtone contrast in Photoshop that I discussed in a previous blog post. It will contain not only buttons that you press but also text that explains the workflow.  You can get the instructions for your panel from the steps in that post.

1          Set the panel title to read Midtone Contrast Boost and size the panel so it is quite large.

2 The first step in the midtone contrast workflow is to ensure that you have a flattened image or and, if not, you should flatten it. Open the Widgets area in Configurator and double click Simple Text to add a textbox to the panel.

Type number 1 and then the instructions for the first step into the text box.

Add a Simple Text box for the instructions for the second step. If you need to duplicate the background layer then this can be done using a button so add one to the panel by choosing Commands > Layer > New > Duplicate Layer/Group and drag the button onto the panel. Rename this button by typing a new entry in its caption property.

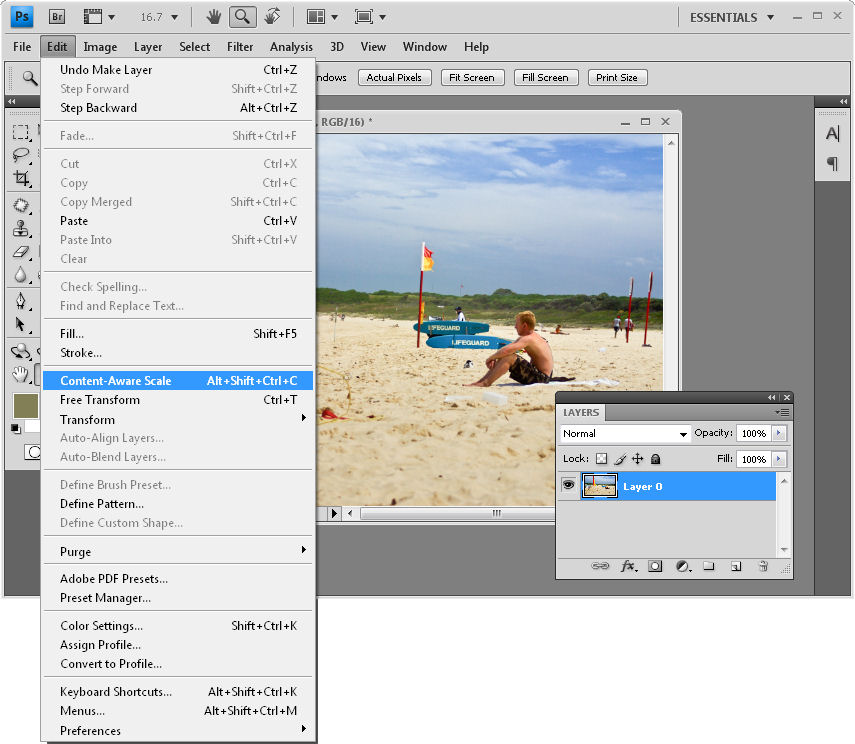
3 Add the instructions for the third step which are to adjust the opacity, blend mode and  blending options for the layer. This can all be done with one command so you can add a button to launch the Layer Style dialog at the Blending Options area. To find this button choose Layer > Layer Style > Blending Options and drag the button into position.

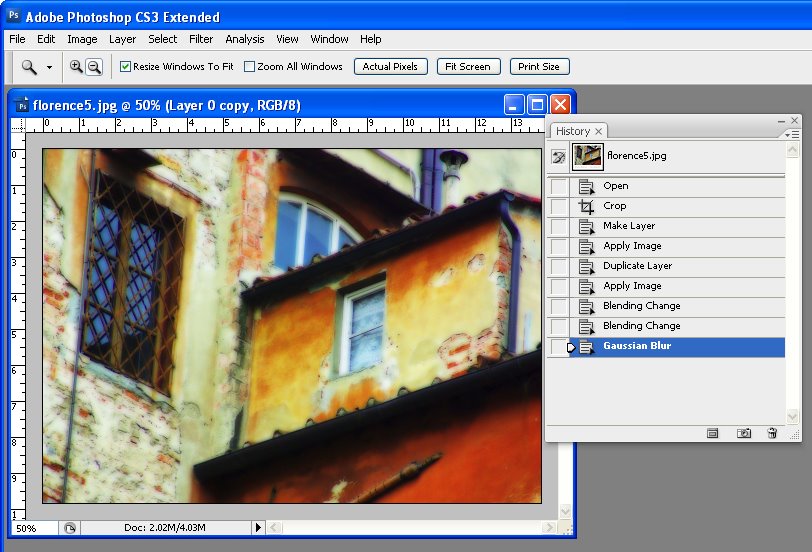
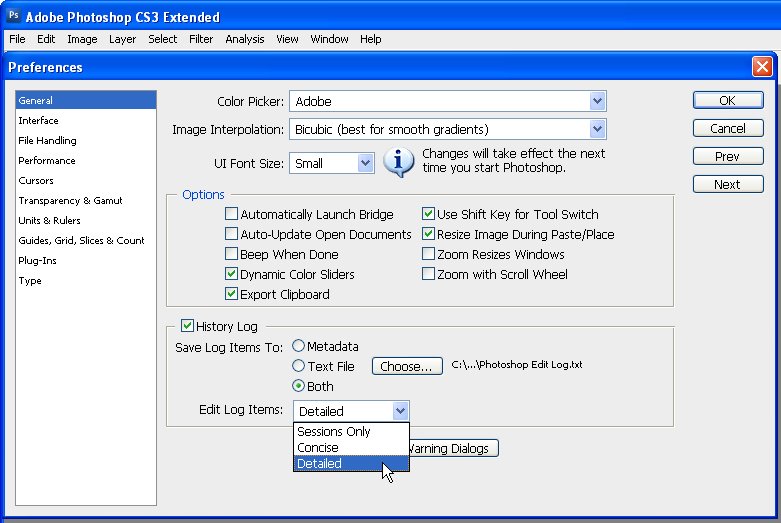
You can also add images to the panel illustrating crucial steps. For example, you could take a screen grab of the Blending Options dialog, crop it to show only the relevant portion of the dialog and save it as a JPG image. Make a note of the image’s width and height in pixels. To add the image to your panel, double click the SWF/Image Loader widget to add it. In the URL box, type the location of the image on your disk. Set the width and height of the Image Loader to match the width and height of the image and position the image in the panel.

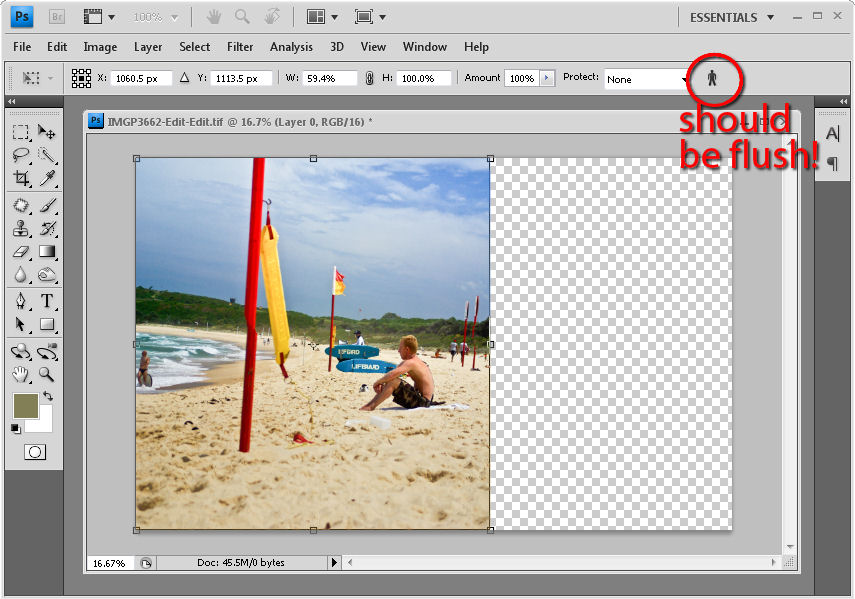
4 The next step of the midtones contrast process is to convert the layer to a Smart Object. Add an explanation of this process to your panel and add a button to perform the task by choosing Commands > Layer > Smart Objects > Convert to Smart Object.

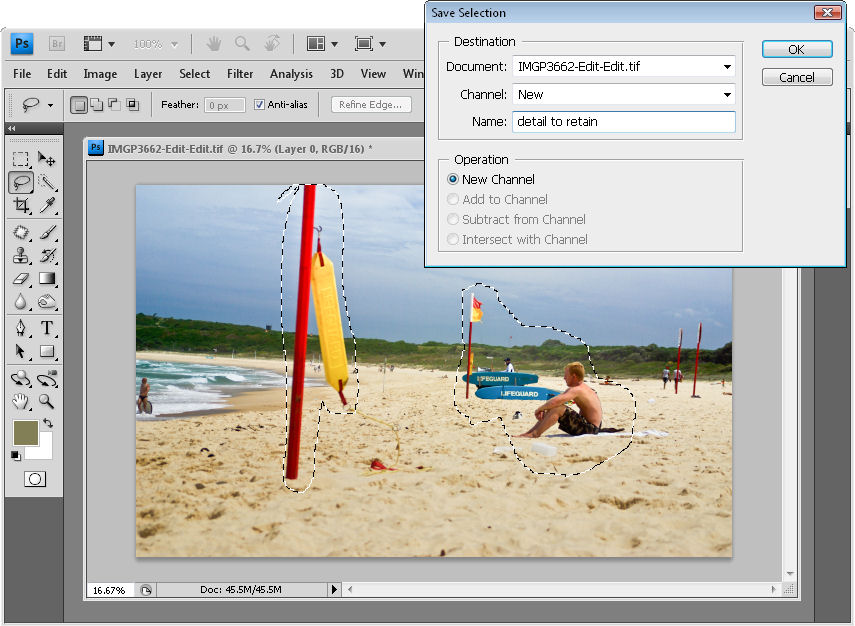
5 The next step is again a command, so choose Commands and then Filter > Other > High Pass and drag that command button into the panel. Add a textbox explaining this step.

To line everything up, select each of the textboxes in turn and select an appropriate alignment option from the toolbar.

Once you’ve completed your panel, save the design by choosing File > Save Panel. Saving the design means you can come back at a later date and alter the panel if required.

Export your panel to use in Photoshop by choosing File > Export Panel, select your Panels folder and click Ok.

When you next open Photoshop, you can load your panel by selecting Window > Extensions and click the panel’s name.

Panels like this, which step you through a process, are a handy way to document processes that you want to remember and use. They can also be shared with others as a learning tool.

6 Always test your panel once you have created it to make sure that it works as expected. If it needs to be changed, return to Adobe Configurator, open your saved panel file, make the changes, save it again and then re-export the panel. Back in Photoshop, close the panel and reopen it to get access to the changed form.

Helen Bradley

Thursday, January 13th, 2011

Unlocking layers in Photoshop

Unlock the Background layer in Photoshop

When you first start working with layers in Photoshop, you’ll discover something about the background layer. The layer is locked which means a few things. Firstly, you can’t move the layer anywhere else in the layer stack because it’s locked. Secondly, while you can use the eraser on the bottom layer – because it is the bottom layer the eraser doesn’t erase to transparent and instead it erases to the background color. You also can’t add a layer mask to the background layer again, because it is locked and it cannot have any transparency applied to it.

When used on a Background layer the Background Eraser and Magic Eraser might look like they are making the background layer transparent but they are, in fact, first converting the background layer into a regular layer unlocking it in the process and then they perform the erase.

You will see that the background layer of a document is locked if you open the layers palette by choosing Window > Layers. There is a lock icon opposite the layer.

How to unlock a layer in Photoshop and Photoshop Elements

There are a few ways to unlock the layer in Photoshop (these also work in Photoshop Elements). The first one is to double click on the background layer and a New Layer dialog will appear. If you want to rename the background layer, type a name for it, otherwise just click Ok and the background layer will be converted to Layer 0. You’ll see that the lock icon is now removed allowing you to add a layer mask to the layer and delete content from it as well as move it elsewhere in the layer stack.

Another way to unlock a locked layer is to drag the lock icon onto the trashcan. You can also right click the background layer and choose Layer from background and click Ok.

Photoshop - how to unlock a layer in Photoshop and Photoshop Elements

Helen Bradley

Sunday, December 26th, 2010

Photoshop Creative: A Simple Composite


In this post, I’ll show you how to create a simple composite by placing one image in another. Along the way, I’ll not only bend one image to fit its new position but I’ll also show you a layer style trick that overcomes the problem that you’ll see if you scroll down to step 6 and take a look at what happens when I mask the image to make the fingertip show.

1 To create this composite, open the images to use. We’ll assemble the composite in the image of the plaster hand. Start by dragging the background layer from the photograph into the hand image. It will appear on its own layer and you can now close that image as it is no longer needed.

2 Size the imported image to fit where it needs to go. In this case the border will be added inside the image so I’ll make the image almost as large as the cardboard it will be ‘attached’ to.

Size the image in proportion so you don’t skew it. To get it to fit on in dimension it will probably be either too tall or too wide in the other dimension and that’s fine.

3 Once you’ve applied the transformation, select the rectangular marquee tool and drag over the area of the photo that you want to retain. Choose Select > Inverse to invert the section and press Delete to delete the excess image.

4 To warp the image to fit the shape of the card, select the image and choose Edit > Transform > Warp. This adds a series of warp handles to the image. Drag on these to bend the image so it fits over the area you want to cover.

When you’re done, confirm the transformation.

5 To add a white border around the image as if it were a photo stuck to the card, select the image layer, click the Add a Layer Style button at the foot of the Layers palette and choose Stroke.

Set the color to white and the size to a size appropriate for your image. Set the position to Inside so you get square corners on the image (if you choose Center or Outside the corners will be rounded).

 When you are done, click Ok.

6 With this image layer still selected, click the Add Layer Mask icon at the foot of the Layers palette.

Select a medium hard brush, set the foreground color to black and paint on the mask to reveal the finger on the underlying layer. This makes the finger look like it is above the image and not behind it.

One simple way to do this is to hide the photo layer and use a tool like the Quick Selection tool to select over the finger on the background layer. Then, with the selection in place, display the top layer and select its mask. With black as the foreground color, press Alt + Backspace (Option + Delete on the Mac), to fill the selected area on the mask with black.

You’ll see that we have some problems with the mask because it distorts the stroke around the picture. We want the stroke applied to the image and we don’t want the mask to have any effect on it – right now it is having an unwanted effect.

7 To solve the problem, double click the Effects entry in the Layers palette to open the Layer Styles dialog. In the Blending Options area of the dialog, select the check box for Layer Mask Hides Effects.

This configures the mask on the layer to hide not only the image content on that layer but also a style applied to that layer.

Helen Bradley

Saturday, March 27th, 2010

Thank you Kevin Ames

fantasy portrait collage

I have just returned from Photoshop World in Orlando and I am full of inspiration for upcoming projects. However one of the classes just inspired me so much that I had to start playing with the concept first. The idea is from Kevin Ames who taught it as a class called Fantastic Portraits…It’s Smoke, Mirrors & Photoshop.

The starting point is half a face, mirrored and stuck back together and then it’s up to you. This is my finished project – it’s a tiny file as I did it on the plane home and I really wanted to conserve battery but still get a reasonable result. With smaller images in Photoshop, of course everything goes much faster but the downside is that the final image is less useful because it is very small.

Here in addition to mirroring the face, I replaced the lips, pupils and part of the nose to get the face I wanted. I used the liquify filter repeatedly to reshape the face and the dodge and burn tools to add highlights and shadows – my additon to the basic concept. Then I brushed on the dots, added lots of backround interest and fashioned her a gold necklet. It helps if you have lots of textures and other interesting elements to use – for example, her hat is a fancy street light from a local park and there is a metal grate, a stairwell and a rusty texture making up the background.

It is a fun way to blow a few hours.

If you’re interested, here’s my starting image (courtesy of my friend Brenda), as you can see, the journey from start to end gave me something totally unrecognizable.

Helen Bradley

Tuesday, September 8th, 2009

Smart scaling with Content-Aware Scale


New to Photoshop CS4 is its Content-Aware Scale tool which allows you to transform an image in a way that you’ve never been able to do before in Photoshop. The technology itself has been around for some time and you may have been familiar with the website rsizr.com which offers content aware scaling as an online service. However, the feature is now built into Photoshop making it a readily accessible tool for images large and small.

In this post, I’ll explain how to use content aware scaling and how to protect areas of your image from being distorted in the process.

Step 1
To see the tool at work open an image in Photoshop CS4 (this feature is not in other versions of Photoshop), double-click the background layer to turn it into a regular layer and choose Edit > Content-Aware Scale.

Step 2
Notice the sizing handles on the image. Drag from one side inwards and watch what happens as you do so. You’ll find that the image shrinks in size, but most of the information in the image is still there – the image is made narrower but key elements in it are not squashed up.

If your image includes people, click the person indicator on the toolbar so that it is not pressed in – when the indicator is flush with the toolbar the option is selected. This protects people by recognizing skin tones and ensuring that they are not distorted by the effect.

Step 3
You can also protect elements in the image using an alpha channel mask. This technique is handy if you have areas of the image that you want to retain at the expense of other areas and it can also be used to protect people in the image.

Make a rough selection around the area that you do not want to be affected by the scale effect. A good tool to use is the Lasso tool – select an area and hold the Shift key to make a second selection over another area, if necessary.

Choose Select > Save Selection, type a name for the selection, such as detail mask, make sure that the Channel is set to New and the operation is set to New Channel and click Ok. Press Ctrl + D (Command + D on the Mac) to deselect your selection.

Step 4
Now choose Edit > Content-Aware Scale and from the Protect dropdown list on the toolbar, select the mask you just created. Scale the image and notice that the masked areas are protected from being damaged as the image shrinks in size.

Content-Aware Scaling is a handy way to change the aspect ratio of an image. For example, you can turn a landscape image into a square image and close up the space between people in a photo if they are a long way apart. It also works in reverse and you can use it to make an image larger. You may need to do some work with the clone tool to repair small areas of the image damaged as the result of the scaling but typically the tool does a very good job.

If you don’t have Photoshop CS4 then head, image in hand, over to rsizr.com and give the online tool a try. Here is an earlier post I wrote on the Rsizr tool.

Helen Bradley

Wednesday, June 17th, 2009

Photoshop – keep a log of everything you’ve done

How many times have you created a neat effect on an image using Photoshop and then wanted to duplicate the effect on another image? The problem is that unless you’ve taken notes about what you’ve done, it is often difficult if not impossible to remember exactly the steps you took to get the final image.

While Photoshop has a History feature this is of limited use. One problem is that, by default, Photoshop only stores 20 history states so, if you’ve performed a lot of steps they may not all appear in the list. The second problem is that, even if you have configured Photoshop to store a large number of history states, all you see in the History panel is a brief description of what you did to the image such as Gaussian Blur, Apply Image, Blending Change and you don’t see the actual settings used.


The History panel in Photoshop lists the basics of what you’ve done but not the detail.

Here are some ways to improve on the basics and keep a log of your work:


Step 1
Before you start work on an image choose Edit > Preferences > General and select the History Log checkbox. You can select to save log items to the image Metadata, to a separate text file or to both. If you select either Text file or Both you’ll be prompted to enter a file name and a location to save the file to. Do this and click Save.

From the Edit Log Items dropdown list select Detailed. Sessions records only the time you spend working on a file, Concise records the Sessions information and the detail from the History palette and Detailed records the detail about the changes – it’s Detail you need.


Step 2
Now, when you work on an image, the detail is stored in the text file, the Metadata or both, depending on the setting you chose.

If you chose to store the data in a text file you can later open the text file with a word processor or a text editor such as Notepad on the PC.

If you chose to record the history in the image metadata choose File > File Info > History and you can read details of the edits you made to the image in the dialog. Use this information to perform the same steps on another image


Tip
To configure Photoshop to store more than the default 20 history states, choose Edit > Preferences > Performance and set the History States value to a higher number. You should note that this History information is available in the History palette and only while the image is still open – it is lost when the image is closed – unlike the Log data which is stored permanently.

Helen Bradley

Thursday, June 4th, 2009

Rsizr – Image scaling on steroids

While Photoshop, Lightroom and Photoshop Elements can resize images for you, only Photoshop CS4 supports content aware scaling. I’ll talk about this new feature in Photoshop in another post but if you’re interested in playing with content aware scaling and you don’t own Photoshop CS4, check out Rsizr.com

Rsizr resizes images by removing the unnecessary content from them or by stretching neutral areas of the image to make the picture bigger. It’s worth a visit just to see it at work.


Start by uploading an image that you want to resize. This should be a JPEG, .PNG or GIF file with a height and width of less than 2,880 pixels – in practice, so you can see what’s going on quickly, upload an image sized smaller than this.

Once the image appears in the dialog you will see tabs with buttons for various functions including the File Function tab, View functions, Resize and Retarget functions.


The program uses a seam carving technique to remove portions of the image. To get started drag the horizontal slider in the top of the window in to the size you want the image to be resized to. Click the Retarget button and watch as the seams are created (they’re the red marks you can see in the image) and the file shrinks in size.


Once the seams have been created, you will see a set of sizing handles around the image which you can use to resize the image either to make it wider or narrower.


You can protect areas of the image or mark them for deletion by clicking the Preserve or Remove indicators on the retarget functions tab and paint over the area to keep or remove.


You might do this, for example, if you see some distortion in the resizing process and want to protect key portions of the image.

The rescale and crop tools are similar to what you’re used to using in your photo editing software – it’s the retarget option which is unique.

If you’re interested in learning more about seam carving technology, visit: www.seamcarving.com to see a video describing it.

Stop Press! There is a cool plug-in available for the Gimp which brings content aware scaling/seam carving to the Gimp. For more information and to get the download, check here: http://liquidrescale.wikidot.com/ and note that the Gimp version is called Liquid Rescale! Just in case you thought there weren’t enough ways to refer to the same thing.

Helen Bradley

Wednesday, April 15th, 2009

How to merge or combine paths in Photoshop

One of the most difficult things to work out how to do in Photoshop if you work with paths is to know how to merge or combine two paths into one.

Say, for example, you have a working path and a second path and you want the two to appear as one path so you can save it or work with it as a single entity. It sounds easy but merging or combining paths is anything but.

The solution is this:


First, convert the working path to a regular path by double-clicking on its name and click Ok. In this example, I have Path1 and Path2.

Click to select Path2 in the Paths palette. Select the Path Selection Tool and click on the path so it is selected (you will see its nodes appear). Press Ctrl + C (Command + C on the Mac), to copy it to the clipboard.

Click on Path1 in the paths palette so that it is now selected and press Ctrl + V (Command + V on the Mac) to paste the copied path into this path. You now have a single path that contains both your paths and you’re almost done.

Check the Tool Options bar as it contains the tools you need to work with the two paths. You can add the shape, subtract the shape, take the intersection of the two shapes or exclude overlapping shape areas – click each and check the diagram in the path thumbnail to see the result to determine which one you want. Select the desired option and click the Combine button and the paths will be permanently joined.

Here is an example where one path is contained inside a second path. You can choose from a number of options for combining the paths depending on whether you want the doughnut, the hole or something different!

Helen Bradley

Page 1 of 212