Thursday, November 29th, 2012

Photoshop’s Amazing Circles

Learn to turn 360 degree panoramas and other images into Amazing Circles, mini planets—whatever you want to call them.

Transcript:

Hello, I’m Helen Bradley. Welcome to this video tutorial. Today I’m going to show you how to make amazing circles in Photoshop. Before we look at how you can create an amazing circle let’s have a look and see exactly what we’re talking about. This is one of the Flicker set on amazing circles and this is a really, really nice amazing circle. And we’re going to create something like this but not with a white background. And there’s these here. They’re in black and white and they’re showing you There are two sorts of amazing circles we can create, either one that has all the detail on the outside or one that has all the detail on the inside.

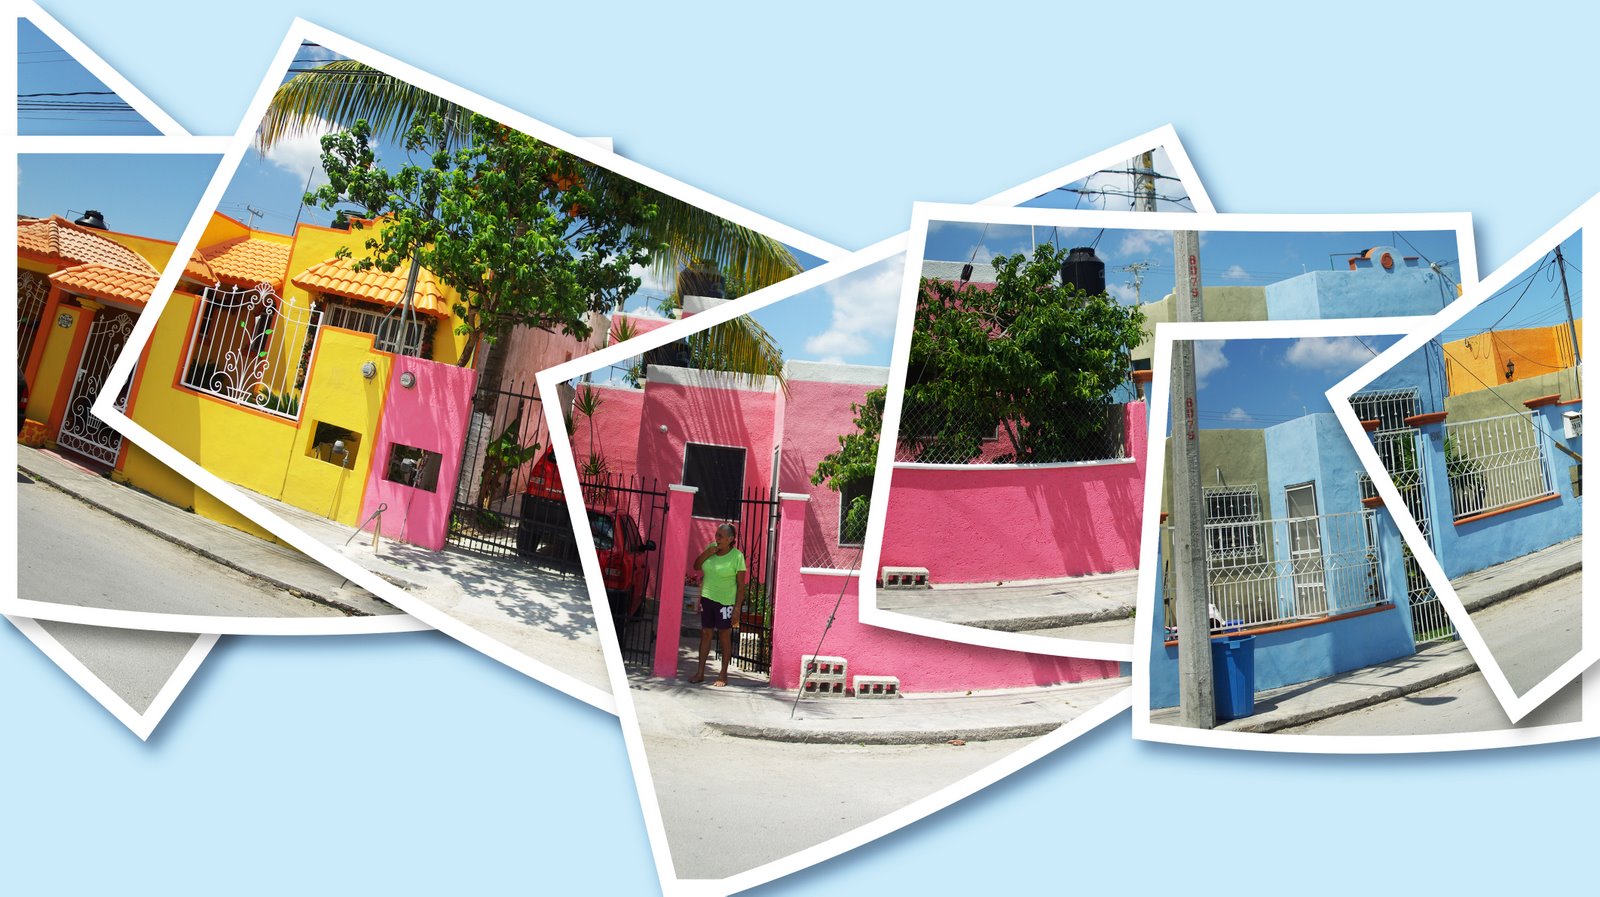
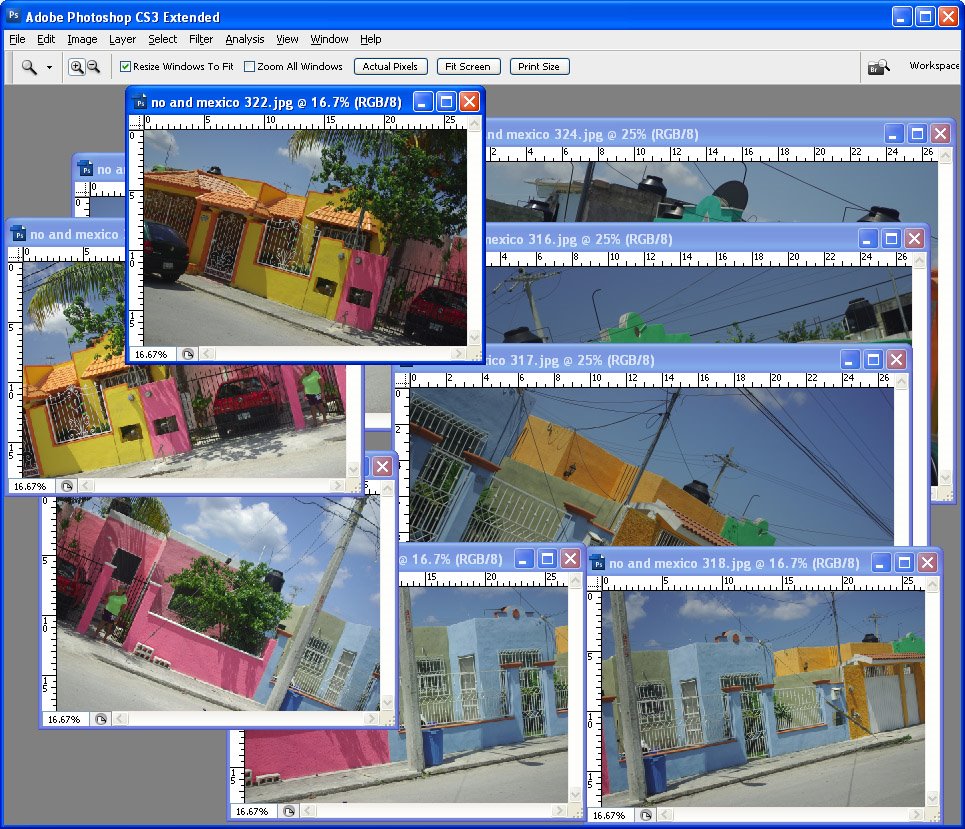
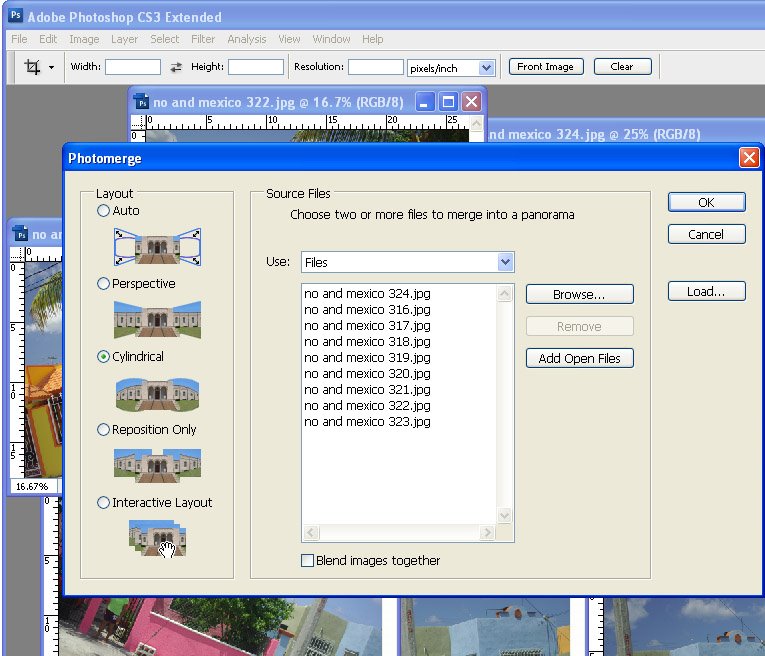
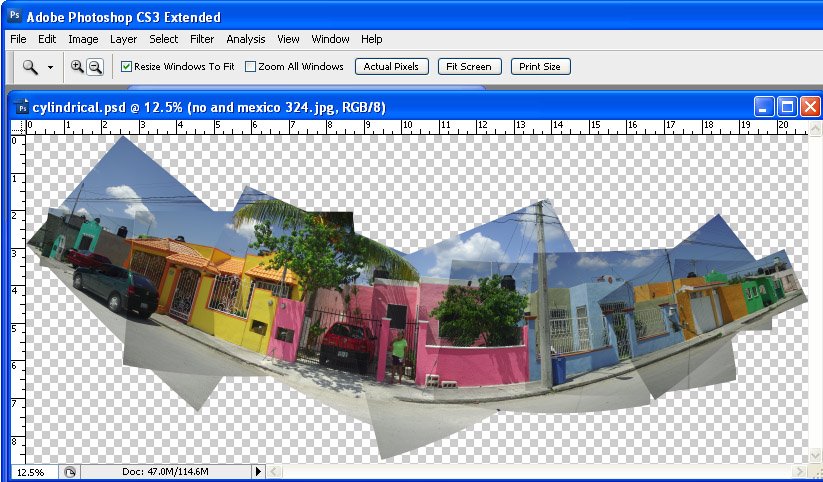
So now you’ve seen what we’re aiming for let’s go and see how we would create this effect ourselves. I’m just going to open Photoshop and I have an image already prepared here. This is a panoramic image. It’s actually of the Seine in Paris. Now you could use any panorama to do it. Now the problem with my panorama is that of course it doesn’t wrap around but I have begun to create a duplicate of the tree on this end of the image so it will sort of partially wrap around. I’ll need to do a bit of cloning to fix it when I’ve actually done my amazing circle but this is a strip. If you’ve got a 360 degree panorama it will be even better. Add a little bit of image to the top and bottom of your panorama. What you want is an image that’s roughly four times as wide as it is high so I’ve added a bit of white on either side. And this will be either the outside or the inside of the amazing circle when we create it.

The first step is to resize the image. So I’m going to choose Image and then Image Size. I’m going to deselect Constrain Proportions because although this image is 8,000 x 2,000 I want it to be square but without losing any of the content. So I’m going to be deselect Constrain Proportions and type 8,000 in here because that’s the largest of these two values, so now I’m going to get a square image quite a bit larger than it was, and click Ok. And let’s just zoom out a bit so that you can see that this is the image just all squeezed up.

Now what we do next is to rotate the image and that gives us one of two possible amazing circles. So before we do that I’m just going to duplicate this image so that we have two images that we can make circles from. So you can see the two alternative shapes. Let’s start with this one and we’re going to just rotate it 180 degrees. So I’m going to choose Image, Image Rotation 180 degrees just to flip it upside down. And then all the work is done by what’s called a polar coordinates filter. It’s Filter, Distort, Polar Coordinates. And let’s just squeeze this up because rectangular to polar is the option that we want. The other option is polar to rectangular and that’s not the one we want. So now that we’ve got rectangular to polar I’m just going to click Ok. And that’s our amazing circle. That’s as easy as it is. You’ll see I’ll need to clone a little bit through the seam area because I didn’t do a very good job of making a circular panorama. But there is our amazing circle.

Now because we’ve flipped it upside down this one has the sky area on the outside and the river on the middle. This one’s going to be the opposite. Let’s just run the filter on this one without turning it upside down before we start. Just size the display, we can see what it’s going to look like and click Ok. And as you can see here the sky is on the inside and the river Seine would be on the outside. You can use whichever you like for your amazing circle.

I’m Helen Bradley. Thank you for joining me for this video tutorial. Please if you enjoyed the tutorial, like it on YouTube. Look out for more videos on my YouTube channel. Subscribe if you will. You can also visit projectwoman.com where you’ll find lots more tips, tricks and tutorials on Photoshop, Lightroom, Photoshop Elements, Illustrator and lots more.

Helen Bradley

Friday, March 26th, 2010

Faux panos in Lightroom


Lightroom finished panorama of Cam River Cambridge, Uk

Ok, so I am using Lightroom for this but seriously you can do this in Photoshop or any application you like. It’s a faux panorama and you do it with one image by simply cropping the image to a long width and a small depth. You need the right image – it needs to have plenty of data across the middle of the image but it does have so much punch that it can turn a ho hum snapshot into something that looks so much more.

Lightroom crop to create a panorama

So, in Lightroom, select your image, move to the Develop module, crop the image to as wide as you can and a small height/depth and then Export it. This one I framed in the Lightroom Print module before printing to a file and posting it. All too simple really and everyone will think you’ve been snapping panos instead of infusing your images with a little creativity.

Oh, and for a tip in a tip, press Control + ‘  (Command + ‘ on the Mac) to make a virtual copy before cropping so you still have your original visible in Lightroom.

Helen Bradley

Saturday, April 11th, 2009

Photoshop: Panorama with a twist

Panoramas don’t have to perfectly or neatly aligned. If you’re looking for a fun way to create a panorama in Photoshop the best way to achieve the effect is to throw away the rule book on how to capture and assemble a panorama and try something a little different. In this article, I’ll show you how to capture the images and create a stylish panorama which is anything but perfect.

Traditionally, you capture images for a panorama using a tripod and taking care to ensure that all the shots overlap and that the camera settings do not change from one image to the next. For my panorama I ignored the rules and captured my images with a hand held camera, ignoring changes in the camera settings and continually varying the camera angle from one image to the next. However, you will still need to have plenty of overlap from one image to the next as the panorama tool needs this to assemble the final image for you.


Download the panorama sequence onto your computer and open all the images in Photoshop. Choose File > Automate > Photomerge to open the Photomerge or panorama tool. Select the Cylindrical, Auto or Perspective options – each renders a different result and disable the ‘Blend images together’ checkbox – this is important as you don’t want the images blended at all. Click Add Open Files to select the open files as those to create the panorama from. Click Ok and wait as Photoshop assembles a panorama from the images that you have selected – this may take some time.


When the process is complete you will have a panorama that is bent in interesting directions with the images making up the scene overlaid over each other in a haphazard arrangement.


To add the final touches to the project, start by adding a new layer behind the panorama images by choosing File > New > Layer and click Ok. Drag it to the bottom of the layer stack and fill it with your chosen background colour. To get a colour that works with your image, sample one from the image itself using the eyedropper.

To adjust the panorama’s contrast and brightness add a new adjustment layer by clicking on the topmost layer and choose Layer > New Adjustment Layer > Curves. Drag on the curve until you have a result you like. This adjustment layer will affect all the layers in the image. If you need to adjust only one layer, select it and choose Image > Adjustments and select the adjustment to make – doing it this way ensures the adjustment affects only the selected layer.


Select one of the layers in the image and click the Add Layer Style icon at the foot of the layer palette. Select Stroke and set the stroke Color to White and add a large enough sized stroke that you can see it clearly. Set the Position to Inside and click Ok.


In the Layers palette, right-click on the Layer Style that you just created and choose Copy Layer Style. Select all the panorama layers in the image right-click and choose Paste Layer Style to apply the stroke outline to all the layers.


For additional interest, click some of the layers in the image and either drag them a little out of position or drag their layer to a different position so they are more or less visible. You can also add a drop shadow to the layers the same way you applied the stroke outline.

Helen Bradley