Friday, March 16th, 2012

Shoot right at night – Tip #7 – Night activity

In busy cities and even in country towns you will find that the activity at night differs from that during the day.

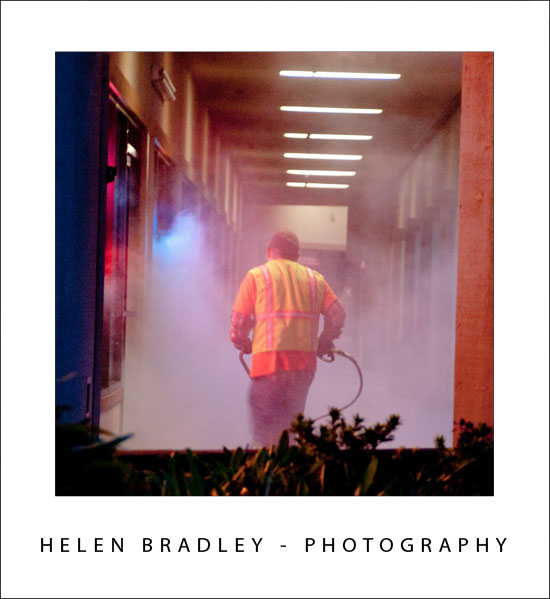
Tankers deliver fuel, people clean areas that aren’t cleaned during the day and they are all great subjects to shoot.

Take the time to search out unusual activities to capture them. Here a cleaner was throwing up a cloud of steam and water and, captured in the night lights of the shops it made for an interesting shot.


Helen Bradley

Tuesday, March 13th, 2012

Shoot right at night – Tip #6 – Early Morning Sun

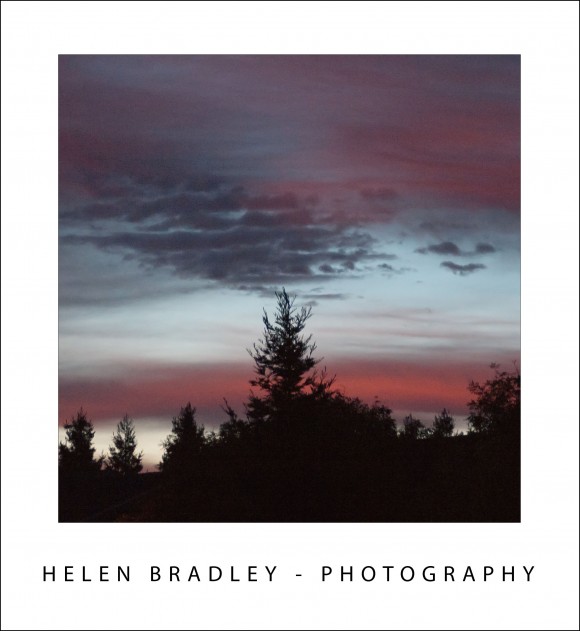
If you’re shooting after sundown or if you are up early in the morning before the sun is up look for drop dead gorgeous skies.

If you can capture the last rays of a dying sun or the first rays in the early morning you’ll get great color and wonderful silhouetting of anything between you and what light there is. Look for interesting trees, buildings and other features to capture as silhouettes.

Use a slow shutter speed, wide aperture or a high ISO (or all three) and be ready to capture the hues as they change from minute to minute across the horizon.

Helen Bradley

Wednesday, February 15th, 2012

Capture a great Panorama


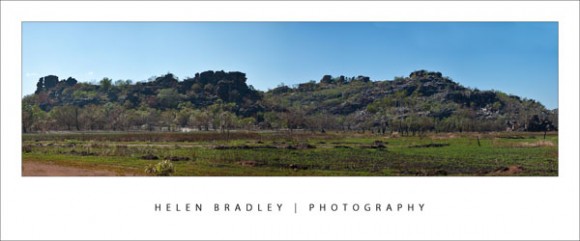
There’s something very compelling about panoramic images. They’re much wider than regular photos and, instead of showing the small portion of a scene that is in front of the camera lens, they show much more.

Some panoramas show a semi circle around a point and others wrap around a full 360 degrees showing everything there is to see. Panoramas have been popular with photographers since the early days of photography. Then, as now, they were created using a series of side by side images put together to form a single seamless image.

Today’s digital cameras and photo editing software let you create panoramas quite easily. Even simple cameras like prepaid phone cameras and point-and-shoot cameras are advanced enough to have a panorama setting. There are, however, some tips and tricks for taking the photos that will help ensure you get a great panorama and I’ve thrown in my best solution for when things go wrong!

Use a tripod

When you take photos for your panorama make sure you stand in one position to take all the shots. It is easiest if you fix the camera to a tripod and test to ensure it will swing around smoothly to capture the images that you want to take. If you don’t have a tripod, practice standing in one position and rotating your body to capture the images.

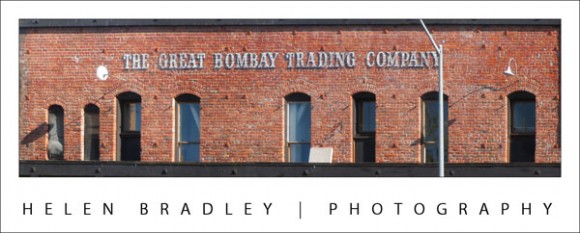
This painted sign on the building above was too large to capture in one shot but it works well as a panorama.

Overlap the images

When taking the individual shots for a panorama, make sure that the photos overlap each other by around 25 percent. This means that the objects that appear on the far right of one photograph should appear on the far left of the next photograph in the sequence.

If your camera has a panorama feature you can use this to help configure the overlap for the images. Your photo editing software uses the overlapping areas as a key for aligning and matching the images so it’s important that you have enough of an overlap for the software to do its work. On the flip side, avoid having too much overlap as that’s not desirable either.

Try to photograph scenes that don’t change rather than subjects that are moving as it’s much harder to match up your images if people are moving around in them such as in this image:

I had to put a lot of work into tidying up this image – with so much action it was far from an ideal topic for a panorama but the results were worth it.

Fix your settings

When capturing photos for a panorama make sure that you do not alter your camera settings, such as the zoom, between shots as this will mess up your images and they won’t be easy to match.

If you’re using a digital SLR camera, keep the exposure the same between shots too. Using Aperture priority mode is a good choice.

There are some classic occasions when a panorama is an obvious solution and I dream of one day spending an afternoon at Lord’s capturing that wonderful cricket ground as a panoramic image. Other shots that work well as panoramas include scenery and landscapes. However panoramas aren’t limited to major spectacles and you can capture a series of two or more images of anything from a sign to a streetscape and assemble it into a panorama.

I’ve shot panoramas of signs, cityscapes, the mounting yard at a racecourse and I’ve done one of my street so one day I will be able to look back and see then what I see now, as I stand on my front porch.

If you’d like to learn more about creating Panoramas, check out this post on Creating Panoramas with a twist. It’s a great way to save an imperfectly shot panorama.

http://www.projectwoman.com/2009/04/photoshop-panorama-with-twist.html

Helen Bradley

Thursday, February 10th, 2011

Valentine’s Day photography – Capture the Essence of You

Whether you’re basking in the first throws of a new relationship, newly hitched or coming up to your silver anniversary, February is a time to focus on your relationship with your husband, partner, or significant other. It’s a time to bring the two of you to the forefront and what better way to do this than in your photos?

If you haven’t done this before, the ‘future you’ will appreciate the time you spend now in chronicling the little things in your relationship. Think how wonderful it will be, tucked up in your rocking chair one day, to look back on the early days of your relationship?

There are lots of ways you can make a photographic record of your lives together. While visiting a professional photographer for a custom portrait will give you a lasting showpiece, some of the best shots can be captured yourselves. These are photos of things that are meaningful to you both and that capture the things that are important to you and your relationship.

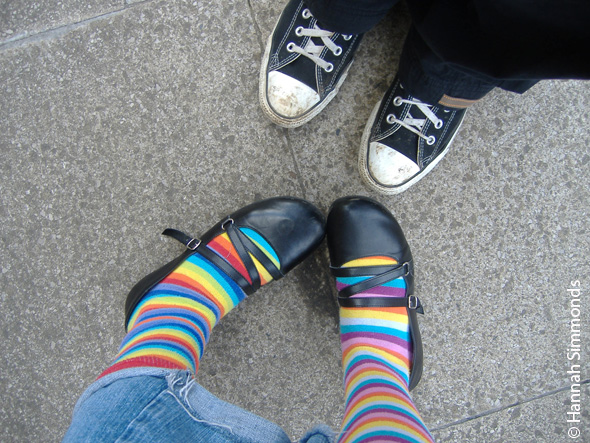
Look around at the day to day things in your life. Take photos of your shoes, side by side in the hallway, the favourite mugs that you use each morning or the magazines you each read. Capture the good and the bad – such as your hands clasped together, the favourite shirt he loves but you hate, and the assemble it yourself furniture that nearly caused you to divorce while putting it together!

Take the time to photograph each other too. It’s a fun way to spend some time together and to get some great photos to boot. Try to capture his goofy grin and get him to catch you with that dreamy look in your eyes he tells you that you get when you’re imagining yourself in a new pair of Jimmy Choo’s.

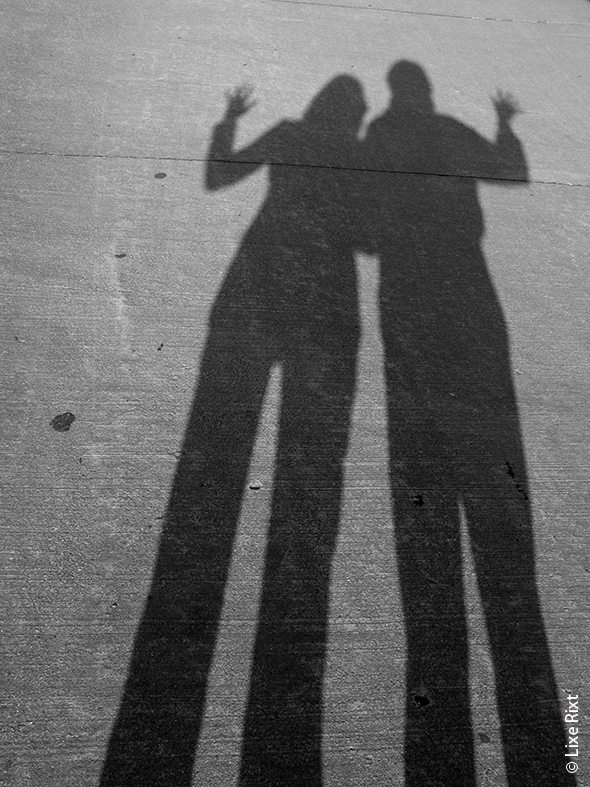
For “together” shots, use the camera’s delayed shooting mode. Have your partner sit or stand in place and set up the camera on a flat surface making sure it’s focused on them. Enable the delayed shooting mode (check your camera’s manual if you’re unsure how to do this) and join your partner for the shot. Repeat as often as desired to get that perfect shot.

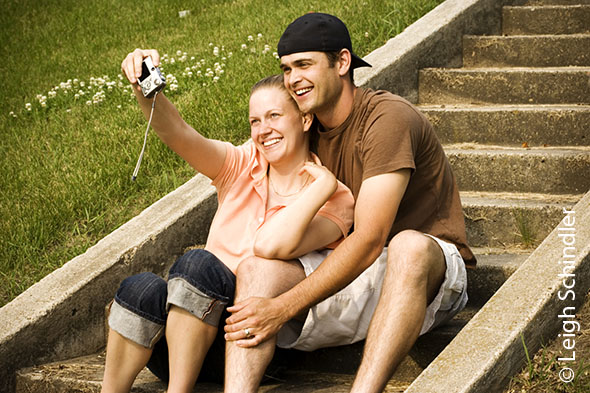
You can also take “together” shots by standing really close and holding the camera up in the air in front of you facing towards you. Snap away as you pose or enjoy a joke. This is a more “hit or miss” approach but it’s possible to get some fun photos this way.

If you have one of those fairground photo booths nearby, spend a couple of pounds and take a strip of photos of the two of you – just the physical effort of jamming yourself into the booth is enough to guarantee ear to ear smiles and a sense of fun.

For a more romantic portrait of your lives, take a photo of your partner lit with candle light or soft lighting at home. You can do this by placing lighted candles where they will light his face and, if desired, use some other soft lighting such as a small lamp but keep it out of the photo. Turn off the camera’s flash or it will ruin the shot and set the camera to night shooting mode. If you can set film speed on your camera, opt for 400, 800 or higher so that the camera will be more sensitive to the light that is available (and the photo will have a wonderful grainy look too). Ask your partner to sit very still as the shot might take a second or more to be captured. Use a tripod to steady the camera because you won’t be able to hold it still this long. You will find that the candlelight will throw a lovely coloured light into the shot and give your partner’s features a soft look.

Helen Bradley

Tuesday, February 8th, 2011

Understand your camera’s settings – Part 3 – ISO

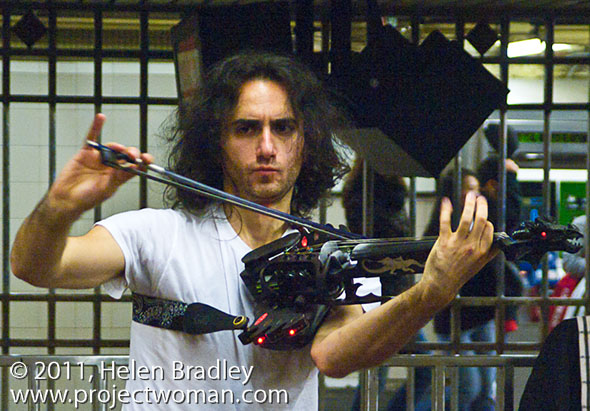
Image: ISO3200, f5.6, 1/80s – the high ISO gives good sensitivity to light allowing this image to be captured quite fast in a relatively dark NY subway station.

In part 3 of this series on understanding your camera’s manual settings I’ll explain how to combine a choice of ISO settings when varying Aperture and Shutter speed.

In addition to Aperture and Shutter speed you can also configure your camera’s ISO setting. You would do this to adjust for the situation where there is not enough light for a shot or where there is too much light.

ISO is the camera’s sensitivity to light and small ISO values such as 80 and 100 indicate low sensitivity so the camera needs more light to take the photo. High values like 400 and 800 (and even up to 6400 and beyond) increase the camera’s sensitivity to light and can be used when you need more light, for example, where the shutter speed or aperture you want to use can’t give the light you want.

Take care when using very large ISO values as these are susceptible to noise so, using a value of 1600 or more might give you a good exposure but the image may have a lot of digital noise as a result.

Small values like 100 and 200 should show little noise at all.

Image: ISO100 f/4.5 1/500s – in bright summer sunlight, the ISO 100 value reduces sensitivity to light still allowing for a fast shot.

Of course, even excessive amounts of noise are preferable to getting a blurred image because you couldn’t hold the camera steady long enough to take it.

While the Auto setting on your camera will ensure that you get a good photograph most of the time, for creative purposes being able to configure your camera to adjust either the aperture or the shutter speed will give you more and varied options for getting even better images.

Image: ISO 1600, f/5.6, 1/15s – At dusk in a NY street, the high ISO gives good light sensitivity and the slow shutter speed allows the cars in the background to be blurred nicely.

Helen Bradley

Thursday, February 3rd, 2011

Understand your camera’s settings – Part 2 – Shutter Speed

Image: 1/320s, f7.1, ISO 1600

In part 2 of this series on understanding your camera’s settings I’ll explain working in Shutter Priority mode.

Shutter speed can be controlled manually by switching to Tv mode. You can then select the shutter speed yourself so you adjust the time the shutter is open for and the camera will adjust the aperture to give you a good exposure.

How to use shutter speed

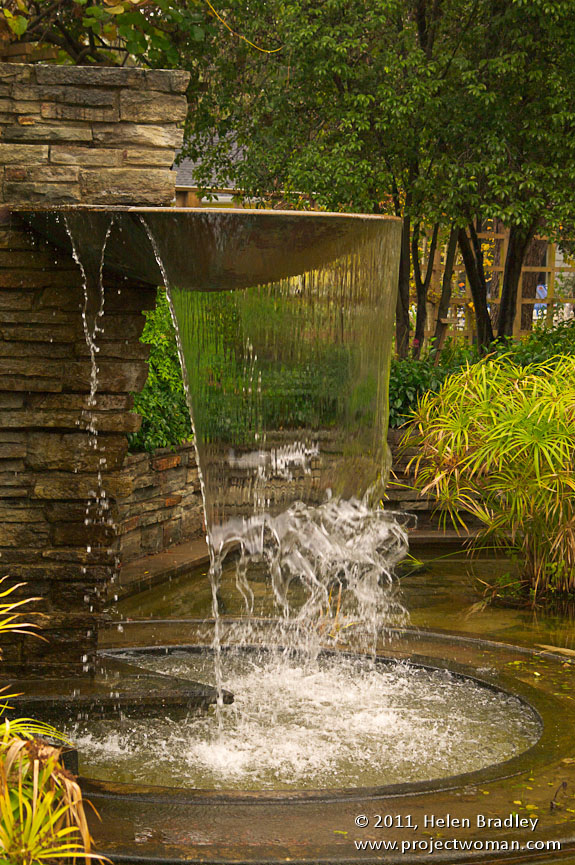
Setting shutter speed is a creative tool too. You might choose a fast shutter speed when photographing a moving object and where you want to freeze its motion. The image at the top of this post, for example, was captured at 1/320s.

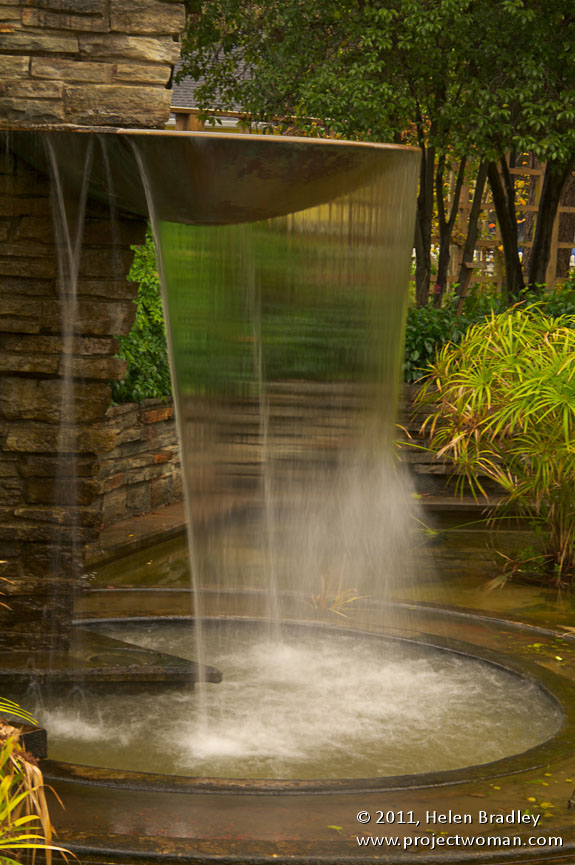
On the other hand, where you want the water in a waterfall or fountain to appear as a silky stream you would use a long shutter speed. Shutter speeds such as 1/250 of a second will freeze motion and shutter speeds of 1/30 a second or slower are considered to be slow.

This second version of the same fountain was shot at 1/3s at f/25 and the water is much silkier:

When you select shutter speed, your camera will show the aperture so you can preview this – on some cameras you may have to press the shutter release mechanism down halfway to see this.

If the camera doesn’t have a large or small enough aperture for the speed you’ve chosen it will indicate this using some warning system allowing you to adjust your shutter speed setting.

Using a tripod

Take care when selecting slow shutter speeds. Anything slower than 1/60th of a second will make it hard for you to hand hold the camera and keep it steady. If you’re using long lenses on a digital SLR, for example, you may not be able to hand hold the camera successfully at even quite fast shutter speeds.

A good rule of thumb is to use a tripod for shots slower than 1/the focal length of the lens so a 70-200mm lens at full zoom would need a tripod for shutter speeds slower than 1/200th second.

Helen Bradley

Thursday, January 27th, 2011

Understand your cameras settings – Part 1 – Aperture

All digital SLRs and many point and shoots can operate in manual or semi-manual modes. If you capture most of your photos using Auto mode it’s time to look at some of the benefits you can get by switching to semi-manual operation.

With these modes you control the aperture or shutter speed and you get a chance to capture more creative photos. So how do you do this and what settings do you use? In this series, I’ll explain your camera’s Aperture Priority and Shutter Priority (Av and Tv) modes and also explain why your ISO setting  is important to understand too.

If your camera can operate in manual mode you’ll have settings such as M, Av, Tv and P on your camera’s dial. The two settings we’ll focus on are Av and Tv where you set the aperture or shutter speed yourself.

What is Aperture?

This begs the question, what is aperture and what is shutter speed? Aperture is, very simply, the size of the hole through which light enters your camera. The larger the hole, the more light gets in.

Aperture is described using an f number which is calculated using a complex formula. A rough rule of thumb is to think of aperture being a fraction so an f number (often called a f-stop) of f/2.8 is bigger than f/22 for example.

Understanding aperture

Aperture not only has a direct relationship to the amount of light let in to the camera, it also affects depth of field. When you use a large aperture such as f/2.8 you will get a small depth of field so only a small distance in front and behind the point of focus in the photograph will be in sharp focus and the remainder of the image will be out of focus.

Depth of field is a creative tool that many photographers use to their advantage. For example, when photographing a beautiful flower, you’ll want the focus to be on the flower and not the things behind it. Using a large aperture such as f/2.8 throws the background out of focus. The photograph at the top of this post is an example of a large aperture and a small depth of field.

On the other hand, using a small aperture such as f/8 or f/11 gives you a large depth of field so everything in the photograph will be in focus – useful when photographing landscapes for example.

The relationship between Aperture and Shutter speed

When you set the aperture using the Av setting on the camera, the camera sets the shutter speed to an appropriate value. This is because there is a direct correlation between aperture and shutter speed.

When you use a small aperture, only a small amount of light comes into the camera so you need to compensate for this by using a slow shutter speed to ensure you capture enough light.

On the flip side, when you use a large aperture such as f/2.8, you get lots of light so the camera will set a fast shutter speed.

When you use Av mode, you’re effectively saying, I’ll set the aperture I want and you – the camera – are to adjust the other settings to give me a good picture. When you are in Av mode, there will be a dial or other option you’ll use to set the desired aperture value.

Helen Bradley

Thursday, June 25th, 2009

When to use your camera’s flash and when not to

Depending on how you use it, your camera’s flash might be your best tool for lighting a shot or the fastest way to ruin one. It’s all in how you use it, and when.

In this post I’ll show you how to tame your camera’s flash to ensure it works for you and not against you.

Configure the flash
The first step for using the flash on your camera is to knowing how to configure it so you can, in an instant, turn it on or off as required. If you’re unsure, check your camera’s manual to see the flash options you have, how to identify what the current flash setting is and how to change it.

This is vital even if you only ever shoot out of doors in full sun – that is, surprising as it might seem – one time you should use your flash and it’s one time your camera won’t default to using it. So, you need to know how to force the flash to fire.

When you are checking for flash options you’re sure to find that your camera has a redeye reduction flash option. This makes the flash fire twice, one low strength flash and one full strength flash. The first flash shrinks the pupil size of your subject so that you’re less likely to get a redeye effect in your photo.
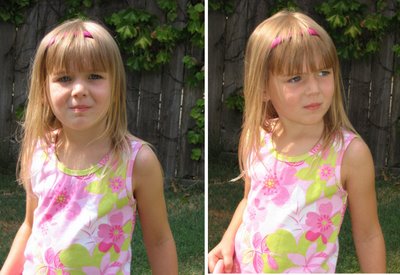

The image on the right was shot with a fill flash to light the young girl’s face – it is a better photo than the one on the left.

Unfortunately your subject often misinterprets the purpose of the first flash and thinks the photo has been taken so they move away and you lose the shot.

It is often a better solution to disable the redeye reduction flash and use your photo editing software to remove redeye later on. You can reduce the redeye effect other ways too, one easy option is to increase the room lighting – the lighter the surrounds are, the less likely you are to get a redeye effect.

Some cameras also have a flash intensity setting so you can set the fill flash to flash but not at full power so you don’t blow out your subject’s skin but you still get a nice light.

How far can you flash?
If you’ve tried using a flash at a night time sporting event or concert you’ll know it is pretty ineffectual. The range of your camera’s flash is around 3 yards/metres so unless you’re very close to your subject it will be of no use at all.

In this situation, turn off the flash and set the camera to night mode. Brace the camera using a tripod or on something steady and take the photo – without the flash. It might take a second to capture the shot but the result will be much better.
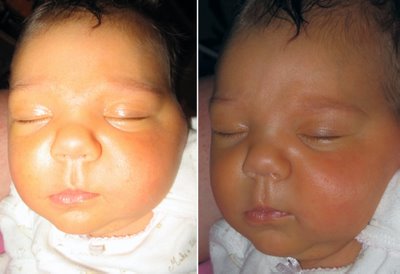

Using the flash too close to this small baby has washed out her face, turning the flash off gives a better result.

Should you use your flash on a sunny day – YES!
When you first start taking photos you’ll think that the last place you need to use a flash is in full sun. Long time photographers, however, know that full sun is misleading and someone standing in full sun in front of a landscape, streetscape or beach won’t be correctly lit unless you stand close enough to them and use the flash to light their features. The flash won’t have any effect on the background but it will improve how your subject looks – one hundred percent.

Check your camera’s manual – some cameras have a special daytime fill flash which you should use for this situation and, if not, just use the regular flash.

Too much flash
With many point and shoot cameras the flash has a tendency to be too strong and it will wash out your subject. You have a couple of choices in this situation, either move further away from your subject so the flash has lost some of its power by the time it reaches them or diffuse the flash.

To diffuse the light, place something in front of the flash to reduce the light – a small piece of wax paper taped over the flash is one option or you can hold a small piece of shiny white cardboard underneath the flash angled upwards to bounce the light upwards – this will create a more diffused lighting effect.
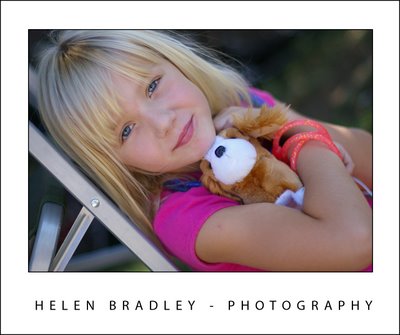

This little girl was photographed in a shady place with no harsh shadows and she was relaxed cuddling a favourite toy.

Knowing when to use the flash, how to work when you can’t use it and when it’s best turned off will help you take your photography skills up a notch. You’ll be able to take great beach shots, you’ll get photos of your favourite bands at their concerts and your friends across the dinner table.

Helen Bradley

Page 2 of 212