Tuesday, October 30th, 2012

7 Camera Settings for Capturing Better Photos

Whether you are using a Point and Shoot or a DSLR camera here are seven camera settings that will help you capture better photos:

Tip 1 – Adjust for light

Most digital cameras, in particular SLRs, let you select ISO film equivalencies. Choose 100 – 200 sensitivity for photographing in bright light conditions and use 400 – 800 when there is less light.  In very poor light you can capture at 3200 – 6400 or higher but you will find that, as a result, there will be more film grain visible in the final image a a result.

To capture an image like this at night you should have an ISO setting of at least 800 -1600 or higher and a tripod to steady the camera.

Tip 2 – Choose your mode

Most cameras, in particular point and shoot cameras have settings for portrait, landscape, night shooting, sports, etc. Choose the correct mode for the type of conditions and the camera will automatically configure the ideal settings to ensure the best shots in the available light conditions.

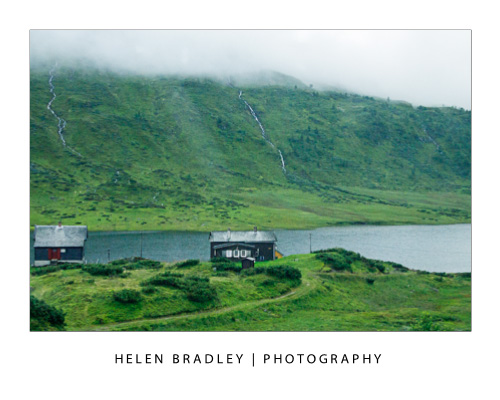
For an image like this choose Landscape mode so it is all in focus.

Tip 3 – Depth of field

Use your camera’s Aperture Priority setting and set the aperture to a small f stop such as 2.8 to capture photographs with an interesting depth of field. Focus the camera on the object to appear in focus and, when you do, objects in front and behind this object will appear pleasingly out of focus.

Here I focused on the girl in front with a very small f stop and she is in focus – the girl facing us is not.

Tip 4 – Axe the digital zoom

Of the two types of digital camera zoom, which you will find in both point and shoot cameras and camera phones only Optical Zoom is a true zoom . If your camera offers digital zoom it is best to disable it or avoid using it. Digital zoom merely increases the size of the image captured and crops away the area not required. Optical zoom actually zooms into the scene to capture it at full size.


Tip 5 – Adjust exposure

Avoid over or under exposed photos using your camera’s exposure compensation settings. These can usually be adjusted to somewhere between -2 to +2EV. To lighten a shot use + values and to darken one, use – values.

Here is the same Boston building captured at -2, 0 and +2 exposure – the one on the right is the better exposed shot.

Tip 6 – Set the correct White balance

Different light sources throw different color casts onto your photos. For instance, inside lighting such as florescent and tungsten globes will throw blue/green or orange tints onto your image. When shooting indoors without a flash, set the white balance mode to match the light source, to remove any undesirable color cast.

This camera is set to an ISO of 80 (suitable for a very bright day) and AWB – Auto White Balance – this  means the camera will adjust the white balance – not good for indoor shooting but should be fine out of doors in full sun.


The image on the left was shot in tungsten light with no white balance adjustment. The one on the right was shot in the same position but with white balance set to tungsten light – the color is much improved.


Tip 7 – Set the Flash

Use your flash when capturing portraits on a very bright day. While it may seem counter productive, the flash will light your subject’s face and avoid the deep shadows that the overhead sun will cast on their face.

On the left the little girl is captured with no flash and over head sun. On the right I fired the flash and her face and clothes are more evenly lit.


Helen Bradley

Saturday, October 20th, 2012

How to shoot from a (fast) train


Ok, I’ve struggled with taking good shots on trains for a while now. The biggest problem is that by the time I know I have bad results it’s just impossible to go back and try to fix the problem.

Recently,  on a trip between Bergen and Oslo in Norway I nailed the shoot and ended up deleting only one third of my shots. There’s no way you won’t mess up a lot of your shots when shooting from a train or fast moving car, but with these tips you can make the percentage that are keepers so much higher.

First of all you have a choice between noise and blur. You need to bite the bullet on this – you can get sharp images but you might have a bit of noise. Personally, I actually like some noise and I think it’s fine. But, if you can’t live with some noise it might be as well to pack your camera away and just enjoy the trip.

Second you need a small aperture so you get a lot of the image in focus. I shoot at 7.1 or 8 which is pretty small so it  requires a corresponding high ISO to compensate. So, I dial up the ISO to 1600 and sometimes 3200. That is very sensitive but it means I can capture at speeds like 1/2000 of a second or even much faster than that – and that freezes the motion.

Third, you need to use manual focus. Unless you have a stupid fast focus on your camera it will get caught trying to focus and refocus and you won’t ever get a shot as the train moves. The autofocus will  be confused by things going fast close like trees, tall grass and power poles. If you manually focus you can work faster and ignore distractions. I have to say, I practically NEVER shoot manual so in shooting manual in this situation I’m doing this because there really isn’t any alternative to doing so.

Fourthly, the grass is always greener on the other side of the train. You will always think your side of the train has nothing interesting and it is all on the other side. This probably isn’t the case so don’t keep running back and forth  across the train. Instead, focus on what is on your side of the vehicle, learn to anticipate what you might see so you can react to it instantly when you see it.

Fifthly, I like to sit facing backwards so things move away from me and in a window seat of course. YMMV on this.

Once you are set up, find a direction to shoot that minimizes the reflections from the train window and inside lighting and start shooting. Accept the fact that trees and poles will mess up a lot of shots but if you take more than the usual number of pictures you will get a good number of good shots. Also accept that you will miss more than you capture depending on the situation. On my trip across Norway trees, power poles, tall grass and numerous tunnels played havoc with my shooting but the skies were wonderful and I did nail some really great shots and i felt way more in control of the shooting than ever before.

So, next time you are. on a fast train traversing a continent, set your camera up and enjoy the shooting experience.

Helen Bradley

Monday, October 1st, 2012

Photography – limit your color palette

One way you can strengthen your images is to use a limited color palette. This involves actually choosing areas/things to include in your images and what to leave out.

When you aren’t seletive about color you run the risk of including a lot of color which can be visually confusing especially when it doesn’t add to the photo.

So, a shot of colored flags or colored shapes is great because the shot is all about color but lots of color in an image about something else can just add up to clutter and is distracting. Here the color works because the scene is supposed to be busy:

When I am shooting I will often try to limit the color palette by selectively leaving out areas of a scene that have colors that aren’t in the palette I am using. I may also look out for specific color such as in doors and buildings that are interesting simply because of the colors used. I might also look for a scene like this where the colors suit the subject matter and reinforce the desolation:

Here the bright colors and the contrast in the red and green make for a great image – it wouldn’t be the same if the building were white or pale green for example:

Like everything you shoot, it helps to be aware of color and how you can use it to make better photos.


Helen Bradley

Wednesday, September 26th, 2012

Wonder with a wide angle

Wide angle lenses come in two types, some are wide angle and some are fisheye. I have a fisheye and from my experiences recently with it, I am tempted to buy the other type – not because I don’t like the fisheye, but because I see the possibilities with a wide angle lens.

Where I use a wide angle is when I have a lot of stuff in front of me – generally high things and where it just doesn’t fit in the screen.

These next images are from the Avon Aqueduct in Scotland. It is high and wide – impossible to capture without a wide angle, but with a wide angle lens everything fits nicely and you get an idea of the scope of the structure.


Now on the top of the aqueduct, which by the way is a canal for boats, the view is expansive. Huge, wide, diverse and you really want everything in the one shot if you can. Here, again, the wide angle saves the day and lets you get plenty of the scene in your shot.


In fact, this trip to Scotland, I pulled the wide angle out a few times. Tall buildings, streetscapes and bridges all got captured with it. I love the curve you get with the fisheye but I’d like the option to just get a wide shot without the bulge sometimes.

Helen Bradley

Wednesday, September 19th, 2012

Reflections make the ugly look charming


I really cannot emphasise too much how reflections can help you capture wonderful images. They can make even the most ugly objects like discarded road signs and rusty fences look great. It seems that anything reflected seems to grow an immediate charm factor and you can take advantage of this.

In this image, the traffic cone caught my eye so that made the subject something to look at. Perched on the old fence and standing in the canal it had a certain charm. Then the reflection made the shot. If I could pull it all together I had a worthwhile image. I like the result.

When you are out, look for reflections – you will find them in water and in shop windows, in car windows and all sorts of places you might not think of but they are there.

Helen Bradley

Monday, September 10th, 2012

Art with the flash

I got caught recently photographing in Scotland. While I had packed 2 more lenses than I ususally travel with – usually it is only one – I forewent the tripod – I do have my limits and I was spending 6 nights on a 6 foot wide narrowboat on the canals so to say that space was at a premium is an understatement. So, night one of the trip we are moored at the Falkirk Wheel. This huge monolith lifts boats using a rotating wheel up 80 feet or so from one canal to another. It’s big and beautiful and very kindly the guys at the wheel turned the lights on for me so I could photograph it. So, there I was late at night, the weater was cold but luckily pretty still but I really needed a tripod. There was nothing around to sit the camera on so I braced myself and got off a few shots, not too shabby in the circumstance – the lights were great but I love to get something just a bit different.


So here’s what happened – I had spent the afternoon photographing some kelpie statues – these are creatures with horse like heads and dragon like tails. In this case there were only the  heads and they were sitting on a boat in the mooring pond at the foot of the wheel – funky stuff. At night it made a perfect focal point for my shots – but still the problem of no tripod. Now there is a flash curtain setting on most cameras – you typically have a front and a read curtain sync flash. Essentially what it gives you is a combination of both a flash and a long exposure – the front and rear bit is when the flash fires – the beginning or the end of the exposure.

So, I could use the flash to capture the statues and the long exposure to capture the lights. Because the sculptures were so dark they didn’t get caught in the long exposure but they were frozen in the flash. Having shot a few test shots, I thought it needed  just a bit more so I combined the flash and long exposure and at the same time I moved the camera.

So, the kelpie (horse) statues are lit and they are sharp, the lights are caught but moving and out of focus – and because the statues are little bits of metal welded together with holes in them, the light show through and over them. All in all I called that a technical challenge well met  and an ace final result.

A word of caution. The solution to this problem required me to have  played with the flash in the past so I understood the curtain sync process, it also helped that I’d played a bit with moving the camera so I could forsee what that might give me. So, as always it will pay to learn to use your camera features before you really need to put them to use.

Then pure luck put the statues there (they get moved around a bit) and it got my host Nick to call the wheel guys and get the lights turned on and Irene to wake me and tell me the lights were on – an all round community effort which paid off with some shots I love.

Helen Bradley

Thursday, June 14th, 2012

Shoot right at night – Tip #9 Shoot from Hotel Windows

If you’re travelling for work or pleasure, ask for a room on a high floor in the hotel and shoot the night skies from your hotel window. There’s always something of interest happening in the streets below even if you have a totally awful view in daytime, the nightlights can offer photographic opportunities you don’t get in the daytime.

When you’re shooting from a hotel or office window at night, turn out the room lights so you minimise the reflections in the glass. Look for interesting buildings and light effects, jam your lens up against the window and start shooting. A table or windowsill can be used to steady the camera for long exposures too.

Helen Bradley

Wednesday, March 21st, 2012

Shoot right at night – Tip #8 – Closed shops

After dark you will find many shops completely blacked out but those which are lit or partially lit offer unique opportunities to photograph empty places.

Without people around to question what you are doing you can spend the time you need to do to find great subjects to capture. Look for different colours of light and repeated objects – here the local laundromat provides a moody subject which is only enhanced by the grain from the high ISO setting used.

Helen Bradley

Friday, March 16th, 2012

Shoot right at night – Tip #7 – Night activity

In busy cities and even in country towns you will find that the activity at night differs from that during the day.

Tankers deliver fuel, people clean areas that aren’t cleaned during the day and they are all great subjects to shoot.

Take the time to search out unusual activities to capture them. Here a cleaner was throwing up a cloud of steam and water and, captured in the night lights of the shops it made for an interesting shot.


Helen Bradley

Tuesday, March 13th, 2012

Shoot right at night – Tip #6 – Early Morning Sun

If you’re shooting after sundown or if you are up early in the morning before the sun is up look for drop dead gorgeous skies.

If you can capture the last rays of a dying sun or the first rays in the early morning you’ll get great color and wonderful silhouetting of anything between you and what light there is. Look for interesting trees, buildings and other features to capture as silhouettes.

Use a slow shutter speed, wide aperture or a high ISO (or all three) and be ready to capture the hues as they change from minute to minute across the horizon.

Helen Bradley

Page 3 of 512345