Sunday, July 21st, 2013

Change the Tone Curve to allow it to behave as a draggable Point Curve
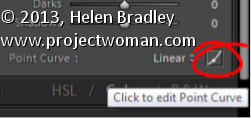
In Lightroom, you can make the Tone Curve behave as a Point Curve clicking the Click to edit the Point Curve indicator at the foot of the Tone Curve panel.
When a tone curve is set to be a point curve you can drag on any point on the curve to adjust the tones in the image at that correspond to that point on the curve.

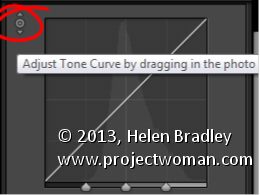
With the point curve selected, click on the Targeted Adjustment Tool in the top of the Point Curve dialog and drag on the image to lighten or darken the image at that point. Drag upwards to lighten, down to darken.
To delete a point on the curve, hold your mouse over the point, right click (Command + Click on the Mac), and select Delete Control Point.
Helen Bradley
Labels: command click, Delete Control Point, Develop, Develop Module, dialog, indicator, Lightroom, Lightroom 3, Lightroom 4, Photoshop, Point Curve, right click, targeted adjustment tool, tip, tone, Tone Curve, trick, Tutorial
Categories:Lightroom, photoshop
posted by Helen Bradley @ 6:10 amNo Comments links to this post
Thursday, July 18th, 2013

Using the Tone Curve to Adjust your Image
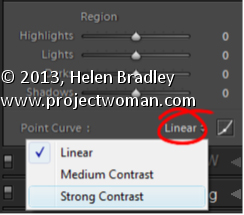
Using the Tone Curve, you have the choice of preset settings: Linear, Medium Contrast or Strong Contrast. Use these as a starting point for adjusting the image.
Select the starting point then drag the Highlights and Lights sliders to the right to lighten these areas. Drag to the left on the Darks slider to darken the Darks. To bring detail out of the shadows, drag to the right on the Shadows slider.
Helen Bradley
Labels: adjust, Darks, Develop, Develop Module, highlights, Lightroom, Lights, Linear, Medium Contrast, Photoshop, Point Curve, shadows., Strong Contrast, tip, tone, Tone Curve, trick, Tutorial
Categories:Lightroom, photoshop
posted by Helen Bradley @ 6:00 amNo Comments links to this post
