Tuesday, February 7th, 2012

Create a collage in Gimp

One task I perform regularly in Photoshop and Lightroom is to assemble multiple images on a single page for printing.  I love displaying my photos, for example, as triptychs –which are three side by side images.

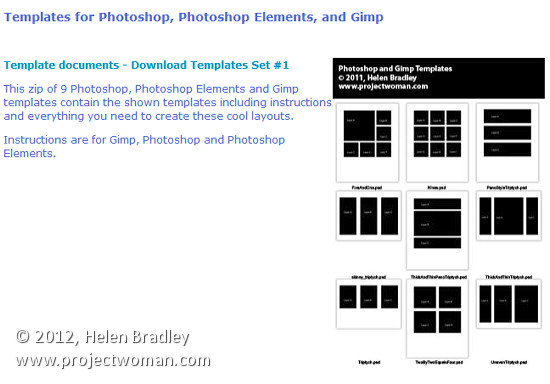
I’ve posted before on the process in Lightroom here (http://projectwoman.com/2009/07/creating-a-triptych-in-lightroom.html) and here (http://projectwoman.com/2009/10/how-to-select-and-compose-a-triptych-in-lightroom.html)and today I’ll show you how to do this in Gimp using a set of templates I have created for you and that you can download free.

These templates work with both Gimp and Photoshop and you can find them here: http://projectwoman.com/articles/45PhotoshopTemplates.html

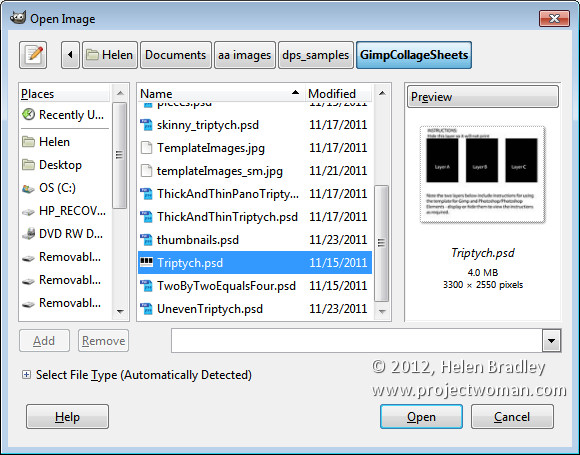
Unzip the files and open the one to use in Gimp along with the images that you want to use. I’m using the Triptych.psd file.

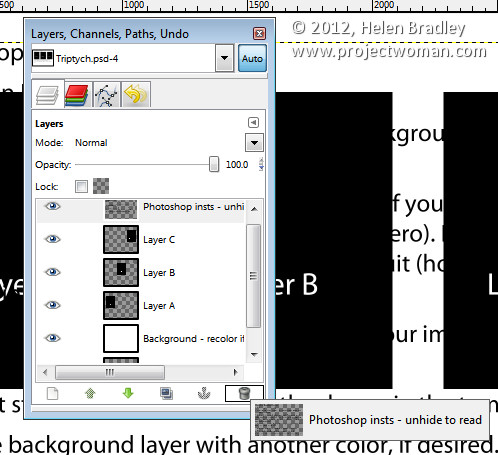
Start by viewing the template you are using and, in the Layers palette select and discard the top three layers which include the instructions for using the template in Gimp and in Photoshop and Photoshop Elements.

Select the first of your images, choose Select > All  and then select > Edit > Copy to copy the image to the clipboard.

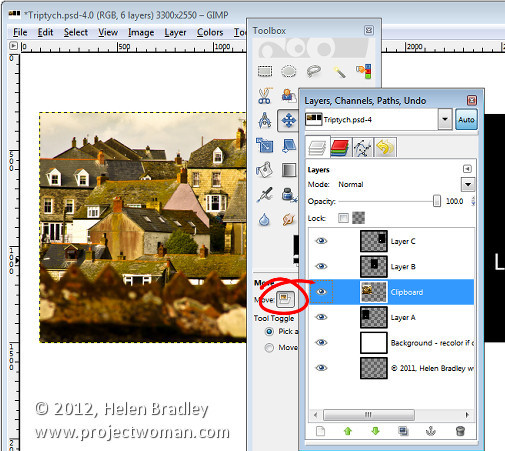
In the template click on the layer marked A and choose Edit > Paste as > New Layer. This pastes the image from the clipboard into the layer immediately above layer A.

Click the Move tool (set it to Layer) and drag the image over the top of the shape on the right. If desired, click the Scale tool and scale the image to size it larger than the black rectangle.

Move the portion of the image that you’re most interested in seeing over the shape.

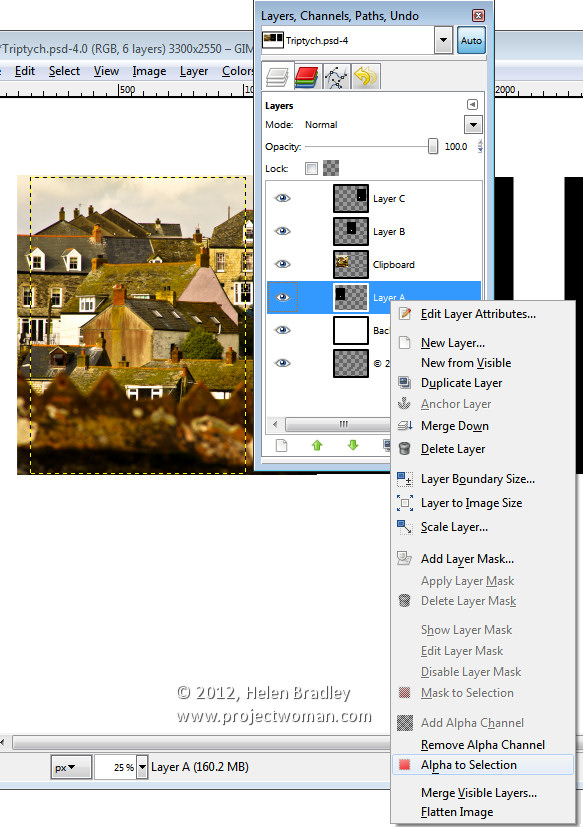
Now, to crop the image to size, click layer A, right click and choose Alpha to Selection.

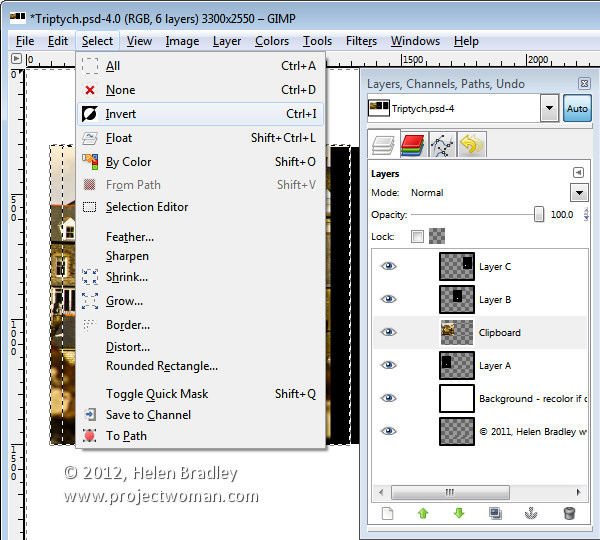
Now select the Clipboard layer that you’ve been working on, choose Select > Invert and press Delete.

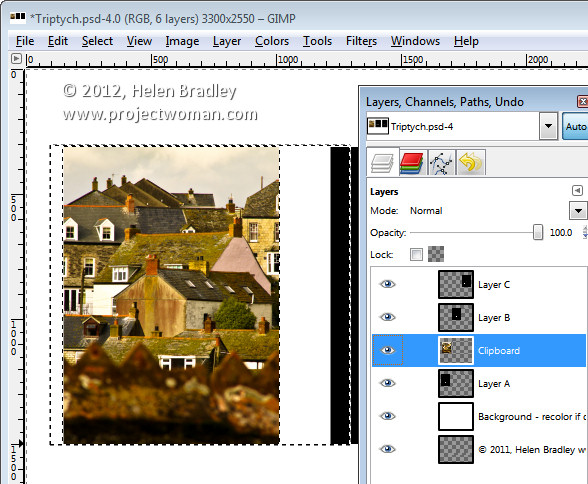
The image will be clipped to size using the template shape as a guide to the size. Choose Select > None before continuing.

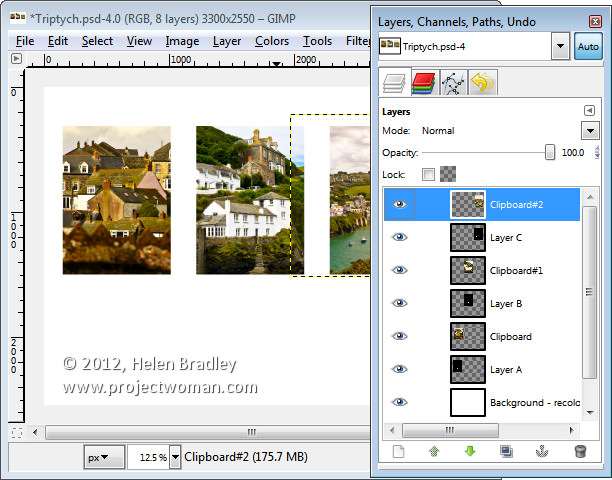
Repeat this process for layers B and C – select and copy the image to use, click the layer you’re working with (B or C) and choose Edit > Paste As > New Layer.

Move the image into position and scale it if desired. When scaling, making sure to lock the width and height so that the image is scaled in proportion.

Right click the layer you’re working with – Layer B (or C) and choose Alpha To Selection. Click your newest clipboard layer and choose Select > Invert and then Delete.

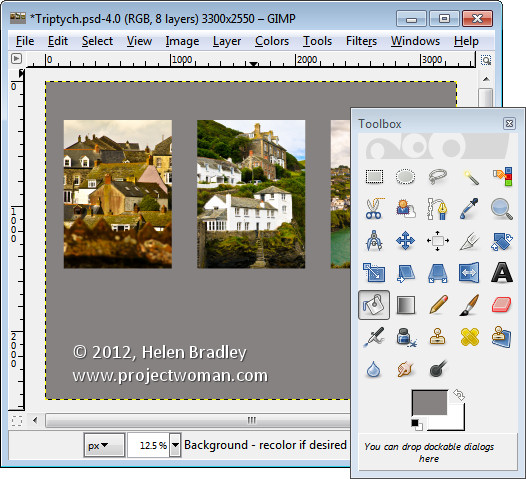
When you are done you should have all 3 images in position.

This image has a background layer behind the pictures which currently shows white. If you prefer to add a solid color behind everything, delete this layer and add a new layer filled with your choice of color. Here I’ve added a new dark grey filled layer.

You can finish off the design with some text or simply save the resulting image.

These storyboard templates are a good place to start with your picture layouts. You can find similar templates elsewhere on the web so start with a search for “Free Photoshop Clipping Mask Templates” or “Free Storyboard templates”


Helen Bradley

Tuesday, December 8th, 2009

Photoshop image framing template

I love things that look good and which are simple to use and this custom framing technique is one of them. Here’s how it is done:

Step 1
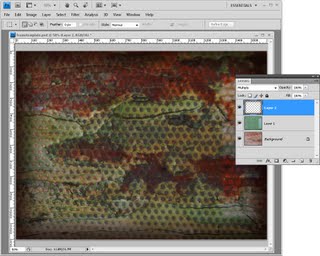
Open an image to use as a template background. Here I’ve stacked two texture photos on top of each other and blended them with the Color Burn blend mode. I then added another layer with a brown blurred edge to give the design a vignette effect.

Step 2
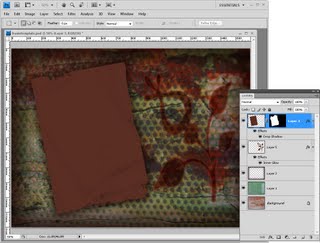
Next create a new layer on the image and make a selection on it for the photo. Fill the selection with a solid colour. You can, if desired, add a grunge layer mask to this layer as I have done – I used a grunge edge from Graphic Authority and added a blended flower for decoration. I think the Graphics Authority grunge effects totally rock.

Step 3
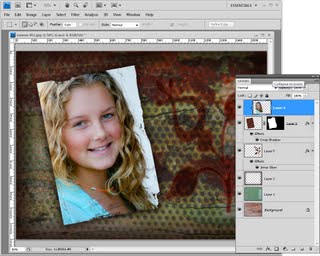
Open the photo to frame with this design and drag its background layer into your template design. Rotate the image to match the rotation of the shape on the layer below and drag it on top of that shape. Choose Layer > Create Clipping Mask to mask the image to the shape below.

Once it is made, you can reuse this template by simply replacing the image layer.

Helen Bradley

Friday, May 4th, 2007

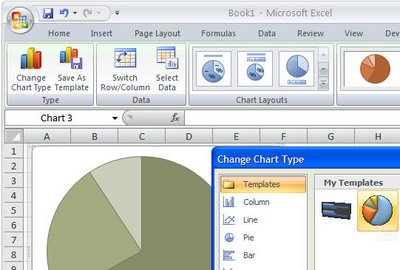
Reuse a Chart’s "Look"

Sometimes you’ll create a chart that just looks so good you want to save the ‘look’ so you can use it again. You can do this by turning your chart into a template. This would be a technique you could use if you were creating a report and you need to use multiple charts that are all formatted in a similar way.

To save a chart as a template, first display or create the chart and select it. On the Chart Tools, Design tab, choose Save As Template in the Type group. In the Save In box check you’re using the Charts folder and type a name for your template and click Save. Later, to apply the template, to a chart you’re about to create, select your data the Insert tab, click the Other Charts button to open the list and choose All Chart Types. Choose Templates and then the template you just saved. If you already have a chart created, click the chart and click the Design tab, then Change Chart Type. Click Templates, then click the template to use from the My Templates area.

You can store lots of templates to meet any need you might have and change from one to the other as required.

Helen Bradley

Saturday, February 24th, 2007

Microsoft Word – Working with normal.dot

Whether you realise it or not, you use a template evert time you work in Word.

Normal .dot is a special Word template which is used as the basis of all new documents created when you click the New Blank Document button on the Word toolbar. Not only does Normal.dot contain the basic formatting for most of the documents, it also contains macros, toolbars, auto text, and styles. Macros which are stored in Normal.dot are accessible to all documents created using the Normal.dot template. Because so much information is stored in Normal.dot you should back it up regularly so that you do not lose the data in the file if it becomes corrupt.

For special documents which have settings that are peculiar to the document type and different to other documents, create your own custom templates. To do this, create a new blank document and place in it all the information and settings you typically use in this type of document. For example, for a memorandum insert the word memorandum, the To, From and Date lines, and perhaps even a signature. Set up the document with the printing setting for your printer (trays and paper etc), and set the font and font size for the Normal style, and page margins. Save the document as a template by choosing File, Save As and, from the Save As type list choose Word Template (*.dot), give the file a name and save it.

You can include styles in a template by clicking the Styles and Formatting button on the Formatting toolbar and create or alter the styles in the document to suit your needs. Resave the template so that the Styles are included in it. These styles will be available to all new documents based on that template.

When you have a template with Styles, Auto Text, Macros, or Toolbars that you want to use in another template, copy these from one template to the other. Choose Tools, Macro, Macros, Organize. Open one template in the left pane of the Organizer and the other template in the right hand pane and use the Copy button to copy elements from one template to the other. This is handy for sharing styles, macros, etc. amongst other users – you can copy the template to a disk and distribute it with the attached elements in it.

To attach a template with its styles and so on, to an existing document choose Tools, Templates and Add-ins, Templates tab and click Attach. Select the template to add, enable the Automatically update document styles checkbox if you wish to apply the styles in this template to the document in preference to the styles currently applied and click Ok.

Helen Bradley

Page 2 of 212