Monday, December 3rd, 2012

Lightroom – harness the power of your scroll wheel

In Lightroom, using the scroll wheel on your mouse has some distinct advantages over using other methods for adjusting sliders. It might take a little getting used to but when you see just what it can do you might be surprised.

Develop module and the Wheel

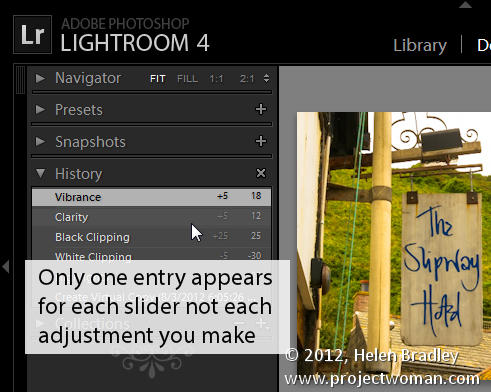
In the Lightroom Develop module you might have used the + and – keys to adjust sliders to fix your images. If you do this, whenever you pause to see how the change looks when applied to the image, Lightroom writes the change value in the history even if you’re not done. If you readjust the same slider a few times, each time you adjust it a new history entry is made.

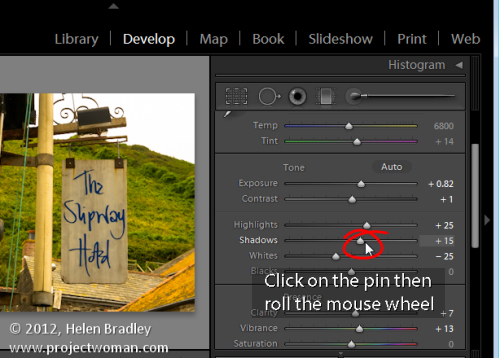
By contrast, you can use the scroll wheel to adjust the slider. Begin by clicking on the pin on the slider and then rolling the scroll wheel up to drag it to the right or down to drag it to the left. Not until you let go and go to the next tool will the change be written to the History. This means that you can experiment with different values rolling your mouse wheel left and right as you please – and until you move away from that control nothing is recorded. Your history list will be a whole lot neater and you have a much easier way to adjust the sliders.

Spot removal and the wheel

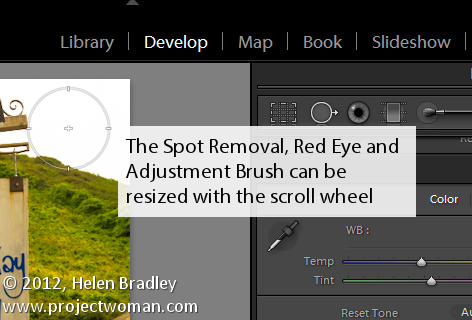
When you have the Spot Removal Tool, Red Eye Tool or the Adjustment Brush Tool selected you can size the brush to the desired size using the mouse scroll wheel.

To see this at work click any of these three tools to target it and then hold your mouse over the image. Roll with the scroll wheel to adjust the brush size. If you have the Adjustment Brush targeted then hold the Shift key as you roll with the scroll wheel to adjust the feathering on the brush.

Move with the Wheel

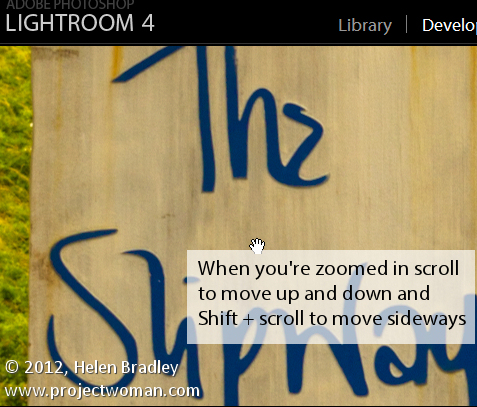
If you’re have used the Zoom feature to zoom into the image then rolling the mouse scroll wheel will move the zoomed image up or down in the work area. To scroll to the left or right use the Shift key with the mouse wheel.

A caveat…

It seems that some Mac users have experienced difficulty with the scroll wheel on various machines so your mileage with this technique may vary. On a Windows 7 machine, with Lightroom 4 and a standard two button mouse with a scroll wheel, everything worked as explained and it’s a whole lot easier than dragging sliders around to make your changes.

Thanks to Frank Schophuizen for his gracious contribution to this post.

Helen Bradley

Sunday, November 18th, 2012

Understanding Lightroom Process Versions

If you’ve used any earlier version of Lightroom and if you now use Lightroom 4 you need to know a bit about Process versions.

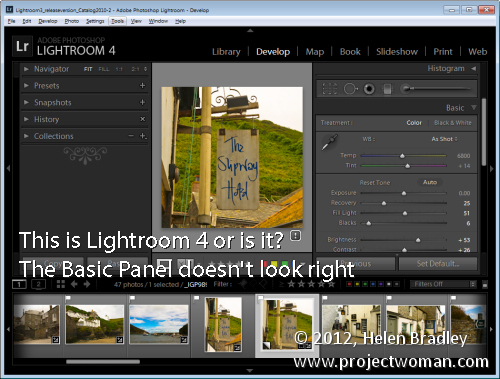
In this post I’ll give you the basics of what you need to know which will explain why you see exclamation points by some of your images in the Develop module and why the new Lightroom 4 sliders sometimes disappear unexpectedly.

Process versions

In Lightroom 3 and again in Lightroom 4 the Lightroom Process version was updated. These process versions affect how your raw images are processed by Lightroom so it’s important to understand what they are and how they work.

Initially there was only one process version used in Lightroom 1 and Lightroom 2 so upgrading from one version of Lightroom to the next didn’t create any issues. The process version used in these versions was called Process 2003.

When Lightroom 3 was released it had a new process version called Process 2010. This process version had better rendering of the raw image and that meant better detail rendering, better noise reduction and better sharpening.

Because this new Process 2010 was so significantly improved, Adobe didn’t apply it by default to images in Lightroom 3 which had been processed using the older Process 2003. To have done so might have produced unwanted changes to images which had been already processed so it was left to each user’s discretion to apply the changes or not. Images newly imported into Lightroom 3 were processed using Process 2010.

Fast forward to Lightroom 4 and the situation is repeated. There is a new process version called Process 2012 in Lightroom 4. Images newly imported into Lightroom are processed with Process 2012, and those which were processed in an earlier version of Lightroom remain unchanged.

So What is the Exclamation Point

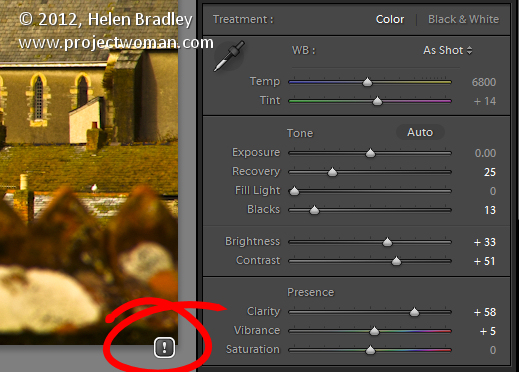
If you see an exclamation mark icon in the Develop module to the right of an image this indicates that it has applied to it a process version that isn’t the current version for the version of Lightroom you are using.

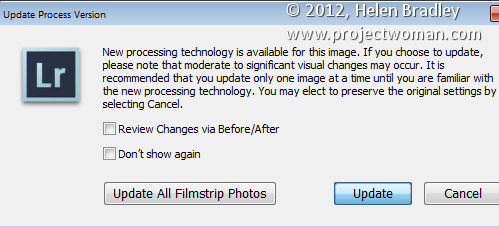
If you want to update an image, click the icon and select to update the image or select to update all the filmstrip photos. You can preview the changes before they are applied if desired.

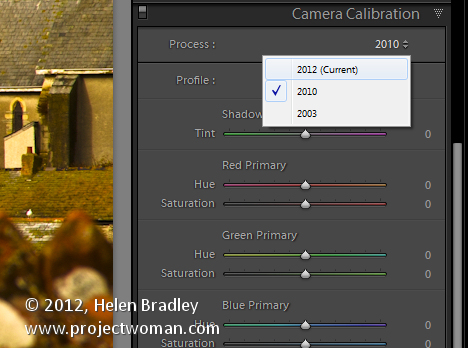
It’s also possible to update images from the Develop module’s Camera Calibration panel.  Here you simply select the desired process version from the Process list. The options are Process 2003, Process 2010 and Process 2012 (Current). In most cases, most users will choose to update the process version to the most current one.

Where did my Sliders go?

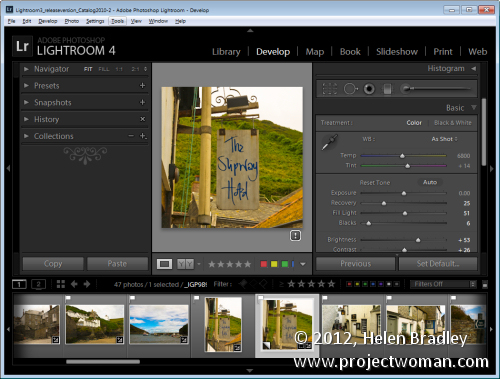
When Lightroom 4 was released the Develop module’s Basic panel was altered significantly. The sliders in that panel are now called by different names, they have different starting settings and they do different things to those in the earlier Lightroom versions. In short, the Basic panel adjustments in Lightroom 4 so significantly differ to those in Lightroom 3 that they aren’t interchangeable. Therein lies the explanation as to why your brand new sliders sometimes disappear and the older Lightroom 3 ones reappear – quite simply they do so when you are working on an image processed with an older process version.

So, if you have an image that has Process 2003 or Process 2010 applied to it, the Basic panel sliders will be those you are used to seeing in Lightroom 3 and earlier. If you’re working on a Process 2012 image the sliders are Lightroom 4 sliders. Updating the process version to the most current version will display the new sliders.

What this means to you

If you want the best processing for your images and if you want to see only one set of sliders in the Basic panel then go ahead and update all your images to Process 2012.

If you can see differences between the process versions and if you don’t want those changes applied to some or all of your images then you don’t have to update your images. It’s up to you to make the choice and you can do so for one or more of your images as and when you want to.

However, if you still have some Process 2003 or Process 2010 images in your Lightroom collection just be aware that Lightroom 4 sliders might disappear and be replaced by those from Lightroom 3 from time to time because of this.

Now it is over to you. Have you upgraded your older Process 2003 and Process 2010 images to Process 2012? If you didn’t what made you stay with the older version?

Helen Bradley

Tuesday, May 15th, 2012

A “Happy Snap” Lightroom workflow

At Halloween last year I was asked to photograph some kids I’ve shot from time to time since they were born. Basically their mum likes to have some up to date photos of the kids and Halloween seemed like as good a time as any to get some shots.

When I’m shooting like this, my aim is to get some good shots but nothing formal and I prefer not to use a flash because I get a better response from the kids without one. I captured the images in raw and I chewed through three small size camera cards in about an hour and a half.

My deal with their mum is that I get to use the photos for my work and she gets a disk of pictures. To keep this fun – so it doesn’t feel like work for me – I need a fast and effective processing workflow.  I need to get the images off my camera, sorted, processed, burned to a DVD and delivered to mum in time for her to enjoy them.

Thanks to Lightroom the process was simple and, in all, I reckon I spent less than 2 hours getting the photos from the camera cards to a DVD. Here is what I call my Happy Snap Lightroom workflow – it’s what I do to quickly process casual snapshots:

Step 1: Determine a plan of attack

To begin with I have some criteria I work by. I never give away substandard photos so anything blurry, out of focus or over exposed gets permanently deleted. Then I sort out the best of the images intending to give mum around 50-60 photos of the kids – it’s a nice range of images for her to use to scrapbook and post to Facebook and it doesn’t over burden her with too many photos to choose from.

Step 2: Download the images
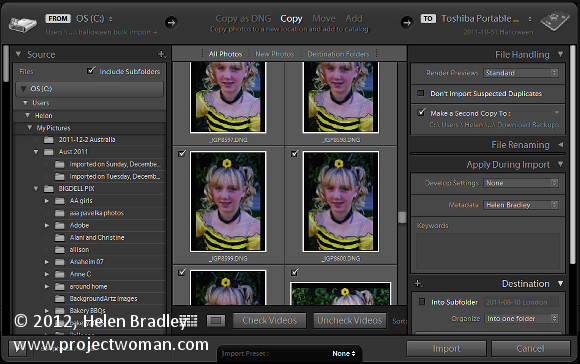
To begin, I download all the images from all three cards into a single folder on my hard drive (if there were only one card I would omit this step).

From there I import the images into Lightroom at the same time copying them to their permanent storage on my external photo drive and making a backup to a second drive. Copying rather than adding images to the Lightroom catalog lets me make backups and also add my metadata to the images so, when they popup on Facebook my copyright details are embedded in them.

Importing all the images in one step also means that when I’ve started the import process – which includes rendering standard previews – I can start working through the images and I don’t have to do it multiple times or switch out cards as I work – (the process works for me – your mileage may vary).

Step 3: Eliminating the duds
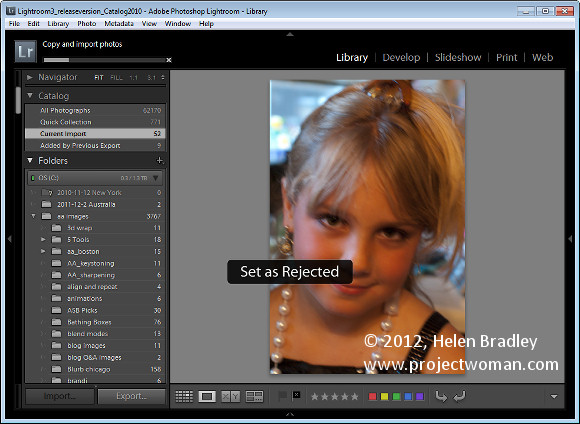
The first time I run through the images I am looking for images to delete as well as getting a general look at what I shot.

As I work through the images I’ll press X for images to delete and use the right arrow key to move past everything else. I’ll select to delete all out of focus images, anything where someone has their eyes closed or similar, and anything I don’t want to put my name to!

Once I’m done I choose Photo > Delete Rejected Photos to delete the images from my primary external photo drive. There are still copies on the backup drive and my hard disk but not on my main photo drive.

Step 4: Sorting the usable images
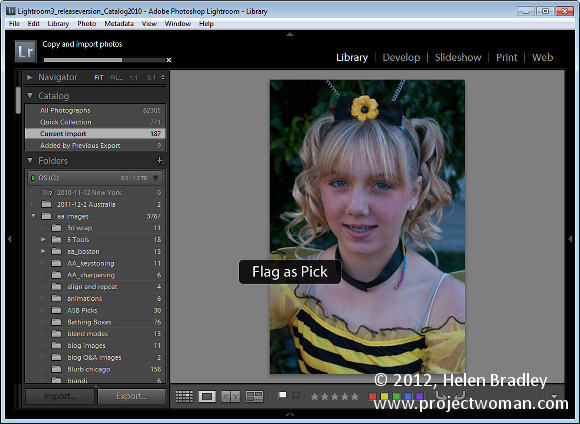
On the second run through the images I pick those I want to use. By now I have a rough idea as to what I have and what I might want to give mum. So this time I run through the images pressing P to pick an image and using the right arrow key to move past those she won’t be getting.

Step 5: Create a Collection
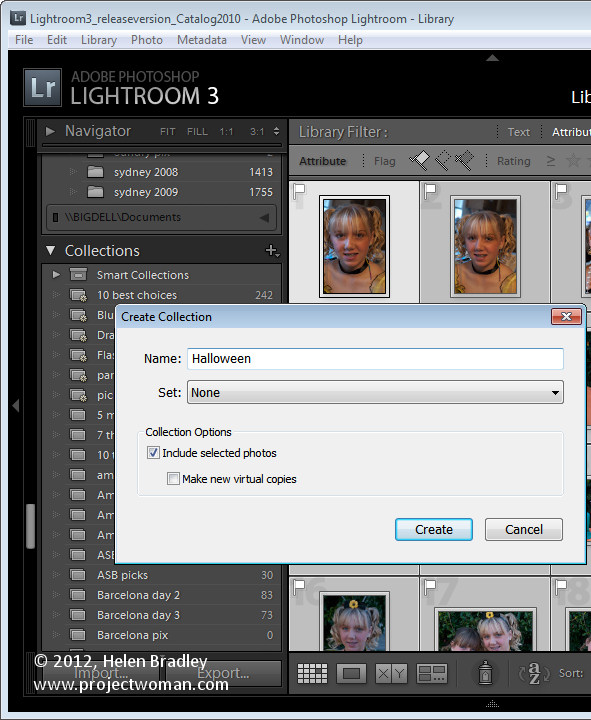
Once done, I isolate the picked images by clicking the first of the filter flag icons above the filmstrip. Then with only the picks visible I press Ctrl + A to select all of them and then click New Collection > Create Collection and type a name for it. Because the images are already selected, I leave the Include Selected Photos checkbox enabled and click Create.

Step 6: Apply initial processing to the images
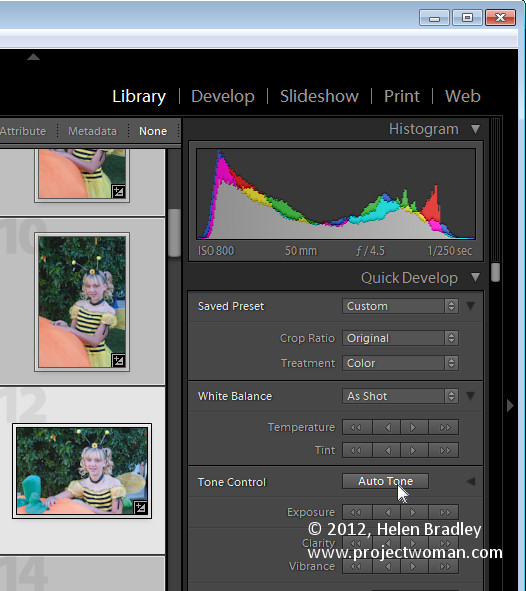
Now I have a collection of the picks and it’s time to process them. I start out by selecting all the images in Grid View in the Library and from the Quick Develop panel I select Auto Tone. This gives me a head start on fixing them but, because of the lighting, pretty much all of them needed a white balance adjustment.

Step 7: Process in the Develop module
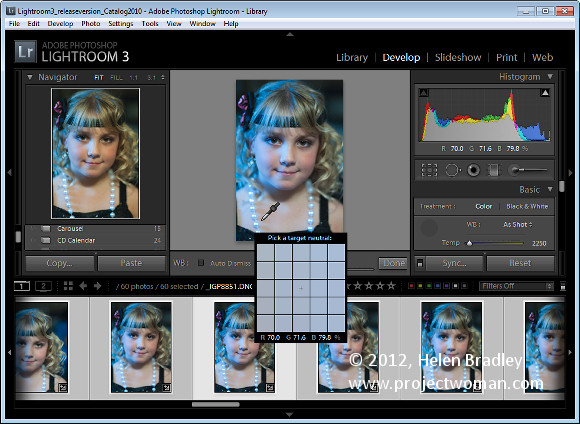
Switching to Develop module with the filmstrip visible I selected the White Balance Selector and then made sure that Auto Dismiss was disabled. This allows me to adjust the white balance on one image and then click on the next one in the filmstrip and continue to adjust the white balance from one image to the next without having to reselect anything. Basically all that most of these images needed was some white balance adjustment.

For those that needed cropping, I cropped as I finished with white balance adjustment and then moved on to the next image. This ensured that each image was dealt with only once as I progressed across the filmstrip.

Step 8: Make one off fixes
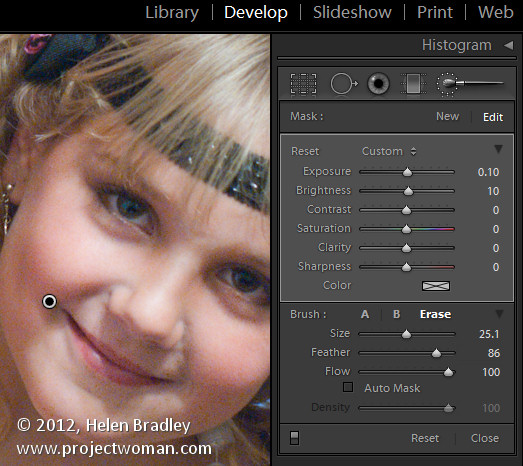
So, having fixed the worst of the problems I work backwards through the filmstrip to see if any of the images warrant special attention. If so, I make a call to fix them or simply remove them from the collection. To remove the image, right click it and choose Remove from Collection .

Here I had one issue with a couple of images where one child’s face was in shadow. For this, I used the Adjustment Brush tool at a small size with a large feather radius. I brushed over the areas where her face was in shadow and then adjusted the Brightness and Exposure to lighten to her face. In the same images other faces were overexposed so I added a second Adjustment Brush adjustment with the opposite settings to attempt to deal with this. The final result wouldn’t  stand up to close scrutiny but is just fine for the web and 6 x 4 printing.

Step 9: Export and burn
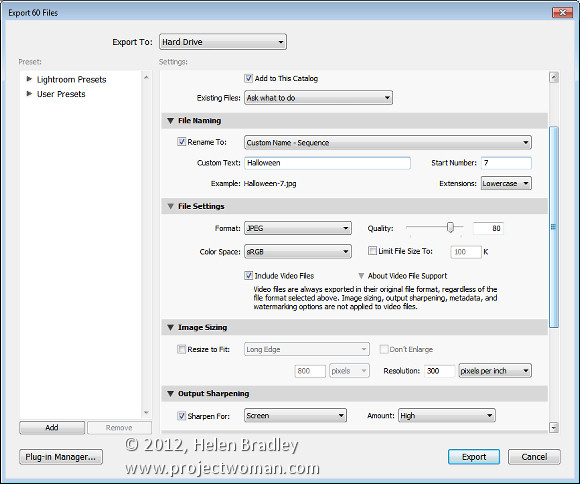
Once this was done it was time to export the images. Because they’re all in a collection, Ctrl + A selects all the images. I chose File > Export and then exported them as JPG images, 80 percent quality at the largest size and I added sharpening to them in the process. I made sure these images all went to a new folder so that they would be isolated from everything else and easy to find.

From there, it was a matter of launching Ashampoo Burning Studio, grabbing all the images and burning them to a DVD.

This workflow is one giant step better than simply burning the images direct to a DVD. It takes only a little more time with Lightroom to sort and apply some basic fixes to the images and it also means that only the best of the images get circulated and those that do have my copyright information embedded in them.

So now it’s over to you. What’s your “happy snap” workflow? Do you capture snapshots in raw? Do you process using Lightroom? And how do you get your images processed quickly so you’re not spending hours on images that are really just family snapshots?

Helen Bradley

Wednesday, May 9th, 2012

Lightroom – flagging in the Develop module

As you probably already know you can flag an image in the Library module in Lightroom using the Toolbar options.

But did you know you can also do it in the Develop module?

Check for the toolbar in the Develop module, if it is not visible press T to display it. Here you will find a series of options including some for flagging the image.

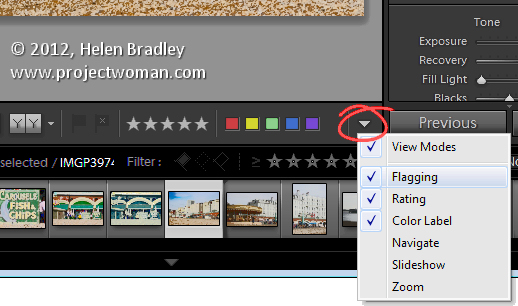
If the flags are not visible, click the down-pointing arrow at the far right of the toolbar and select Flagging from the menu. Click a flag to flag an image from here without having to go to the Library to do so.

The toolbars in the other modules: Slideshow, Print and Web while partially don’t have this same feature but it is a customizable option in the Library and Develop modules.

Helen Bradley
Wednesday, May 20th, 2009

Lightroom – Understanding Clarity, Vibrance and Saturation.


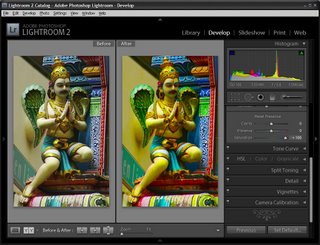
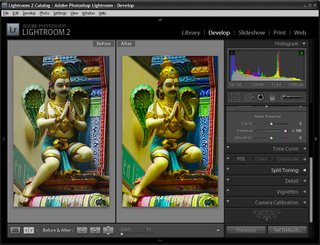
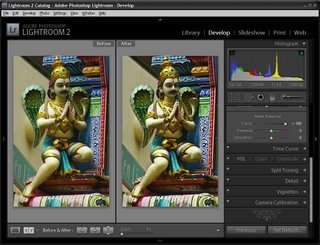
In Lightroom 2 the collection of Basic fixes available for your image includes three Presence sliders that sit together in the Develop module: Clarity, Vibrance and Saturation. This week I’ll explain the differences between these three adjustments and how they affect your photos. In each of the screenshots below I have set the slider value to 100 – way more than you would use to fix your image but a setting that will show clearly how the fixes work.


Step 1
Let’s tackle Saturation first. The Saturation slider works similarly to the Saturation slider in Photoshop or any other graphics software. It lets you adjust the saturation of the colors in the image – drag it to the right to brighten and deepen the colors in the photo. If you drag to the left, you remove some of the depth and brightness in the colors and, if you go all the way to -100 you end up with a desaturated or monochrome image.

One of the problems with using the Saturation slider is that it adjusts all the pixels in the image – those where the color is lacking in saturation and those that are already highly saturated. In trying to fix the pixels that need a color boost you can end up shooting some other pixels into right over the edge so the colors tend towards the ridiculous.


Step 2
The Vibrance slider solves some of the problems that you’ll encounter when trying to boost color saturation because it is more particular about what it adjusts. With vibrance only the least saturated colors in the image are adjusted and those pixels which are already relatively saturated are adjusted less. The result is that you’ll get a general improvement in the saturation in colors in the image but not to the extent where colors become unrealistically bright. Vibrance also offers some protection for skin tones which makes it a good choice for adding saturation to portraits as it is less likely to over saturate and destroy the subject’s skin tones. In many instances you can safely bypass the Saturation slider and adjust Vibrance instead.

Step 3
The Clarity slider affects the contrast in the midtones in the image. It works by increasing some of the edge detail in the midtones giving a general sharpening which adds punch to your photo. Typically you will want to adjust the Clarity of your image in a positive direction using a setting of around 10 to 15. If possible, view your image at 100 percent so that you can see the changes that you’re making to it as you adjust it.

Helen Bradley

Page 4 of 41234