Friday, November 25th, 2011

Craft great Black and white images in Lightroom

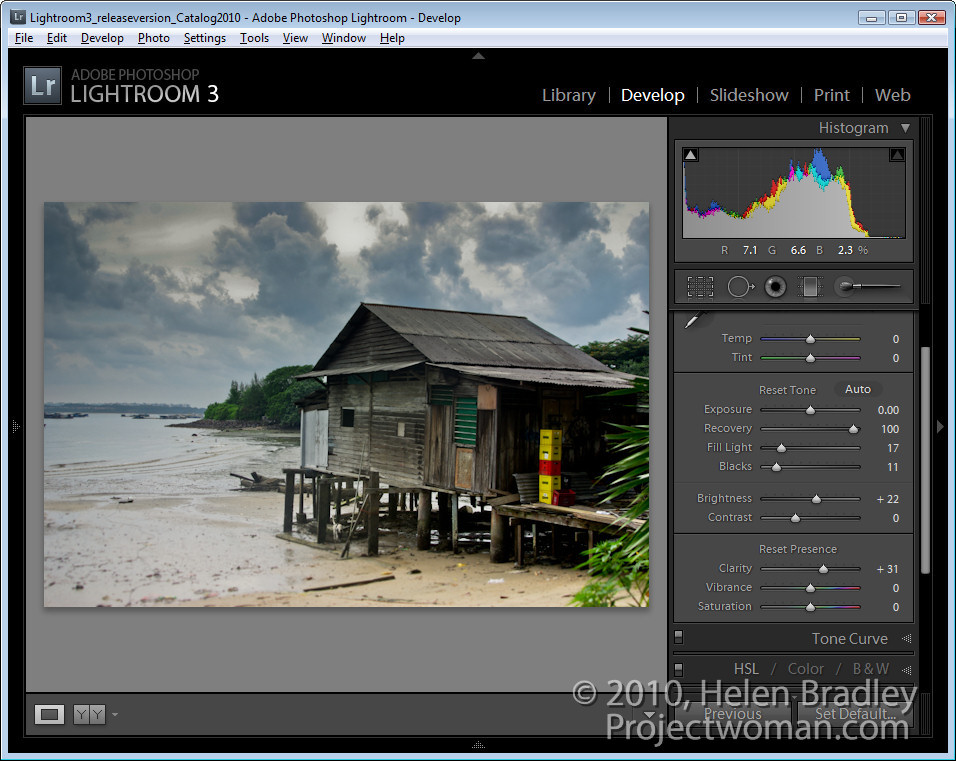
Most of us know we can convert and image to black and white in Lightroom by simply pressing the letter V. However, for the exact same image, your version of Lightroom might give a very different result to my version of Lightroom. The explanation is that there are two settings available for black and white conversions in Lightroom.

I’ll show you what these are, how to configure the one you want to use and how to quickly switch between them.

With a color image on the screen in Lightroom’s Develop module, press the letter V to convert it to black and white.

Open the B&W panel – it’s called Greyscale in Lightroom 2 – and check out the color sliders.

Depending on the preferences that you have set, the sliders might all be set to zero or they might show a black and white adjustment tailored to the image itself which Lightroom calls Auto mix.

The auto mix adjustment applies an auto exposure adjustment to the image as well as a conversion that maximizes the distribution of the grey tones in the image. This is customized for the image so every image will be given a custom adjustment much as you will get if you click the Auto Tone button in the Basic panel. Notice the subtle differences in the histograms in each of the adjustments here.

Whether or not you see this Auto mix applied to a black and white image is controlled by your Lightroom preferences. To see these, choose Edit > Preferences (or Lightroom > Preferences on the Mac), select the Presets tab and there’s an option there which reads “Apply auto tone mix when first converting to black and white”.

If this is checked you will get the auto tone mix applied to the image, if not, you will see a black and white adjustment where each color is given the same adjustment value of zero.

Regardless of which setting is in place you can switch between the two in the B&W panel.

If an Auto mix has been applied, hold the Alt key (Option on the Mac) and you will see an option Reset Black and White Mix. Click this and all the sliders will be set back to zero.

On the other hand, if your sliders are all set at zero, click Auto to apply the auto mix adjustment to the black and white image.

Step 5

You can further adjust the black and white regardless of whether you have an auto mix applied automatically to it or not by adjusting the sliders.

You can also select the Target Adjustment Tool and drag on an area of the image to adjust whether it is light or dark. Dragging downwards will darken it, dragging upwards will lighten it.


Helen Bradley

Wednesday, November 23rd, 2011

Lightroom’s Selected and Most Selected Images

One of confusing things when you’re getting started in Lightroom is understanding the concept of selected images and the most selected image in Lightroom.

Step 1

To see this at work, start in the Library module and press G to move to Grid view. Click on any image to select it and Shift + Click on another image. You’ll now have a sequence of images selected.

Notice that in both Grid view and on the Filmstrip the first image that you selected has a lighter border around it than all of the other selected images and notice that the unselected images have darker borders.

The image with the lightest border is the most selected image and it is the image that will be affected by changes that you make to various settings, in particular when you are working in Loupe view with multiple images selected.

Step 2

What you have selected in Lightroom and the view you are in impacts how changes are applied to an image.

In Grid view if you select the Quick Develop panel and choose a different white balance setting then all the selected images that are selected will be altered.

Step 3

However, if you are in Loupe view and if you make the same change only the most selected image will be altered and not all the selected images.

Grid and Loupe view work very differently and it’s important to understand, particularly in Loupe view, that when you have multiple images selected, there is one that is most selected.

Step 4

When you have all images in a folder or collection selected it can be difficult to see just how to deselect the images. To deselect a selection, click outside the thumbnail area of any of the selected images in an empty area of the cell it is in. This deselects the current selection so only the image that you just clicked will be selected.


Helen Bradley

Friday, October 7th, 2011

Round tripping with Lightroom

One of the most confusing things for new Lightroom users is understanding how documents get round tripped from Lightroom to Photoshop and back.

Step 1
To start, open Lightroom with the image displayed in the Develop, Library, Slideshow or Web modules. Right click the image and choose Edit In > Adobe Photoshop.

If you chose a raw file then the image is sent direct to Photoshop.

Step 2
If you chose a jpg or tiff file, then other options are available. You can choose Edit a Copy, Edit Original or to Edit a Copy with Lightroom Adjustments. If you want to take the changes that you’ve made to the image in Lightroom with you to Photoshop, then use the Edit a Copy with Lightroom Adjustments option.

This is exactly what happens if you are working with a raw image – you don’t see the dialog – and the image is sent direct to Photoshop with the Lightroom adjustments in place.

Edit Original ignores any changes that you have made in Lightroom and sends the unedited original image to Photoshop.

Edit a Copy sends the image direct to Photoshop ignoring any changes you’ve made to the image in Lightroom but at the same time it creates a copy of the image so you won’t be editing your original.

Step 3
When you’ve finished editing the image in Photoshop, click File > Save to save the image.

The one thing you should avoid when saving a photo that you have taken from Lightroom to Photoshop is to rename it when you save it. If you rename an image by choosing File > Save As then the link between the image in Lightroom and Photoshop won’t be retained and the edited saved version won’t appear in Lightroom catalog. To get the image back into Lightroom you have to find it and then import it into the catalog. This is typically the step where new Lightroom users fall foul of the process and get understandably frustrated.

Step 4
When you return to Lightroom, if you were editing a raw file or if you chose to Edit a Copy, you will find your original file and the edited version in place in the Lightroom catalog. The edited version of the file is stored in the same folder as the original.

The edited version has the same file name as the original but with -edit added to it. In the case of a raw file, the edited version will be saved by default as a tiff file.

If you chose Edit Original then only the original file with its edits will appear in Lightroom.

Step 5
If you wish to do so, you can send also send an image to Photoshop as a Smart Object by right clicking it in Lightroom, choose Edit In > Open as Smart Object in Photoshop.

This opens the document in Photoshop with the image on a layer converted automatically to a Smart Object. You can do this for tiff, raw and jpg images.

When you save the file it is saved as a tiff with –edit added to the filename – the tiff file format supports Photoshop Smart Objects so the Smart Object will be there when you edit the file again.

Step 6
You can determine how Lightroom sends files to Photoshop by choosing Edit > Preferences and click the External Editing tab. Here you can select the file format to be used, the color space that will be applied to the image, the bit depth, resolution and any compression available for the chosen file format.

From the foot of the dialog you can also configure the file naming convention used for files sent from Lightroom to Photoshop. By default, it will be the original file name with –Edit attached to it, although you can change this if desired.

Here too you can add other programs to the shortcut menu so you can take your images from Lightroom direct to programs such as Photoshop Elements or your favorite editor.

Helen Bradley

Saturday, July 9th, 2011

Copyright watermark your images in Lightroom 3

In Lightroom 3 Adobe built watermarking into the Export module (and it is available in the Print, Slideshow and Web modules as well).

To watermark your images, select one or more images in the Library module, right click and choose Export > Export. In addition to choosing options such as the export location, file name and file type and sizing an image you will find the new watermarking option near the bottom of the dialog.

Enable the Watermark checkbox and from the dropdown list, select Edit Watermarks to display a watermark dialog. You can apply a text or a graphic watermark. For a text watermark, click the Text option button, then from the Text Options select your Font and Style.

Alignment controls the text alignment within the small box that it is placed inside so you will use this option if you have multiple lines of text. Color is the text color which you can select from a color picker – unfortunately there is no contrasting shadow added so you have to choose a text color that works on most images.

The Opacity setting adjusts the transparency of the copyright text and you can adjust this downwards to blend the copyright text in with the underlying image a little. Select Proportional size, Fit or Fill as desired. For my watermark I selected Proportional which is typically the option you will want to use.

The Anchor options allow you to place the copyright text within one of nine areas on the screen varying from top/left through center and to bottom/left.

Once you’ve selected the Anchor, adjust the Inset values to bring the text in from the vertical and horizontal margins so that it doesn’t sit at the very edge of the image.

You can rotate the text by clicking one of the Rotate options.

On the left of the dialog under your image is a text box with the word “copyright” in it. You can replace this with your own text – to create the copyright symbol type (C).

When you’re done, click Save and type a name to save the copyright data as a preset so you can use it again in the Export or any other module that supports watermarking of images.

If you are editing an existing watermark, click the down-pointing arrow in the top left of the dialog where it will show (edited) after the preset name and choose Update Preset or Save Current Settings as a New Preset depending on what you want to do.

Instead of a text watermark, you can use an image you have created. To do this, enable the Image option at the top of the dialog and click to select the image to use.

A watermark saved as a JPG image will not be transparent so the watermark will appear as a solid rectangle on your image, as shown here.

If you want to have a transparent background around your watermark, create the watermark as a PNG image with transparency in Photoshop or another editor, and import that as your watermark.

When you export your images, your watermark will be automatically added to them.

These same watermark options are also available, for example, in the Flickr Publish Services so you can automatically watermark images as you upload them to your Flickr account.

Helen Bradley

Friday, January 28th, 2011

Crafting images in Lightroom

Lightroom has more tricks up its sleeve than simple photo fixes such as exposure and contrast. It’s possible to craft images inside Lightroom and, in many ways, the tools in Lightroom make the task easier than it would be in Photoshop or another editing program.

In this post I’ll show you a way to turn a relatively hum drum image into something much more visually exciting. So, when you don’t get the image you want straight out of the camera see if, armed with some simple Lightroom tools, you can coax some better results from it. Remember too that this is a creative technique – you’re not looking for realism as much as a way to create a different look for your image.

Step 1

Start out with an image that has what I call “good bones”. It needs to be pleasingly composed and it needs to have something that compels you to want to look at it and to spend some time working with it. Good contenders for this process are images with interesting skies and these include heavy clouds and clouds captured at sunset and sunrise.

Step 2

In the Develop module use the adjustments in the Basic panel to apply global adjustments to the image. I focus in detail on the adjustments that aren’t available in the Adjustment Brush and Graduated Filter such as Blacks, Fill Light, Recovery and Vibrance.

I will adjust the Recovery slider at least half way to the right and adjust Fill Light to get some detail from shadows. I’ll adjust the Blacks even to the extent of plugging some shadows for now. I’ll also use other adjustments such as Exposure and Brightness just as a start.

The fact that none of these changes are permanent is a big plus because if you don’t like the results later on you can come back and readjust them.

Step 3

Having dealt with the overall image I’ll now turn my attention to parts of it. Here there are three areas in particular – the hut and bottom right of the image, the bottom left and the sky.

Starting with the hut I’ll drag the Graduated filter in from the bottom right of the image. Then I’ll bring some detail out in that area by adjusting Brightness, Exposure and Clarity.

Step 4

The sky is treated the same way as the hut. This time the Graduated Filter is dragged down from the top. Then I decreased Exposure and Brightness to reveal the detail in the clouds. I added some Contrast and Clarity and a hint of dull yellow color.

Step 5

In the bottom left of the image another Graduated Filter adjustment fine tunes this area of the image and adds a hint of dirty yellow color. Reducing both Sharpness and Clarity softens the details here.

At this point I might consider adding a second Graduated Filter over the top of this one to again reduce Clarity to soften the details even more. The Graduated Filter can be used cumulatively so adding one on top of the other enhances the effect.

Step 6

Once I’ve finished with the Graduated Filter, I will return to the Basic panel and fine tune the settings there. Here I adjusted the Brightness and Fill Light to lighten the image a little.


Step 7

At this point I cropped the image to remove some excess detail from the bottom and right edges to focus interest more in the water and the hut.

Step 8

To finish, I used the Adjustment Brush on the plastic crates. By painting over them with the brush and reducing the Exposure slightly they are made a little less distracting.

At any time I can revisit any of the changes I have made including those applied with a Gradient Filter or the Adjustment Brush and adjust the settings if desired.

Not every image will lend itself to this treatment but many will. You should note too that here I was working on a jpg image and because of the in camera processing applied to jpg images and the fact that much of the data that the camera captures is discarded in the process of saving an image as a jpg, the scope for adjusting this image was significantly less than would have been the case if I had the image captured as a raw file.

Helen Bradley

Tuesday, January 18th, 2011

Use Lightroom to Remove Sensor Dust

One of the annoyances most photographers encounter from time to time is sensor dust. This is dust that you get on the camera’s sensor and which shows up in your images as dark marks or flaws on your photos. Most often you’ll see this in the sky but it can appear anywhere in an image and it will appear in the same place in all your images – the tell tale sign that you have problems.

Of course, the only way to get rid of the dust is to clean your camera either using its dust removal option or by physically cleaning it. However, chances are that the reason you know you have a dust problem is that you see it on your photos. For these images, at least, cleaning the camera won’t help. Instead, digital removal is required.

If you’re faced with a series of photos that have dust problems, Lightroom can simplify the process of fixing them. Its Spot Removal tool can be used to fix sensor dust and, the benefit of doing the work in Lightroom rather than Photoshop, for example, is that once you have one image fixed, you can automatically fix most of the others.

To get started, locate one image in the sequence that has sensor dust issues. Switch to Develop move and select the Spot Removal tool. Set it to Heal (the other option is Clone). Set the brush size to something large enough to cover the problem area and set its Opacity to 100 percent.

Click on the dust to set the location for the fix. You’ll see two circles appear on the image; one over the problem area (the spot circle) and the second over the area used to fix it (the sample circle). You can tell which circle is which as the arrow between them points from the sample circle towards the spot circle.

You can drag to reposition either circle and you can drag on one circle when the mouse pointer shows as a double headed arrow to resize the pair.

You can add multiple fixes to one image and, if you make too many, right click on the one to delete and choose Delete from the menu.

You can also use the right click menu to change from Heal to Clone to see if you get a better fix with this setting.

Once you have fixed the spots on the current image, you can copy these to other images. To do this, click the Close button to close the Spot Removal Tool drawer.

Right click the image and choose Settings > Copy Settings and when the dialog appears, select Spot Removal, disable all other options and click Copy.

Select one or more images in the sequence that you shot and that need the fix applied to them. These do not have to share the same aspect ratio as Lightroom can fix portrait and landscape images at the one time.

Right click and choose Settings > Paste Settings. This will paste the fix onto the other images. Alternately you can select the fixed image and one or more other images, click Sync and select Spot Removal.

Check each fixed image in turn. Some images may have image content under the sample circle that doesn’t provide a suitable match for the problem area so you will need to move the sample circle to adjust the fix.

However, the entire process should be quicker than performing the fix to each image individually in Photoshop, for example.

Helen Bradley

Wednesday, October 20th, 2010

Create a Root Folder in Lightroom

If you store your photo collection on an external drive and switch between two or more computers, you can run into trouble when the Lightroom catalog does not recognize the current drive letter assigned to your portable drive. In this case, you may find that all of the folders in your Lightroom collection are “missing” requiring you to individually locate each folder in turn on the disk so that Lightroom can find the images.

If you have a large number of folders in Lightroom this can take a lot of time to fix and it’s a major nuisance. The solution is to create a folder in which all the other folders on your removable drive are located. Then add this folder to Lightroom so that it becomes your root folder. Then if the folders are ever reported as being missing you can quickly locate this root folder and Lightroom will automatically find all the other missing folders that are contained within this one.

To create a root folder, first make sure that you locate all the folders of images in your Lightroom catalog in a single folder on your external drive. Then make sure that there is, at the very least, one image in your root folder – if needed, simply copy an image there so you can continue.

Now return to Lightroom and import the root folder into Lightroom. You need at least one image in the root folder because Lightroom requires there to be at least one image in a folder before it will import it and its contents into Lightroom.

Once you’ve imported your root folder and its single image you can remove the image from Lightroom and from the disk if desired. Once the root folder appears in the Lightroom catalog it will stay there even if it doesn’t contain any images.

Now, in future, if you move your external drive to another computer and if it is not recognized by your Lightroom catalog, select the root folder in Lightroom and locate it on the disk. All the other folders below this in the hierarchy will then be automatically found.

Helen Bradley