Monday, August 19th, 2013

Learn how to suppress halos with the Detail Slider when Sharpening in Lightroom
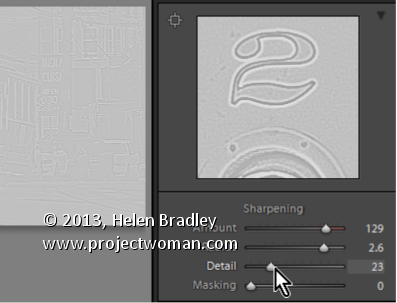
The Detail slider in the Detail panel in Lightroom lets you suppress the haloes you create with the Radius slider.
At zero position you will fully suppress any halos and at 100 you will have no halo suppression so you will see all the halos added using the Detail slider.
This means that a low value for the Detail sider sharpens only the largest edges in the image and a large value for Detail will tend towards sharpening everything.
Hold Alt (Option on the Mac) as you drag on the Detail slider to see the effect on the halos around the edges in the image.
Typically if you use a high Radius value then you will want to use a low value for Detail and vice versa.
Helen Bradley
Labels: 100%, Alt, detail, Develop, Develop Module, edge, halo, Lightroom, option, Photoshop, radius, Sharp, Sharpening, sharpening in lightroom, slider, tip, trick, Tutorial, zero
Categories:Lightroom, photoshop
posted by Helen Bradley @ 6:39 amNo Comments links to this post
Wednesday, August 14th, 2013

Learn how to fine tune sharpening with the Amount and Radius Sliders
The Detail panel in Lightroom controls sharpening on the image. Use the Amount slider to manage the intensity of the sharpening – set this to a high value to begin.
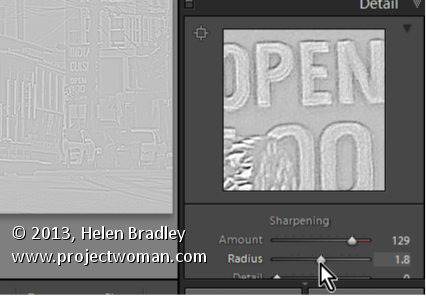
The Radius slider adds halos around the edges in the image which is what gives the sharpening effect.
For an image with lots of fine lines and detail such as a building select a low radius. For a portrait or an image with softer detail, use a high radius value.
Hold the Alt key (Option on the Mac) as you drag on the Radius slider to see the halos.
Helen Bradley
Labels: Alt, amount, detail, detail sharpening, Develop, Develop Module, edge, effect, halo, Lightroom, option, Photoshop, radius, Sharp, Sharpening, sharpening in lightroom, slider, tip, trick, Tutorial
Categories:Lightroom, photoshop
posted by Helen Bradley @ 6:31 amNo Comments links to this post


