Thursday, April 11th, 2013
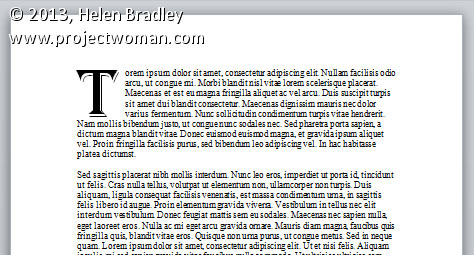
Drawing Attention with a Drop Cap
One easy and fun way to add visual interest to a text heavy page is to use a Drop Cap. A Drop Cap is when the first letter of a paragraph is increased in size and, more often than not, put in a more ornate font.
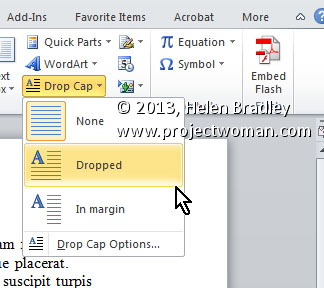
To create a Drop Cap, place your insertion point in the paragraph you wish to start with a Drop Cap. Then, choose Insert on the Ribbon, click Drop Cap > Drop Cap Options. The ‘Drop Cap Options’ allows you to either insert the Drop Cap into the paragraph, with ‘Dropped’, or place it separate from the text, with ‘In margin’. If you’re unsure what to use, I would suggest ‘Dropped’ and increase the ‘Distance from text’ setting to .3cm and the ‘Lines to drop’ setting (which affects the Font size of the actual Drop Cap) to 5 and click OK.
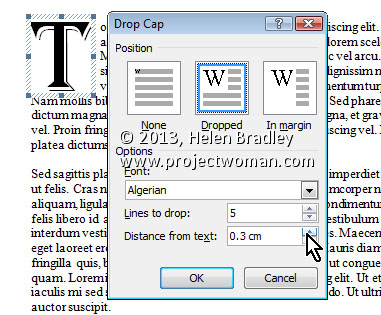
To change the font of the Drop Cap, you can either select the font you want directly in the ‘Drop Cap Options’ window or highlight the letter (which appears in a Frame) afterwards and changing it. You could even use Format, Borders and Shading, Shading tab to fill the frame with colour.
Helen Bradley
Labels: 2010, 2013, big, Cap, Distance from text, drop, Drop Cap, first, format, letter, Lines to drop, Microsoft Office, Microsoft Word, Office, tip, Word
Categories:office
posted by Helen Bradley @ 6:30 amNo Comments links to this post
Tuesday, December 18th, 2012
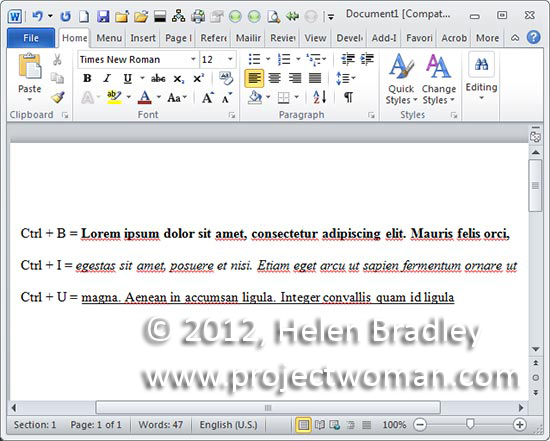
When you want some text to stand out by being bolded you can press Ctrl + B and then type the text. To turn bolding off, press Ctrl + B again. This also works to bold already typed text – select the text and press Ctrl + B to bold it. The keyboard shortcut Ctrl + I can be used to italicize text and use Ctrl + U to underline it.
Helen Bradley
Labels: bold, how to, italics, Microsoft Office, tip, trevor office, trevor payne, underline, Word
Categories:office, trevor tip
posted by Trevor Payne @ 8:00 amNo Comments links to this post
Tuesday, December 11th, 2012
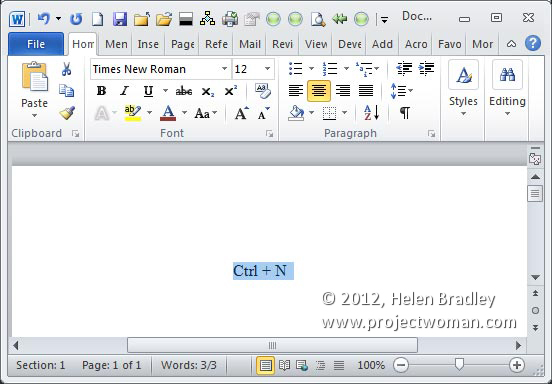
You can bypass the Open and New document dialogs in Word using shortcut keystrokes. To start a new blank document from inside the document you are working on now, press Ctrl + N. To open a document that already exists to reference or edit it press Ctrl + O and browse to locate and select the document to open and click Open.
Helen Bradley
Labels: how to, Microsoft Office, new window, tip, trevor office, trevor payne, Word
Categories:office, trevor tip
posted by Trevor Payne @ 8:00 amNo Comments links to this post
Tuesday, November 27th, 2012
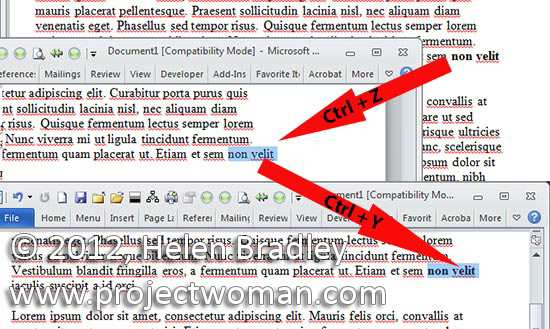
Made a mistake? Undo it with Ctrl + Z and, if you change your mind yet again, redo the undone command by pressing Ctrl + Y. In most programs you can press Ctrl + Z repeatedly to roll back your changes.
Helen Bradley
Labels: how to, Microsoft, Microsoft Office, redo, tip, trevor office, trevor payne, Undo, Word
Categories:office, trevor tip
posted by Trevor Payne @ 8:00 amNo Comments links to this post
Tuesday, November 13th, 2012
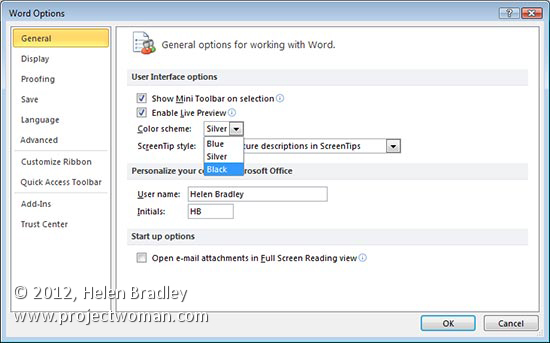
Use these keys to quickly select items in any Windows dialog. Press Alt+Down Arrow to open a dropdown list and then use the Up Arrow and Down Arrow to navigate to an item to select. Use the Space Bar to select or deselect options in the dialog box or, if an item has a letter underlined in its description press Alt + that letter – for example for File, press Alt + F.
Helen Bradley
Labels: dialog box navigation, how to, key shortcuts, Microsoft Office, navigate, tip, trevor office, trevor payne
Categories:office, trevor tip
posted by Trevor Payne @ 8:00 amNo Comments links to this post
Tuesday, November 13th, 2012
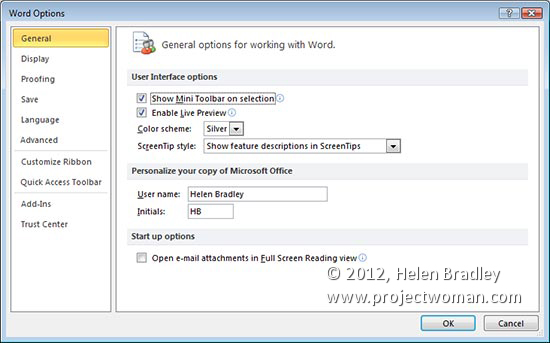
In any Windows program, Office included you can move through dialog boxes quickly without using your mouse if you press the Tab key on your keyboard. Tab moves you from one selectable item to the next. To move in reverse press Shift + Tab. If you press Ctrl + Tab you can move to the next tab in a tabbed dialog and press Ctrl + Shift + Tab to go back one tab.
Helen Bradley
Labels: dialog box, how to, Microsoft Office, navigate dialog, tip, trevor office, trevor payne, Word
Categories:office, trevor tip
posted by Trevor Payne @ 8:00 amNo Comments links to this post
Saturday, July 7th, 2012
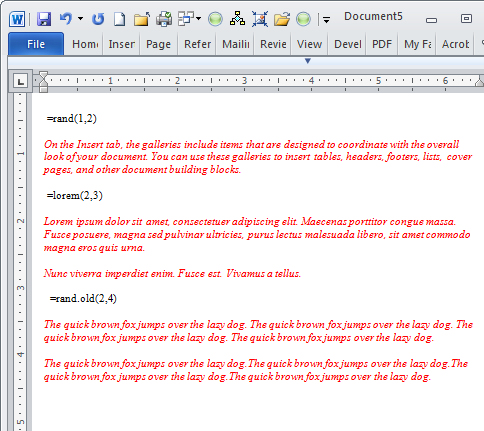
You may already know that typing =rand(1,2) on a new line in Word types one paragraph of two sentences in Word. The text is this random Word help style text:
“On the Insert tab, the galleries include items that are designed to coordinate with the overall look of your document. You can use these galleries to insert tables, headers, footers, lists, cover pages, and other document building blocks.”
But did you know there are other types of text you can type? Try =lorem(2,3) and press enter to get two paragraphs of three sentences each of the Lorem ipsum dummy text.
“Lorem ipsum dolor sit amet, consectetuer adipiscing elit. Maecenas porttitor congue massa. Fusce posuere, magna sed pulvinar ultricies, purus lectus malesuada libero, sit amet commodo magna eros quis urna.
Nunc viverra imperdiet enim. Fusce est. Vivamus a tellus.”
If you type =rand.old(2,4) and press enter you get the older Word dummy text – the Quick Brown fox..
The quick brown fox jumps over the lazy dog. The quick brown fox jumps over the lazy dog. The quick brown fox jumps over the lazy dog. The quick brown fox jumps over the lazy dog.
The quick brown fox jumps over the lazy dog. The quick brown fox jumps over the lazy dog. The quick brown fox jumps over the lazy dog. The quick brown fox jumps over the lazy dog.
So now you have plenty of random text options – of them all the Lorem one is the most handy for when you really need large portions of dummy text in a document.
Helen Bradley
Labels: filler, Helen Bradley, how to, Microsoft Office, Microsoft Word 2010, Random text, tip
Categories:Uncategorized
posted by Helen Bradley @ 7:16 am3 Comments links to this post
Wednesday, June 29th, 2011
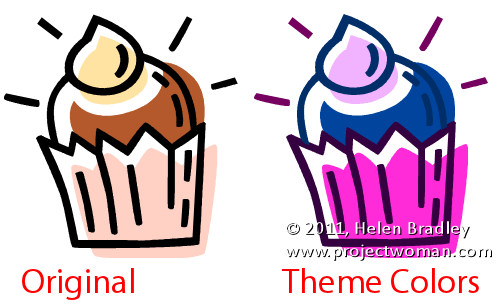
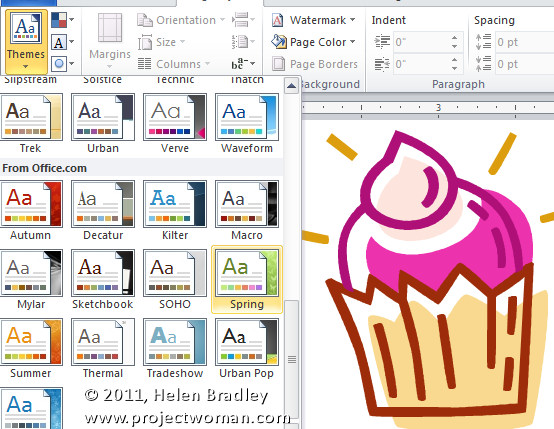
Much of the illustration Clip Art in the Microsoft Clip Organizer can be edited by changing its colors. By doing this you can not only recolor the art to match the look of your document but, if you use Theme colors then the art will change color when the Theme or Color scheme changes.
Now you won’t need information technology degrees to learn this – but maybe you’ll be so good at it, you just might consider graphic design college.
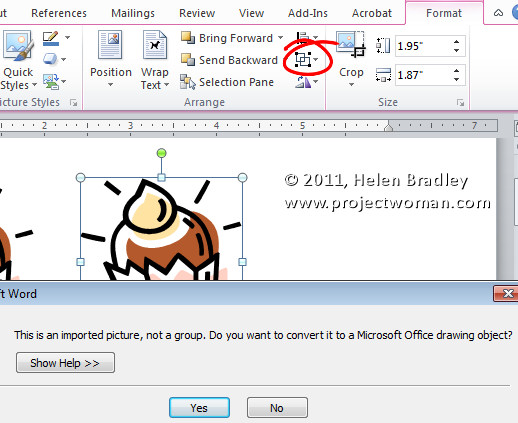
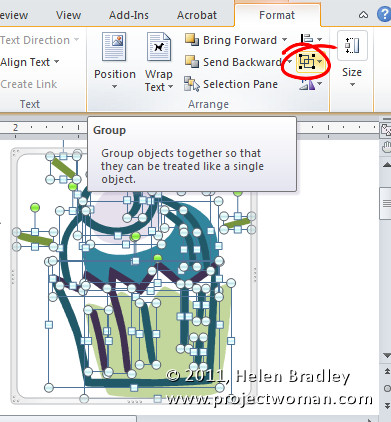
So, let’s see how the recoloring is done. First select the Clip Art and from the Picture Tools -> Format tab click the Group > Ungroup button. Answer Yes if you are prompted to convert the image to a Microsoft Office Drawing Object. In some applications such as Publisher you’ll need to repeat the process and select Ungroup again.
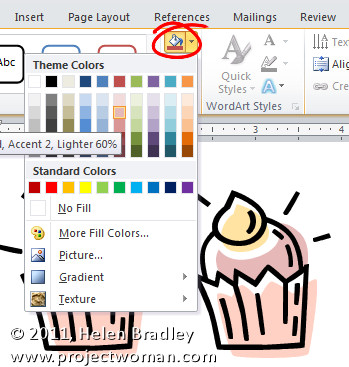
Now click on individual parts of the object and either remove them or recolor them by selecting a Shape Fill Color from the Drawing Tools > Format tab. If you use Theme colors then the colors will change later on when the theme changes.
When you are done and you have recolored all the pieces you want to recolor, select all the pieces, right click and choose Group.
Change the document theme or Color Scheme to see the image change color to match the look of the theme.
Helen Bradley
Labels: clip art, color scheme, Excel 2010, Microsoft Office, Publisher 2010, recolor, theme, Word 2010
Categories:Uncategorized
posted by Helen Bradley @ 6:22 pm1 Comment links to this post
Thursday, October 28th, 2010
Quite often, I need to sign a Word document and convert it to a PDF or fax it. It’s easier to do everything on the computer rather than printing it, signing and then scanning it all over again.
The solution is to scan your signature and convert it into an image that you can use inside Word. To give you access to your signature image in Word, first save it as a GIF, JPG or BMP file and then from the Microsoft Office Group in your All Programs menu, select the Microsoft Office 2010 Tools > Microsoft Clip Organizer.
Choose File > Add Clips to Organizer > On My Own and browse to the folder that contains the images of your signature. I have a simple Helen signature and one for Helen Bradley. You can also do the same with your company logos and other elements that you’re likely to want to use repeatedly in Word.
Select the images and click Add. They’ll be added automatically to your clip organizer. Hold your mouse over the first image, click the dropdown arrow to its right and choose Edit Keywords.
Now in the Keyword box type a keyword that describes the image. Add one keyword, click the word Add and then add additional keywords. If there are keywords in the list that you don’t want to use, select them and press Delete. Click Apply to apply the selected keywords to the image and then click Next to do the same thing for the next image in the sequence.
I add my name and the word Signature as keywords to my signature files so they are easy to find.
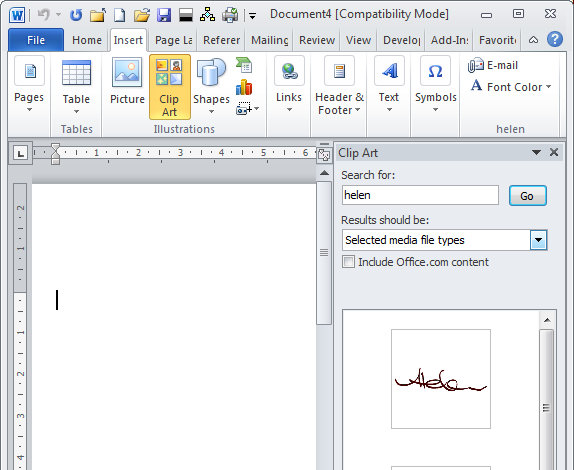
Now you can close the Clip Organizer and whenever you need the image inside Word, choose Insert > Clipart, make sure that the file types are set to Illustrations if you saved the images as Gif files or set to Photographs if you saved them as JPGs or Tiffs. Type your search text which in my case is Helen and press Go.
Microsoft Word locates the signature image and you can then drag and drop it into your document. The images are permanently in the Clip Organizer so they’ll be there next time you launch Word or any Office program that can access it.
Helen Bradley
Labels: Clipart, Microsoft Office, signature
Categories:Uncategorized
posted by Helen Bradley @ 8:27 am9 Comments links to this post


