Wednesday, November 13th, 2013

Add Spacing to Word Table Cells

Learn to quickly add extra spacing above and below the contents of a Word table cell

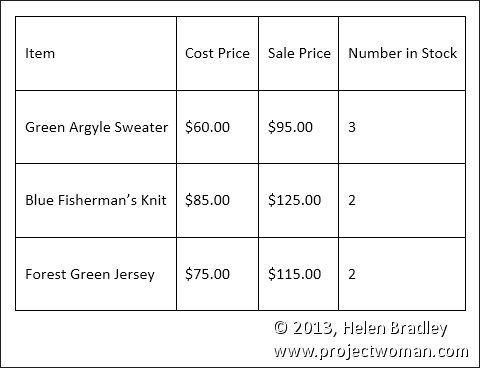
When you enter text in a Word 2013 table you may want more space above and below your text than appears by default.

While you can make the table cells larger and vertically centre the text in the cells this is a cumbersome solution and there is better and faster way.

To add extra spacing you can change the table’s cell spacing values.

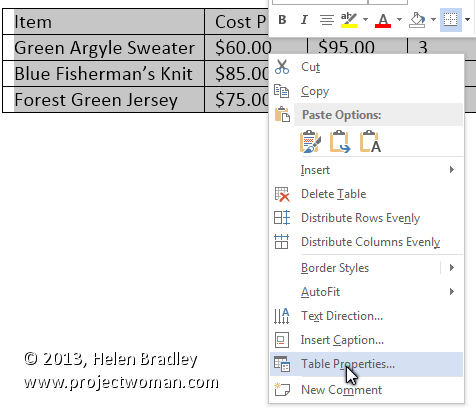
To do this, first select the table, right click choose Table Properties.

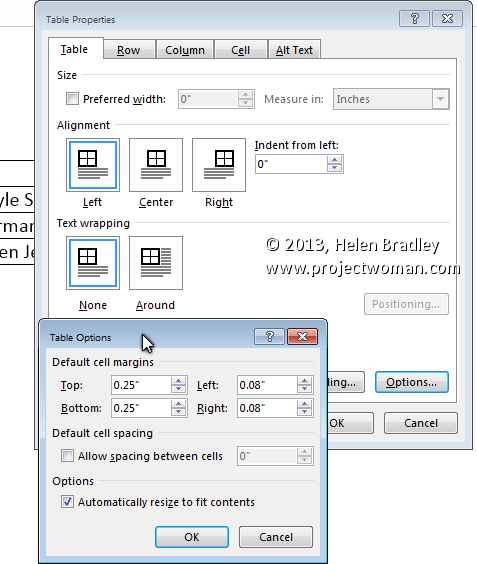
Click the Table tab and click Options.

Here you can set the Top, Bottom, Left and Right cell margins for all cells in the table. Set the Top and Bottom values to 0.25″ to add a little extra space above and below the text in the cells.


Helen Bradley

Saturday, May 25th, 2013

Photoshop Tip – Custom Workspaces

How to Create a Photoshop Workspace Just for You

I like Photoshop to open and “look the way I want to see it”. But sometimes ‘the way I want to see it’ is different than others. I’m fickle – but thankfully Photoshop plays nice with me – the secret is its Workspaces. These Workspaces let me preconfigure my Photoshop screen for various scenarios, to save them so I can reuse them, and to put everything back in its place when I mess them up.

If this sounds like something you could use – here’s how to give your Photoshop window a custom look with workspaces.

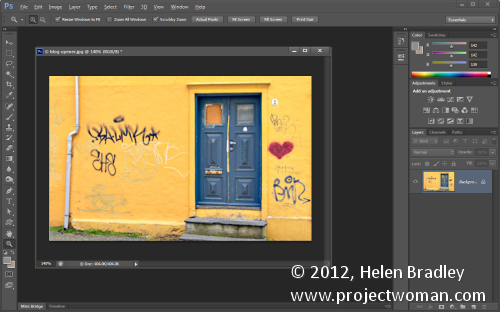
The first thing I do is to set up Photoshop the way you want it to look and that means hiding all the panels you don’t want to see and displaying those that you do.

Then arrange them on the screen exactly the way you want to see them. For me, I prefer my toolbar to be in two columns rather than one long one. I like my layers and paths palettes visible but not much else.

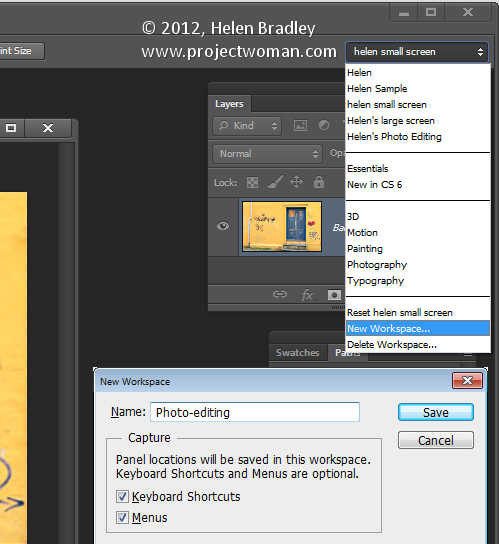
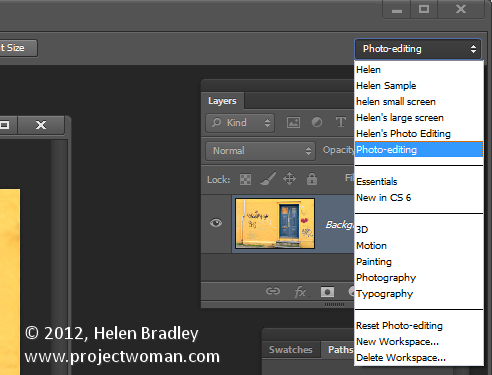
Once the screen is organized the way you want it to look, from the dropdown list in the top right corner choose Essentials > New Workspace and type a name for the workspace. Select the options for keyboard shortcuts and menus select and click Save.

You can repeat this process, if desired, and create other workspaces. You might make one for photo-editing, one for collage, one for illustration or one for videoing depending on your own personal needs.

In future you can set up your screen by choosing the workspace of your choice from the dropdown list.

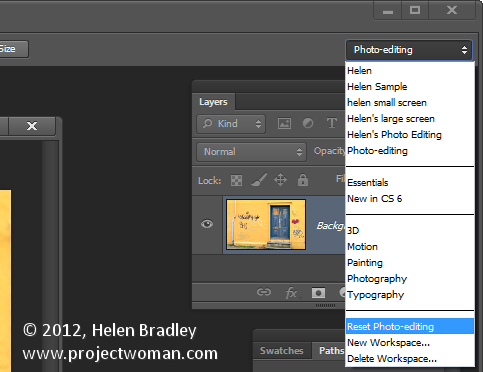
If you move things around and things go a bit crazy it is easy to reset a workspace back to how it was when you last saved it.

To do this, first make sure you are viewing the workspace to reset and then open the Workspace menu and choose Reset .

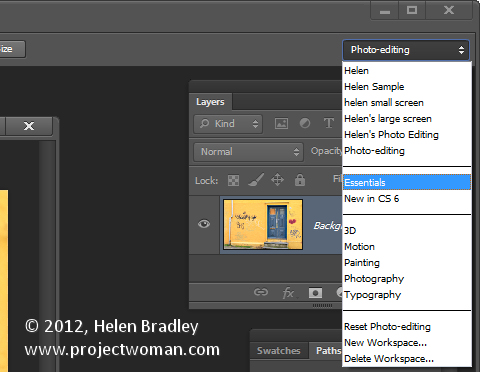
Likewise you can return to Photoshop’s default workspace anytime by selecting Essentials then click Reset Essentials.

And one last word on workspaces…
If you want to see what’s new in Photoshop CS6 click the New in CS6 workspace and you can see what is new in Photoshop. Open a menu and any new options in it will show as blue on the menu.

Helen Bradley

Monday, May 13th, 2013

Max Out Editing Space in Google Docs

If you like working with the cleanest view possible, Google Docs makes it easy for you. First select View > Full screen. This will remove all menus from the screen, so make sure you don’t need to access any buttons while using this view. Now you can make your browser itself full screen. In most browsers you can accomplish this by pressing F11. With these options you will see absolutely nothing but the page you are typing on.


To undo these options, press F11 again to eliminate the browser full screen, then esc to eliminate Google Doc’s full screen mode.

Helen Bradley

Tuesday, December 18th, 2012

Photoshop – Make more canvas

One of the issues that I’ve had with painting on the iPad is I quite often run into the top of the canvas leaving the image no breathing space.

For example this image created in Art Rage tips the top of the canvas with plenty of spare room at the bottom.
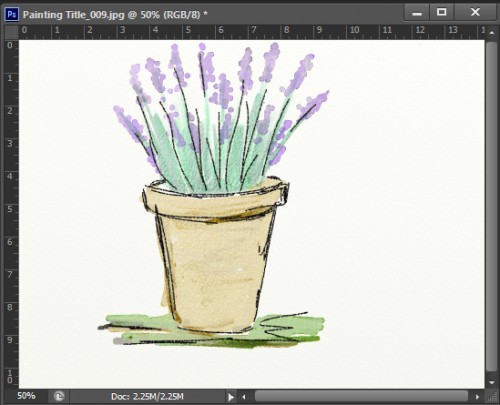
The simplest solution is to email the image to myself on my desktop computer and then open the image in Photoshop.

To begin I cropped this image to a 1 x 1 ratio by clicking the Crop Tool, set the ratio to 1 x 1 and then drag on the image. Once I let go the Crop Tool I can then drag outwards on it to add some extra canvas at the top of the image.

Right now I’m looking for a smart crop plus some extra room at the top that I will fill with canvas shortly. So the blue area in this image is the bit I need to “manufacture” to get the result I want.
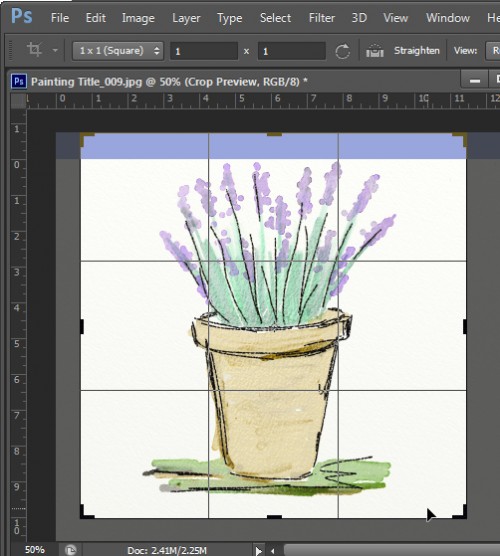
Once the image is cropped I’m ready to get rid of the blue and create some canvas from it.

One issue with this particular image is that the canvas itself has a texture in it so just filling it with white or a plain color won’t work.

So, with the Layers palette visible I’ll click on the Add Layer Mask icon to add a layer mask to the background.

Then I select black as my foreground color, a solid round brush with a hard edge and with the mask targeted I’ll paint out the entire painting, leaving only the textured canvas visible. It’s really important to get rid of all the original painting.
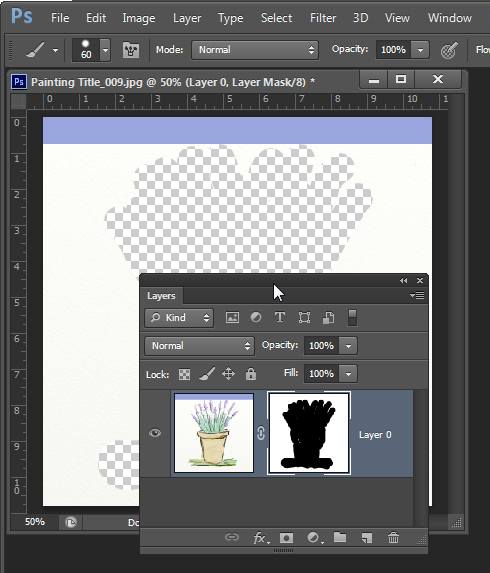
Because this is just a mask the image hasn’t actually been removed, it’s just been hidden for now. Grab the Magic Wand Tool, click on the image layer itself and make a selection of the area you want to remove.
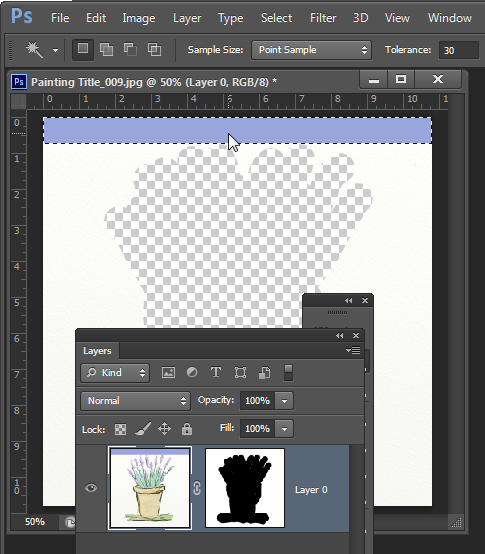
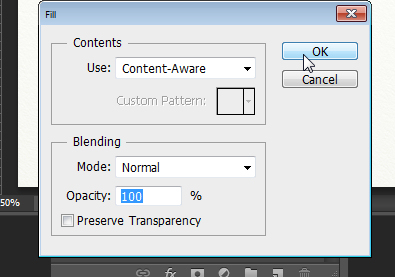
To fill it with texture, choose Edit > Fill, set the Use list to Content Aware and click Ok.
The colored area will be removed and will be replaced with a texture matching the remainder of the image.
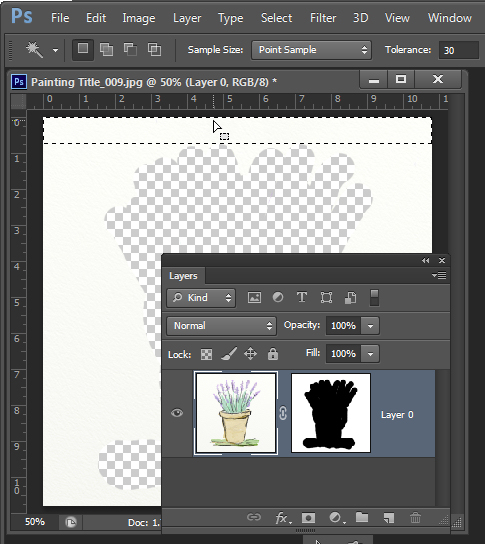
To finish, drag the Layer Mask onto the trashcan. When asked whether you want to apply the mask before removing click Delete and the mask will be removed leaving the image in place.
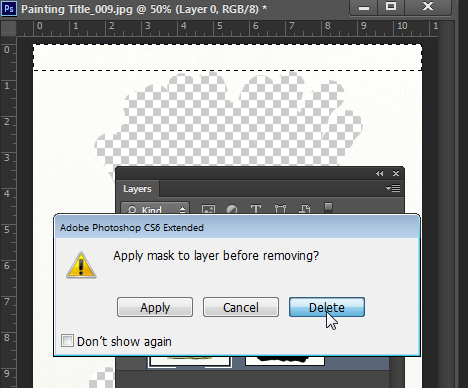
Choose Select > Deselect to remove the selection and then save the image.

Helen Bradley