Wednesday, June 20th, 2012

Print big images with Paint


Well, who knew the humble Microsoft Paint could do what just about no other program can easily do? Well it can. I recently assembled a very large image from a series of screenshots of a help screen. The help screen was really long so I captured screenshots of each portion of it, assembled them into one really narrow and long file and then got stuck – how the heck could I print this? Hmm… enter Microsoft Paint… but first, here’s the entire process from Print screen to Photoshop to Paint!

I brought all the screen capture images into Photoshop, cropped them using an action to do it very quickly, rotated them counterclockwise 90 degrees and then saved the images with sequential numbering. There was a bit of overlap in each image – you need this for the panorama merge to do its stuff and they need to be rotated or they won’t assemble properly.
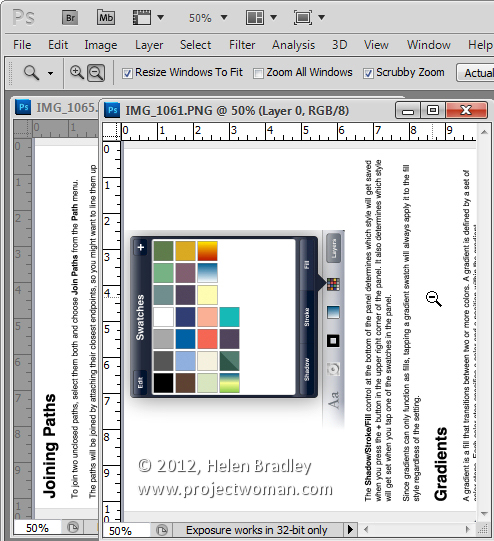


Having done that I then used the photo merge tool in Photoshop (File > Automate > Photomerge) to create a merged image from the individual images.
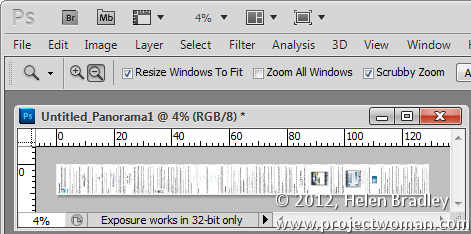


Then, once the merge was complete, I rotated the image back this time 90 degrees clockwise to get a vertical image that was 770 pixels wide and over 9,000 pixels long.

The problem with an image this size is that when you try to print it from Photoshop – it has to be squeezed down to a very small size to print on a single page and no other option is available so you can’t print it on multiple sheets.

The question then becomes how to print a very large image in lots of smaller pieces. The solution is nearer than you think and, curiously, it comes in the form of Windows Paint.


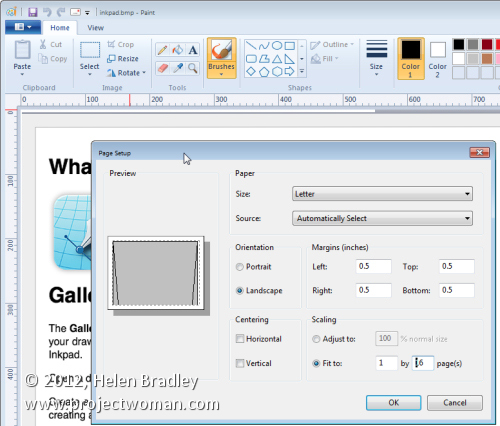
Launch Paint and open the image. Choose File > Print > Page Setup. Here you’ll find an option for sizing the printout to a fixed number of pages wide or long or you can shrink option to adjust the percentage scaling size. Wow! This is really very smart indeed.

When you do this, watch the boxes below as this will tell you how many pages tall and wide the image will be printed at. When you’re satisfied with the results, you can go ahead and click to print the document. If you have a PDF printer then you can print the document direct to a PDF file or if preferred, feed some paper into the printer and print the image. Then get out some sticky tape and stick it all together.

Helen Bradley

Tuesday, January 11th, 2011

Crop to a Valentine heart shape in Photoshop

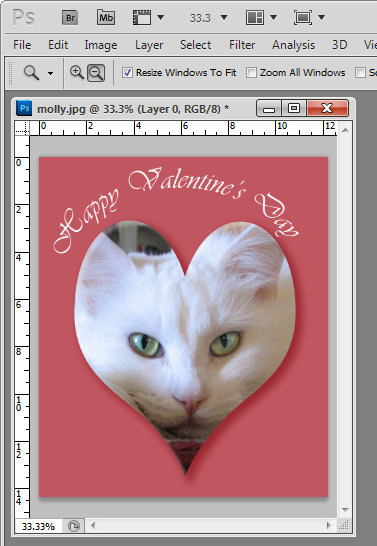
With Valentine’s Day coming up shortly you might be wondering how you create heart shape images in Photoshop. Well, here’s how:

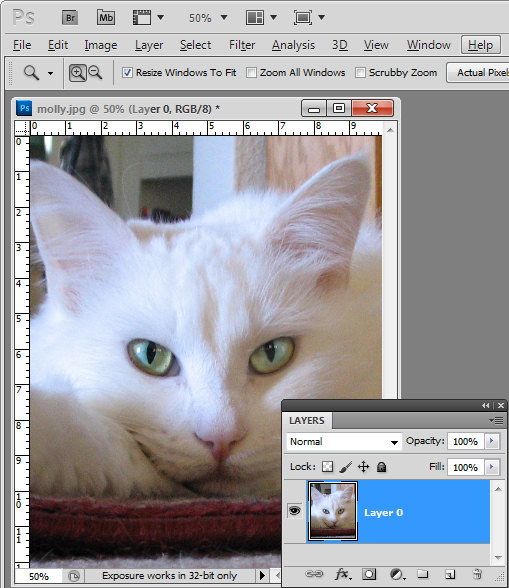
Start by opening an image that you want to use and convert the background layer to a regular layer by double clicking the background layer in the layers palette and click Enter.

Crop image to Valentine's heart shape in Photoshop

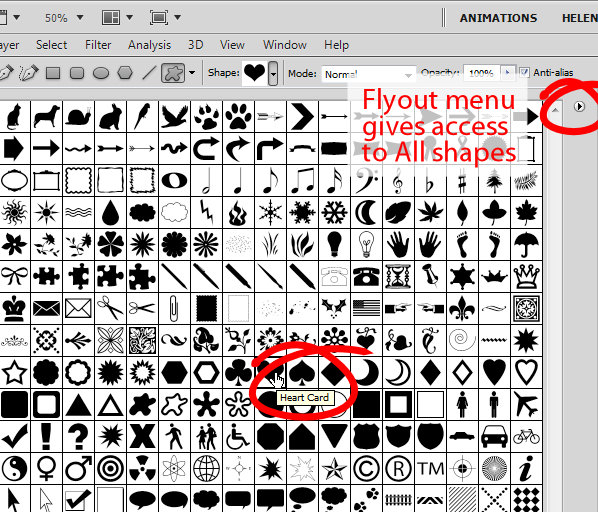
From the tool palette, select the Custom Shape tool, which sits below the Rectangle tool.

From the Shapes dropdown list on the Tool Options bar, select a heart shape.

If you don’t have a heart shape in your list, click the flyout menu and select All. Click Append to append all the shapes available which will give you access to at least one heart shape. In fact you probably have a Heart Card shape, a Heart shape and a Heart Frame shape.

To cut a heart shape out of your image you’ll want the Heart shape or the Heart Card shape.

Crop an image to a heart shape in Photoshop

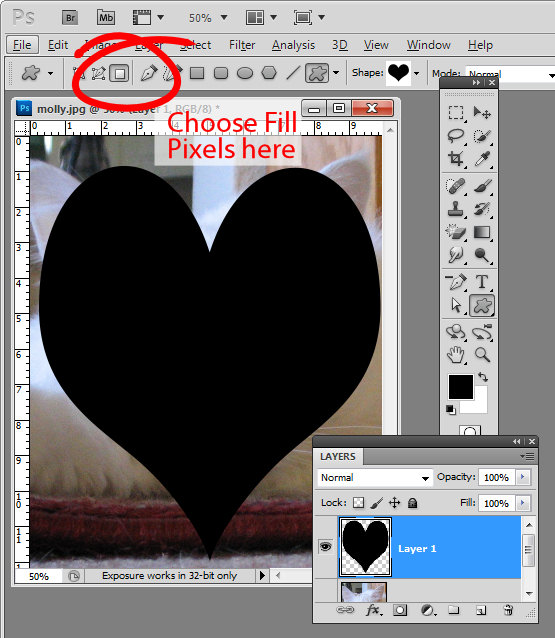
Click the New Layer icon at the foot of the layers palette or choose Layer > New > Layer.

From the toolbar, select the option that says Fill pixels. Drag a heart shape over your image. Don’t worry that there is a fill color associated with the heart and that it is covering up your image. Size the shape using the move tool until it’s positioned pretty much where you want it to be.

Crop image to valentine heart shape

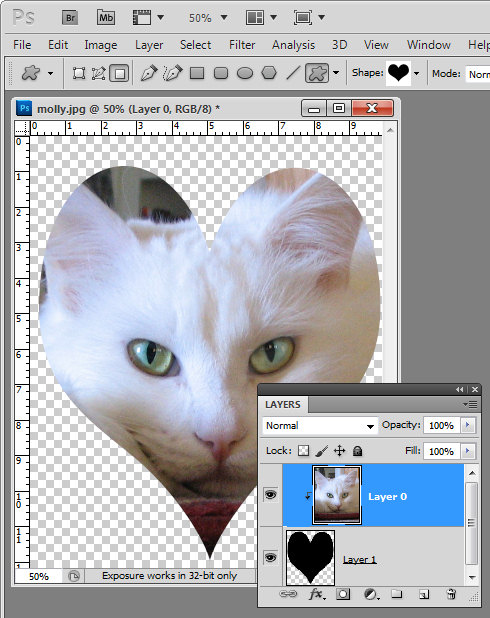
Now with the heart layer selected, drag it below the image layer and select the image layer again.

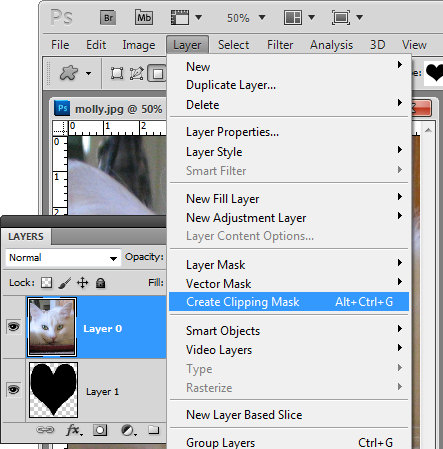
Choose Layer > Create Clipping Mask and your image will be clipped to the heart shape.

crop image to valentine heart shape

This method of creating a heart shape is ideal as the heart can be moved into a different positioned and resized by selecting the heart layer and resizing the heart appropriately.

In addition, you can click to select the image layer and drag with the Move Tool (V) on the image to place the image inside the heart in an appropriate position.

Crop an image to a Valentine heart shape

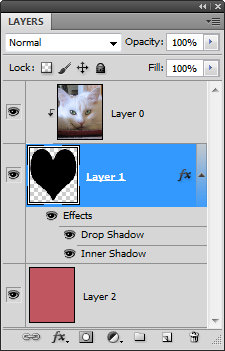
If you want a background for your image, click the bottommost layer and then Ctrl + Click (Command + click on the Mac) on the new layer icon at the foot of the layers palette.

This adds a new layer below all the other layers.

Select a foreground color to use, target your new layer and press Alt + Backspace (Option + Delete on the Mac) to fill  this layer with the foreground color.

Finish your Valentine heart effect by selecting the heart layer and apply a drop shadow to it by clicking the Add a Layer Style fx button at the foot of the layer palette and choose Drop Shadow.

Add some text and you’re ready to save and print the file.

There is a YouTube video of this process using Photoshop CS6 here – it is the same in any version of Photoshop.

Helen Bradley

Sunday, March 7th, 2010

Step 8 Photo-editing workflow – Fix skin tones

Often you will encounter difficulties when fixing colour problems in an image where there are significant areas of skin tones. Skin tones are more difficult to fix than general colour casts, in part because we’re all so familiar with what skin tones should look like that we ‘know’ immediately when they look wrong.

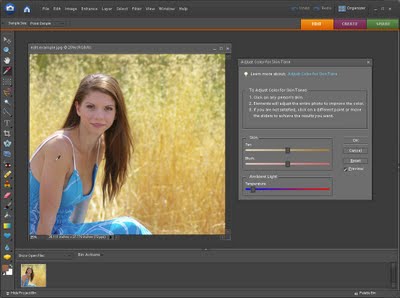
Luckily Photoshop Elements has a good tool for fixing skin tones. To apply this fix to your image choose Enhance > Adjust Color > Adjust color for skin tone. The mouse cursor will change to an eyedropper and you should use this to click on an area of skin tone in the image.

If you don’t get good results sampling from a person’s face, try sampling on their neck or arm – sometimes makeup on the face can give poor results and skin not covered in makeup gives better results.

Once you have selected the skin tone, if the fix isn’t good enough, use the Blush and Tan adjustments until you match what the skin should look like. The Ambient Light temperature slider lets you warm up or cool down the colour fix.

Helen Bradley

Monday, March 9th, 2009

Photoshop – change the color of your house


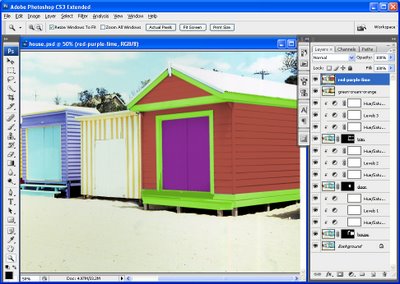
You can change the color of anything using Photoshop. A friend of mine is about to paint her house but before her husband goes shopping for paint, she wants to know that the result will look good and that the house will blend nicely with its surroundings. It’s a job for a digital camera and some Photoshop know-how. Here’s how to recolor your house (or anything else) and save color combinations to review with someone else later on. I’ve used Photoshop CS3 but almost any version will do.

Open a photo of your house in Photoshop. I’ve used a bathing box for simplicity but the principles are the same for a house or, indeed, anything at all. You’ll need one extra copy of the background layer for each item you’ll recolor. For this image I’ve duplicated the background layer three times so I have a background layer, a layer for the house color, one for the door color and one for the trim and I’ve named them appropriately.

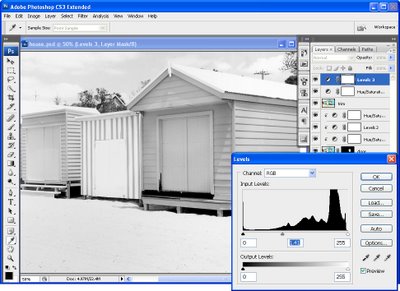
Start with the house layer and hide the others. Choose Layer, New Adjustment Layer and add a Hue/Saturation adjustment layer and drag the Saturation slider to -100 and click Ok. Add a second adjustment layer by choosing Layer, New Adjustment Layer, Levels and adjust the sliders until the area you’re focusing on looks like it could be painted with white paint. You want to retain the detail but lighten the area. Ignore everything else in the image for now. Click Ok when you’re done.

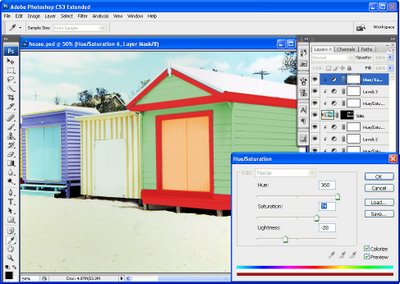
Now add a third adjustment layer using Layer, New Adjustment Layer, Hue/Saturation. Click the Colorize option and adjust the Hue, Saturation and Lightness sliders until you have the color that you want for the area you are working on. Again, ignore the effect on the rest of the image. Click Ok when you’re done.

Now, to limit the effect to the area you want painted in this color, select the adjustment layer just above the layer you’re working with and choose Layer, Create Clipping Mask. Repeat for the other two adjustment layers. You should see the adjustment layers indented in the Layers palette. Now, you can paint on the color. Select the layer you’re working on, in my case this will be the layer named house and hold Alt as you click on the Add Layer Mask button at the foot of the Layer palette. This creates a Reveal All layer mask so your photo should now be its original color.

Select white as your foreground color and paint over the areas you want to be coloured with the color you just selected. If you paint over something by mistake, switch to black foreground color and paint the original color back.


Step 1
For each area of color in the image, add the same three adjustment layers, one to remove the color, one to adjust the lightness and one to add color back. Create the adjustment layers as a clipping group with the appropriate layer. Finally, add a layer mask and paint the effect onto an area to recolor it.


Step 2
Because you will use adjustment layers for all the changes, you can alter the settings at any time if desired. Simply double click on the Adjustment layer thumbnail and the dialog will open so you can make changes to its settings and then click Ok to reapply it to the image.


Step 3
To save a color scheme, add a new layer at the top of the Layers palette, select it and press Control + Shift + Alt + E to create a new merged layer. Name this and turn its visibility off. Now change the colors to test a different look and save that version the same way.

Helen Bradley

Page 23 of 23« First101920212223