Learn how to selectively recolor a portion of an image using the Hue/Saturation adjustment layer and to do so without having to make a complex timeconsuming selection to do so.
See all our video tutorials on our YouTube channel
Learn how to selectively recolor a portion of an image using the Hue/Saturation adjustment layer and to do so without having to make a complex timeconsuming selection to do so.
See all our video tutorials on our YouTube channel
Labels: Helen Bradley, how to, layer adjustment, Photoshop, video tutorials, YouTube
 (photo by: Piotr Bizior)
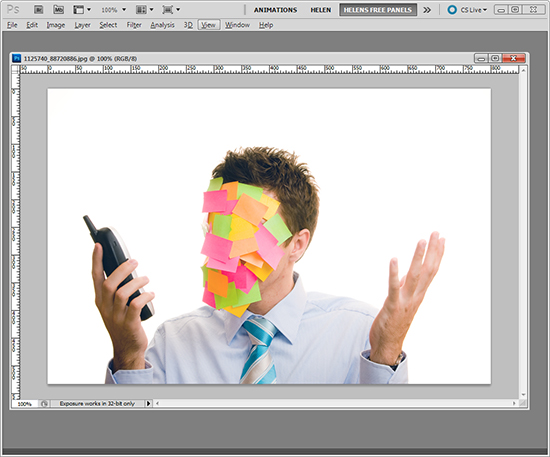
If your work space is feeling cluttered with palettes you can press the Tab key on your keyboard to hide them all or Shift + Tab to hide all but the tools palette. Want them back? Press Tab again and there they are.
 (photo by: Piotr Bizior)
Labels: palettes, Photoshop, tip, trevor adobe, trevor payne, work space clean up
Categories:photoshop, trevor tip
Learn how to add impact to your animal and bird images with this smart and easy Lightroom fix.
Come and see all our video tutorials on our YouTube channel.
Labels: fixing photo, Helen Bradley, how to, Lightroom, Tutorial, video tutorial, YouTube
Categories:photoshop
 (Photo by: Jorge Vicente)
Change the size of your brush, eraser, or any tool that is brush based quickly by press the ] key to increase the size and the [ key to decrease the size.
Labels: brush, brush size, Photoshop, shortcut, size change, tip, trevor adobe, trevor payne
Categories:photoshop, trevor tip
Yeah! The folks at Moo have released a Lightroom plug in that makes it easier than ever to get photos to Moo.
Visit this page and grab the zip file – click the Zip button to get it.
Unzip the contents and rename the folder moo.lrplugin
Then launch Lightroom and choose File > Plug-in Manager and grab the plug in folder. That’s all you need to do. It will be installed and ready to be used.
Just select the images to send to Moo, choose Export and select the Moo Export Plug-in from the Lightroom Presets in the Export dialog.
Labels: export, Lightroom, moo, plug-in, publishing service
Categories:photoshop
Learn how to make a convincing painting from a photo in Photoshop using the Art History Brush tool.
Come and see all of our videos on our YouTube Channel
Categories:photoshop
Learn to make a faux hdr (high dynamic range) effect in Lightroom 4.
Check out all our video tutorials on our Helen Bradley YouTube channel.
Categories:photoshop
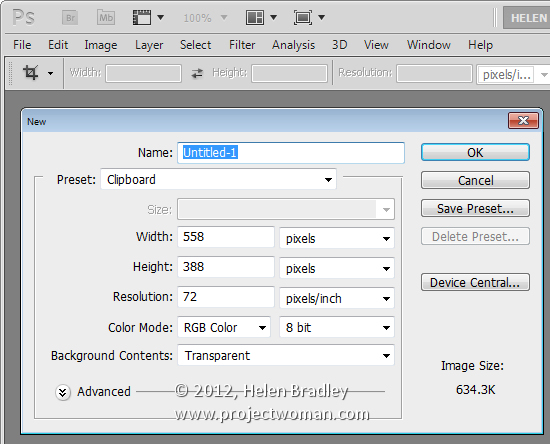
It is easy to save an image copied from the web to a Photoshop file. To do this, first copy the image to the Windows clipboard then choose File > New and press Ok.
The Photoshop file will be sized automatically to exactly the same image size as the image on the clipboard.
Now choose Edit > Paste to paste the image into position and you are ready to save it.
Labels: Clipboard, copy image, file size, helan bradley, how to, image, paste image, Photoshop, tip
Categories:photoshop
 photo by: lcrumling via www.sxc.hu)
Want to quickly match a color without disrupting your work flow? Press the I key to activate the Eyedropper tool, then click on the color your trying to replicate to sample it.
Labels: color, color matching, eyedropper, Photoshop, tip, trevor adobe, trevor payne
Categories:photoshop, trevor tip
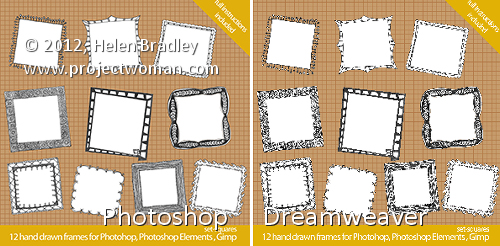
In the images above, you can see that the image on the right looks appalling in comparison with that on the left.
The two images are the same size but the one on the left was scaled down from a large size in Photoshop and the one on the right was scaled down by downsizing it in Dreamweaver.
The results are a great example of why you should never downsize an image in a web editor instead of a graphics program! The resized version on the right is downright nasty in comparison to the one on the left.
If you need to scale down your images – these were reduced from 2,376 x 2,376 pixels in size to 300 x 300 – then it’s vital that you use a proper tool to do so.
Photoshop has an image resize tool which you can get to by choosing Image > Image Size. Type the width and height of the finished image and then from the Resample image dropdown list select Bicubic Sharper (Best for Reduction). If you compare the results with different settings, you’ll see that the Bicubic Sharper typically gives the best result for downsizing images.
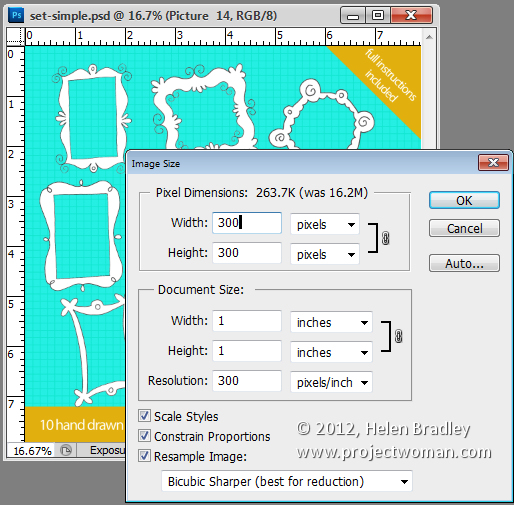
When you use this option the resulting images look as good downsized as they do on the screen in front of you.
Downsize them, save them and then import them into Dreamweaver and use them at that size. You will love your images a lot better when you do this.
Labels: downsizing images, Dreamweaver, Helen Bradley, how to, photo editing, Photoshop, photoshop vs dreamweaver, resizing images, tip
Categories:photoshop