Thursday, October 24th, 2013

Help! My Photoshop Color Picker looks weird

How to get the color picker to look the way you want it to look

or How to fix the Color Picker when it looks all funky

Sometimes when you open the color picker in Photoshop it looks one way and other times it looks a different way. It might even seem like there is  no rhyme or reason to how it looks and that it changes without (what it may seem like) no input from you.

Of course, nothing could be further from the truth but knowing that won’t solve the problem of why it changes and how to change it back!

To change it, don’t go looking under Preferences for all the Color Picker choices. While some preferences can be found in the Preference area the secret changes are made inside the Color Picker itself.

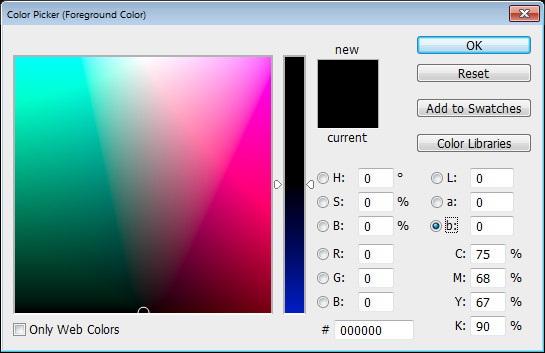
To see them at work, click to open the Color Picker. What you see here depends on what is clicked in the right of the dialog (when you realize this everything becomes blindingly obvious).

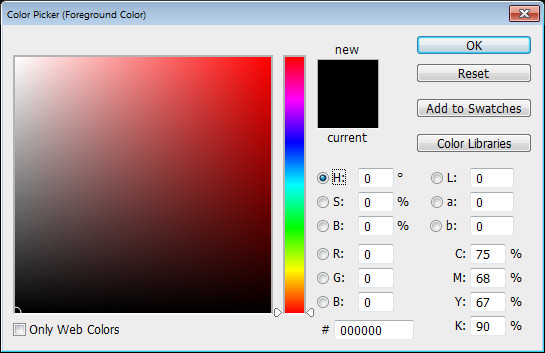
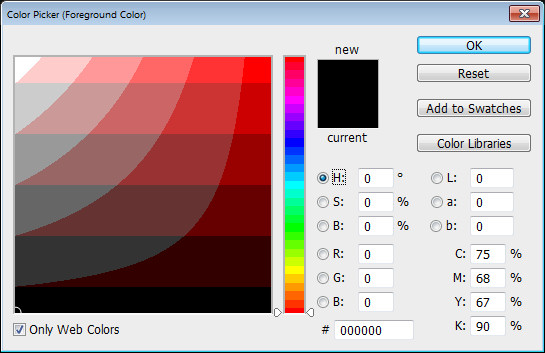
Click H for Hue to see this:

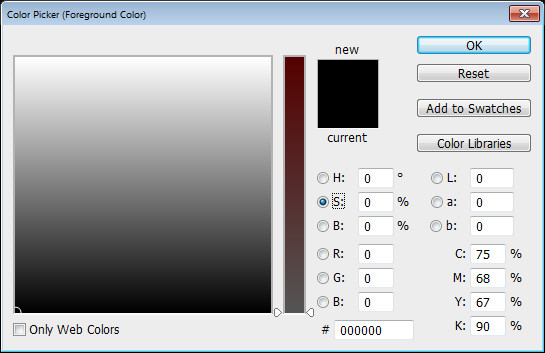
And S for Saturation to see this:

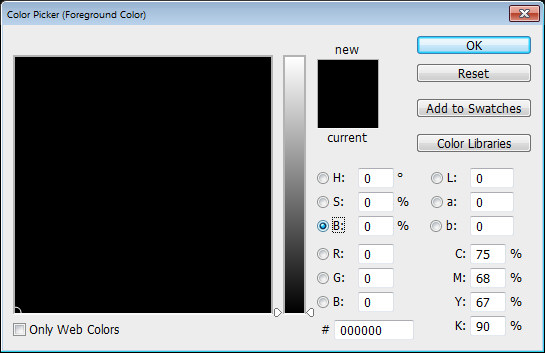
And B for Brightness to see this:

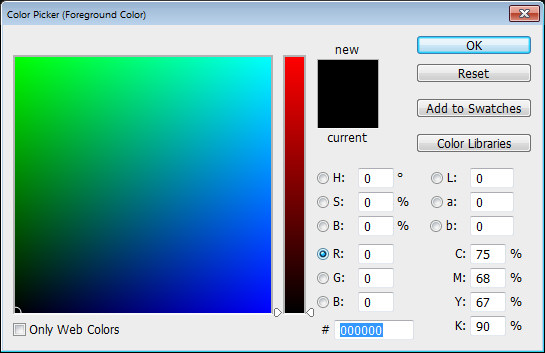
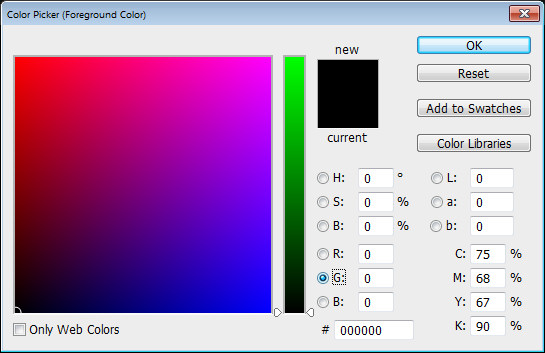
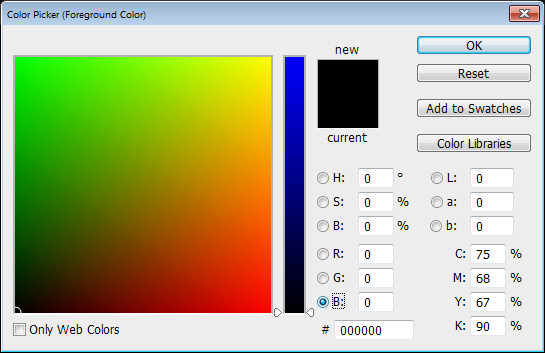
Each of R, G and B make the picker look different:


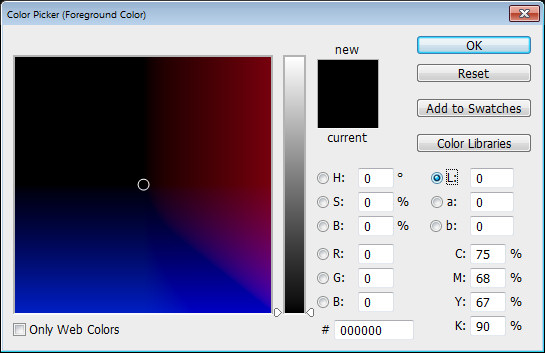
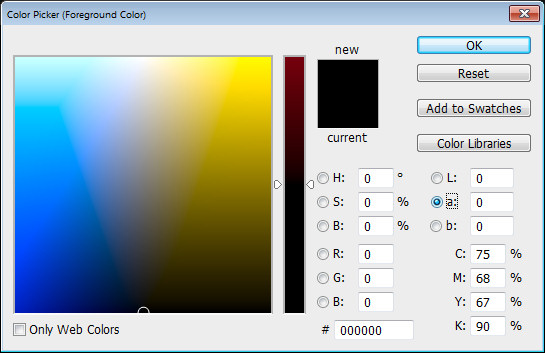
As does choosing L or a or b:

And each looks different if you have the Only Web Colors dialog checked:

Now you know what affects how the Color Picker looks you can choose the one that makes the most sense to you.

Helen Bradley

Sunday, July 28th, 2013

Lightroom Tip – Shortcut key to make your Image Black and White

Quickly Converting your Image to Black and White with this shortcut key

The simplest way to convert an image to black and white is to press the letter V. This is a toggle so press it once to turn the image into black and white and again to make it a color image.

You can also convert an image to black and white by clicking the B&W option in the HSL/Color/B&W panel.

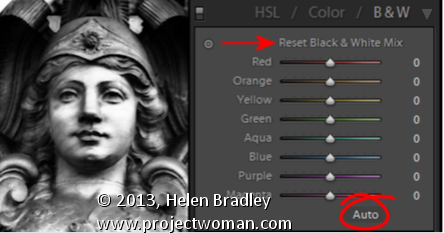
If Auto is enable click it to get a black and white conversion tailored to the needs of the image.

And, if the sliders are already all at different values you can reset them all to zero by holding Alt (Option on the Mac) and then click the ‘Reset black and white mix” option. Choose which is the best starting point for your conversion and progress from there.

If Auto is enabled, click it to get a black and white mix appropriate to the image.

Helen Bradley

Wednesday, July 24th, 2013

Lightroom Tip – Adjusting color and removing colorcasts

How to use the Color sliders to change color and remove color casts

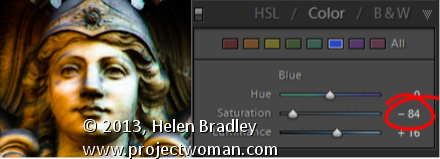
When an image has a colorcast or a color that you’re wanting to play down in it, select the Color option in the HSL/Color/B&W panel. Here you can select the color to minimize the impact of and reduce its impact by dragging on the Saturation slider to reduce its saturation. Drag to the right on the Luminance slider to lighten the color.

This tool also allows you to take one color and alter its hue. So, for example you can target yellow and drag it towards green or towards orange by dragging on the Yellow Hue slider. In this way, any color in the image can be adjusted to one of its adjacent colors.

Helen Bradley

Thursday, September 15th, 2011

Color correction in Lightroom

Lightroom has tools for correcting color not just across the entire image but also for correcting individual colors.

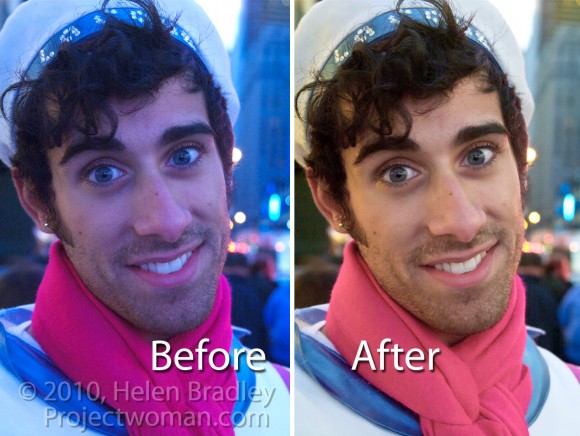
This image was captured in New York’s Time Square where the light is unpredictable at best especially at night because of the bright advertisements and neon signs. Because the colors of the lights change constantly it’s impossible to correct the color in camera using its white balance adjustment. Instead this has to be handled in post production.

Step 1
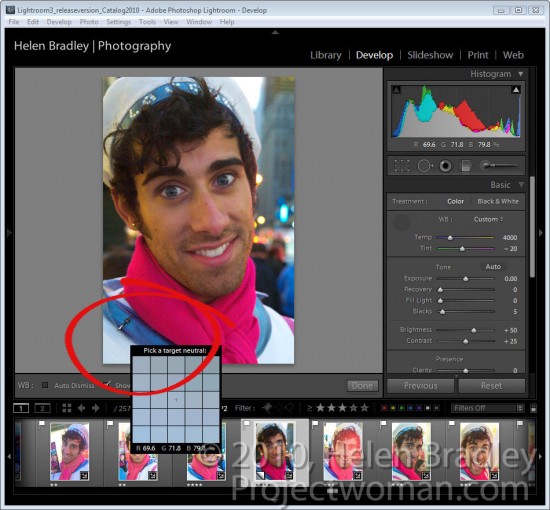
To start off color correcting an image in Lightroom’s Develop module, open the Basic panel and click the White Balance Selector which is the eyedropper in the top left corner of the panel.

Deselect the Auto Dismiss checkbox on the toolbar so the tool remains visible. Click on the image in a place that should be neutral gray to adjust it. If you don’t get the right correction the first time, click again on a different area of the image until you get an adjustment that looks correct to you. What you’re looking to do at this point is to remove the overall colorcast in the image.

Notice as you hold the White Balance Selector over the image that the Loupe shows a gird of pixels around the area you have the mouse held over and it also shows the relative percentages of red, green and blue in the pixels over which the mouse is hovering. Where the color in an image should be neutral grey, these values should be the same and if they are not, there is a color cast.

When you have a result you like, either return the White Balance Selector to its position in the Basic panel or press Escape.

Step 2
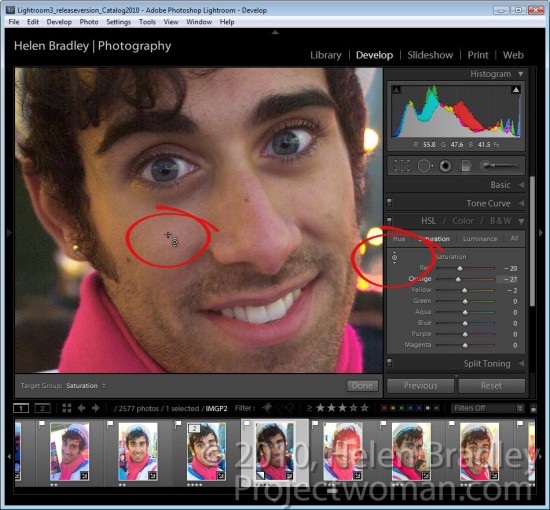
If some individual colors are still incorrect you can adjust these using the HSL panel. To do this, select HSL and then Saturation and use the Targeted Adjustment Tool to drag on an area of the image downwards to decrease or upwards to increase the color saturation at that point in the image. In this case, the skin needed to be desaturated because of the color of the light reflected on it.

Step 3
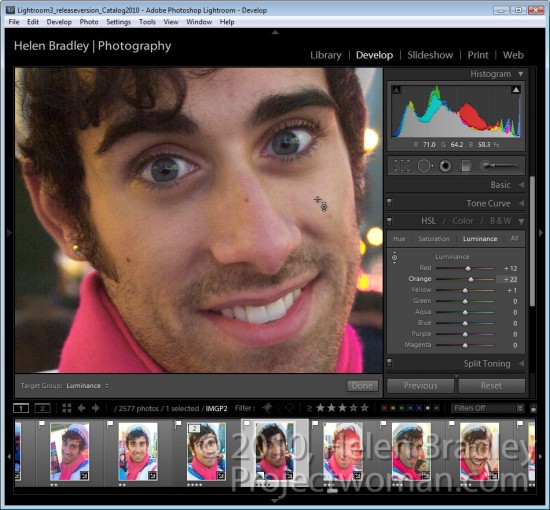
When you have adjusted Saturation, click Luminance and, if necessary use the same Targeted Adjustment tool to increase or decrease the Luminance in areas that are too dark or too light.

For this image I decreased the Saturation and increased the Luminance of the skin tones until I had a result I liked.

Once you’ve fixed the color problems, you can return to the Basic panel and continue to adjust the image using the tools there.

While sites like Times Square will never be an ideal place to capture images you can compensate at some level for poor color using the tools you have at hand in Lightroom.

Helen Bradley

Monday, September 12th, 2011

Targeted adjustments in Lightroom

Many of the features in the Lightroom 3 Develop module have targeted adjustment tools available to help you make the adjustment. Here’s where to find and how to use these on image adjustment tools.

Tone curve
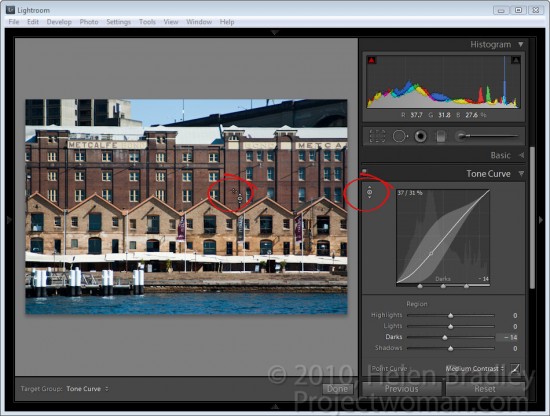
When you select the Tone Curve panel you can adjust an area of the image by clicking the targeted adjustment tool and then drag on the area of the image that you want to lighten or darken.

Click and drag up to lighten and click and drag down to darken.

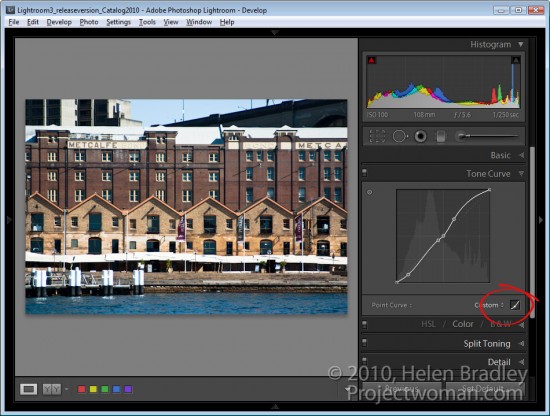
If you click the Point Curve icon at the bottom of the dialog, you will change the look of the Tone Curve panel and the sliders will disappear. Now if you drag on the image using the targeted adjustment tool you will create control points on the curve. You can adjust these control points by dragging on them.

Control points are not added if you do not have the Point Curve icon enabled. So if you’re seeing the sliders, you’re not in this point curve editing mode.

To delete a control point, double click on it or right click it and choose Delete Control Point.

When you are working on the point curve in the tone curve panel, you can decrease the mouse sensitivity by holding the Alt or Option key as you drag on the image. This decreases the sensitivity so you will make smaller changes in the curve with even quite significant movements of the mouse.

HSL Adjustments
There is also a targeted adjustment tool in the HSL adjustment panel.

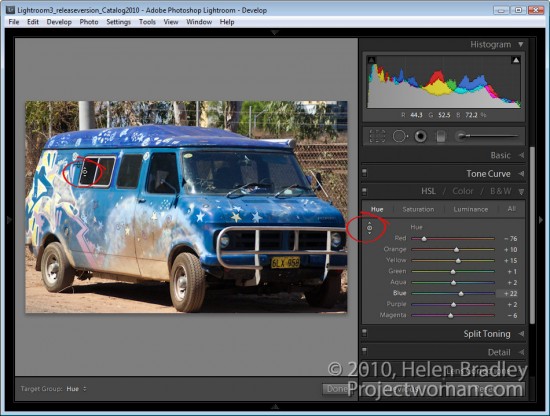
Here you can select Hue, Saturation or Luminance and then select the targeted adjustment tool and drag on the area of the image that you want to change. If you’re working in Hue, you’ll be applying a color shift to the selected area of the image. If you’re working in Saturation, you’ll be adjusting the saturation of the color under the mouse pointer as you drag on the targeted adjustment tool. Drag up to increase saturation and down to decrease it.

If you’re working in Luminance dragging up will lighten the color under the cursor and dragging down will darken it.

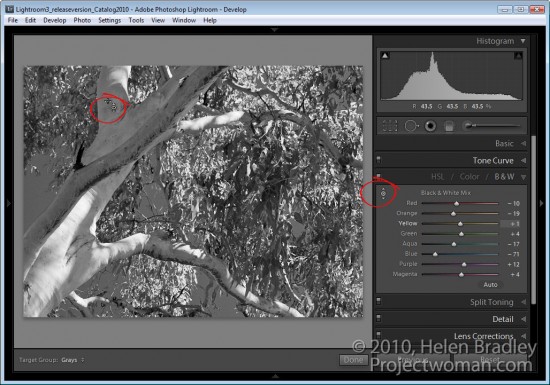
B&W Adjustments
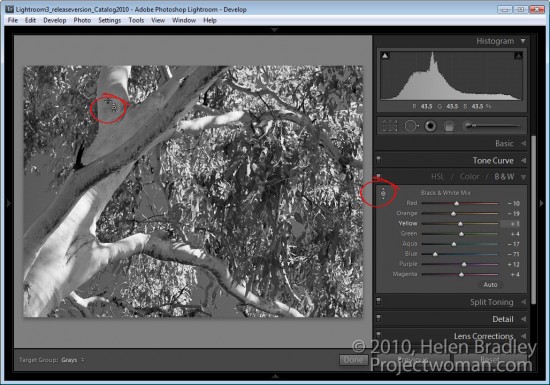
In the B&W or black and white adjustment area there’s also a targeted adjustment tool. In this case, when you drag up or down on a selected area of the image, you’ll lighten or darken that area so you can craft your own greyscale image.

Unlike in other versions of Lightroom, when you exit a panel while you have the targeted adjustment tool enabled it will be automatically disabled and you don’t have to remember to turn it off.

Helen Bradley