Friday, August 9th, 2013

Word 2010 and 2013 Tip – Flow text through a document with linked text boxes


How to use linked text boxes to flow text throughout a document automatically

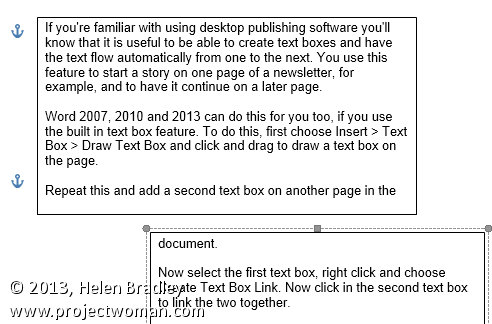
If you’re familiar with using desktop publishing software you’ll know that it is useful to be able to create text boxes and have the text flow automatically from one to the next. You use this feature to start a story on one page of a newsletter, for example, and to have it continue on a later page.

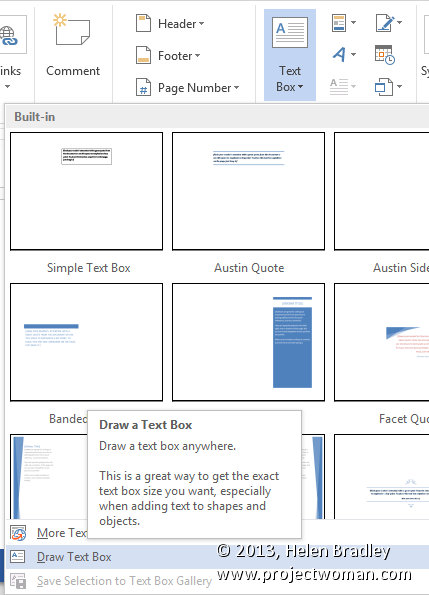
Word 2007, 2010 and 2013 can do this for you too, if you use the built in text box feature. To do this, first choose Insert > Text Box > Draw Text Box and click and drag to draw a text box on the page.

Repeat this and add a second text box on another page in the document.

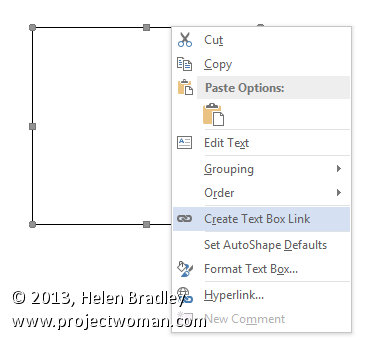
Now select the first text box, right click and choose Create Text Box Link.

Now click in the second text box to link the two together.

In future, any text which you type into or paste into the first text box and which won’t fit because the box is not large enough to accommodate it, will flow automatically into the second text box.

Helen Bradley

Wednesday, June 26th, 2013

Word 2010 and 2013 Tip – Create Side by Side Tables

Place tables side by side in a document using text boxes to keep them in place

If you add a table to a text box in Microsoft Word, you can position the text box wherever you want it to be on the screen.

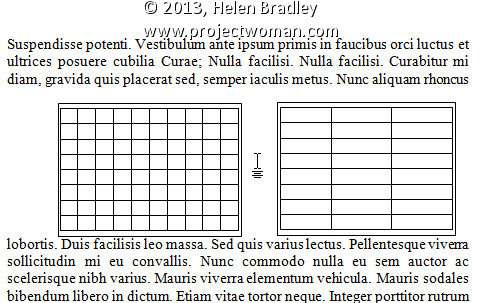
If you need two tables to be placed side by side in your document you can do so by placing each of them inside a text box and then arranging the text boxes side by side.

To do this, create a text box by selecting the Insert tab on the Ribbon, click Text Box and click Draw Text Box. Click and drag to create a text box and then click inside it and create a table by choosing Insert > Table. Repeat the process to create the second table in its text box then drag to position the text boxes side by side.

Helen Bradley

Thursday, April 9th, 2009

Cool Word 2003 and 2007 Breakout Boxes


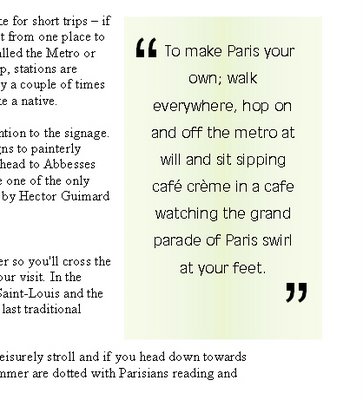
Breakout boxes or pull quotes are a great way to add visual variety to a very text heavy document. Even if you don’t have images you can use you can still add some color and interest to the page. To do this, you will need some text to use – ideally it will be an interesting quote or sentence or two from the document itself. You will copy this so it appears in the correct position in the text but so it is also a feature element on the page.

Create a textbox
Start by selecting and copying the text. Click outside the text so it is no longer selected and choose Insert > Text box and draw a textbox on the page. Click inside it and choose Edit > Paste to paste in the text on the clipboard.

Format the text
Text in a breakout box looks better if it is formatted differently to the surrounding document, for example you may want to center it, change the font and adjust the line spacing to double line spacing so that the text looks very different.

Format the text box
You can add a colored background behind the textbox by selecting the textbox and choose Format > Textbox and from the Colors and Lines tab select a Fill Color for the textbox. To remove the border line, choose Line Color > No Line (or choose a line option that you like), and click Ok.

Add quote marks
Adding an oversize pair of quotation marks helps delineate the breakout box or pull quote from the remainder of the document. In this instance it’s best to place the oversize quotation marks each in a separate textbox, format them so they are very large, set the textbox so that the fill color is set to No Fill and the line color to No Line and then drag it into position over the textbox that contains the breakout text.

Set the wrapping
If you set this small textbox’s wrapping to in front of text the text will not be forced to wrap around it and the textbox with the pull quote will control the wrapping not the double quote marks. Format the double quote marks in an interesting font that has an attractive shape for the quotes so that you create an interesting effect.

Helen Bradley
Wednesday, March 11th, 2009

Instant text boxes in Microsoft Word


Just a short tip today, I just tripped over this and thought “WOW! I didn’t know that!” so I wonder if you know it too?

Ok.. step back a bit. I’m doing a column on columns in Word and I’m showing how to place a text box or image in a document laid out in 2 columns so the text box or image travels with the text and how to take it out of the line of text so it floats independently.

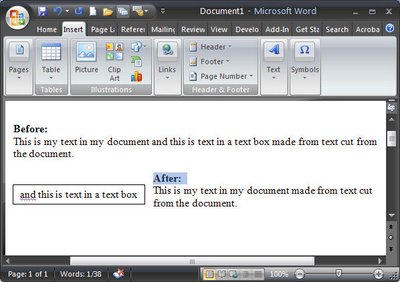
To create the text box, I select my text, then realize I need to create the text box first and click the Text box button without deselecting the text. [insert WOW moment in here].

What happened was that the text box got created automatically and the selected text appears inside it – just like that – how cool is that?

So, next time, instead of creating a text box and then copying and pasting text into it, select the text and click the Text Box button on the Drawing toolbar in Word 2003 and earlier and it will all be done automatically for you in one smooth step. The same process works in Word 2007 too but you must click the Insert tab, click the Text box button and choose Draw Text Box for it to happen.

Instant text in text boxes in Microsoft Word – can’t ask for anything more simple than that.

Helen Bradley

Wednesday, August 22nd, 2007

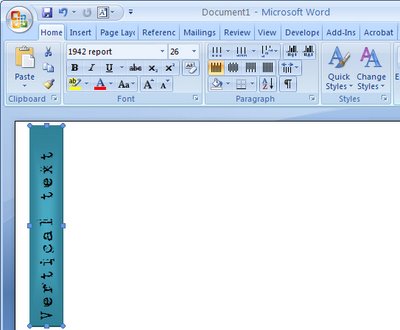
Rotated Text in Word 2007

I love the look of page headings that appear down the side of the page – vertical text mixed with regular text just looks so cool.

Here’s how to create rotated text or vertical text on a page in Word 2007:

Start by creating a text box so choose Insert > Text Box and select either a text box style from the list (not the best idea), or click Draw Text Box to draw your own (much better).

Type your text in the text box then click Text Box Tools > Format and locate the Text Direction button. Click it to rotate the text to the desired orientation. Now simply size the text box to the desired size and move into position and apply one of Word’s new text box styles and you’re done. Simple and fun.

Helen Bradley