Wednesday, April 10th, 2013

Lightroom Tip – Find your way around with Disclosure Triangles

Learn how to find your way around in Lightroom panels by Expanding and Collapsing its disclosure Triangles

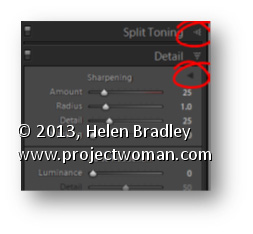
Throughout Lightroom small disclosure triangles appear in various places – click on these to display or hide that feature.

In the image, you would open the Split Toning panel by clicking on the topmost disclosure triangle.

Click the second marked triangle in the Detail panel to display the Sharpening preview window.

Look out for these triangles as they are often difficult to see but they can be used to hide and reveal important panels and other program features.

Helen Bradley

Sunday, April 7th, 2013

Lightroom Tip – Find Images by Keyword

Find images by Keyword

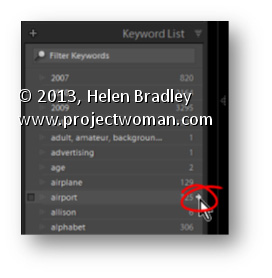
In the Library module in Lightroom the Keyword List panel tells you how many images are keyworded with a particular keyword. It can also find these images for you so, open the Keyword List panel, and click the arrow to the right of a keyword to view images that have that keyword associated with them.

These arrows appear only when you are hovering over a keyword in the list.

Helen Bradley

Wednesday, April 3rd, 2013

Lightroom Tip – Flick a Switch

Flick a Switch – Using Switches in Lightroom

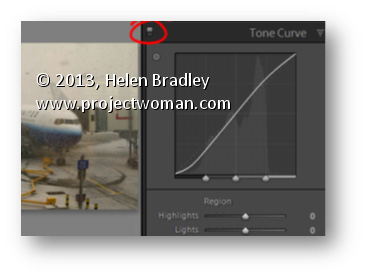
Switches in Lightroom appear in areas such as the Develop module where they can be used to enable or disable a setting such as the Tone Curve. You can use this switch to compare your image with or without the effect in place.

Set the switch to the up position to turn it on and to the down position to turn it off.

The benefit of doing this is you can turn the effect on and off in isolation to any other changes made to the rest of the image and you don’t have to wind back your history to see the change.

Helen Bradley

Sunday, March 31st, 2013

Lightroom Tip – Navigator View Options

Navigator view options

In the top left corner of the Library and Develop modules you’ll see the Navigator. Hover your mouse over an area of the image in the Navigator – it will look like a magnifying glass – click to view that portion of the image in the main preview.

In addition, whenever you see a rectangle in the Navigator you can drag on it to move the area of the image being viewed.

Helen Bradley

Tuesday, March 26th, 2013

Lightroom Tip – Pick a color from your Image

Learn to sample a color from your image

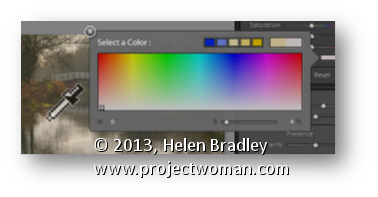
Sometimes when you need to grab a color in Lightroom you’d really like to use a color sampled from your image. This is easy to do.

In any situation where you have access to the Color Picker, click on the color swatch to open the Color Picker and hold your mouse over it. Press the left mouse button to get the Eyedropper but don’t let go – instead move out of the dialog and over the image and sample your color from there.

Helen Bradley

Tuesday, March 5th, 2013

Lightroom Tip – Using Image Watermarks

The Watermarking feature in Lightroom was significantly overhauled in Lightroom 3. As a result you can now add sophisticated watermarks to your images on export either to disk or via the Print and other modules.

Not only can you add a text watermark to an image but you can also add an image watermark – and that’s what this post is all about – making and using images as watermarks in Lightroom 3 and Lightroom 4.

Create the image

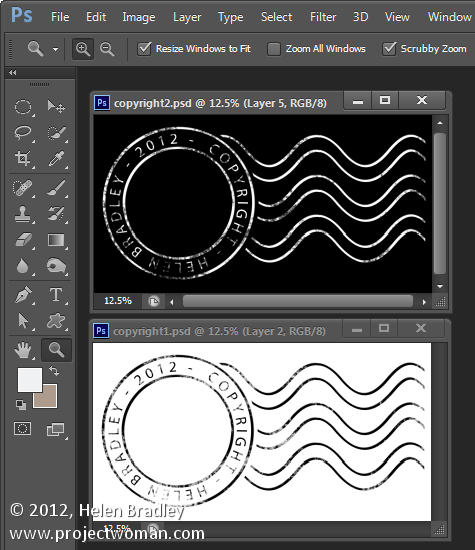
To use an image watermark in Lightroom you will need an image and for that you’ll need an image editor. You can use anything that can create .png images – Photoshop and Photoshop Elements are obvious contenders but basically any photo editor or painting program will do.

Unlike text watermarks you can’t set the color of an image watermark in the Watermark dialog so you need to get it right before you begin. For that reason I create two – one black and one white – which cover most situations.

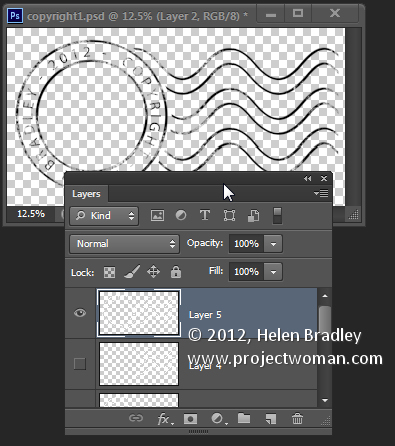
I do this in Photoshop working on a transparent layer – the reason is that I want this transparency to appear in the watermark when it is placed over the image. So, even if I use a fill layer behind the watermark so I can see the design as I work, I’ll hide this before saving the image.

When saving the image I’ll save it as a .png format file – this flattens the image to a single layer but retains transparency – something that the .jpg format does not.

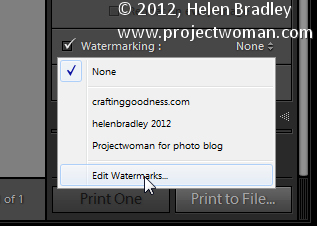
To create the image as a watermark open a module that has Watermarking such as the Print module. Click it to enable it and then choose Edit Watermarks from the dropdown list.

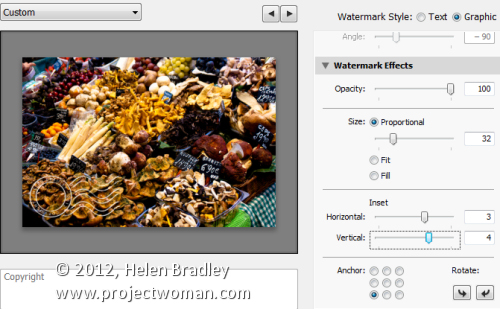
Click Graphic in the top right corner to select that as the Watermark Style. When prompted select the image to use. This image is dark so I chose the white version of the copyright watermark image.

If you cannot see the image, scroll down to the Watermark Effects area and adjust the Size so you can see the image. Set the desired size and placement using the Size, Anchor and Inset settings. Typically you will use the bottom left anchor point (or the bottom right) and move the image a little in from the edge of the photo.

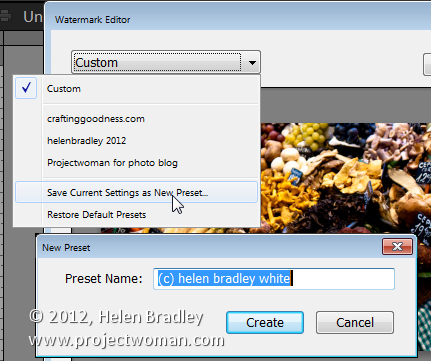
Once you have the position and size correct you can save this as a Watermark you can use anytime in future by clicking the Custom dropdown list and choose Save Current Settings as New Preset and type a name for the preset.

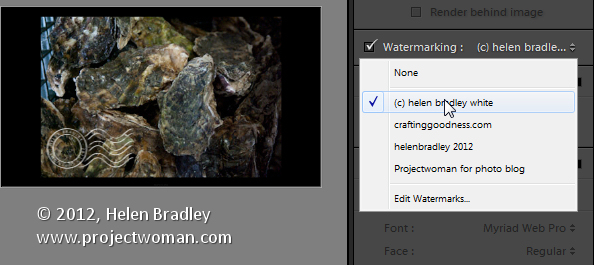
In future you can select and use this watermark in any of the panels in Lightroom that support Watermarking such as the slideshow module here:

Helen Bradley

Thursday, February 28th, 2013

HDR Presets in Lightroom


Processing an image with HDR presets in Lightroom

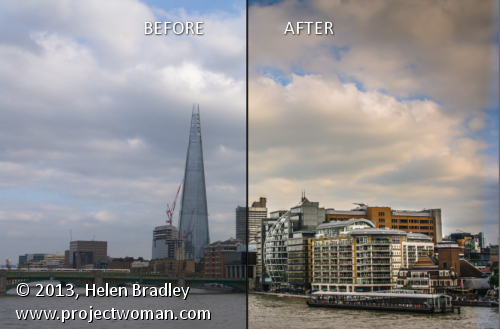
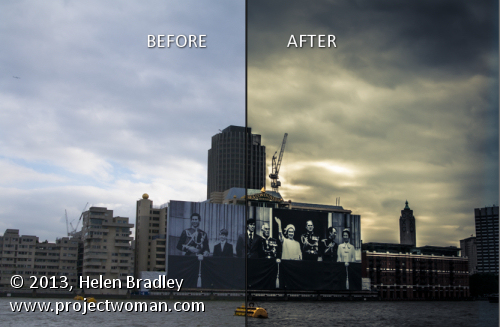
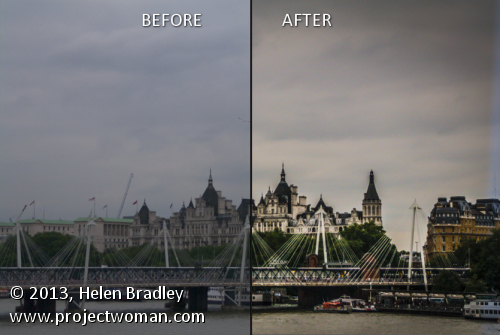
As I mentioned in a previous post I am loving working with Trey Ratcliff’s HDR Presets for Lightroom. These presets really rock and for more than just images with great skies.

I have been sorting through a few thousand images I shot in Norway, Sweden and the UK last year and just seeing what is there. I tripped across these two images yesterday and something about them just screamed HDR.

This is the result and I have to say, these images totally rock. In the first, the intensity of the scene is enhanced by the  HDR treatment – it makes this back alley really come to life.

In the lead image for this post, repeated here, I saw something in the HDR version I missed in the original – the guy’s reflection in the window. I  checked back at the original – the reflection is there but it’s not obvious. In this version it is unmistakable and it takes the image from ho hum to wow – it makes it so much more than it was as an unprocessed image.

Now, as with all Lightroom presets there is nothing in the presets that you could not achieve if you adjusted the sliders in Lightroom yourself. However,  these presets are single click fixes – they are quick to apply and they are great.

For me they’ve been an eyeopener and they are helping me to see my images in an entirely new light.


Helen Bradley

Wednesday, February 6th, 2013

Lightroom Presets for Adding Punch to your Images

 These downloaded presets will kick start your image processing.

I don’t buy a lot of presets for Lightroom – I prefer to create them myself. However I had a student the other day who had some images he was very unhappy with. They had been shot in the desert and they should have looked wonderful and they didn’t. In part this might have been the choice of white balance setting used in the camera and the fact that he shot in jpg, but in part the images just needed a real boost.

In the interests of having something to help him with I went hunting around the web and finally tripped over the very wonderful Trey Ratcliff’s presets. These cost $19.97 but if you have images that need a real kick ass fix it could be the best $20 bucks you spend.

You can find the presets here at his Stuckincustoms.com website: Trey Ratcliff’s Ligthroom Presets. There are 75 presets in the collection in all. 


I downloaded them, installed them and then put them to work on some images I had that had good skies and some potential but which really needed some serious work. These can be one click solutions and in some cases I took Trey’s presets as a starting point and added a few tweaks of my own but the presets really got the images well on their way. More so, they are quick to use and the results are fantastic.

The collection includes a heap of cross process and gradients, a collection of funky fixes and the HDR presets. It is the HDR ones I wanted to use to test for my student, but seriously all the presets are good and you’re sure to find some you like. One I love is the Flatjack HDR adjustment – it really works a treat.


Helen Bradley

Saturday, January 19th, 2013

Output from Lightroom to your blog

I use Lightroom to prepare the images ready to upload to my blogs so it’s critical that I can get them out of Lightroom all ready to upload without having to do any more work on them.

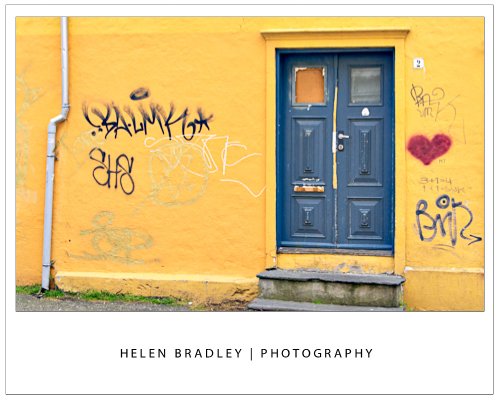
On one blog I use framed images and therein lies a problem – the images need a thin keyline around them so you can see the edge. Without an edge the image would just blend into the surrounding white background of the blog page.

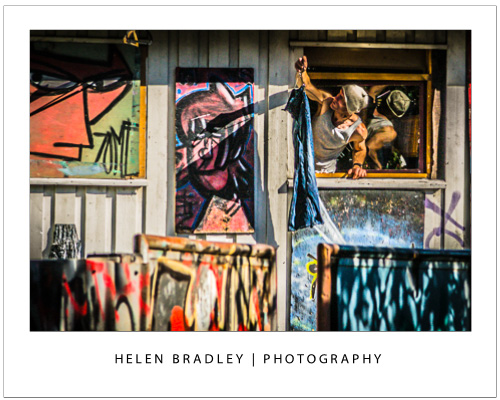
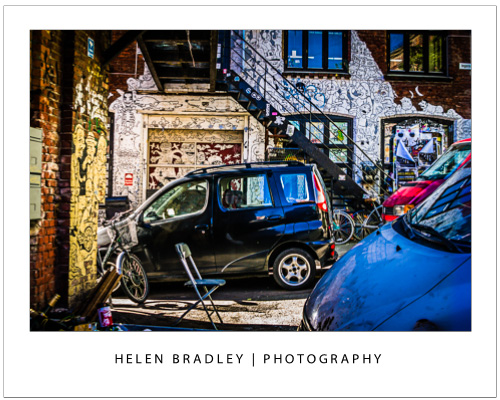
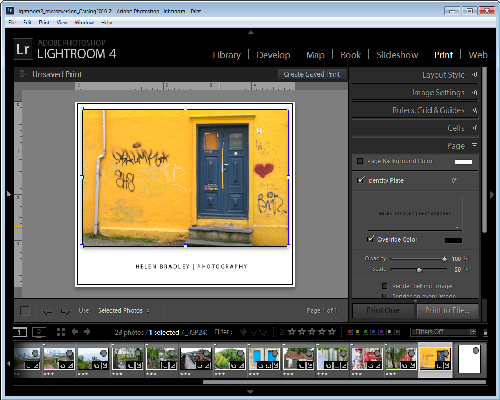
So, here’s how to create a frame effect in Lightroom – the images will be sized for the web with the appropriate resolution, they will have a frame around them, together with my name, and they will have a keyline around the image and around the page itself. And, to finish, it will all be saved as a reusable template.

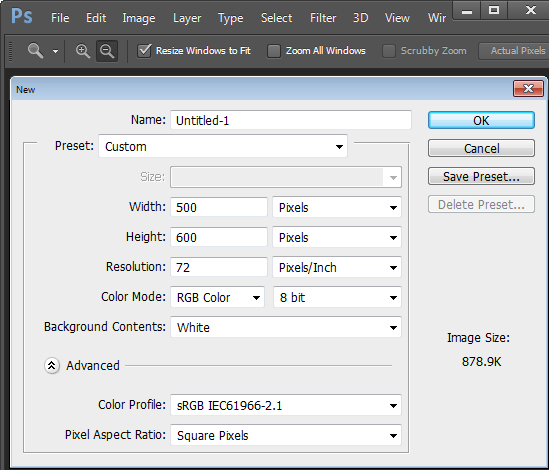
Start outside Lightroom in any graphics or photo-editing program and create an image 500 x 600 pixels in size and filled with white. Save it as a jpeg format image and import it into Lightroom – place it somewhere easy to find.

Then, in Lightroom place the images for the blog post into a collection and add the empty image you just created to the same collection. For convenience I use a single collection for the images destined for my blog – it makes them easier to find and it simplifies the output process.

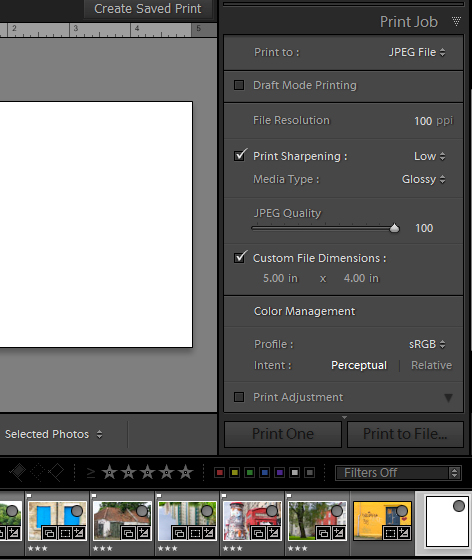
Switch to the Print module and select the collection. To configure the document size, from the Layout Style panel select Custom Package and from the Print Job panel set Print To to read JPEG file. Set the File Resolution to 100 ppi and select the Custom File Dimensions to 5 in x 4 in to make a landscape orientation image which will ultimately be created as a 500 x 400 pixel image. Set Color Management Profile to sRGB.

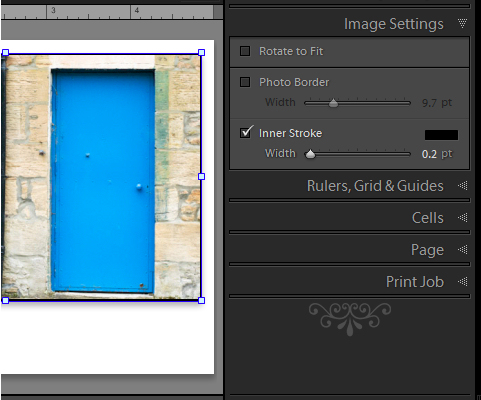
Now, drag and drop the first image into the work area and size it to suit. Choose Image Settings > Inner Stroke and then set the width to 0.2 pt black line. This will appear around the image.

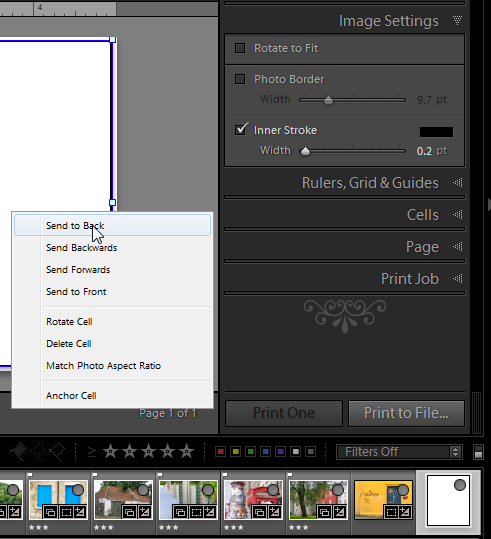
Now drag the empty white image into an empty place in the work area and then size it to just smaller than the size of the work area. It will automatically have a line around it – the Inner Stroke setting is applied to all the images. To place this image behind the first image, right click it and choose Send to Back.

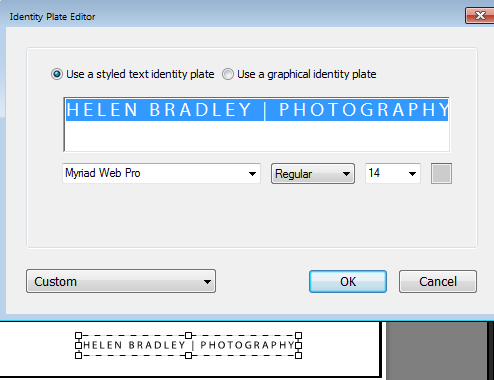
The text is added using an Identity Plate. To make one, click the Page panel and enable the Identity Plate checkbox. Click the small triangle in the Identity Plate box and click Edit and then click Use a styled text identity plate.  Type the Identity Plate text – for example, mine reads Helen Bradley | Photography – select and format it as desired. Click the Custom button, click Save As and type a name for it, click Save and then Ok to add it. Move it into position and size it to suit.

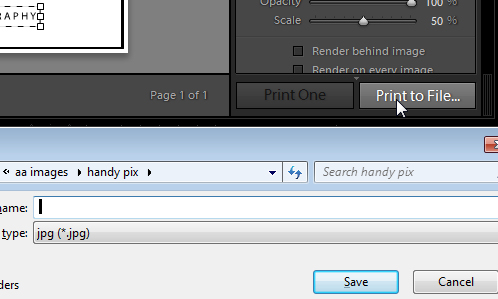
When you’re done click Print to File to print the image.

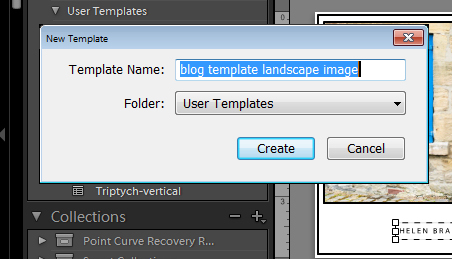
To save the design as a template you can use over and over again, click the + opposite Template Browser in the left panel. Type a name for the template.

In future you can select this template and use it to print another image. Before you do so, you will need to drag and drop an image into the image placeholder and add the empty image to the larger  placeholder. If you want to be able to print portrait orientation images, repeat the process to create a second template – you can reuse the empty image and the Identity Plate.

Helen Bradley

Sunday, December 9th, 2012

Create an HTML web gallery in Lightroom

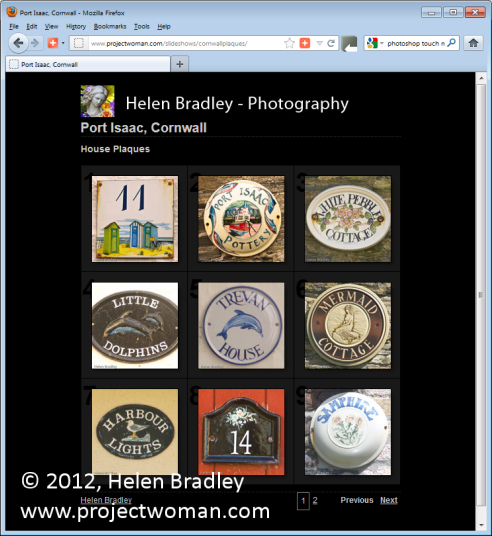
With the increasing popularity of the iPad and iPhone it’s no longer appropriate for most of us to create Flash based web galleries – they just can’t be easily viewed on these devices. If you want almost everyone to be able to see your galleries then you need to create them as HTML galleries and not Flash.

Lightroom has a range of HTML Templates you can use to create a reasonable looking gallery in a very short time.

To make your web gallery in Lightroom start by placing your images in a Collection. This makes it easier for you to work with the images and you can save the gallery so you can edit it in future if needed.

Select your Collection and switch to the Web module. From the Layout Style options, you can select Lightroom HTML gallery or, easier still, from the Template Browser panel on the left of the screen, select a gallery that is HTML based. If you look in the preview area the HTML gallery templates all have the letters HTML in their bottom left corner. Select a template to use.
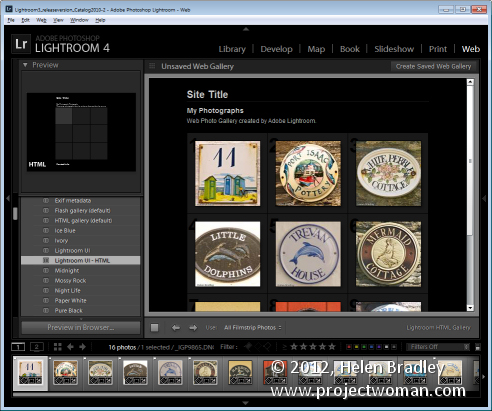
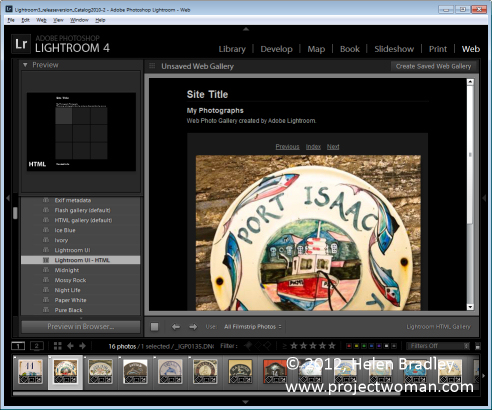
From the toolbar (press T if it isn’t visible), choose All Filmstrip Photos if you have a Collection selected and this will add all the images to your gallery. What you see on the screen in the editing area is a live version of your web gallery. You can click on any image to view it as it will look on the web.
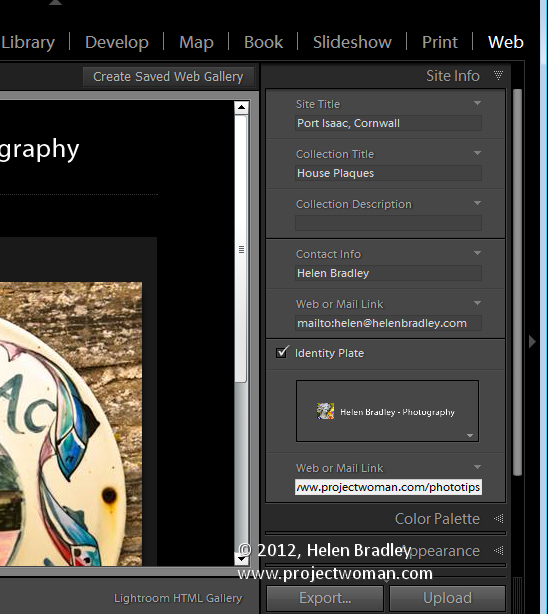
Open the Site Info panel and type a Site Title, a Collection Title and a Collection Description. If you don’t want to use all of these simply delete the placeholder text for those items you don’t want to use and the space they take up in the template will be freed for use for your images.

For the Contact Info, type your contact name if desired and then complete the Web Or Mail Link and this will be linked automatically to the contact name in the web gallery.
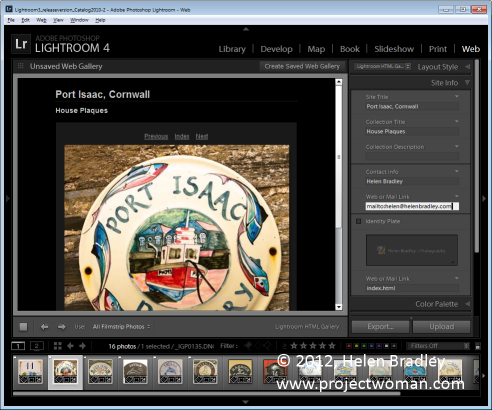
You can add an identity plate to the gallery, if desired, it will sit above the Site Title. You can link it back to your site if desired by completing the Web or Mail Link box.
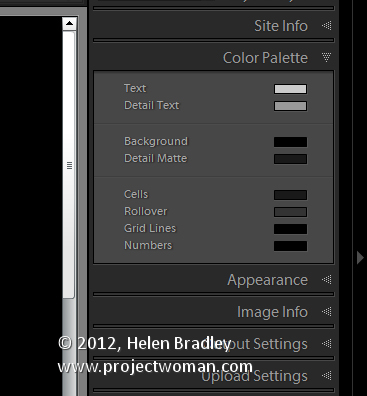
The Color Palette options let you change the colors for the various elements in the website template.

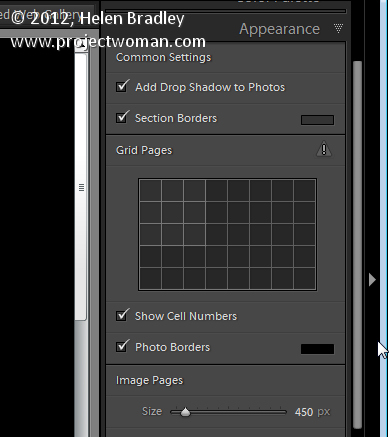
In the Appearance panel you can set the thumbnail image grid size – it defaults to 3 x 3 and cannot be any smaller but it can be considerably larger. If you want to show cell numbers over the images you can do so – this is useful when you need to give viewers an easy way to identify images they like. Images are numbered sequentially and if you have multiple pages the images on the second page continue sequentially from the numbering from the first page.
You can control the size of the full size image on the Image Page by adjusting the Size slider. You can also add Photo Borders to the images in the Image Pages. Note that the Appearance panel is divided into Common Settings, Grid Pages and Image Pages allowing you to make change that effect the entire gallery, only the grid pages or only the image pages.
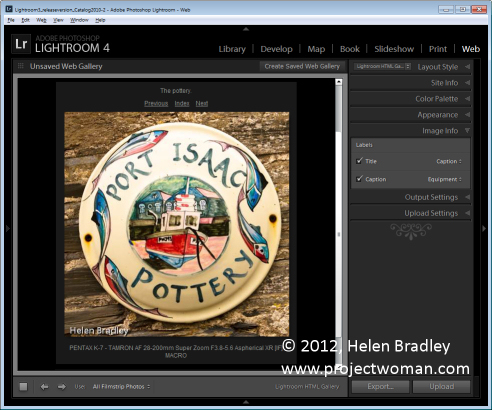
In the Image Info panel you can select to add labels to your images. These appear on the Image Page only. You can select a Title which appears above the image and a Caption which appears below the image. For each you can source the text from the image metadata and there is no reason why you can’t set the Title to be the Caption metadata and the Caption to be your Equipment metadata, for example.
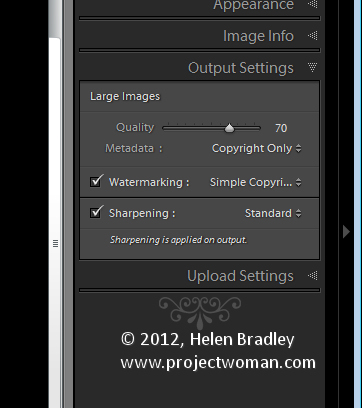
In Output Settings select the quality of the larger size JPG images – 0 is low quality and 100 is high quality. If you want to include Metadata with the image select what to include – your choices are Copyright Only or All.

Also add a Watermark if desired. If you select to add a watermark, you’ll see it on the image page and the index pages so you can check to see that it’s what you want.

Select whether or not to sharpen the images – this sharpening is only applied as the images are output so you won’t see it on the screen. If you’re unsure what to use, enable Sharpening and set it to Standard.
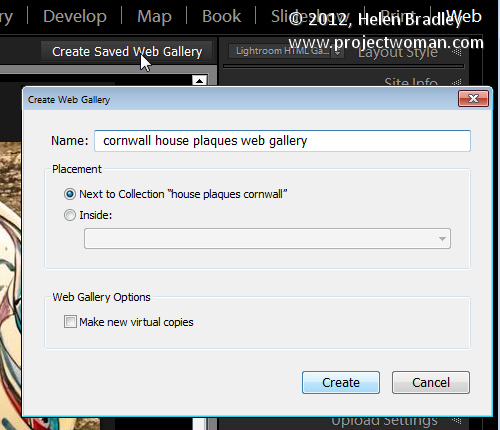
When you’re done, click Create Saved Web Gallery – this is a new option in Lightroom 4 and it appears to the top right of the main editing area. Type a name for your web gallery and click Create. Doing this ensures that the gallery is saved and once you have done this, Lightroom will track your changes from now on.

In future you can come back to the web gallery by clicking the special collection that Lightroom creates for you.
If you want to upload your gallery to the web later on, click Export to export it to disk. Otherwise you can upload it direct to your website by selecting the Upload Settings panel and configure your FTP server. For this, you’ll need your server details, user name and password. You’ll also need the server path although you can click Browse to browse your server to find it if desired. Type a subfolder in which to place the gallery – you’ll need to do this if you plan to have multiple galleries in the server folder you are using. Each gallery needs to be placed in a different subfolder or it will overwrite the previously uploaded gallery.
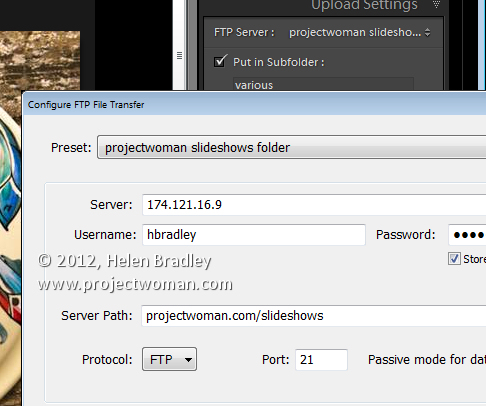
When you have everything configured click Upload to render the gallery images, create the necessary html code and upload it all automatically to your server.
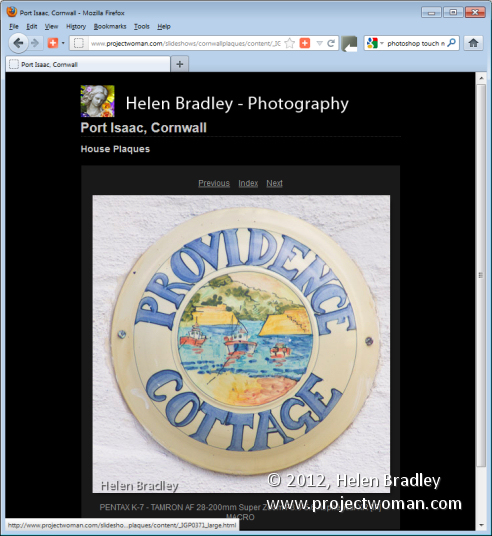
The HTML galleries in Lightroom aren’t the best looking galleries in town but having a gallery accessible to almost any device is definitely and incentive to use them in place of Flash galleries.

Helen Bradley