When you install a new version of Photoshop the first thing you’ll need to do is to set things up so that they work properly for you. Here are settings I make in the Preferences panel every time I upgrade.
1. Set your History States
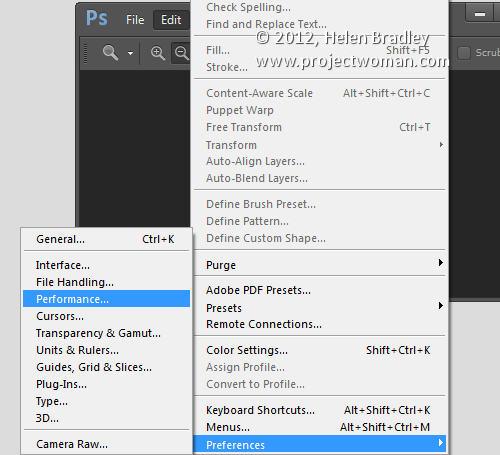
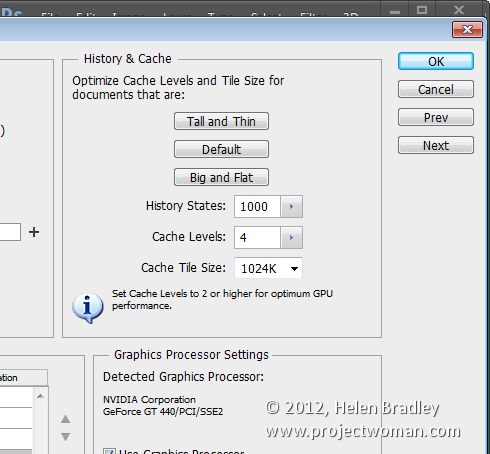
Choose Edit > Preferences > Performance or Photoshop Preferences > Performance on a Mac and set the number of History States. Having a high setting for History States ensures that you can undo changes that you make to your image. By default it’s set to a paltry 20 so this is the first change to make.
I set my History States to the maximum value 1,000 – but even a quarter of this would be a good setting.
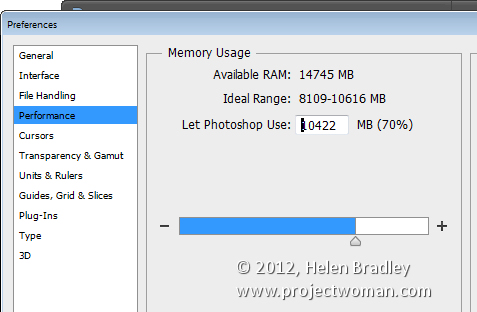
Here too I ensure that Photoshop can use plenty of the available RAM so I’ll crank that up to a large value – what you use will be dependent on the amount of memory you have installed.
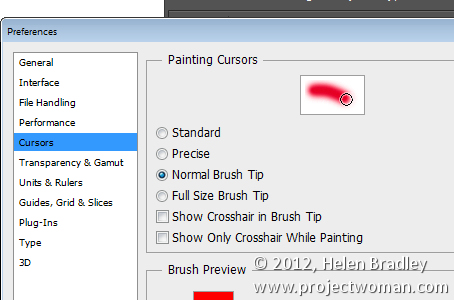
2. Set Cursor Shape and Size
Still in the Preferences panel I like to use a Normal Brush Tip for my Painting Cursor and Precise for my Other Cursors. This can be set in the Cursors area.
You may want to use something different but it pays to look at these options and decide how you want your cursors to look as you work with them.
3. Opening Files My Way!
I dislike that Photoshop opens documents as tabs and that they are docked to the toolbar. This behavior really grates on me. If you’re like me and you prefer your documents to float you can set this in the Preferences Panel.
Choose Interface and disable Enable Floating Document Window Docking and disable Open Documents as Tabs.
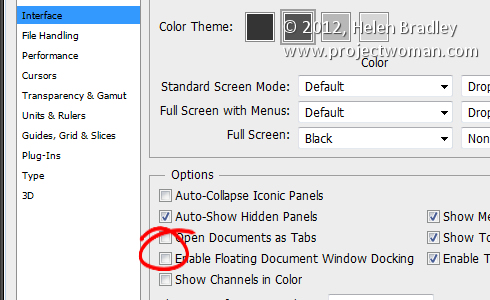
In this panel you will also find the new Photoshop Color Themes in Photoshop CS6 so if
the dark gray look is not to your liking you can return to a more “CS5” look by selecting the lighter gray color.
4. Control Where Files are Saved to
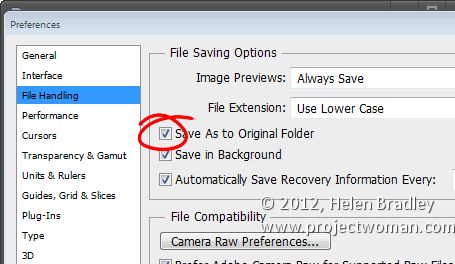
Photoshop can be set either to save images back into the original folder when you choose File, Save As or to the folder that was last used for saving files. You can choose which of these behaviors you prefer Photoshop to default to in the File Handling area of the Preferences panel.
To save back to the original folder, enable the Save As to Original Folder option. To default to the last folder you saved to disable this checkbox.
5. Write your own History
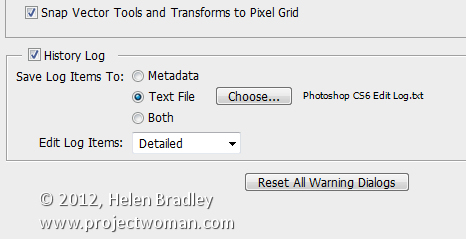
So I can go back and retrace my steps in a large project I like to store a History of all that I do in Photoshop. To do this, click the General tab and enable the History Log checkbox. I save to a Text file (rather than inside the file itself) and I save a Detailed history as that stores the richest data. Choose a filename and place to save it and Photoshop will keep a log file of everything you do to every file.
So, now it is over to you. What preferences do you set up when you first install a new version of Photoshop?
Helen Bradley


