Friday, July 20th, 2012

5 Cool Excel 2010 tips and tricks

Here are five cool tips, tricks and keystrokes to help your day go faster in Excel:

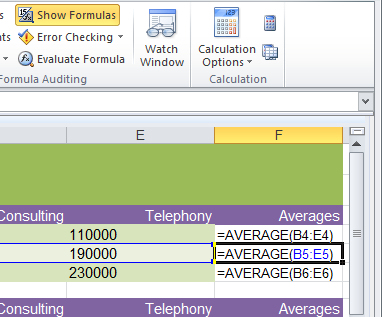
Display cell formulas and not results

If you want to see the cell in your worksheet display formulas rather than the results of those formulas then  you can do it one of two ways.

Use the keyboard shortcut Ctrl + ~ to toggle formula display on and off

You can also use Formulas > Show Formulas

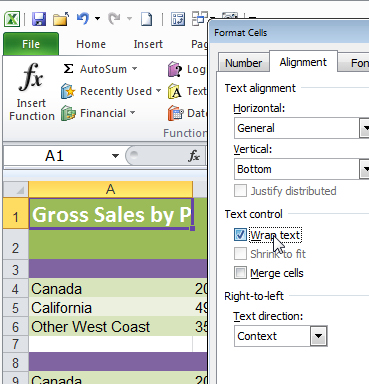
Start a new line

When you need to add a line break to a cell to start a new line of text press Alt + Enter in the cell. If you just want to wrap a long piece of text in a cell right click the cell and choose Format > Alignment tab > Wrap Text.

Copy the contents of the cell above

To copy the contents of the cell above into the current cell press Control + ‘.

Moving around super fast and super smart

To move from one sheet in a workbook to the next (or in reverse), press Control + PgDn and Control + PgUp.  To move to the next open workbook press Control + Tab or Control + Shift + Tab.

Super quick mouse free SUM formula

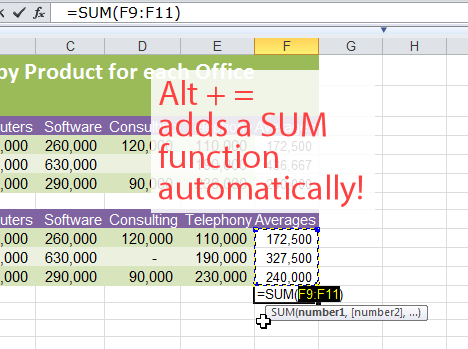
Skip taking the mouse to your Ribbon to add a SUM function and do it with a simple keystroke instead. Type Alt + = and Excel adds the SUM function automatically to the current cell. Doesn’t get much easier than that!

Helen Bradley

Thursday, July 19th, 2012

pptPlex-cool PowerPoint Presentations

Check out all our video tutorials on our YouTube channel.

Helen Bradley

Thursday, July 19th, 2012

eBook Template in Word

Check out all of our tutorials on out YouTube page

Helen Bradley

Tuesday, July 10th, 2012

Sending to Send To


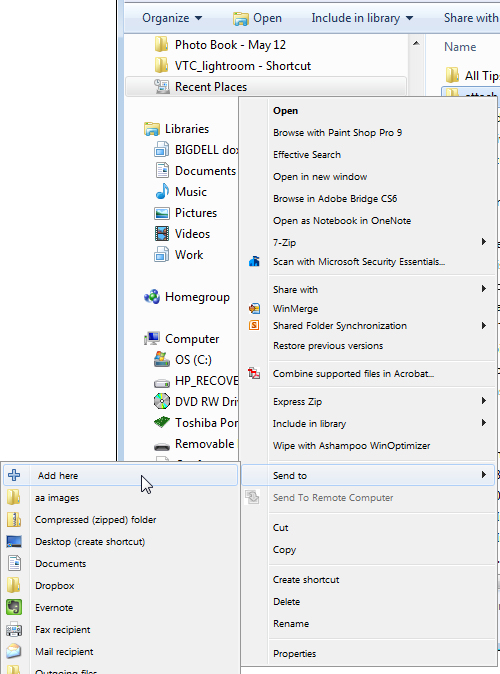
If you’re like me, you use the Send To feature of Windows Explorer quite frequently. Simply right click on a file in Windows Explorer and you have a Send To option. Click this and you’re able to send files to a list of sources.

While some of these options are built-in such as Compressed (Zip Folder), Desktop, and Mail Recipient, there are times when you’d like to add your own preferred location to this list.

For me, I like to assemble my files for emailing into a folder called Outgoing Files. I need that in my Send To list so that it’s accessible any time I need to send a file to it rather than having to copy and paste the file from one folder to another.

The problem with Send To is that it’s easy to use but difficult to add items to the Send To list itself.

Of course, you could go and find the folder and dump things in it but wouldn’t it be a whole lot easier if adding files to the Send To list were as easy as sending files to somewhere using it? I think it would be!

Enter a small free and opensource application called SendToSendTo. You can find it here: sendtosendto download

Download and install the application then restart your computer.

When you do this, locate a folder or file, right click and choose Send To. You’ll find that now you have an entry at the very top of the list called Add Here. Right click it and choose Send To > Add Here and you can then add that folder to the send to list by simply clicking Create.

What SendToSendTo does is to automatically add the folder that you point to into the Send To list.

One of the things that you’ll love about SendToSendTo is that it’s simple to install and use and it makes something that should have been easy to use all along work the way it should not as Microsoft designed it – enough said!

Helen Bradley

Monday, July 9th, 2012

Maximum Length of YouTube Video Descriptions

There is a lot of discussion around about adding Caption text to your YouTube video descriptions. YouTube will automatically convert the audio content from your video stream to regular text – so it can be used for closed captioning. You should of course  check and edit this as the results are a little weird from time to time!

You can then add this caption text to your YouTube video description so it will also be indexed by search engines. The problem is that it’s very easy to encounter an error with YouTube where it says that your video settings could not be saved the reason being that either the description is too long or contains illegal characters. This is an extremely unhelpful error message – well, YouTube you tell me – is the description too long? Or is does it contain illegal characters? Or both? WTF?

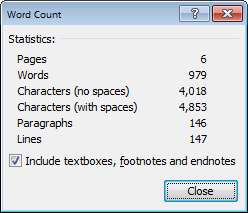
Having encountered this issue a few times, I set about to experiment and see just what is what so far as YouTube descriptions are concerned. I don’t have a definitive answer but I have a pretty good one. By simply shoving increasingly big pieces of text into a YouTube video Description I was finally able to force the error when I got to what Word reported to be 979 Words, 4,018 characters (not including spaces) and 4,853 characters (including spaces). This was 146 paragraphs of caption text which was 147 lines of text or thereabouts.

Anything over this tripped the error what the description that could not be saved. I am now assuming that somewhere around the 4850 characters including spaces mark is the limit on the maximum text in a Description.

Now to what are “illegal characters”. As you might have already realized, characters like periods (.) and commas (,) are legal. So too are regular straight apostrophes (‘), Question marks (?), equals sign (=), dash (-), colon (:), slash (/) and plus (+). The big NO, for Descriptions seems to be the Greater Than (>) and Less Than (<) symbols – they are illegal in YouTube Video descriptions so they will cause the error to occur.

So, this means you cannot include “<a href=” type code in your descriptions but you can include URLs in the form http://www.projectwoman.com as all these characters are perfectly legal.

If anyone else has additional information on what is allowed or disallowed in YouTube video Descriptions, please, feel free to join in the conversation.


Helen Bradley

Tuesday, July 3rd, 2012

Make a Website a Chrome App

I’ve been working with Google Chrome a lot lately because it makes good sense as a Browser. I have my assistant to thank for this as, without his continual poking and prodding to explore Chrome I probably would not have got there as quickly as I did.

One of the nice things about Chrome is its integration with Google+. However it’s not Google+ that I plan talking about here but rather I want to show you how to add a website as an app to Chrome.

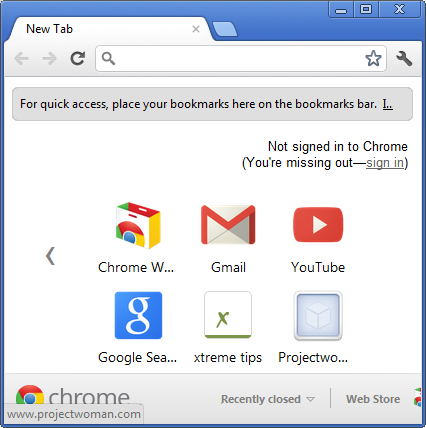
If you click the New Tab icon in Chrome and then click Apps at the foot of the page you’ll see that there are some apps already in the list such as YouTube, Gmail and so on. What I am going to show you is how to add your own choice of websites as apps and to do it quickly and easily.
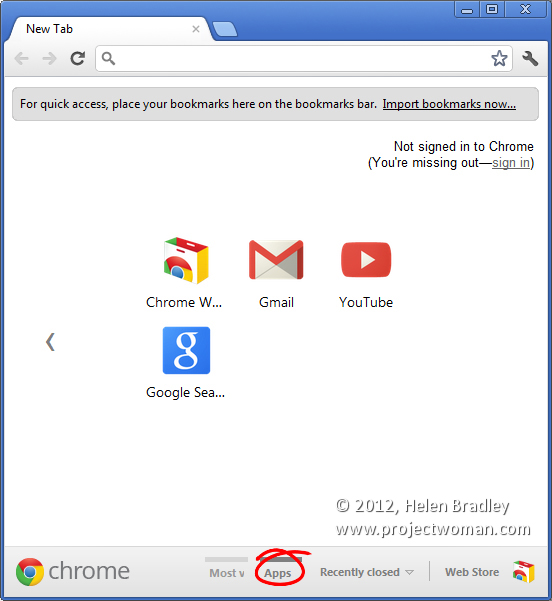
You may already know that you can create an app from a Most Visited page. Click Most Visited at the foot of the New tab and anything that’s in that list can be easily created as an App by just dragging and dropping it onto the Apps icon. This automatically makes the page an App.

The problem is that if something isn’t a Most Visited page it’s a little cumbersome to make it an App. The solution is to click the New Tab icon and display the Apps page. Size your browser down so that you can see everything clearly.

Now click the New Tab icon again and this time browse to the page that you want to add as an App. Once you’ve visited that page drag the tab for that page somewhere else on the screen so that you have two browser windows – one showing the Apps area and the other one with your web page open in it.
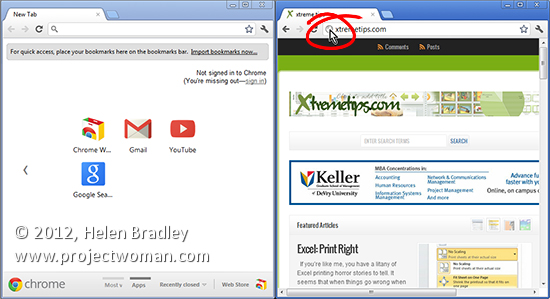
Now locate the icon immediately to the left of the page URL that you want to add as an app. As you hold your mouse over it, it will show View Site Information as a tooltip.

Drag and drop this into the Apps area in your Chrome browser. It will automatically be added as a new App. You can then drag and drop that App or any others to rearrange them to suit.
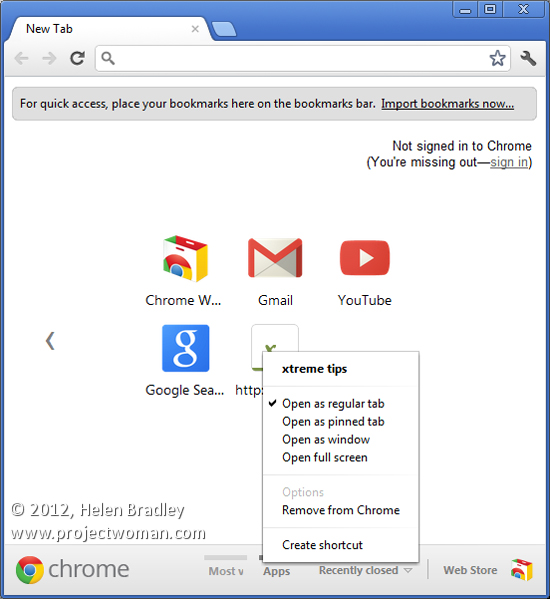
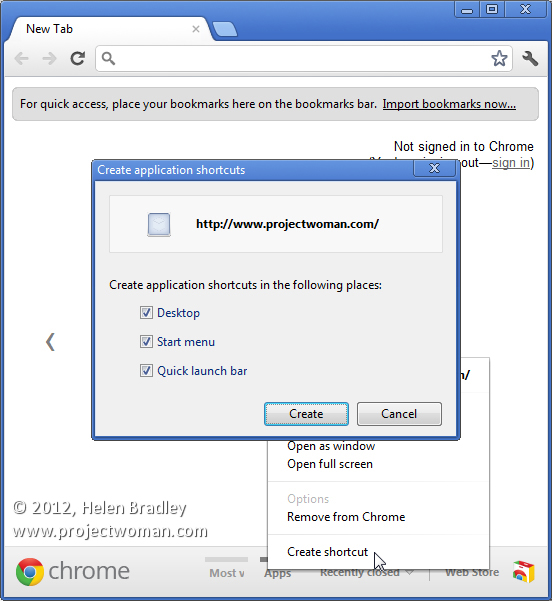
An app can also be created as a Desktop, Taskbar or Start Menu shortcut. To do this right click the web page in the Apps area and choose Create Shortcut. You’ll get a series of shortcut options including Desktop, Start Menu and Pin to Taskbar. Select the checkboxes for those that you want to create and click Create.
There’s a lot of misinformation on the web regarding adding websites to the Chrome apps collection. A lot of sites suggest you repeatedly remove Most Visited pages until you get to the page that you want to add. This solution which involves simply dragging and dropping a URL into the page is far quicker and makes a lot more sense.

Helen Bradley
Wednesday, June 27th, 2012

Excel fill intermittently empty cells

Often when you’re working in Excel you won’t enter all the data because it is repetitive.

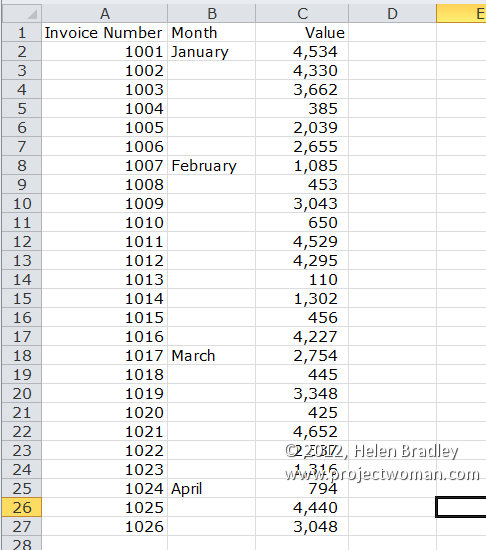
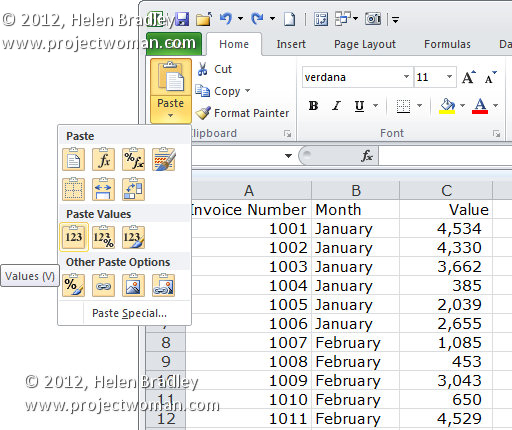
In this example, the cells in column B really should be filled with the months but because the month only changes periodically I have only typed it when the change occurs. If I need to work with this data such as in a PivotTable it may be necessary to fill the data down column B.

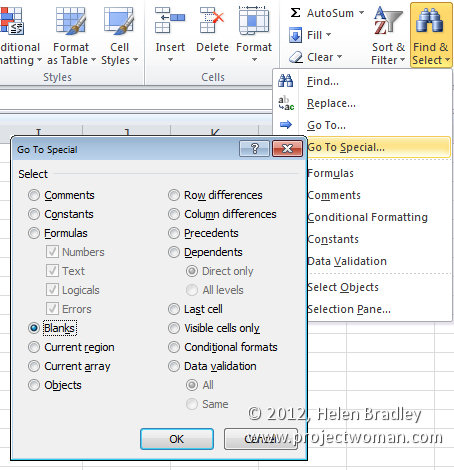
This can be done easily by selecting the cells in column B and choose the Home tab  on the Ribbon, click Find & Select > Go To Special > Blanks to select the blank cells.

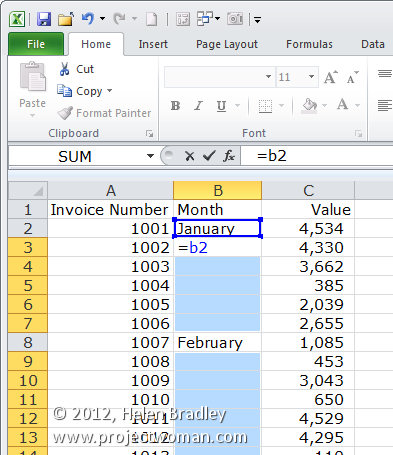
Type =B2 in the cell, this represents the first cell in column B with the data in it.

Press Control + Enter.

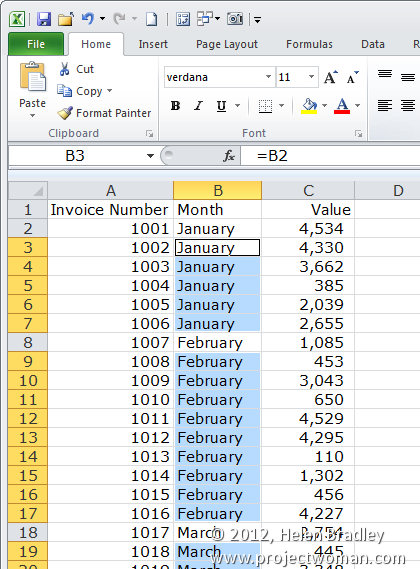
Now, to fix the cells so they contain words and not cell references, select all the filled cells in column B, choose Edit > Copy and then Paste > Values and click Ok.


Helen Bradley

Wednesday, January 24th, 2007

Find duplicates in an Excel list – quickly and easily

Check for Duplicates in an Excel List
To check an Exel list for duplicate entries, first select the list and name it using Insert, Name, Define and call it ListToCheck.

Now, select the list (and, assuming the list starts in cell A2), choose Format, Conditional formatting and type Formula Is and then
=Countif(ListToCheck,A2)>1

Then click Format to apply a format and click Ok.

Now each cell containing a duplicate entry will be formatted so you’ll see it clearly.

Helen Bradley

Page 11 of 11« First7891011