Wednesday, March 26th, 2014

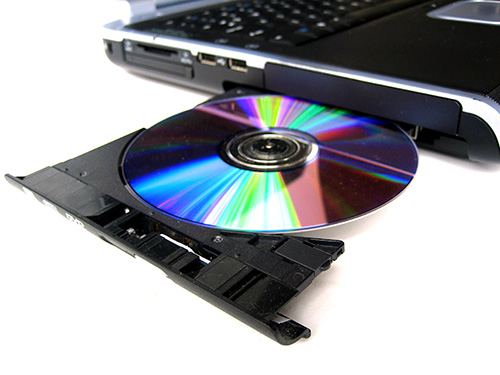
Play and Burn DVDs in Windows 8

© ugaldew, sxc.hu

If you’re using Windows 8 or 8.1 you can play videos and movie files you have stored on your computer but you can’t view DVDs using Windows Media Player—this feature was removed from Windows 8 along with the Media Guide.  If you want to be able to play DVDs in Windows 8 you will need to download and install a DVD player. If you’re using Windows 8 Pro then you can download and install Microsoft’s Windows Media Center which costs $9.99 – this site will step through the process. If you’re not using the Pro version then you would need to upgrade to Pro to use the Media Center, which ends up being a $100 upgrade  just for the ability to play a DVD. Instead, I recommend you use the free VLC Media Player.

If you need to burn DVDs you will need a DVD burner to do so. Windows 8 doesn’t ship with a DVD burner but that doesn’t mean that the manufacturer of your computer hasn’t provided one. Check the Start screen and see if there’s a DVD burner already installed. If not, here is a round up of some of the DVD burning tools around which are Windows 8 compatible. The good news is that most have free trial versions so you can test them out and see how they perform:

Wondershare DVD Creator — $39.95

Ashampoo Burning Studio Free — upgrade to full version for $49.99

Aimersoft DVD Maker for Windows – $39.95

Nero Burning ROM 12 – $49.99


Helen Bradley

Helen Bradley

Saturday, March 15th, 2014

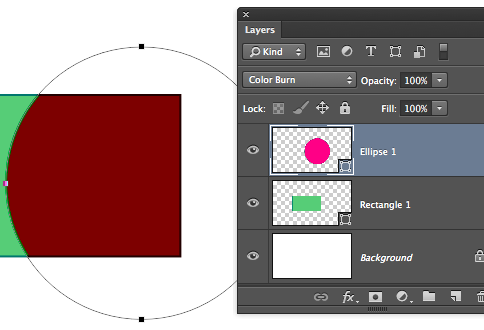
Scroll though Blend Modes in Photoshop – Mac and PC

scroll through blend modes on the mac

by Helen Bradley

Learn the keystrokes that help you quickly scroll through blend modes in Photoshop on the PC and Mac

On the PC, being able to scroll through the blend modes in the Layers palette is a simple as selecting one blend mode in the list then use the Up Arrow and Down Arrow key to go from one to the next.

On the Mac, it isn’t as easy but it (thankfully), can be done.

On the Mac, click in the Blend Modes list and select a blend mode. Then use the Shift + + or Shift + – keys to scroll up and down the list. Unlike on the PC, the Mac keys roll you around the list so, when you reach the bottom and press Shift + + once more you go right back to the top. Neat huh?


Helen Bradley

Monday, March 10th, 2014

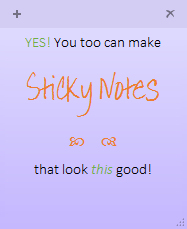
Format Sticky Notes – Learn the Hidden Secrets

Learn these quick techniques to format your Sticky Notes

I love using sticky notes to stick things to my desktop. Using these on my digital desktop is helping keep my real desktop clean and tidy. However, sometimes I need to format my notes and help for doing this is not easy to find. So, here, in a nutshell, are the super secret shortcut keys you can use to format your text on your sticky notes :

Bold                     Ctrl+B
Italic                   Ctrl+I
Underlined               Ctrl+U
Strikethrough            Ctrl+T
Bullet list              Ctrl+Shift+L 
    (press this twice for a numbered list)
Subscript                Ctrl+= 
Superscript              Ctrl+Shift++ 
Increase/Decrease font size
                        Ctrl+Shift+> and Ctrl+Shift+<
                        (or Ctrl+Scroll wheel)
Single space lines      Ctrl+1
Double space            Ctrl+2
1.5 Line spacing        Ctrl+5
Captialize Text         Ctrl+Shift+A 
Right Align             Ctrl+R
Left Align              Ctrl+L
Center Align            Ctrl+E

You can also use fancy effects in sticky notes if you create them in another application such as Word and then copy and paste them into the Sticky Note.

Other handy Sticky Notes keyboard shortcuts:

Undo                    Ctrl+Z
Redo                    Ctrl+Y
Cut                     Ctrl+X
Copy                    Ctrl+C
Paste                   Ctrl+V
New Note                Ctrl+N

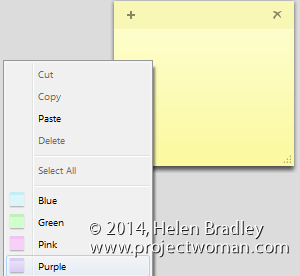
To change the color of a note, right click it and choose a color.

To Backup your Sticky Notes:

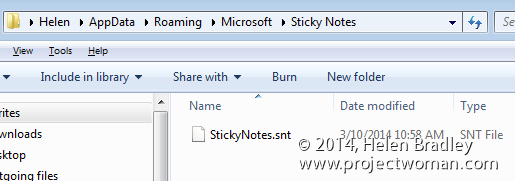
You will find your Sticky notes file at
c:\users\<username>\AppData\Roaming\Microsoft\Sticky Notes

To make a backup, copy the stickynotes.snt file you find there.

To launch Sticky Notes if you haven’t yet discovered them:

Start > All Programs > Accessories > Sticky Notes


Helen Bradley

Friday, September 27th, 2013

Put the Apps back on my Chrome New Tab! NOW!

If the new Chrome Update (Sep 2013) messed up your browser, here’s how to get the old look back

Ok, I am rightly angry – my Chrome browser just updated and all the Apps on the New Tab (that I had laboriously configured and which I use daily because, hello Google I need them)disappeared.

Sure, I can click the new little Apps button on the Bookmark bar to view them – I get that – but why? I had Chrome all nice and organized – I didn’t need Google’s input to fix it… just like I don’t expect Google to walk into my house and rearrange my desk or my bookshelf or anything else I have organized the way I want it.

So, rant aside, here’s the solution to how to put the Chrome Apps back on the New Tab:

UPDATE:

As of Chrome 33 the option to fix the problem as detailed below (in red) has been removed. Seriously at Google people actually worked hard to remove this feature so we can no longer make Chrome behave the way we want it to? Way to go! Yet another reason I hate the Cloud and I hate apps that automatically update and companies that couldn’t care less about the needs of their user base. I just don’t understand why Google doesn’t listen to its users and help them out instead of giving us a totally useless Google search box in the middle of the new tab window. Now I understand that not everyone wants or likes the old style interface but why break the fix (that worked), for those of us who do?

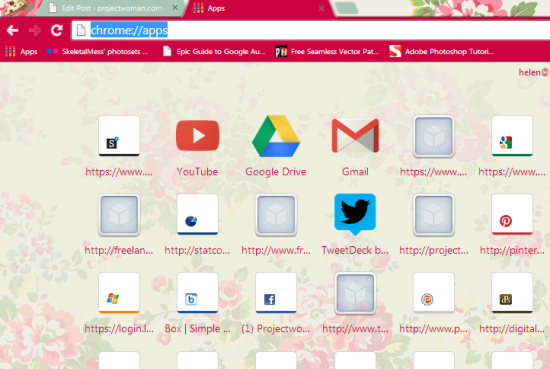
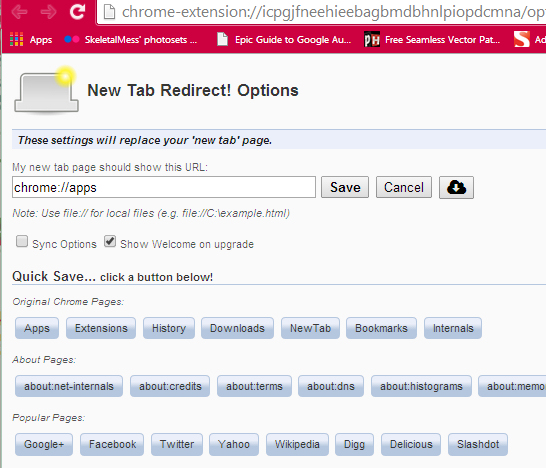
Ok, today’s solution (until Google folk mess with this and break it too) is to download the New Tab Redirect app from the Chrome Web store here. Once installed, the Extension launches so you can set it to show your apps. So, you need the My New Tab page should show this URL to read:

chrome://apps

You can do this by typing the entry yourself or you can click the Apps button below Quick Save and it will be done automatically for you.

Now, in future when you click the New Tab button it will show your apps.

It works, no thanks to Google.

I hope this solution saves you from the stress of having Chrome apps disappear from your New Tab Page. It has certainly reduced my blood pressure!

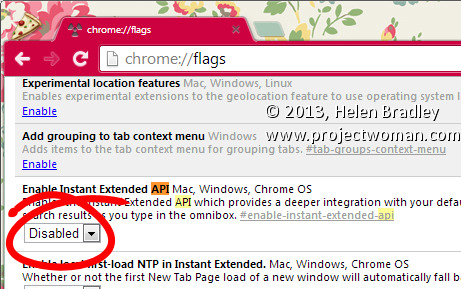
1.    Go to the address bar and type this in:

chrome://flags/

2.    Press Enter and then search for this word:

Extended API

This will take you to the Extended API option which is set to Default

3.   From the drop down list choose Disabled and then close and reopen Chrome.

Voila! your browser is now restored to its former glory!

Helen Bradley

Tuesday, September 17th, 2013

Uninstall All Windows 8 Start menu Apps

If you’ve upgraded to Windows 8 you may have found that you have no use for Window’s new tiled Start menu apps. You might, like we have, found yourself frustrated when files automatically open in these apps instead of the programs you’ve been using for years. Well fear no more! You can uninstall apps permanently with just a few easy steps.

First, search for Windows PowerShell using Windows 8’s program search.

Right click it and, from the options that appear choose Run as an administrator.

With PowerShell open, type the following command and press Enter to delete all apps from all accounts on your computer:

Get-AppxPackage -AllUsers | Remove-AppxPackage
 
If you wish to remove the apps from your user account only then remove “-AllUsers” from the statement above.
Windows 8 will also automatically install the apps on any new user accounts you create in the future. To prevent this, type this command:

Get-AppxProvisionedPackage -online | Remove-AppxProvisionedPackage -online
 
You will now find that only programs that you have actually installed will appear in the Start menu tiles.

Helen Bradley

Wednesday, May 29th, 2013

Stop Lync and Windows Messenger in Windows 8


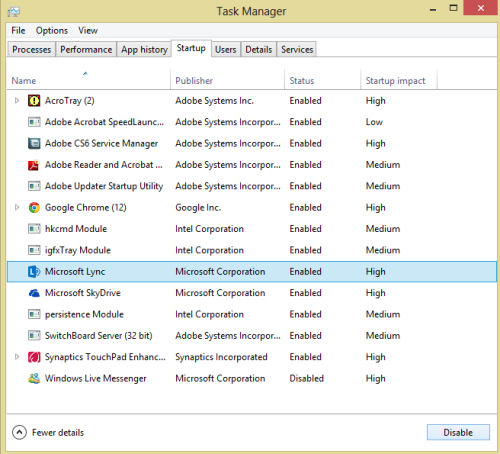
Ok. so I have Office 2013 installed but I don’t use Lync – but the damn program launches each time I start my Windows 8 machine and that doesn’t suit me. I shut down my computer every time I use it to save battery life when I travel and for airplane safety. For this reason, the fact that Lync starts up with Windows 8 is a major inconvenience. Not so much so Windows Live Messenger but I don’t want that either – Microsoft is phasing it out and I never use it to communicate – haven’t done so for years. So, the question is – how to remove these annoying startups in Windows 8. Turns out the solution is simple – much simpler in fact than in earlier Windows versions.

Press Ctrl + Alt + Del once and click Task Manager. This is now not only the way you stop a program from running once but also how you axe it permanently. Click the Startup tab in the list and locate the application to stop – in my case, it is Lync. Then click the Disable button in the bottom right of the dialog. Repeat for any other program you want to stop running – of course never stop anything from running that you don’t understand the purpose of – you never know just how vital that program might be – but Windows Live Messenger and Lync are not needed.

When you’re done, click the close button and next time you start up your machine these programs won’t run. Yeah! No more annoyance – well, there are plenty of annoyances but these no longer count!

Helen Bradley

Wednesday, March 13th, 2013

Change your Windows 8 Lock Screen image

Change your Windows 8 Lock screen and other personal settings

It isn’t easy to find but you can change the images you see on your Lock screen and start screen in Windows 8 by pressing the Windows logo key and I and choose Change PC Settings.

Click Personalize and you can view different options for your Lock screen, Start screen and account picture.

Yeah! No more Seattle Space needle for me!

Helen Bradley

Wednesday, February 27th, 2013

Shake Up Windows

See how to minimize everything on your screen except what you are working on

This tip falls into the category of WTF? Who knew this? I certainly didn’t until I fell over it the other day. It’s a tip for Windows 7 and 8 for hiding everything on the desktop except what you are working on.

Grab the title bar of the current window with your mouse and give it a good shake. When you do, everything that was open except what you are working on disappears and you’re left with just the current window.

Do it again and everything comes back in the position it was in. It’s not a tip that will save you a lot of time, but it works and it’s fun to do – at least the first few times.

Helen Bradley

Page 2 of 212